
Bob Kenny
Daily Driver
After missing FFO for the last 5 years (all on the east coast) for various reasons....family functions, camping trips, etc., I never had the motivation to get my '76 in order. I thought for sure the FFO would go back west and I'd never get there, but when I found out it's on Long Island this year (23 miles from home), i decided to get motivated.
Some might remember this thread from 2008 http://www.network54.com/Forum/12159/message/1210392451/And+then+there+were+two-----
I never did much to the car besides keeping it running, and last year when I finally put electric in the garage, I pulled it in and started dismantling it in hopes of getting it ready for FFO in Virginia.....didn't happen. There it sat until the Long Island announcement, and I decided to get busy. My wonderful, beautiful, understanding wife gave me a reprieve from working on the house until the car is done and I'm taking full advantage.
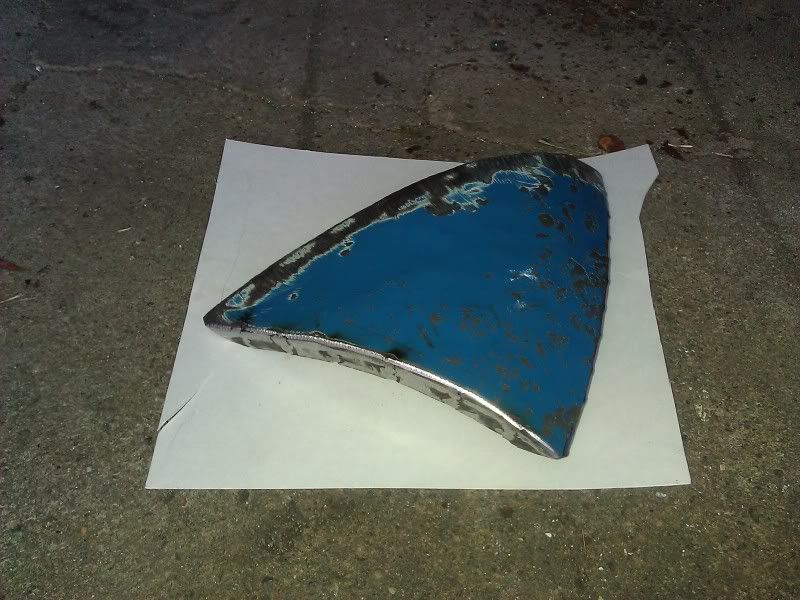
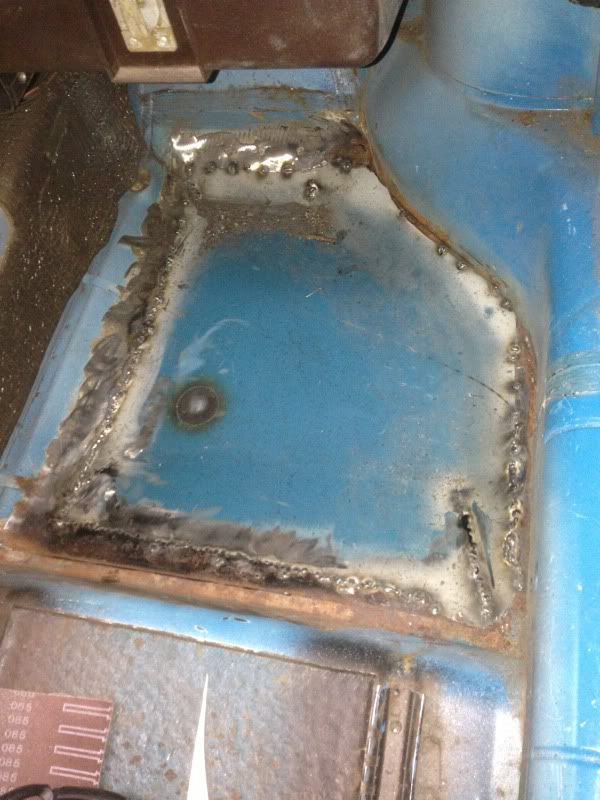
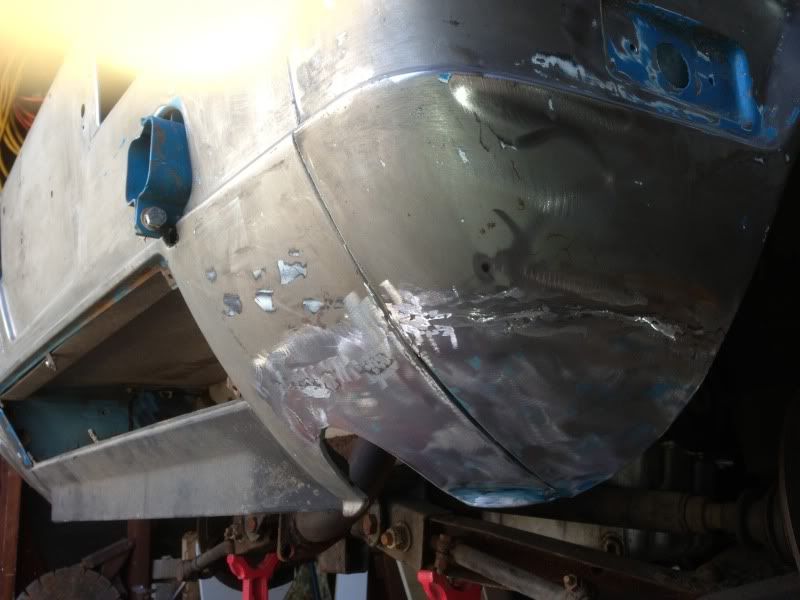
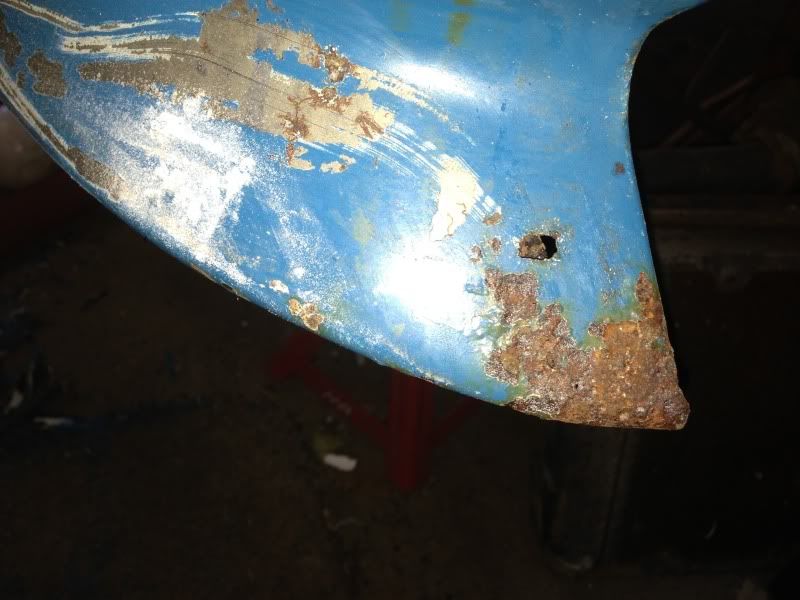
This corner of the car I actually did last year, I banged out a piece on a sandbag and it actually fit pretty well, it's not perfect, but it's good enough:

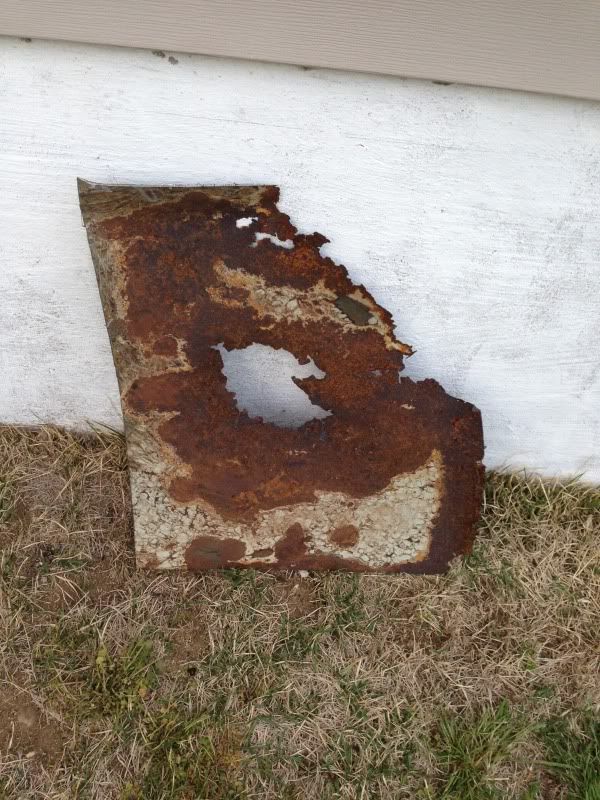
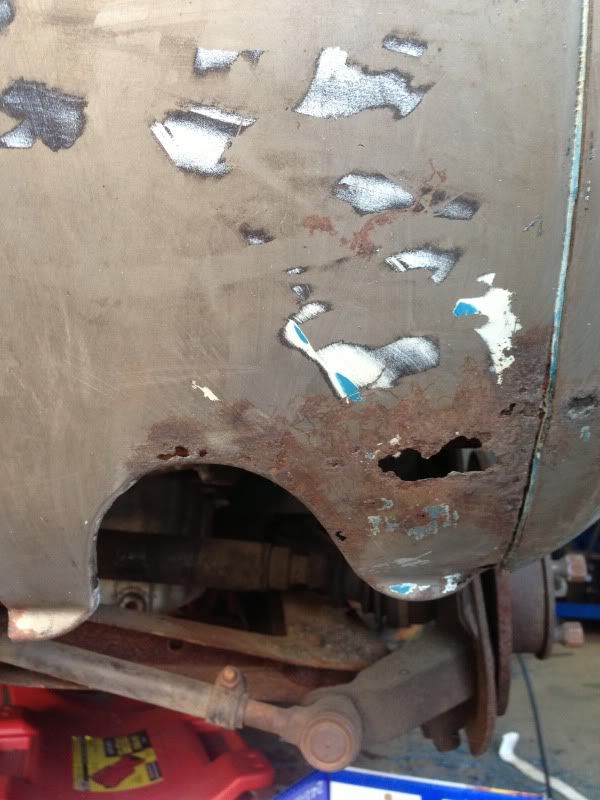
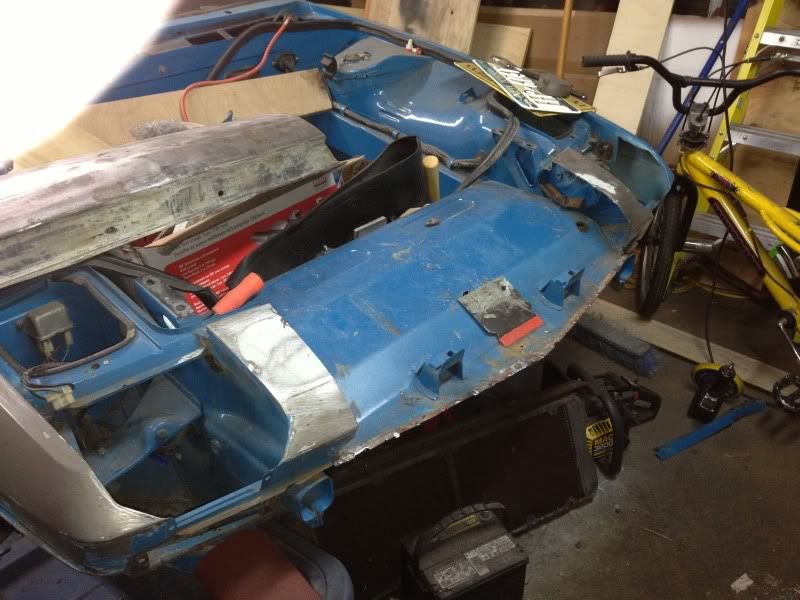
Next was the passenger side floor pan...This is what I cut out:
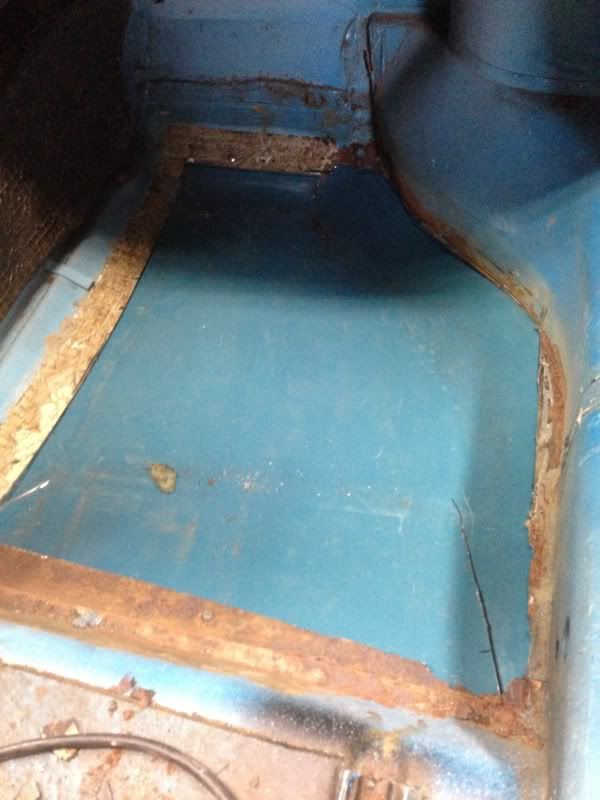
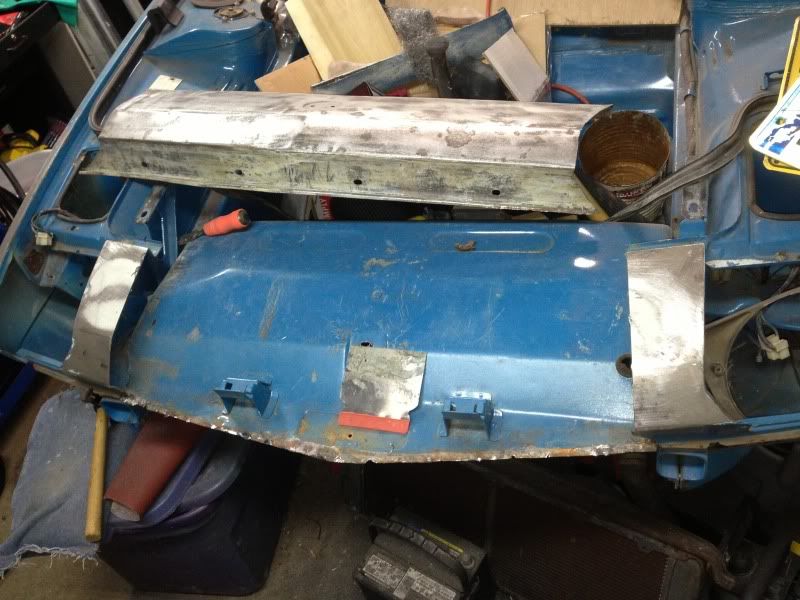
I shaped a new piece with My HF Planishing Hammer and welded it in:
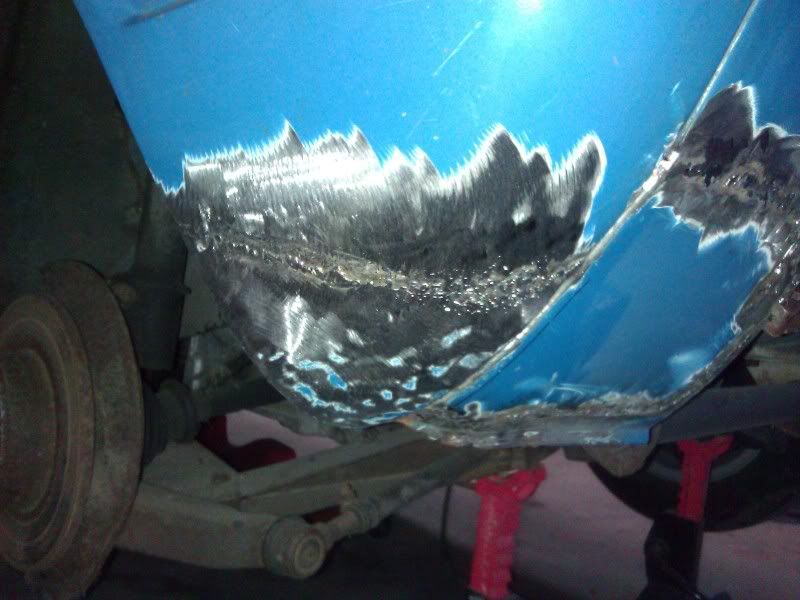
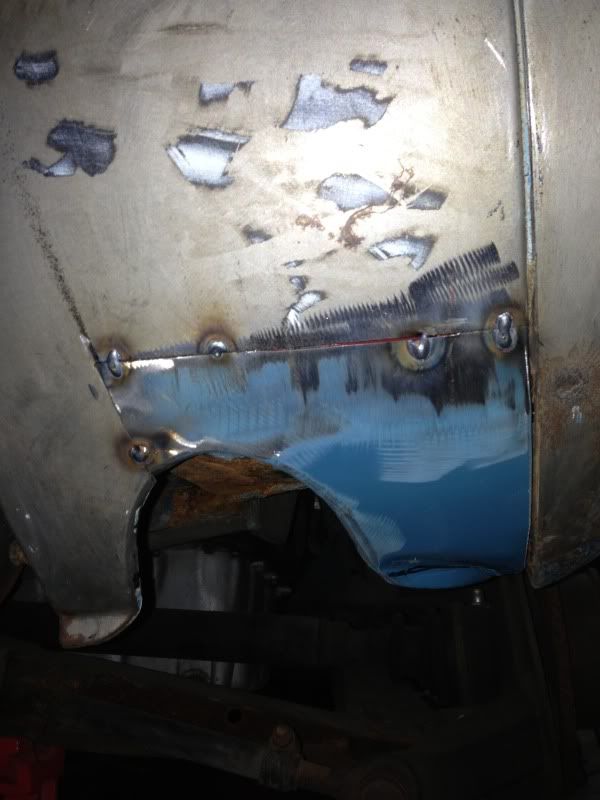
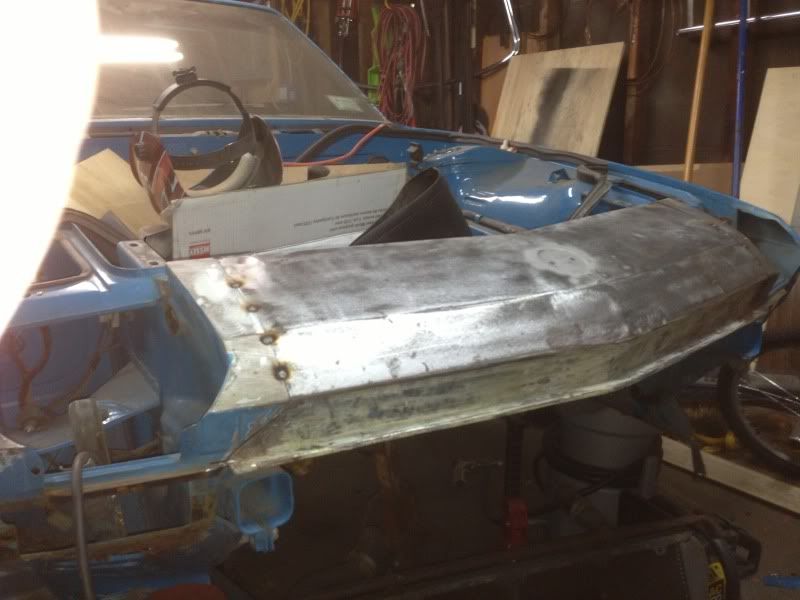
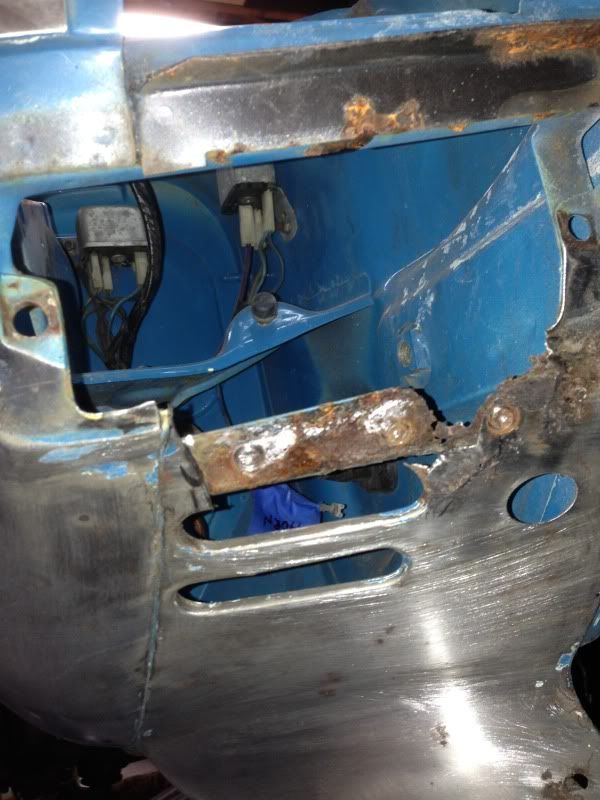
Next came the tailpipe outlet...I was a little nervous cutting this out, but I figured I could always get a replacement patch if I needed to:
I made a template and after a few bends with a pair of vise grips, it was welded on, again...not perfect, but surprisingly good:
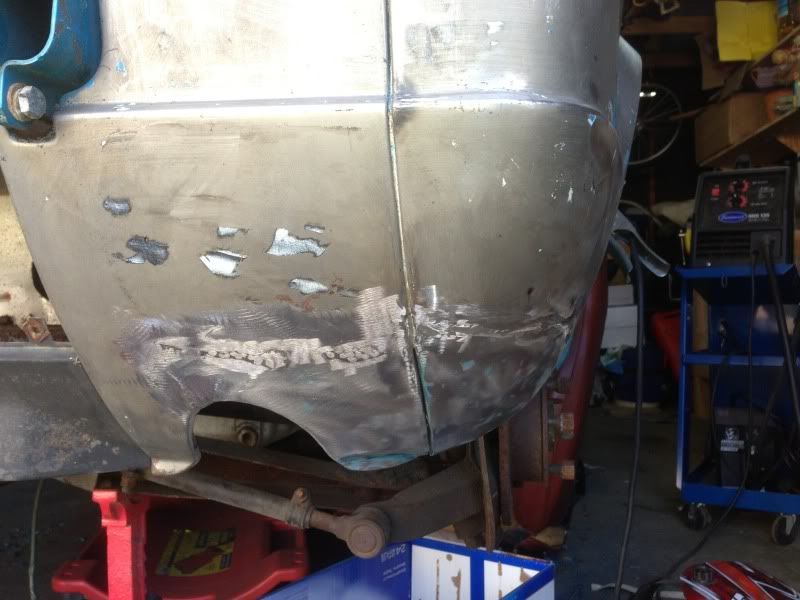
Next it was on the nosepiece...the PO must have driven under something, smashed it down, pulled the dents out(a little) and covered it with bondo. I tried to straighten it, but couldn't get it right, so I ordered a used front section from Matt at Midwest $49 plus $21 to ship. The ad said it needed some elbow grease to make it usable, and the ad was right, but I had it apart and my car prepped and the piece tacked on in a couple of hours, so all in all it was a great deal:
There are a few more areas that need attention, but nothing structural, and I doing a little more every night.
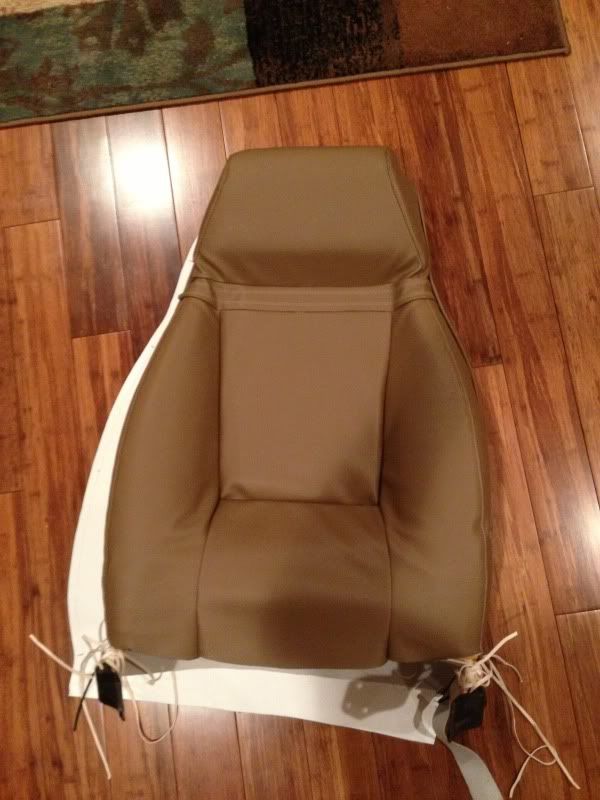
When I get fed up working on the body, I'm working on stitching up new upholstery. This is my first mock up of a seat back I made from patterns made from the old seat. It needs a little tweaking, so I'll adjust the patterns and steam some life back into the foam. When I get it right, I'll make them with the appropriate material.
I'll update my progress as it goes along. Sorry this was so long, but it's been a busy few weeks.
I hope to finally meet some forum members at this years FFO. I'll try to set up a meeting at my house that week, as it's only 2 miles out of the way.
Thanks for reading,
Bob
Some might remember this thread from 2008 http://www.network54.com/Forum/12159/message/1210392451/And+then+there+were+two-----
I never did much to the car besides keeping it running, and last year when I finally put electric in the garage, I pulled it in and started dismantling it in hopes of getting it ready for FFO in Virginia.....didn't happen. There it sat until the Long Island announcement, and I decided to get busy. My wonderful, beautiful, understanding wife gave me a reprieve from working on the house until the car is done and I'm taking full advantage.
This corner of the car I actually did last year, I banged out a piece on a sandbag and it actually fit pretty well, it's not perfect, but it's good enough:


Next was the passenger side floor pan...This is what I cut out:

I shaped a new piece with My HF Planishing Hammer and welded it in:


Next came the tailpipe outlet...I was a little nervous cutting this out, but I figured I could always get a replacement patch if I needed to:

I made a template and after a few bends with a pair of vise grips, it was welded on, again...not perfect, but surprisingly good:


Next it was on the nosepiece...the PO must have driven under something, smashed it down, pulled the dents out(a little) and covered it with bondo. I tried to straighten it, but couldn't get it right, so I ordered a used front section from Matt at Midwest $49 plus $21 to ship. The ad said it needed some elbow grease to make it usable, and the ad was right, but I had it apart and my car prepped and the piece tacked on in a couple of hours, so all in all it was a great deal:


There are a few more areas that need attention, but nothing structural, and I doing a little more every night.


When I get fed up working on the body, I'm working on stitching up new upholstery. This is my first mock up of a seat back I made from patterns made from the old seat. It needs a little tweaking, so I'll adjust the patterns and steam some life back into the foam. When I get it right, I'll make them with the appropriate material.

I'll update my progress as it goes along. Sorry this was so long, but it's been a busy few weeks.
I hope to finally meet some forum members at this years FFO. I'll try to set up a meeting at my house that week, as it's only 2 miles out of the way.
Thanks for reading,
Bob
")
