VW RABBIT
 STRUT INSERTS FOR THE X1/9
STRUT INSERTS FOR THE X1/9
STRUT INSERTS FOR THE X1/9
Very few different strut inserts for the 1300 X1/9 are still available. None of them are performance oriented, unfortunately. While the later sealed units can be used on early X1/9s, and KYB gas units are available for around $75 each, strut inserts are needed for certain modifications. On the Fiat 128 and the Yugo, the front can be effectively lowered by installing early X1/9 rear struts. X1/9s can be lowered by close to an inch by relocating the bottom bracket on the strut tube. Since welding on the bracket in its new location would probably overheat a sealed strut, the early struts are generally used for this purpose.
Following a suggestion by Mike Mittlestead, I have modified KYB gas strut inserts for a VW Rabbit (Golf 1 in Europe) to fit the X1/9.

Here is the installation procedure.
1) PURCHASE INSERTS
The KYB part number is 361005, I paid $55 at Bow Wow.
I have been told that they should be available for around $35 mail order
though.
2) MODIFY BOTTOM END OF INSERT
The insert has a small foot welded onto the lower end
that has to be removed. This is easily done with a hacksaw.
Try to cut more into the the foot than the shock body. Refer to Fig.1.
3) MODIFY LOCATING COLLAR
The insert comes with a steel collar ring that fits snugly
over the top of the shock housing and locates the insert in the strut tube.
Its outer diameter is a little to large to fit inside the Fiat strut housing
so it needs to be ground down. See Fig.1. While the collar could
be turned down on a lathe, it would be hard to set it up, and I found that
using a bench grinder works just fine. I stuck my gloved right index
finger through the hole in the ring and used my right thumb and left hand
to constantly turn the ring against the grinding wheel (The ring is held
upright as shown in Fig.1, not laid down). The ring needs to be cooled
off periodically in a tub of water. Grind it until it fits down into
the strut housing on top of the modified insert.
The standard Fiat strut retainer now threads into the
housing on top of the modified collar ring.
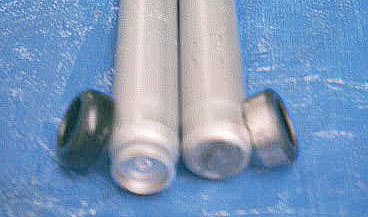
Fig.1: Lower end of insert and locating collar. Original
on the left, modified on the right. (Sorry for poor picture quality).
4) MODIFY TOP MOUNT
The end of the VW piston rod is threaded a little larger
than the Fiat one and does not have the flats on the side (see Fig.3).
To hold the piston rod while tightening the nut, it uses an allen wrench
fitting at the top of the piston rod. Consequently, the metal "funnel"
of the Fiat top mount needs to be drilled out to fit the VW piston rod.
Refer to Fig.2. Since I didn't have a drill bit large enough, I used
a Dremel rotary tool with a grinding stone to open up the hole in the "funnel".
A washer is also required to raise the nut high enough
out of the funnel to be accessible with socket. Because the OD of
the washer needs to be very small, I ended up opening up the hole in a
1/2" small washer with the Dremel.
When the strut is assembled, the VW piston rod does not
protrude far enough through the "funnel" for the locking part of the supplied
Nyloc nut to engage. I purchased non-locking nuts (I *believe* the
size is M14x1.5) instead. All threads of the nut engage the rod,
but a thread locking compound such as Loctite MUST be used instead of the
locking nut!

Fig.2: Modified "funnel and washer, locking and regular nuts. (Sorry
for poor picture quality).
5) REASSEMBLE
The strut can now be reassembled (using Loctite on the
top nut!) and reinstalled.
Fig.3 shows a strut with a stock insert and a strut with
a Rabbit insert side by side. Note that the VW shock has more travel
even though it sit lower in the strut tube.
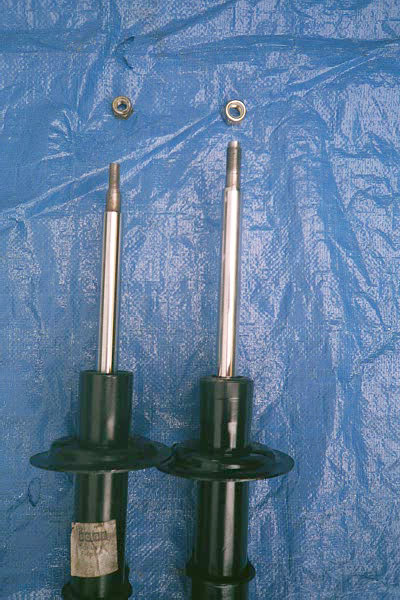
Fig.3: Stock strut on left, Rabbitized
strut on right.
6) GO FOR A TEST DRIVE!