Fiat 128 Sedan Build for the Bride of Burrito

Burrito

Daily Driver
I figure this as good a time as any to start porting my 128 build thread over to this neck of the woods. I'll try to get a few of the updates brought over every day as time allows. It's a little time consuming as I have to change all of the image tags.

6/9/2015

20150602_074135_zpsmk7a0qii.jpg


20150602_074122_zpsvzjt38va.jpg


20150602_074100_zps2yffdfth.jpg


20150602_074041_zpsu7ot47or.jpg


20150602_074030_zpsqzecl0ea.jpg


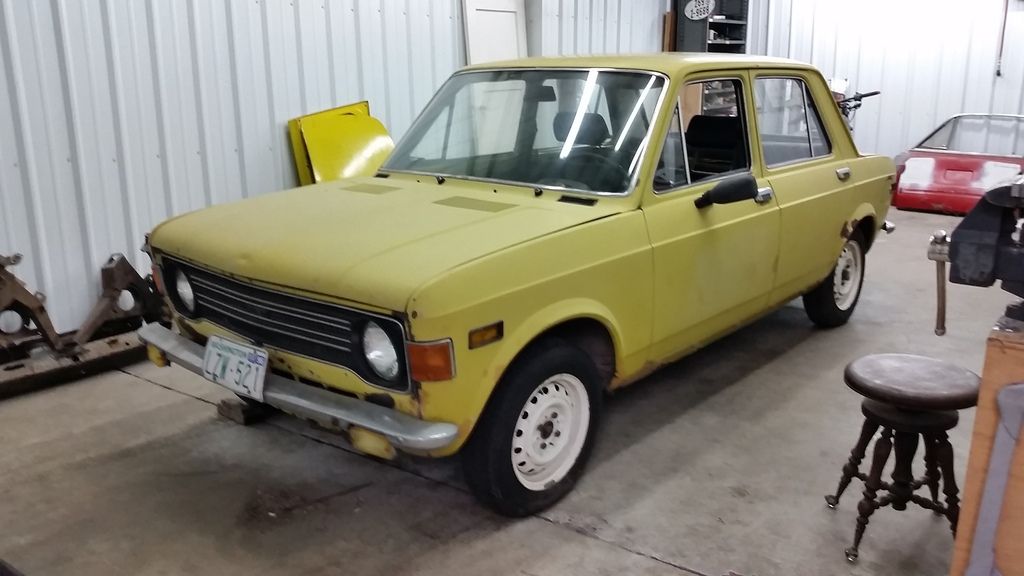
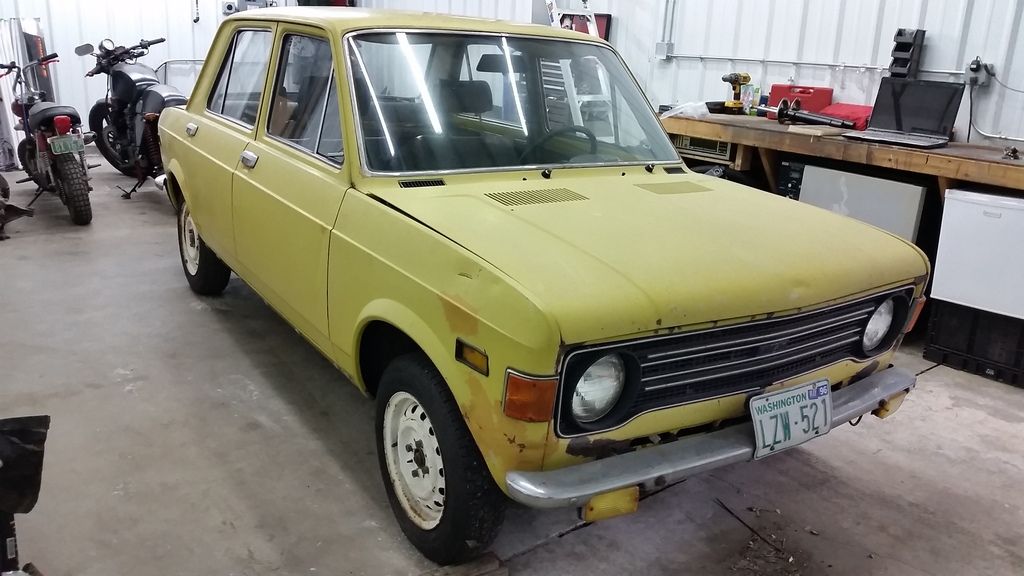
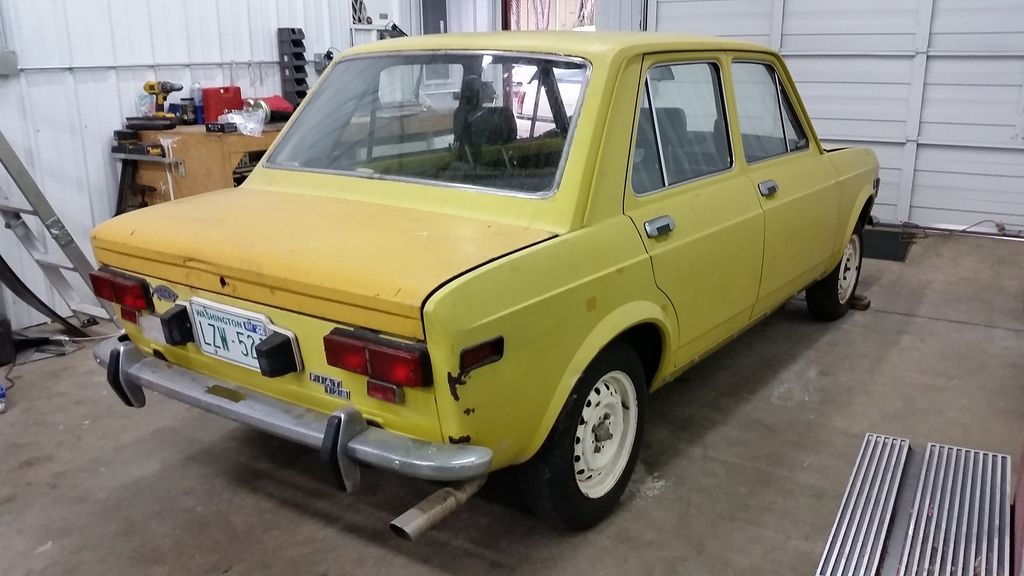
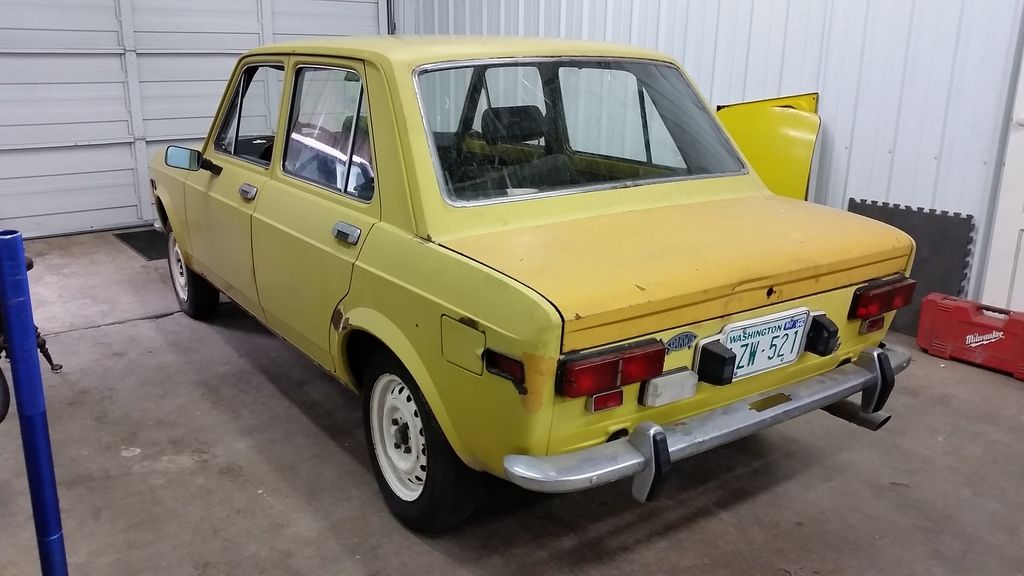
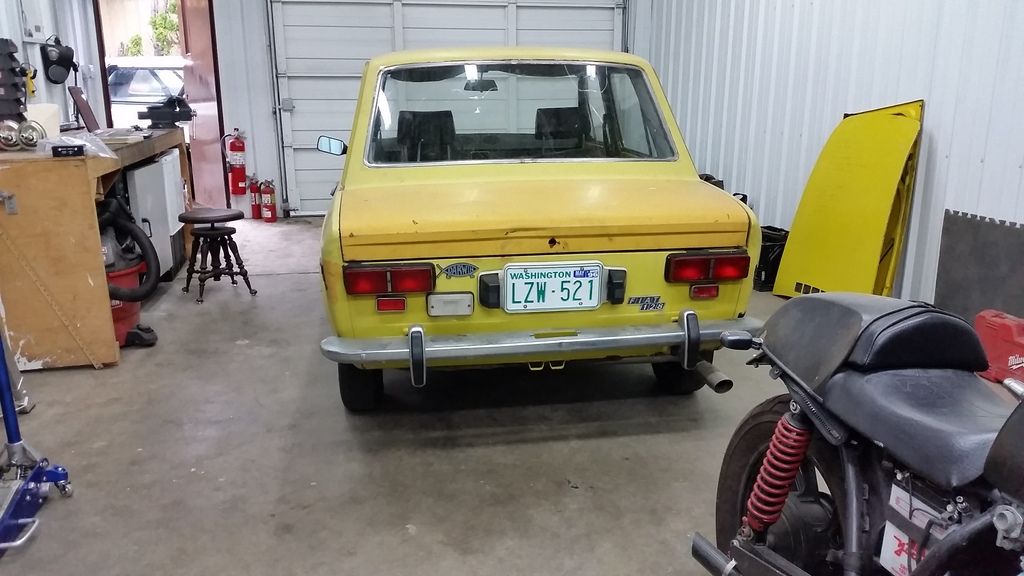
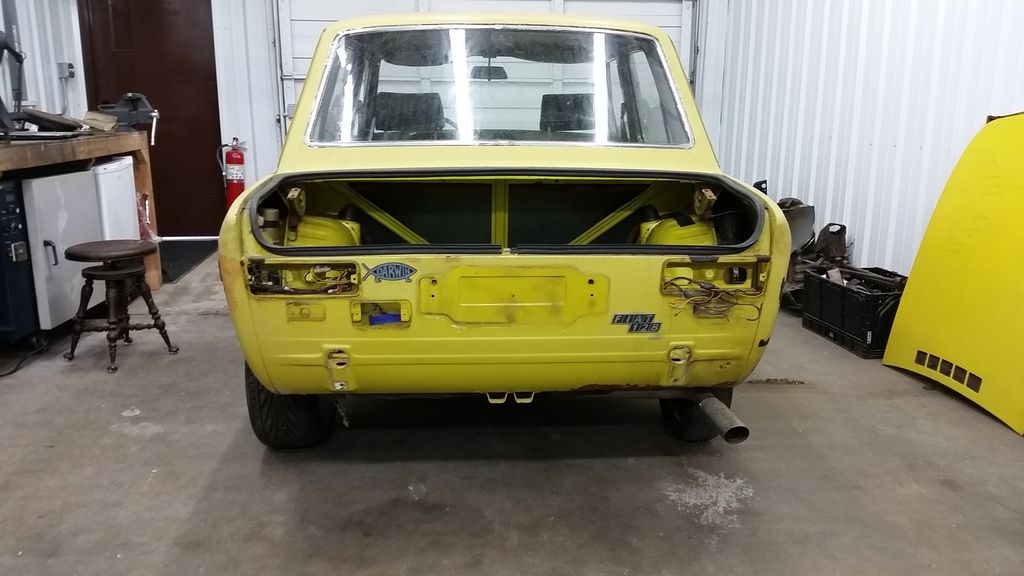
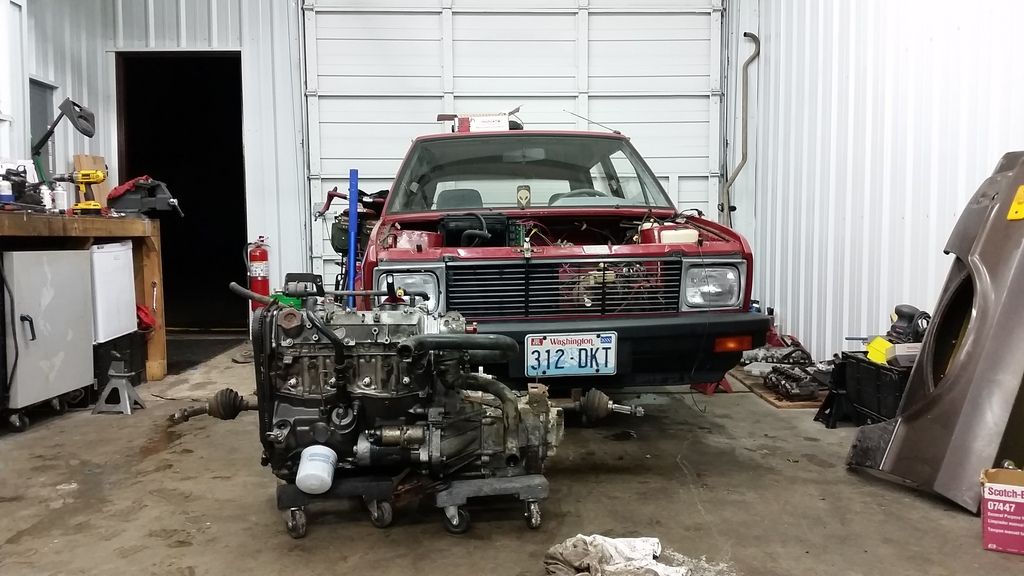
This car came up on our local Craigslist early last week and, after a short conversation and some cursory research, we both agreed that we should drag it home. The previous owner bought the car June 1st 1990; We took deliver 25 years later, to the day! It was parked in 1996 after the head gasket popped and was put into storage until last week.


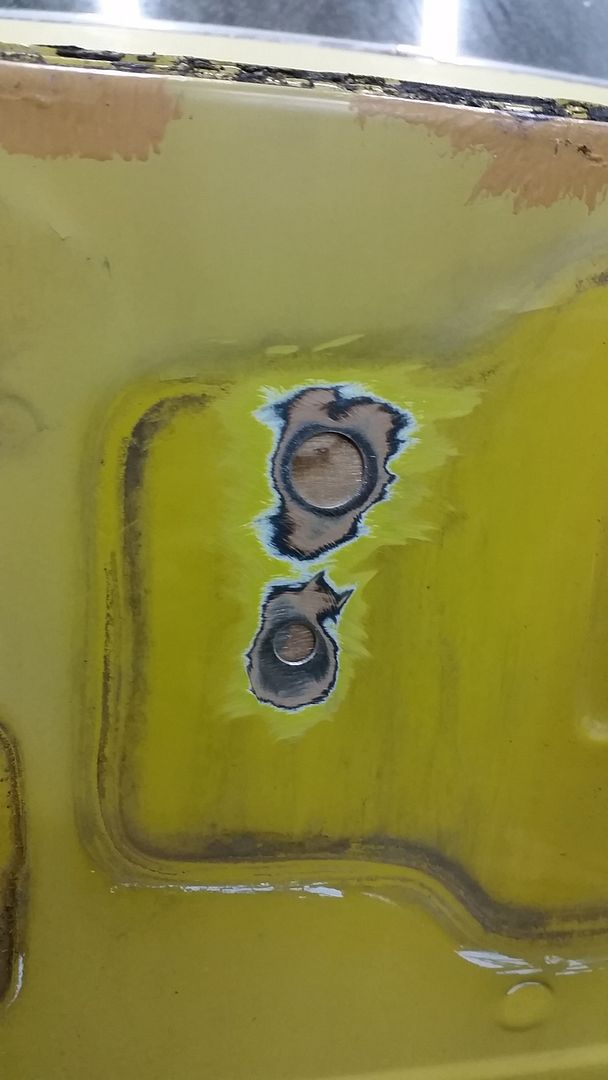
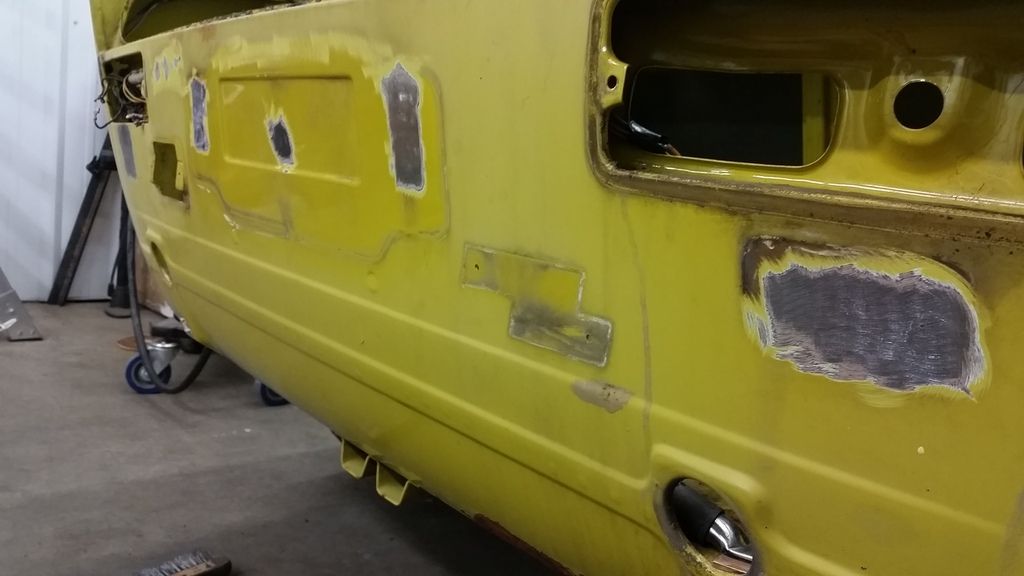
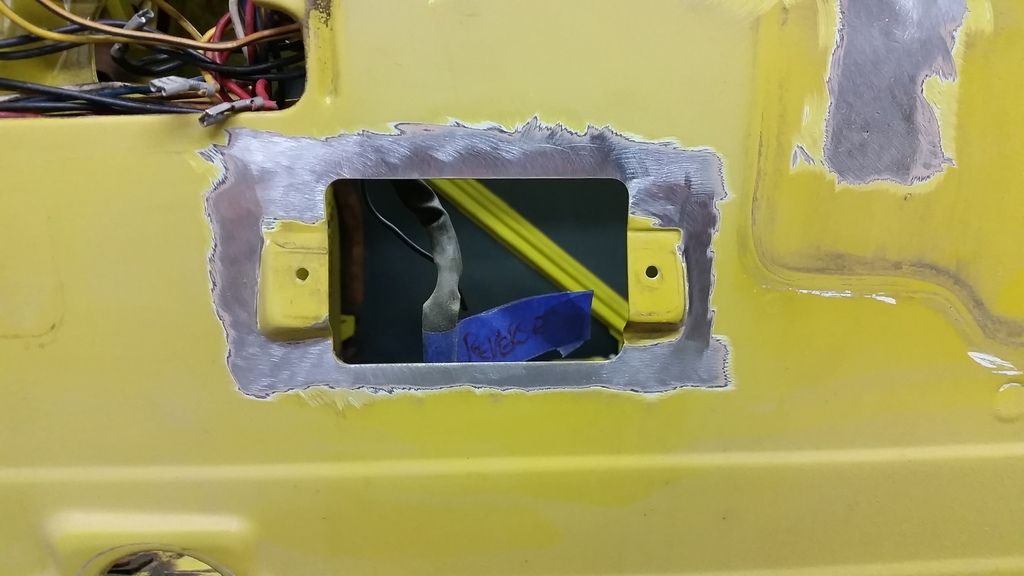
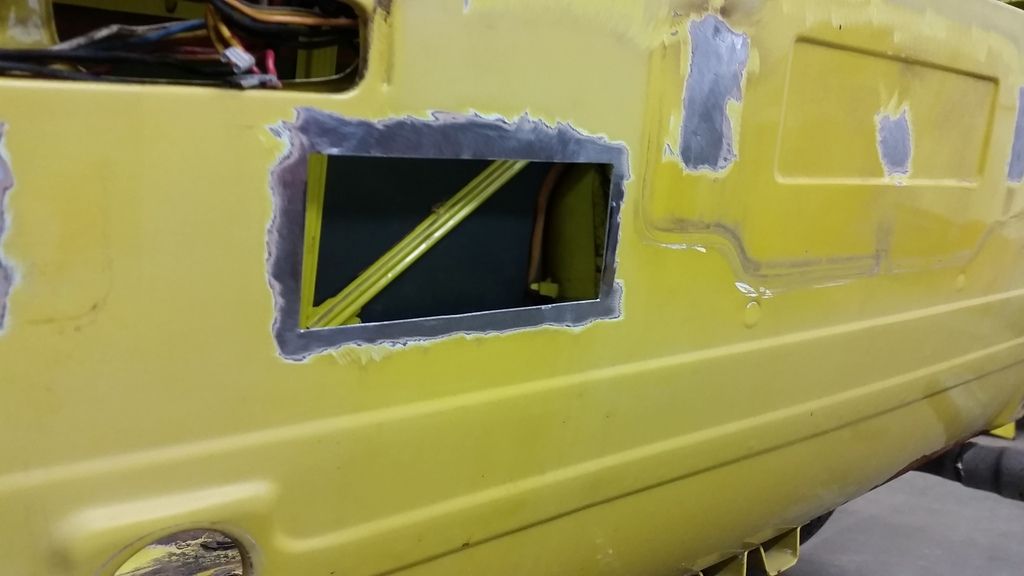
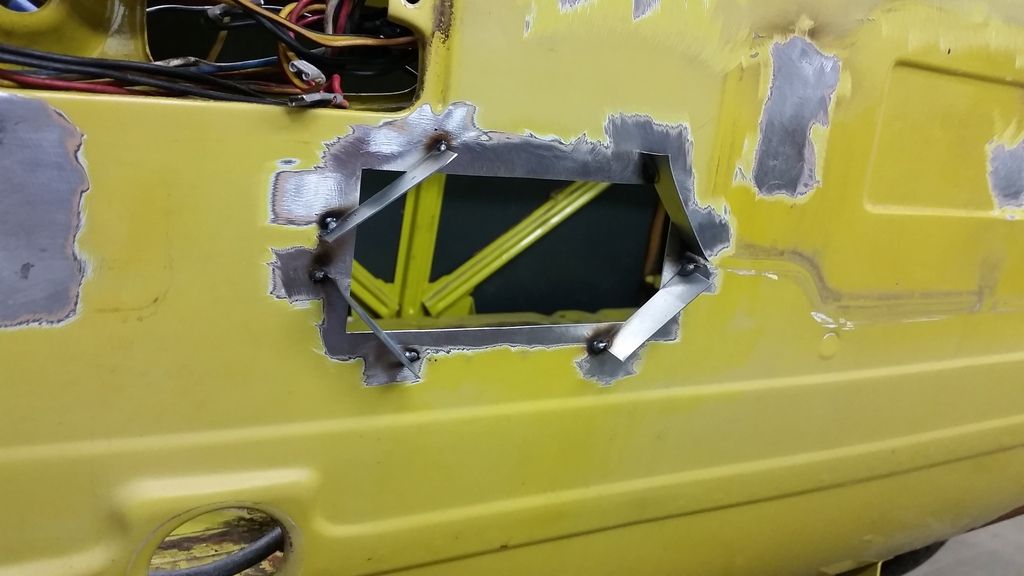
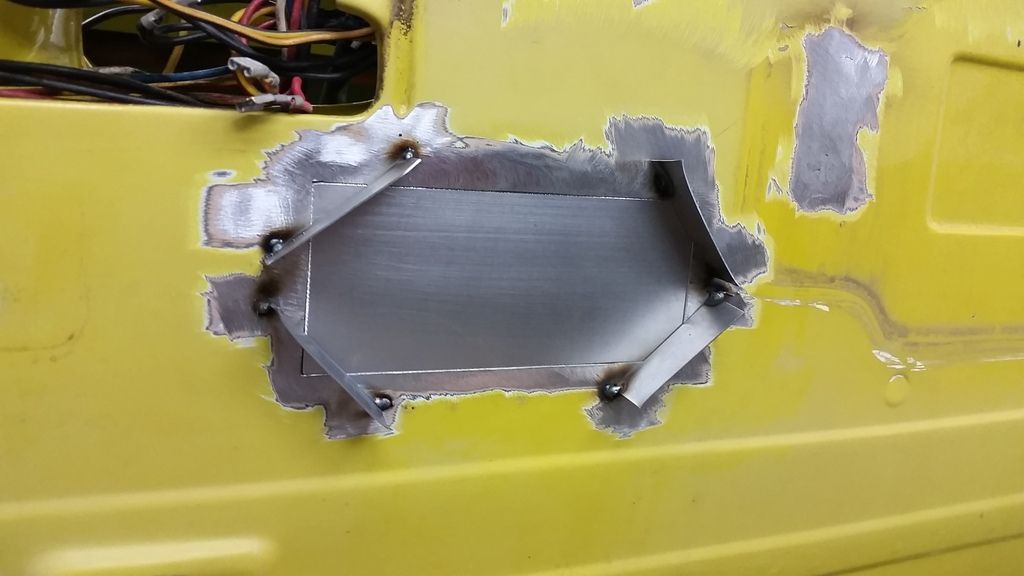
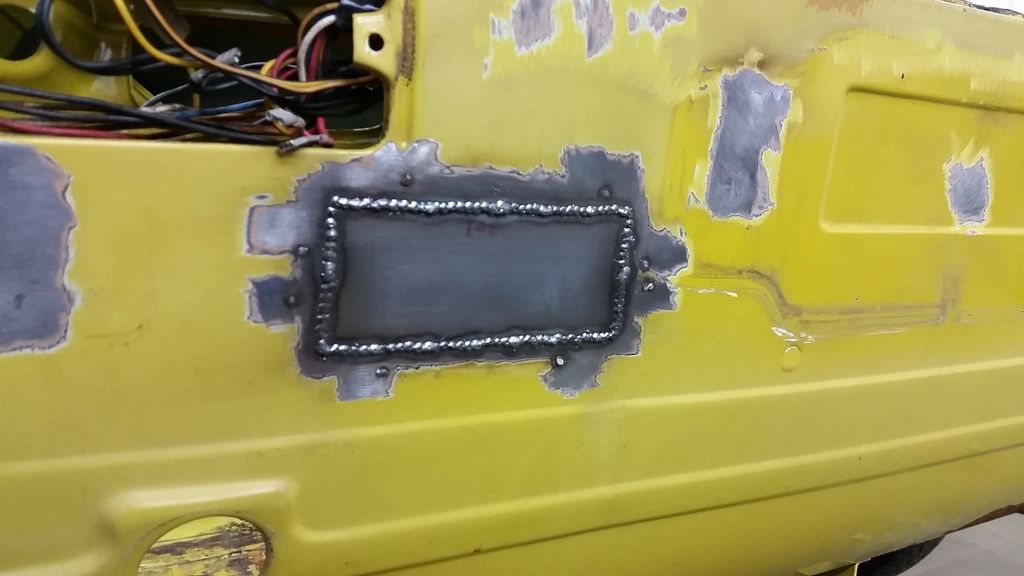
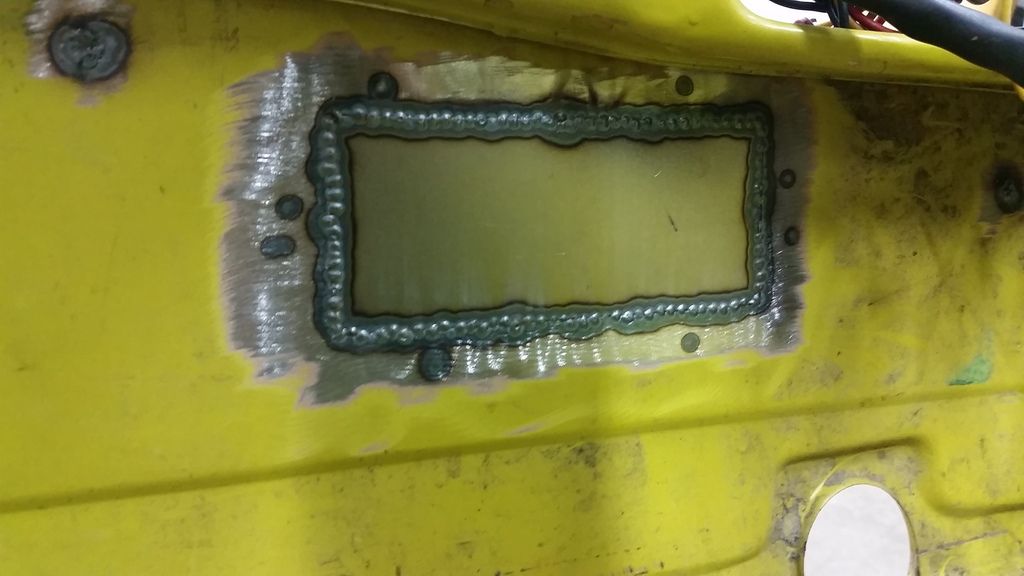
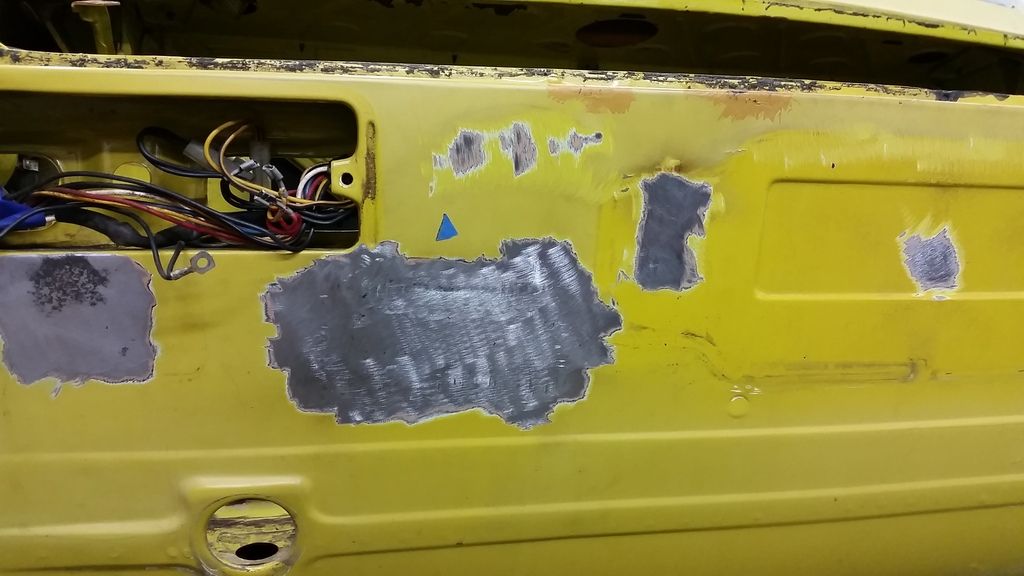
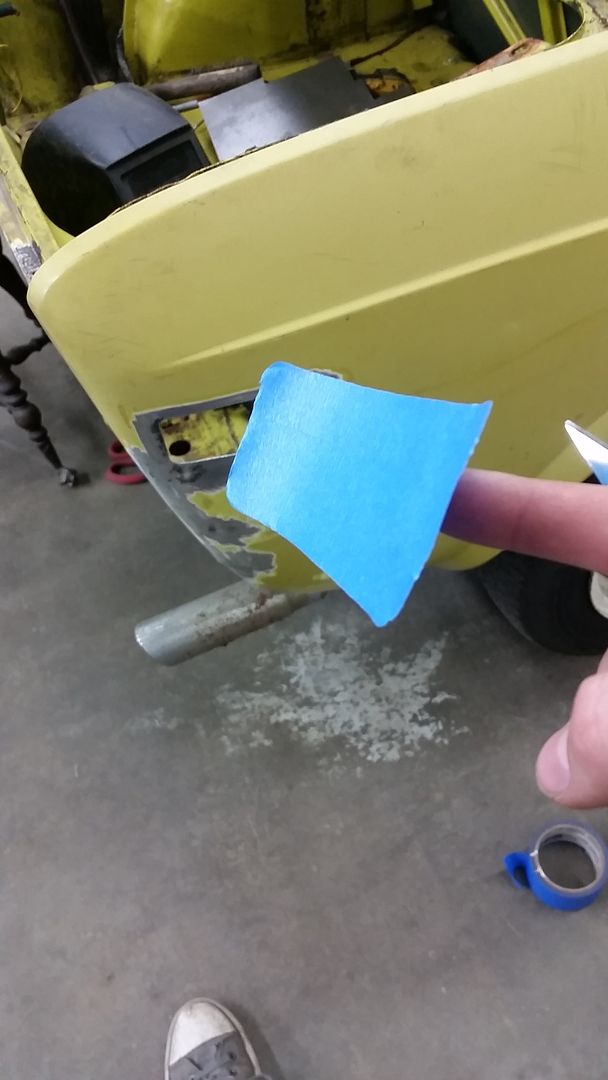
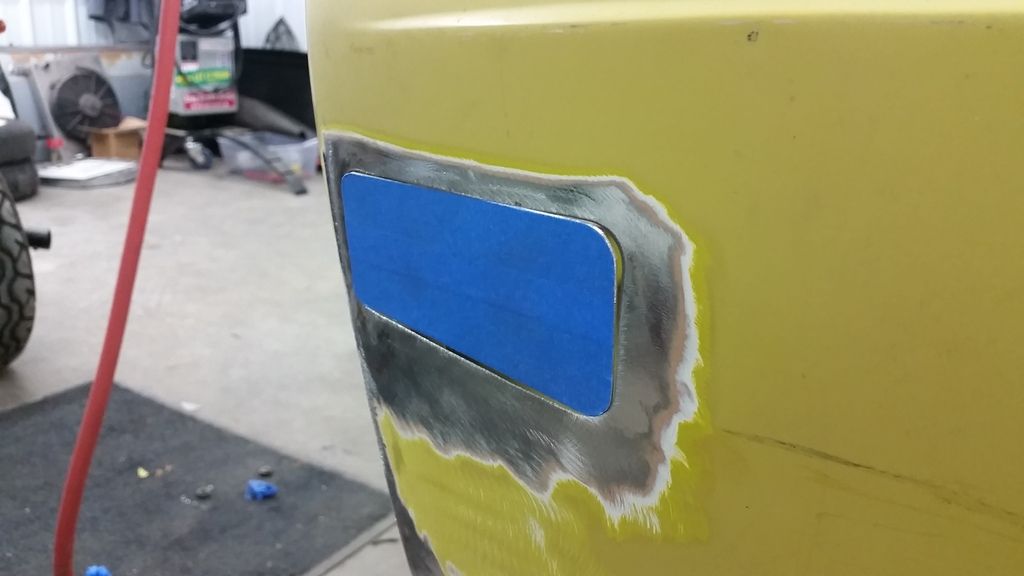
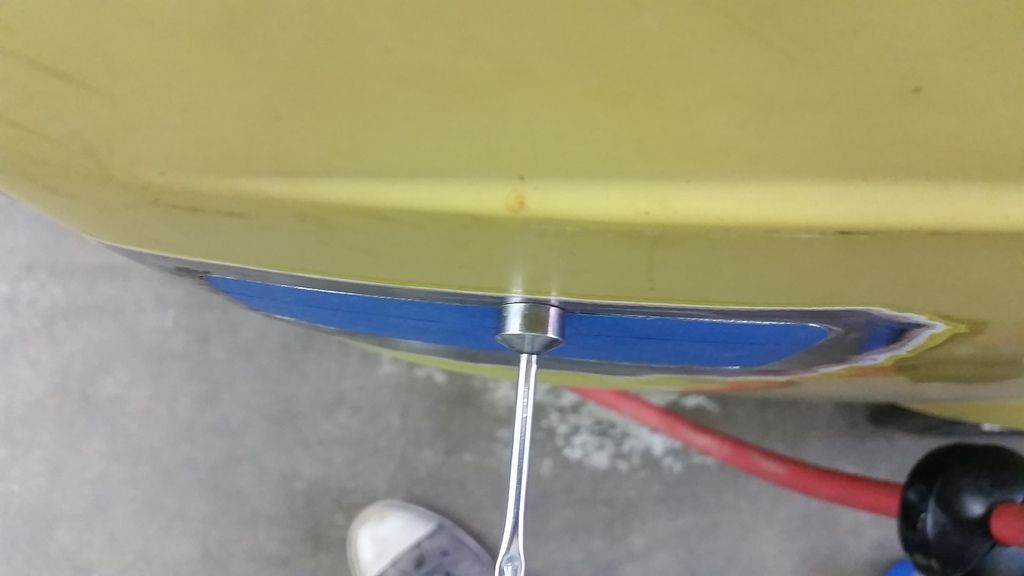
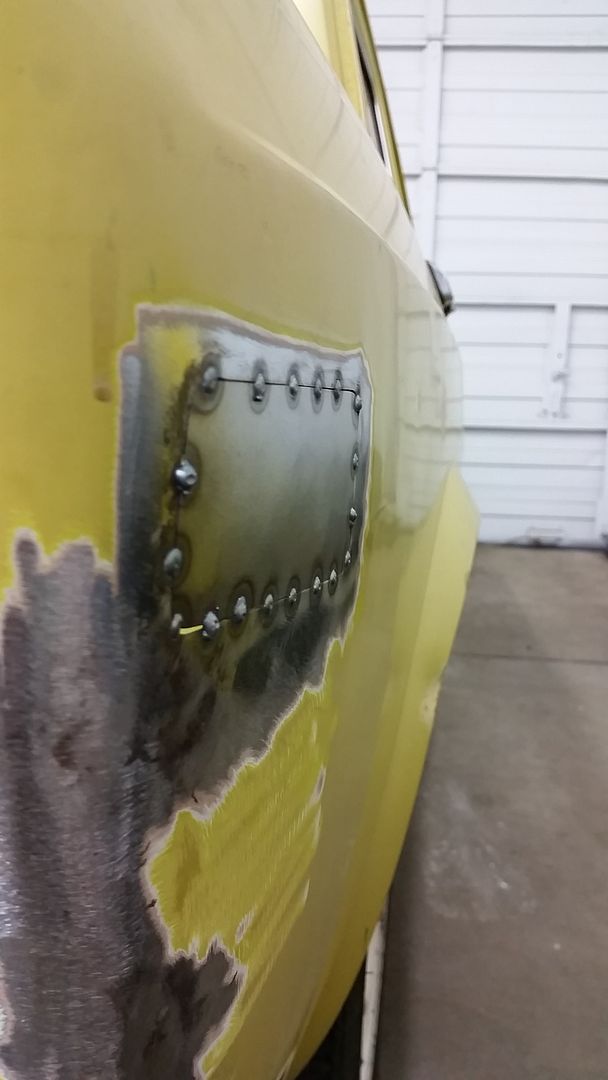
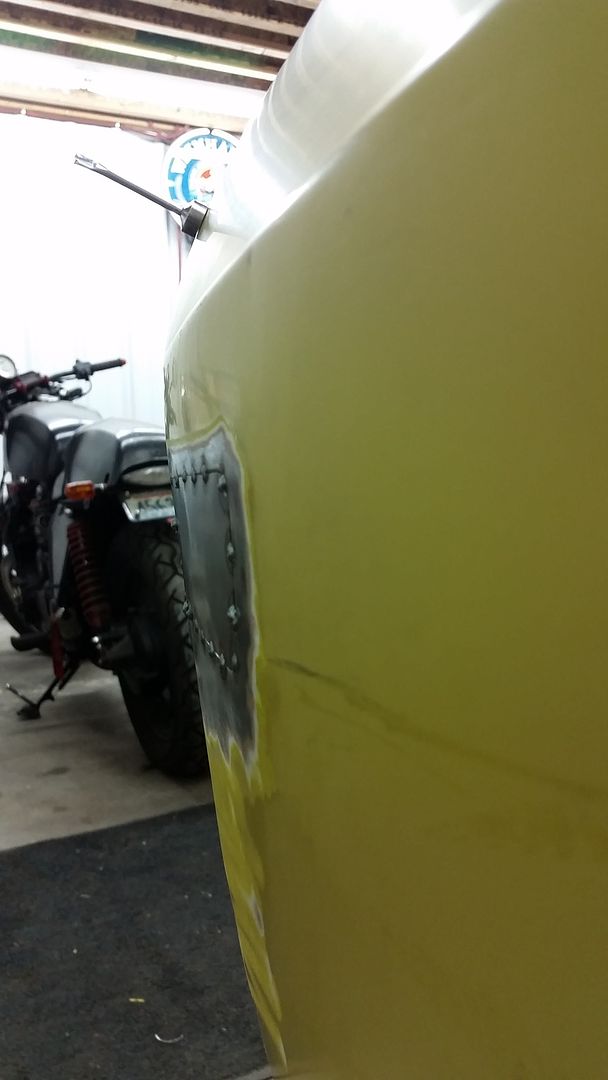
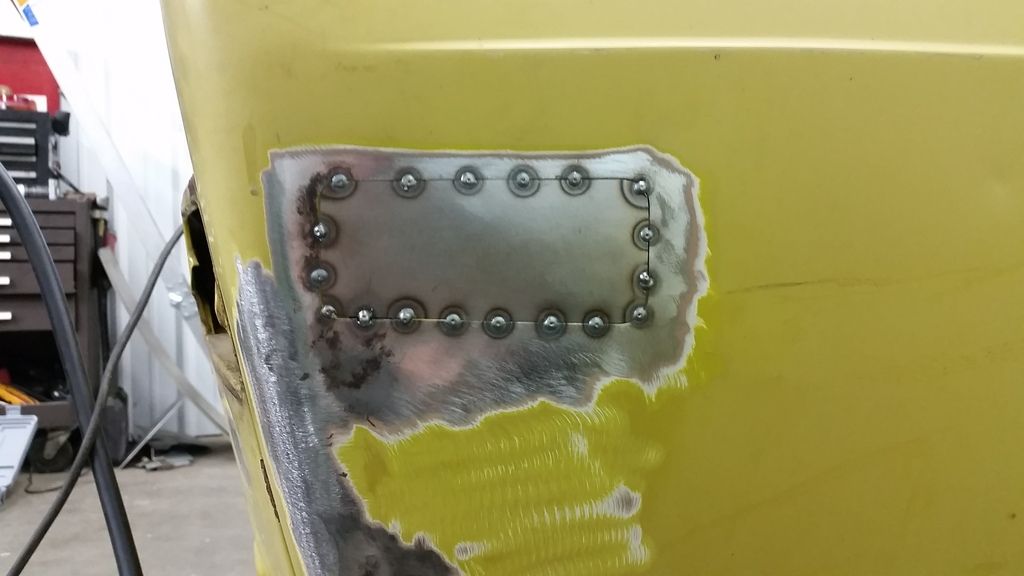
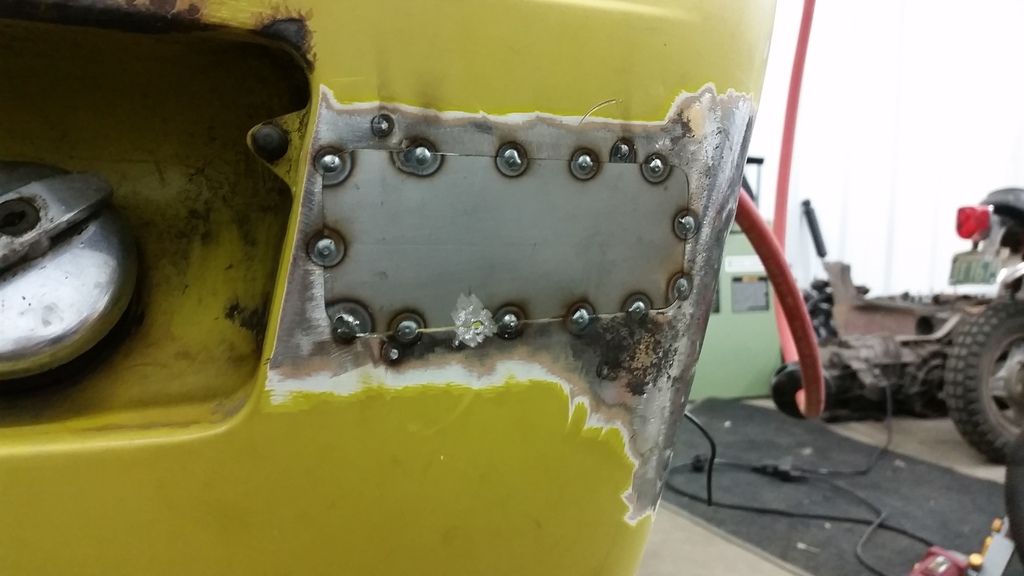
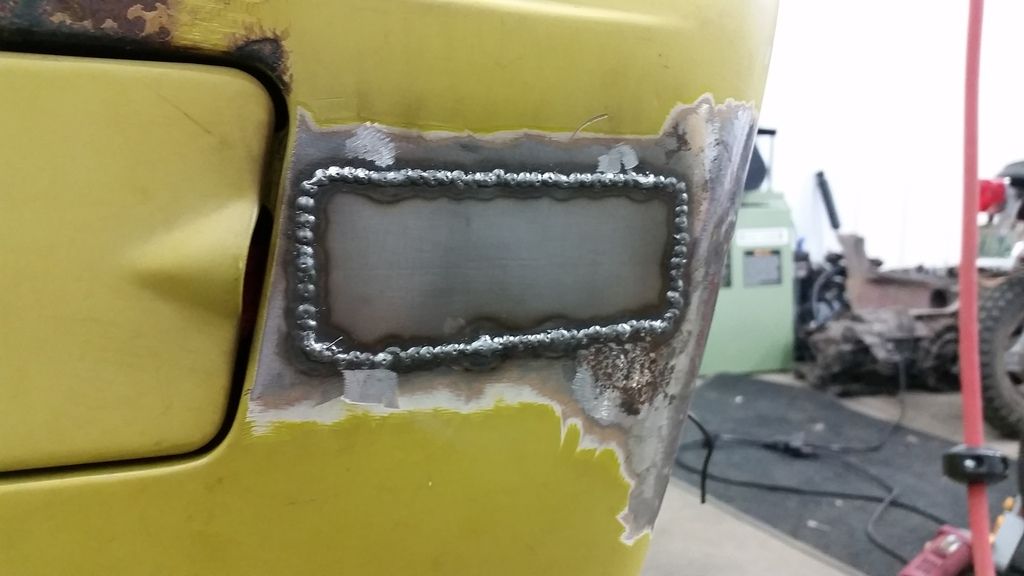
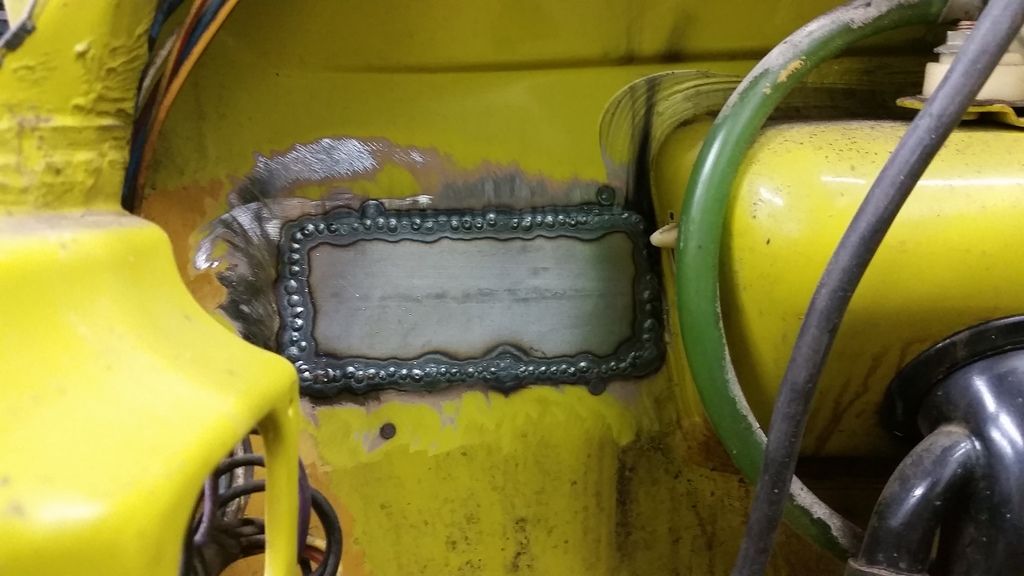
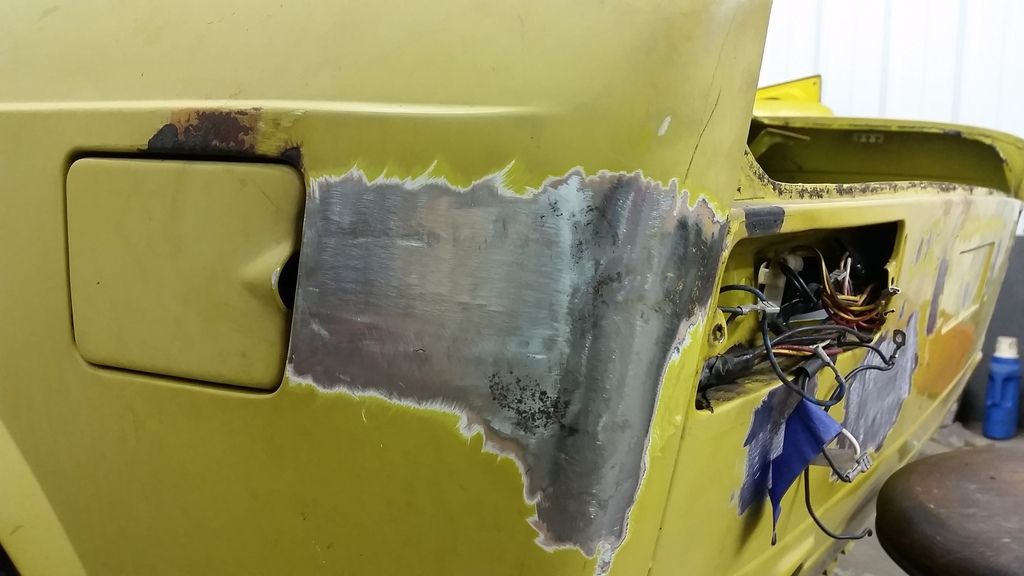
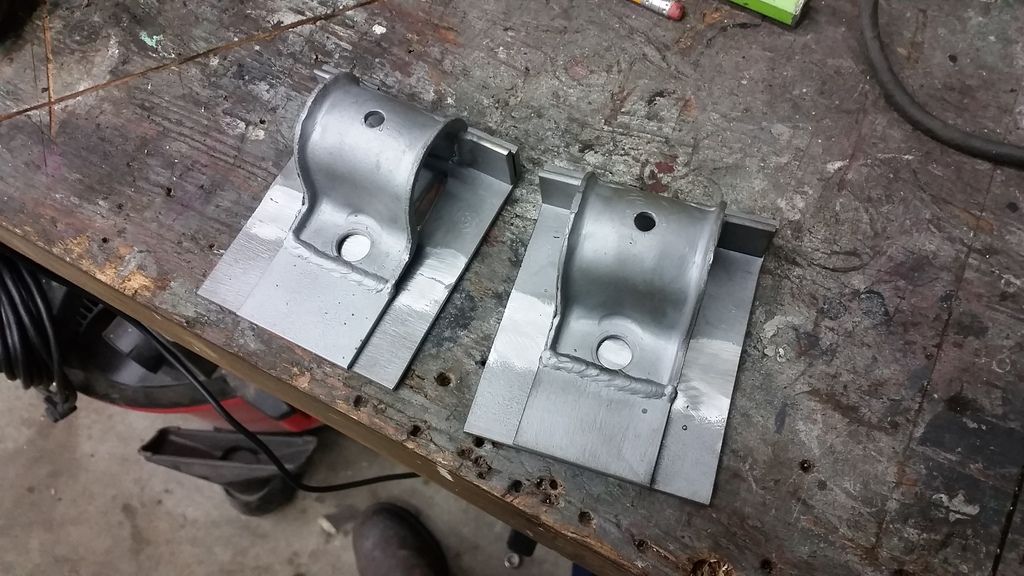
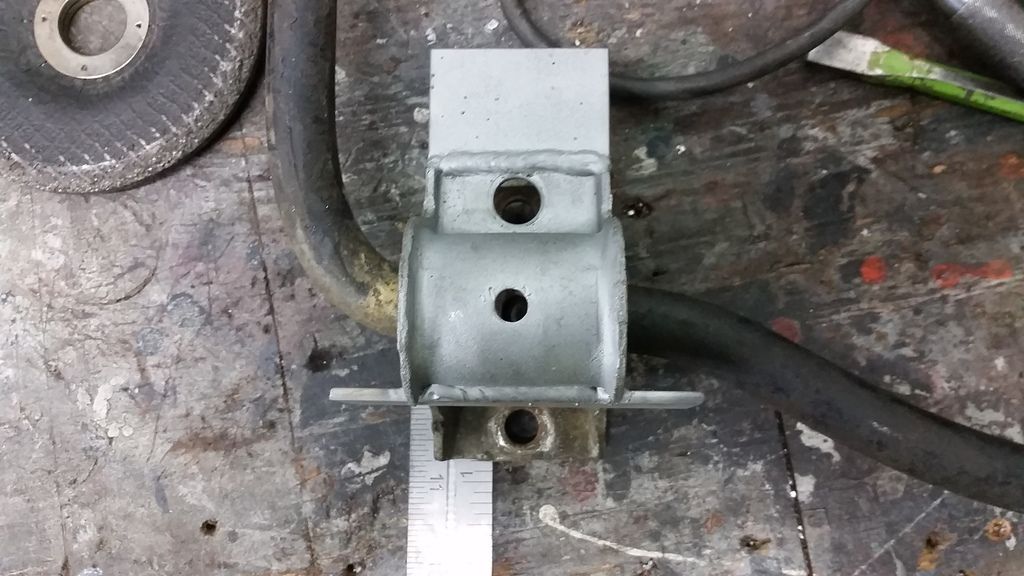
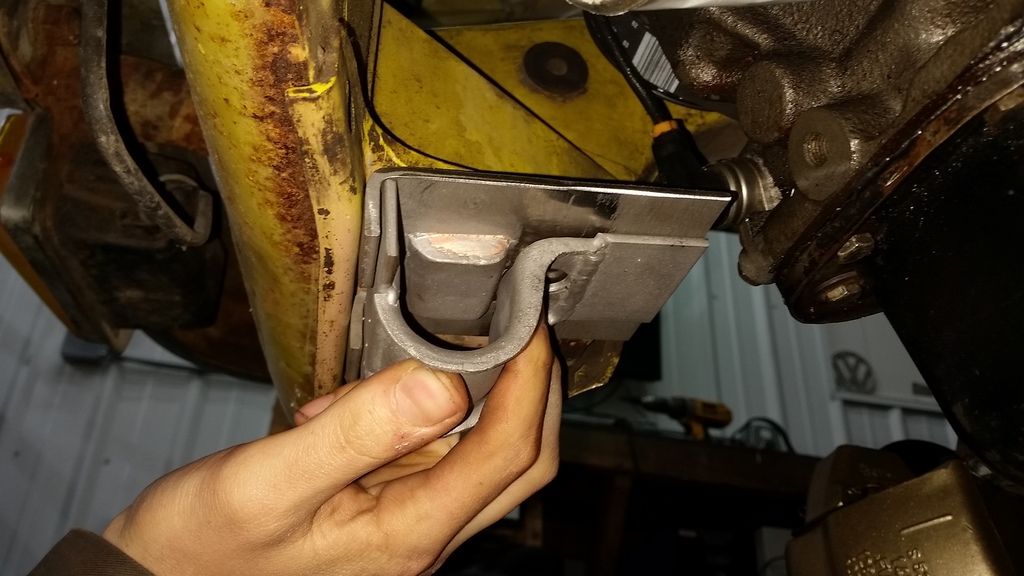
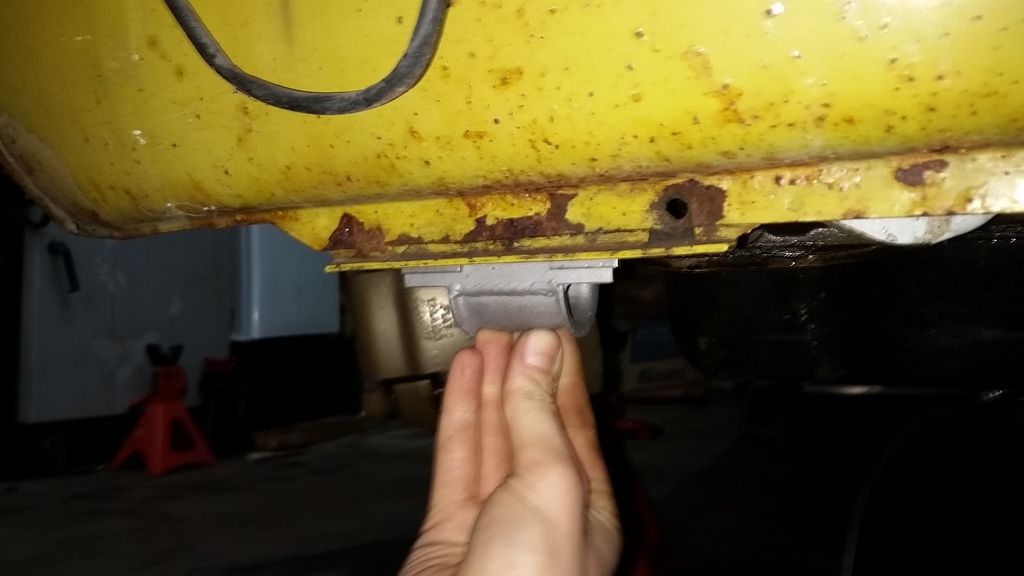
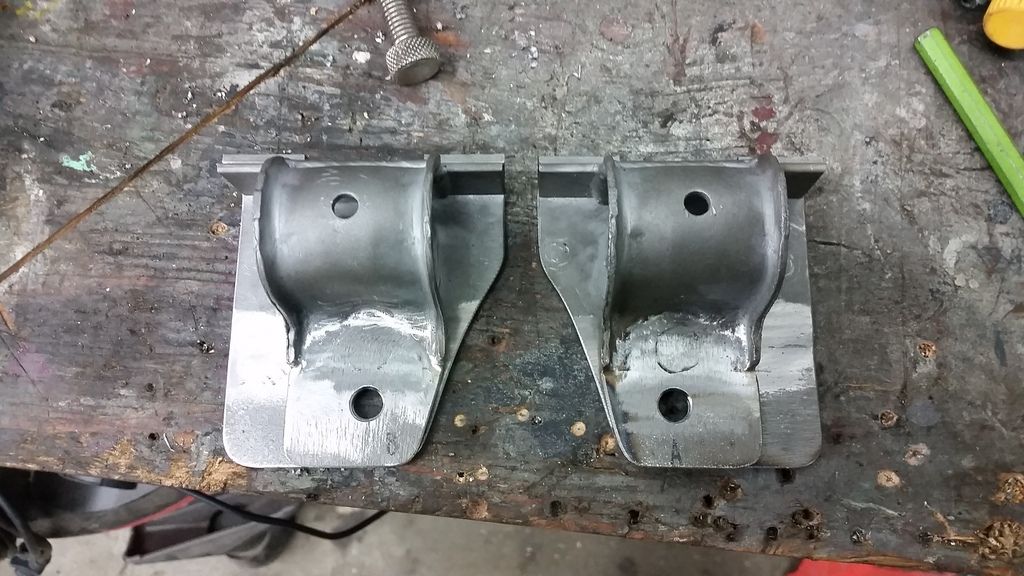
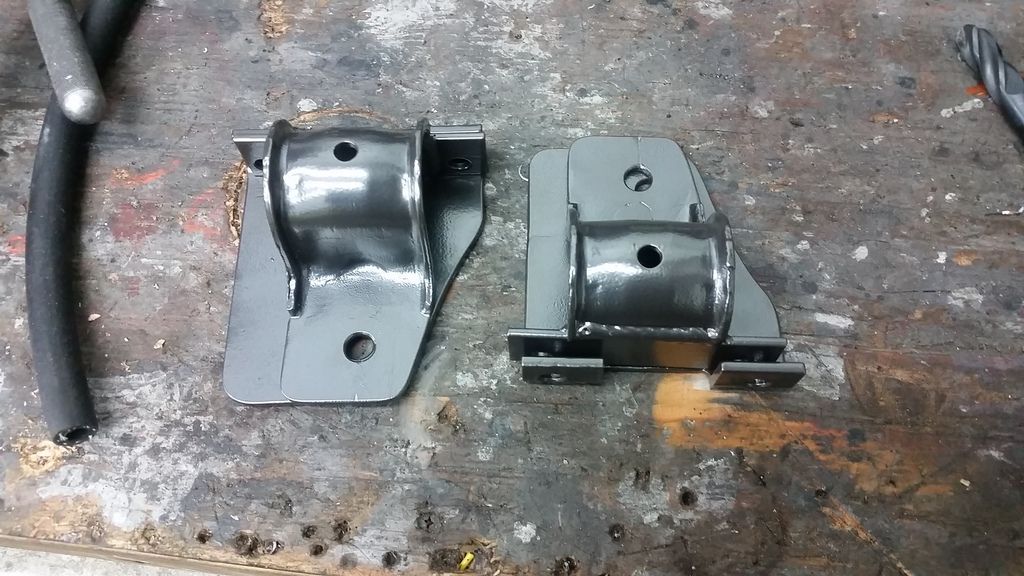
This thread should move fairly quickly, unlike some of my others. I'm jumping straight into the rust repair before doing too much with the mechanics. The car is scabby, but very solid, so there might not be too much in the way of sheet metal work here. I'd like to have it ready to go off for paint in two weeks, barring any extreme rust that I've yet to uncover.

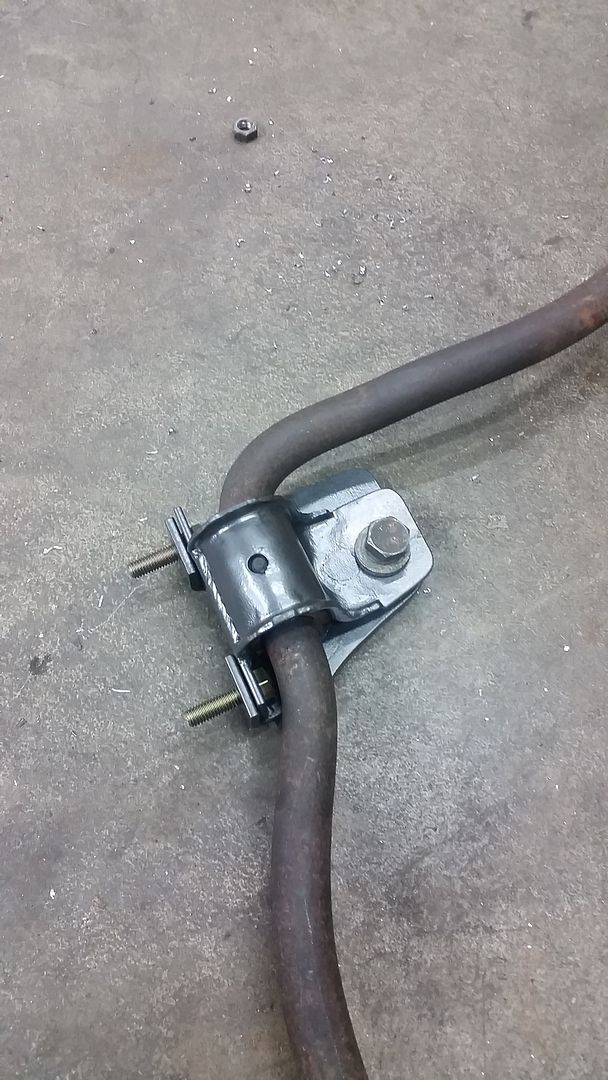
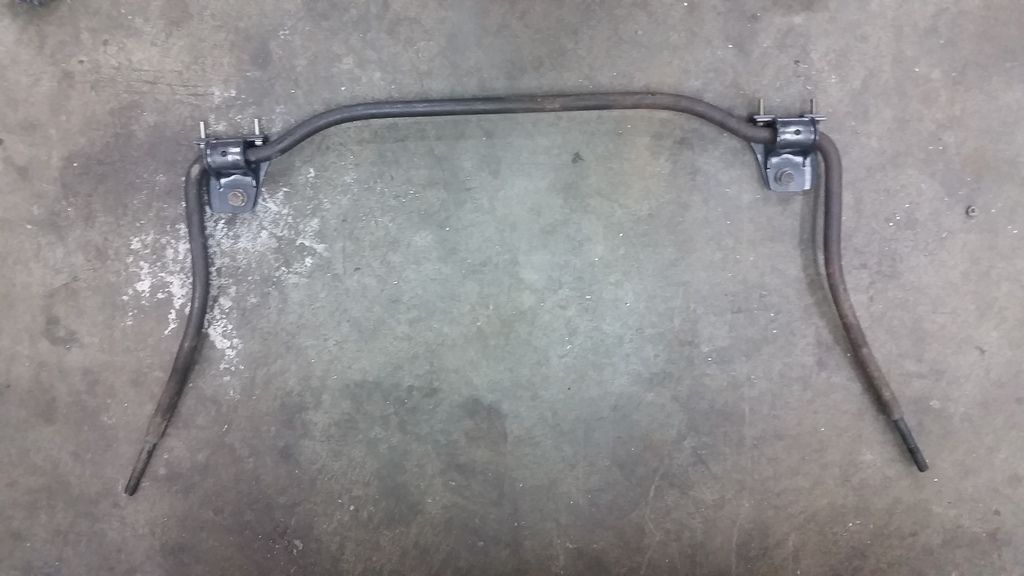
The immediate plan calls for a X19 1.5, 5 speed, and L-Jetronic swap, rabbit struts and coilovers up front, wagon leaf spring and new dampeners out back, fresh paint, and some lows on steel wheels. Obviously brakes and steering components will also be freshened up as things come apart.
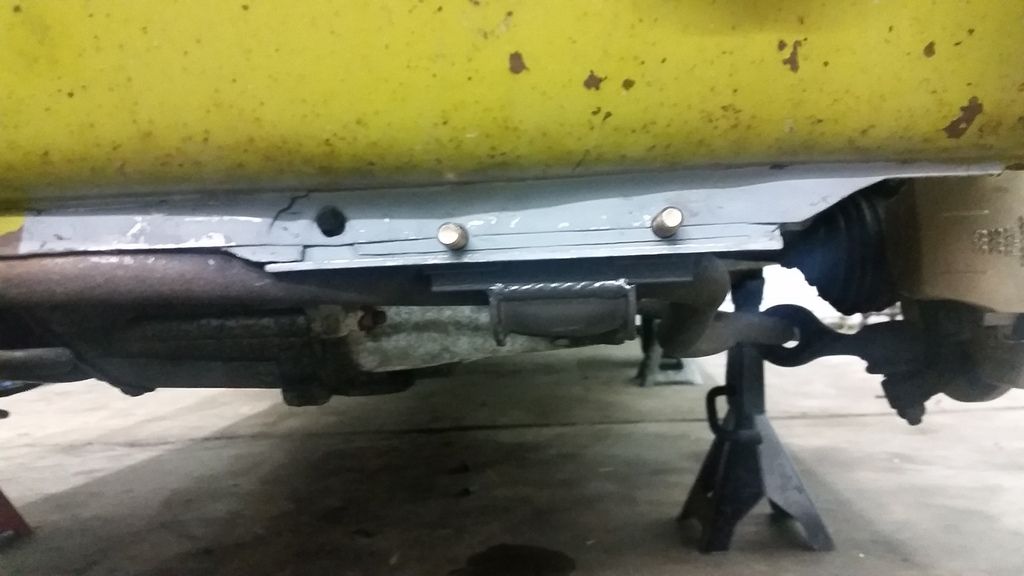
 
6/9/2015

This was originally a rubber bumper car. The PO converted it to chrome bumpers at some point during it's tenure with him. As grateful as I am for that fact, there are a few remaining relics of it's previous life as a big-bumper car.

Just look at all those reflectors, the giant license plate holder, and the scabbed on reverse light. Since we are going for the "Cleaned" look, all this has to go.

20150602_074030_zpsqzecl0ea.jpg


Since we are lucky enough to have the early bumper, the plate light and reverse light will be easily relocated to their proper locations. The license plate lights are available new for about $25 to my door and the reverse light will be a universal unit unless I stumble upon an early piece for cheap.

Here's an example of the earlier rear end:

fiat-128-4.jpg


Much better!

So, lets tear it down and see how many holes we have to deal with.

20150608_102047_zpsnu3uitfd.jpg


Ok. Bumper off, lights removed, and a quick roll call for the newly uncovered holes. 2 for each reflector, 5 for the plate holder, and a biggy for the reverse light. A nice even ten hole job.

The Darwin fish might make a reappearance later on in this cars life (it is dated 1990, after all), or maybe we will see if there's a booming market for pseudo-vintage Darwin fish on eBay.

All of the small holes (about 3/8" and under) were filled in with the welding spoon thusly.

20150608_104347_zpshb0ro3mg.jpg


After a spell we had nine holes filled in, and nine welds ground flush.

20150608_114506_zpstt9zaogq.jpg


20150608_114517_zpsgwov4oro.jpg


20150608_115956_zpsek2zsef4.jpg


Awesome, already looking much better. I may have stuck a few of my VTO wheels on there to check clearances, ignore that for now.

Onto the big hole for the reverse light.

20150608_121241_zpsjybztgas.jpg


I opened the hole up a bit to get rid of the two proud mounting ears.

20150608_122709_zpsxk1ody0b.jpg


But at some point during the move into the new shop I lost my little surface mount clampy things and the last one of my rare earth magnets. Queue ingenuity.

I don't need no stinking magnets or cumbersome clamps.

20150608_125738_zpsssxy4dwm.jpg


I gave the patch a little curve to match the rear panel.

20150608_125959_zpsmrajfebb.jpg


After a hundred or so pulls of the trigger and more than a few short breaks for beer and panel cooling we are all welded up.

20150608_134919_zpsnibtwsqr.jpg


And good penetration on the backside (heh).

20150608_134935_zpsb2qovdoo.jpg


After about a decade with a grinder, again moving slowly to not warp that wide flat panel, we are all ground off flush. There's a little bobble on the top seam. Nothing a skim of filler can't hide. /media/img/icons/smilies/wink-18.png" class="smiley" alt="

20150608_144244_zpsxbtxll7v.jpg


20150608_144252_zpsvxqrhovz.jpg


That pretty much rounds out the rear panel until I find a plate holder I like (or fabricate something). Next step is rear corner marker shaving and rear quarter panel rust repair.
 
6/10/2015

So, continuing on with plugging up the holes. I made my typical tape template (big thanks to NOHOME on GRM for that tip).

20150609_191256_zpsi5ojhwtb.jpg


Stick it on some sheet and snip it out.

20150609_191346_zpsyizviaep.jpg


As a flat sheet it well and truly doesn't fit so well.

20150609_191855_zpsrbb4ah55.jpg


So, naturally, hit it with a hammer until it does.

20150609_195901_zpsje7gy84e.jpg


Side B fits pretty dang well.

20150609_202449_zpsyywciaec.jpg


20150609_202507_zpsxm74q6ud.jpg


20150609_202531_zpspuvzxklb.jpg


Side A does, too.

20150608_165751_zpsnm8r4w1u.jpg


Side A all welded in.

20150608_171442_zpsjnlxksv6.jpg


Looks good on the backside.

20150608_171451_zps7um4vwyt.jpg


All ground off. Again, a little wave, but well within reason. I think I warped it in the grinding process, I will take a little more care on the opposite side.

20150609_190722_zpssm9odvln.jpg


Side B is left at this point for the night.

20150609_202531_zpspuvzxklb.jpg


Hopefully tomorrow I can get it all welded in and ground off before moving down to the rear quarters / trunk corners.
 
Largely text update:

Last night I got the passenger rear cornermarker patch all welded in a partially ground off. It's coming out nicely. I'll grab some pictures of that once it's all finished up.

Since I had a helper for the night and the $600 X1/9 has disappeared, we thought it would be wise to put a bit of time into the stock lump. The possibility of pushing off the engine and transmission swap for a few months is pretty likely, so I'd like to hear the stock motor cough to life before A. throwing money at it or B. condemning it to life as a boat anchor. Maybe living with the tiny stock engine and 4 speed will make us appreciate the halfway modern 1.5l FI setup more.

So we tossed a battery in it, put it on the charger, and made sure she had some oil in the crankcase. Lights on the dash! Cool. Turn the key. Nothin'.

Ok. Pull the fuses, clean all the contacts with a little tiny brass wire wheel in the drill and scotchbrite the fuses. Reinstall fuses, note that far right fuse is popped, replace with new. Fuel pump runs! Raw fuel leak at the carb. Fix fuel leak.

Turn the key. CLICK. Hmm. Grab a long drift and a big hammer and bang on the starter for a few seconds. Pull the spark plugs so it doesn't have to fight compression. Wert, wert, wert. She slowly cranks over, now we are getting somewhere. Stop cranking for a few seconds. Wertwertwert. Faster this time. Wertwertwertwert, now she's cranking at full speed. Radical!

Check for spark. No spark. 12v at the 15 terminal on the coil. Good. Oh, E36 M3. This thing has points. I'm 28, what the berkeley do I know about points? They suck, that's about the bulk of it; electronic ignition is a gift from Science. Some cursory internet research ensues. Testing. More testing. Toss in a spare coil. No change.

Clean every electrical contact between the coil and plugs, including points. "I need a good 12v test light if I'm going to be working on analog stuff", I finally admit to myself before turning in for the night, dejected and without spark.

I think I have it narrowed down to a bad condenser at this point. I'll grab a set of points, too, just to be sure.

Ordered wheels. $180, plus $60 shipping.

attachment.php
 
fun with Fiats

Always nice to see guys working on 128s. Wish my welding skills was up to your level. I run a 1500 with a carb in my 128 wagon. Unlike youngsters like you I prefer changing jets to looking at a VOM to solve induction issues. I do run electronic ignition though.

carl
 
suscribing!!!......and can you tell us what yr is it then?....and any pics on how the early rear bumper is mounted?.....thanks
 
Last edited:
Very nice build! I look forward to seeing more. I might add one tip, If you do source a X19 1.5 F.I. or carb motor, the 5spd trans will not be usable to you. It has a different lay out , "backwards" to the 128/Strada. You can use a Strada 5spd, and perhaps a Yugo 5spd with modifications.
 
In reply to Karfrik: The car is a '74. I'll try to grab a few pictures of the bumper mounts this evening.

In reply to Kevin Channer: Yeah, I realized that a few months into the project. Naturally, it wasn't until I was laying under an exxie in a junkyard that the differences in the transmissions were so stark.

I apologize for leaving you guys hanging for a few days. My week ended up being a fair bit busier than expected and I haven't had much time to dork around on the internet. I'm off work all next week though, so I should be able to get you folks all caught up to date on the project.

Here's a little bit of foreshadowing:

20151110_214705_zpscvy8b89t.jpg
 
let us know what you need

Super cool, Yugo 5 speed plus the requisite sway bar! If you need a perfect Ducelier distributor to get the existing drivetrain running, give a shout. Your new points may do the trick, but in case not....
 
I tried the GVX swap on my '76 sedan years ago. The car was lowered and the stock 128 bar would hit the 5th gear cover on the trans in bump. I tried to install a GVX bar but found that the arm lengths were different, by about an inch.

128:

128_swaybar1.jpg


GVX:

GVX_swaybar1.jpg


I did drive it that way for about a week (rubber hose on bar for cushion). The gearing was noticably lower on the freeway but my stock-ish 1290 could barely pull it. Definitely go for a 1500 with the trans swap.
 
Awesome work! I've got similar parts and plans for one of my sedans so I'm quite interested to see how yours turns out.
 
I'm apparently a busy man!

Well, it's become increasingly obvious that I'm never going to find the free time to port the entire build thread over, so here's what we are going to do: I'll just drop the link to the full build over on GRM here (and in the first post on this page) and start mirroring updates and posting on both forums from here on out. Capisce?

https://grassrootsmotorsports.com/forum/build-projects-and-project-cars/1974-fiat-128-sedan-for-the-bride-of-burrito/102542/page1/

Hopefully I will have the age old question of "How do I mount a Yugo swaybar to my 128 Sedan?" all figured out tonight. :thumbsup:
 
Better late than never.

I couldn't ignore the swaybar dilemma any longer. It turned out to be a little more work than I had anticipated, but it is mostly done now. For those of you not in the know, the Yugo swaybar is about an inch longer that the 128 bar. If you were to try to install in the stock orientation you would end up with fairly extreme negative caster. So, here's one way to mount the more bendy 5 speed Yugo swaybar to a 128.

Drill the rivets out of the stock swaybar brackets and hack one ear off.

20151130_201759_zpsxbuf8kwv.jpg


Uhhh, add some pieces.

20151203_201612_zps5dbjctkk.jpg


The lump on the bottom bracket comes from the stock bracket. The stock bracket material is 10ga, I used .125" flat strap because that's what was in the scrap bin...

You can kinda see where I'm heading here. Move the swaybar mounts forward, regain some caster.

20151203_202626_zpsjw20qhtv.jpg


Here's the proposed installation.

20151203_201804_zps5kmiebo9.jpg


20151203_201820_zpsm2fulxxy.jpg


After some profiling, grinding, filling old holes, and making new ones we have a pretty good looking bracket.

20151204_172451_zpsxkw4eqia.jpg


After some powder coat.

20151207_190122_zpss012kxuy.jpg


And bolts.

20151207_202900_zpss2b64m9f.jpg


And a motha' truckin' swaybar.

20151207_202914_zpsvrz7teun.jpg


I still need to make 2 small brackets out of some 12ga to space the nuts out flush with the little lip here

20151207_205239_zps6py3z4uk.jpg


20151207_205403-1_zpsqiuwlync.jpg


I did have to massage the lower valance ever so slightly to clear the swaybar in its slightly more forward position.

Once I know that everything is copacetic and this actually works I will gladly post dimensions so other 128 dorks can do the same, if there's any interest.
 
Clean solution...

128's are notoriously weak in the front end (once you install more powerful engines) and as you have excellent fabrication skills you should give some thought to some front end strengthening, plating gussets and triangulations at the weak points... much easier to do a "stitch in time, and save nine" while the front end is square...

SteveC
 
So I have heard. I'm hoping that a fairly standard 1500 isn't enough to tear it up in the short-term. I'll be monitoring it pretty closely for the first few thousand miles; if it starts to come apart or tear spot welds out, I'll leap into action. I'll tell my wife to refrain from any big drag style launches...

At any rate, I plan to do the front end reinforcements when the car comes apart for rust repair and paint next year. I'm thinking something similar to what Myte128 did to his Sedan over on T124, but with a Burrito flourish. :)
 
I rallied one for a few years back in the 1980's, and reinforcing the front end was needed, as it began to crack up badly after only two events.

If you want any tips on how to do it, send me a PM.


SteveC
 
Back
Top