"Dog-bone" [engine torque strut] rebuild...updated with new content

Great write up on the repair, Jeff. I did something a little different on my '74 - I repaired one side a few years back with a generic napa shock bushing., But when trying the same bushing on my '78 it was too loose to be useful, so be prepared for one replacement diameter not fitting all dogbones.
 
I was wondering if something like this would work.
https://www.energysuspensionparts.com/9.9485
That is along the lines of what "SteveG" was suggesting also.

Back when I did the mod to mine I researched the urethane bushing idea. The problem was nothing I found came close to fitting the stock dogbone strut, so a complete new one would have to be made as SteveG said (which would not be difficult, could even make it with an adjustable length). But I was hoping the solid rubber engine mount would work so I did not pursue the generic urethane idea any further. Plus depending on the "duro" rating, urethane can be too stiff for a road car. I might still have a couple references with the list of available urethane bushings with some dimensions. But they are not well organized or comprehensive, so a bit difficult to navigate.
 
I used a shock damper on my old wagon, but that was because the 500AWHP otherwise ripped the lower engine mount to shreds in short order. It generated a fair amount of vibration. I took it apart and actually it relied on a series of different density poly bushes.

V70-XR-0055.jpg
 
An alternate approach would be to use a standard type poly bush and make a new dog bone to suit.
A bit like this oneView attachment 22554

Good idea, however those are more rigid that even the mount I have, so more vibration. The bushes with open sections (like the snail mount bushing) provide good damping, that's what I want to add.

I used the type of bushing illustrated for my Radiator mounting, as they are quite rigid
:D

X19-0114.jpg


X19-0169.jpg
 
Last edited:
RevTek used SuperPro SPF0021K for the dogbone in his first video, I wonder if they have lasted....
 
For the most part I agree with Huss, urethane bushings are too firm for a street car (as suspension or eng/trans mounts). However some of the urethane bushing manufacturers offer a range of duro ratings to choose from. The softer ones are actually quite compliant, you can easily squeeze them with your hand (with the bushing not installed in a race). But I have not tried any of those softer duro ones on a vehicle to see how they feel, so I have no idea if they are soft enough to be good for regular driving without too much vibration transmitted. However I doubt you are likely to find a selection of duros for universal bushings(?). So it would have to be a part that fits another vehicle, and comes in different firmnesses, and fits in the dog bone.
 
RevTek used SuperPro SPF0021K for the dogbone in his first video, I wonder if they have lasted....
I talked to Dominic (I believe his name is) about the video. I saw the vid and wanted to copy his directions. I still have the bushings and might yet follow through with his given his experience and review after some miles.

Hi Andrew,

The bushing fit fairly well, there definitely was not 10mm of space between the bushing and dogbone housing, maybe closer to 5mm (2.5mm each side).

To fix this, I used an polyurethane sealant all around both mounts (in the air gap between bushing and housing) which has secured it 100%, there is now zero movement and the bushing should last forever.
I didnt get a chance to show that part in the video, the part you see in the video is before I added the sealant.

I did a big search, could not find a bushing closer to the size for our dogbone as its not just the OD that needs to match, but the ID for the pin, and the width of the bushing. I found the superpro bushing to be withing 5mm of all the measurements (ID is exact) which is pretty good.

Dom​
 
His mention of the urethane sealant brings up another option that I don't believe we've discussed. On other forums it has been quite popular to take stock engine mounts or other various rubber bushings and fill any/all voids with a urethane sealant (windshield glue seems to be the most common). With the stock dog bone bushings the void is actually large but located inside the metal housing (round tube). So I'm not sure the best way to fill that void with the adhesive. But it should make them much more durable if someone can think of a clever way to do it.

3m-08609-400.jpg
 
Here is a photograph of the solid mount I made, and the modified stock unit I made when I found the solid mount to transmit too much vibration for me:

DSC_0221.jpg


The bushings in the dog bone are the ones that Jeff recommended, only they I expanded them greatly when I pressed in the larger steel center bushings. They fill the full cavity, are very stiff and have held up well so far. Not many miles and one track day on it, so I am not sure about longevity.

Paul Davock
 
I expanded them greatly when I pressed in the larger steel center bushings
Paul, I can see that those inner sleeves are much thicker and push the insert much further out. That not only fills the outer metal cases better, but also compresses the rubber to make it more dense in the available space. Very interesting. Even with the stock inner sleeve I enlarged the center hole in the rubber to fit it in. Did you open up the hole any, or manage to press the thicker sleeve into the smaller hole into the rubber as it came?
 
Paul,
If you want to sell the solid one, I'm interested. I'm already using a solid one and I was looking to modify it to be able to adjust the length.
 
This is what I have on my car and it’s been working fine with no objectionable vibrations.

I talked to Dominic (I believe his name is) about the video. I saw the vid and wanted to copy his directions. I still have the bushings and might yet follow through with his given his experience and review after some miles.

Hi Andrew,

The bushing fit fairly well, there definitely was not 10mm of space between the bushing and dogbone housing, maybe closer to 5mm (2.5mm each side).

To fix this, I used an polyurethane sealant all around both mounts (in the air gap between bushing and housing) which has secured it 100%, there is now zero movement and the bushing should last forever.
I didnt get a chance to show that part in the video, the part you see in the video is before I added the sealant.

I did a big search, could not find a bushing closer to the size for our dogbone as its not just the OD that needs to match, but the ID for the pin, and the width of the bushing. I found the superpro bushing to be withing 5mm of all the measurements (ID is exact) which is pretty good.

Dom​
 
The SuperPro SKF0021K in the referenced mod by Dom is a rear suspension trailing arm bushing for a 124 Fiat. I recall the suggestion of using a stock 124 rear arm bushing in the past. But it sounds like they are actually too small and require the use of urethane adhesive to hold them in the metal cylinder?
 
The metal sleeves on the stock 124 trailing arms are for 10mm bolts; not 8mm like on the X1/9 dog bone. That’s why they won’t work.


The SuperPro SKF0021K in the referenced mod by Dom is a rear suspension trailing arm bushing for a 124 Fiat. I recall the suggestion of using a stock 124 rear arm bushing in the past. But it sounds like they are actually too small and require the use of urethane adhesive to hold them in the metal cylinder?
 
Paul, I can see that those inner sleeves are much thicker and push the insert much further out. That not only fills the outer metal cases better, but also compresses the rubber to make it more dense in the available space. Very interesting. Even with the stock inner sleeve I enlarged the center hole in the rubber to fit it in. Did you open up the hole any, or manage to press the thicker sleeve into the smaller hole into the rubber as it came?

Yes, I did enlarge the center hole of the rubber, I do not remember the size. Note that the bolts are 1/2 inch so the steel insert part is bigger too. It expanded the rubber quite a bit when I inserted it.

Paul
 
Here's how I do it...

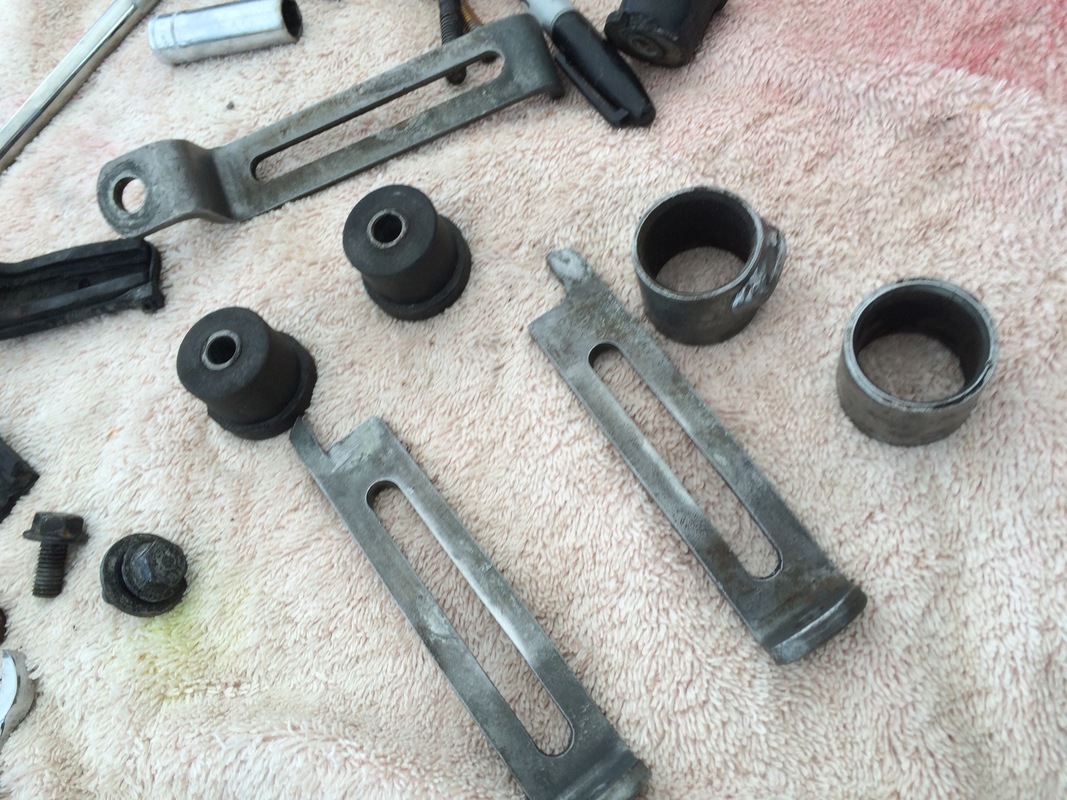
I use an SPF020 bush. This is the GREY bush shown in the pic. SPF021 is the green bush, the yellow and blue bushes are both spf155's but the yellow is old production, the blue is new production and duro 70 rated supplied with the steel sleeve.
20190613_120641.jpg

20190613_120702.jpg


I think the SPF020 is a better choice. While totally crap for their intended application as a suspension bush in a 124 (they are an EXACT copy of the rubber original, so when the OE steel sleeve is press thru the bush effectively locks solid) they work great as a replacement "dog-bone" bush for a 128 / X19

Take to the edges of the SPF020 with a hand held grinder (I mount mine in a vice, I don't like to use my bench grinder for plastics/alloys) a bit like this, it's not rocket science, just so it goes in a little easier.
20190613_122138.jpg

20190613_122148.jpg


To get the old bush out of the torque rod, press out the centre steel sleeve
20190613_122326.jpg

20190613_122337.jpg


make sure you clean the sleeve up, they are usually a bit rusty.
20190613_123909.jpg


next step is to remove the old rubber bush from the arm, pretty simple, bang an old screwdriver thru the top, and twist it out...

20190613_121050.jpg


original bush next to the SPF020 and SPF021
20190613_121223.jpg


next step is to simply by hand slip one end of the slightly modified SPF020 bush into the torque rod end, it should be a snug push thru the hole... I usually run a hand file around the inside of the steel bush ID to make sure there are no rough edges... and rubber grease is always a good thing.
20190613_122914.jpg


next step I actually forgot to take a pic of, but it makes the job much much easier... slip the inner steel sleeve into the urethane bush...in this pic it would be in from the right hand side... but ONLY PUT IT IN ABOUT 1/3 OF THE WAY.

then put the whole lot into the vice again with some appropriate sockets and give it a squeeze.
20190613_123258.jpg


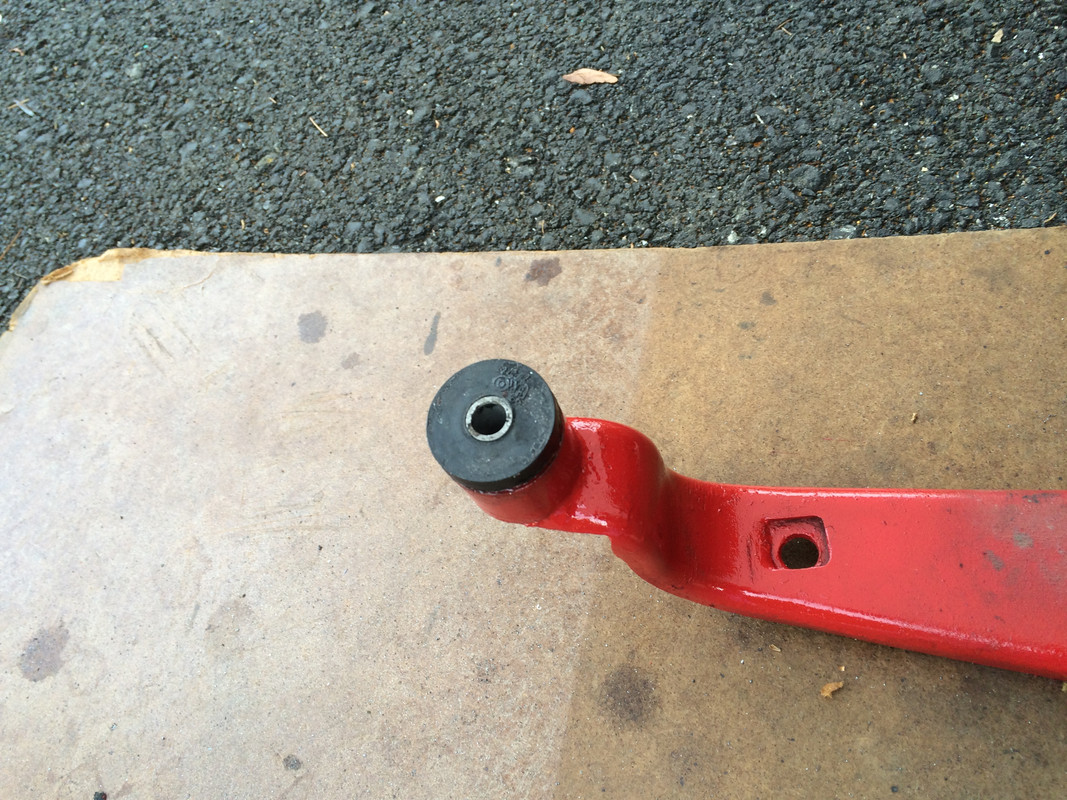
after a bit of jiggling, you'll get this....
20190613_134535.jpg


now the bush is actually a tiny bit too wide, so take to it again to trim it for length with the angle grinder...
20190613_134905.jpg


20190613_134946.jpg

20190613_134955.jpg


I've done this a few times so it took maybe 20 minutes from start to finish including stopping and picking up my phone to take the pics.

SteveC
 
Last edited:
Thanks for taking the time to post the procedure, but the bush you show being inserted is marked SPF020 not 021 or am I misunderstanding?
 
lol... lucky I had nice clear pics of both... yes you're correct ...typo on my part...SPF021 was the previously mentioned bush used by someones else, I use an SPF020...

SteveC
 
  • Like
Reactions: NEG
Back
Top