
You are using an out of date browser. It may not display this or other websites correctly.
You should upgrade or use an alternative browser.
You should upgrade or use an alternative browser.
Preparing For Dallara Body Kit
- Thread starter lookforjoe
- Start date
-
- Tags
- box body box dallara kit
Black-Tooth
Tony Natoli
Thanks all!View attachment 25528 Emailed them in the spring, price is listed correctly and in pounds.
lookforjoe
True Classic
View attachment 25527
Hello!
Went through this thread again, mostly looked at details how You attached kit, so sory, if I didn’t see answer, do You know:
•How much approximately Dallara kit weigh?
•How much weigh did You cut out?
•What is difference in total weigh of car befora and after Dallara?
I’m looking on Cascu kit (one in the picture). To keep it street legal I would have to make it “deattachable” and keep original body panels or cut them out in a way that should look like from factory.
At the moment am looking why I shouldn’t do it, weigh is only I could think of, don’t want to add much more than by adding filler to damaged body.
Hello Janis
I didn't weight anything before or after, I'm sorry. I doubt it actually lost weight though, since I also added metal (albeit aluminum) to make the wider wheel arches. Probably a wash weight-wise.
The kit I had is heavier (3 layer fibreglass) than the Cascu, which I understand to be quite thin and flexible.
lookforjoe
True Classic
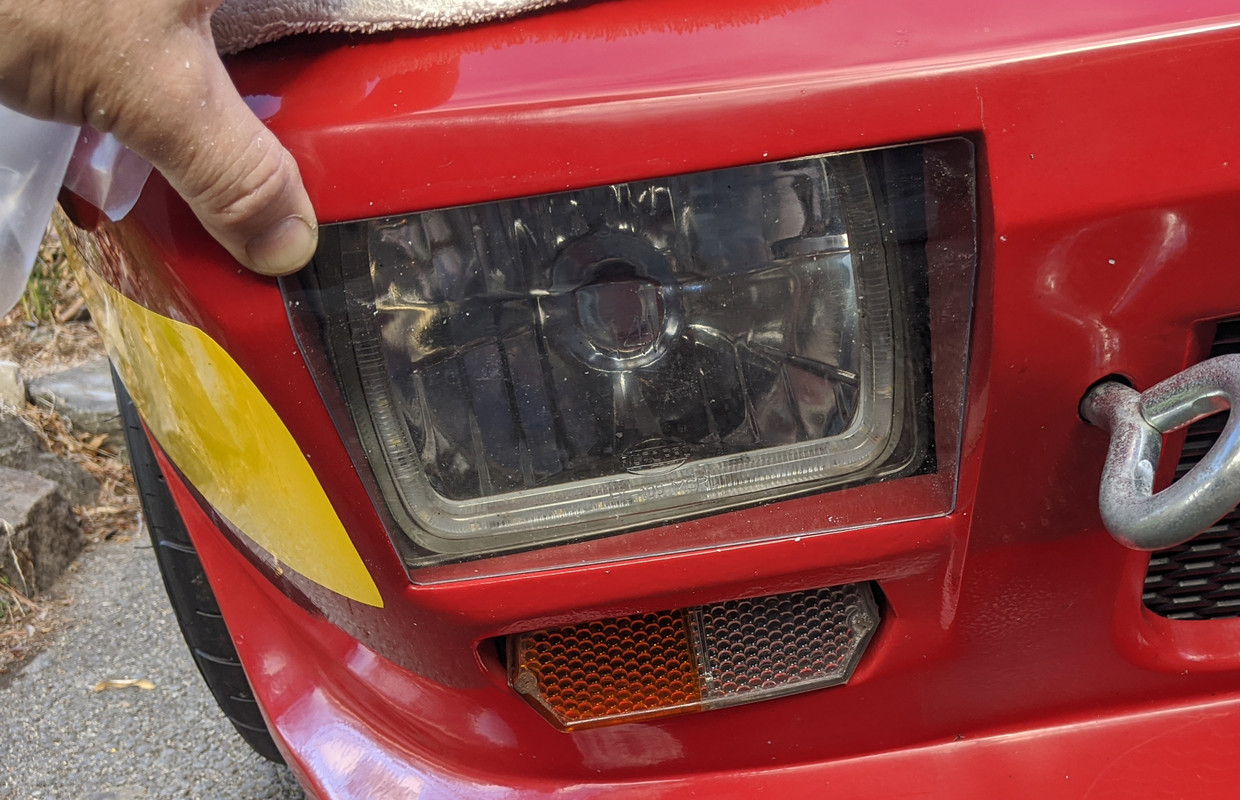
Worked on the Lexan headlamp covers this afternoon. Bought .093" Lexan sheet, 8x10" $5 per at Lowes.
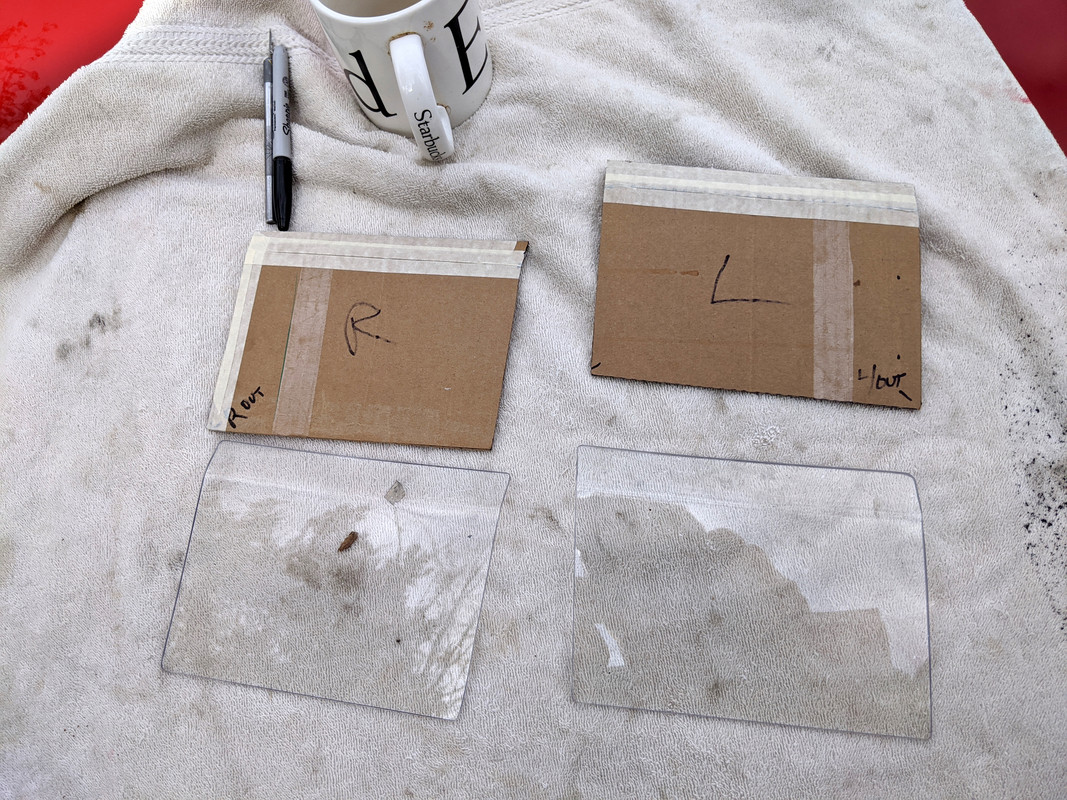
Made cardboard templates in two versions, flat, and with a contour to mimic the nose panel

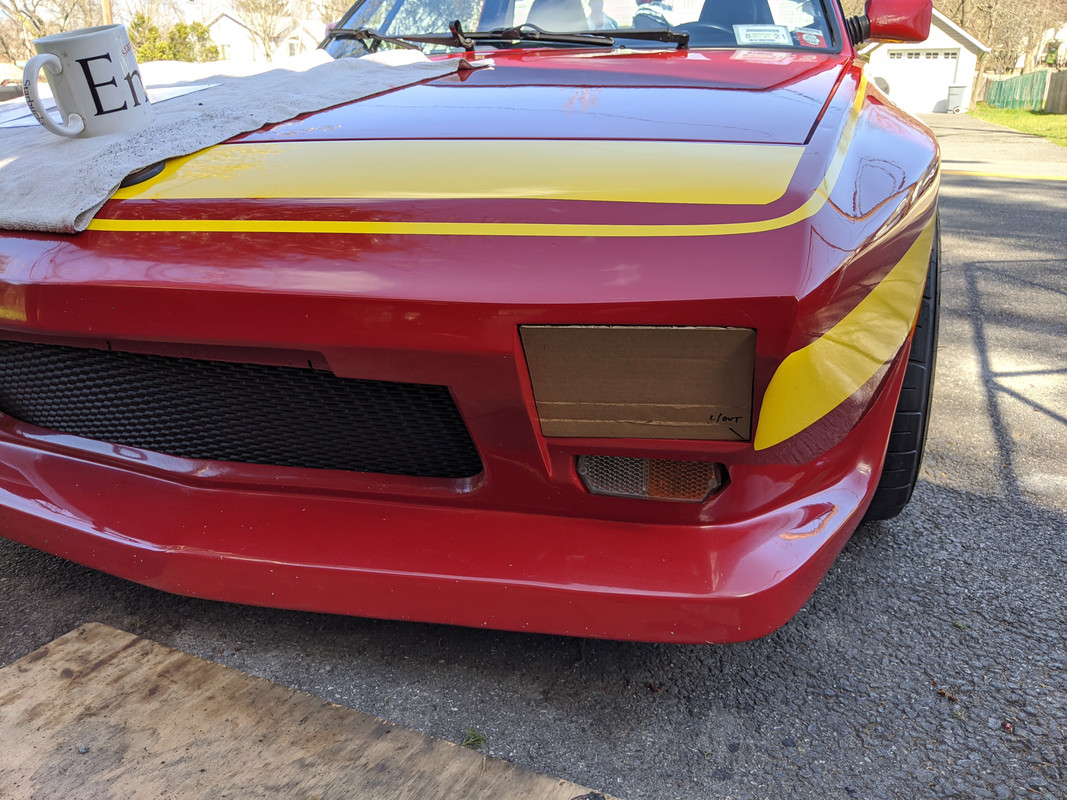
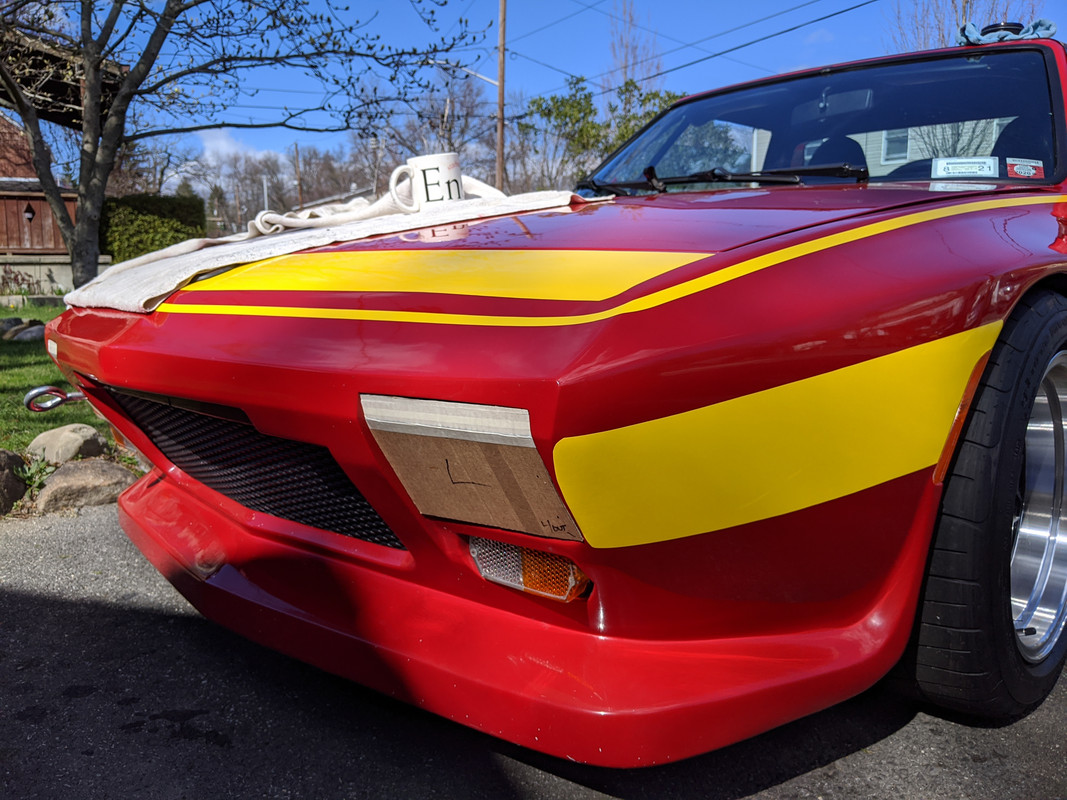
Felt the creased panel made more sense, even if it's more work. The flat version just looks too plain. Had to make separate templates for L & R, they are just different enough that one is not reversible.
Cut from the basic template, then heated and creased the panels (clamped in a vice) for each side. some trimming required after the fact of course
four little "L" brackets will retain each panel

Took some small conduit brackets I had laying around & bent them into the required "L", added a M4 rivnut, and primed/painted.

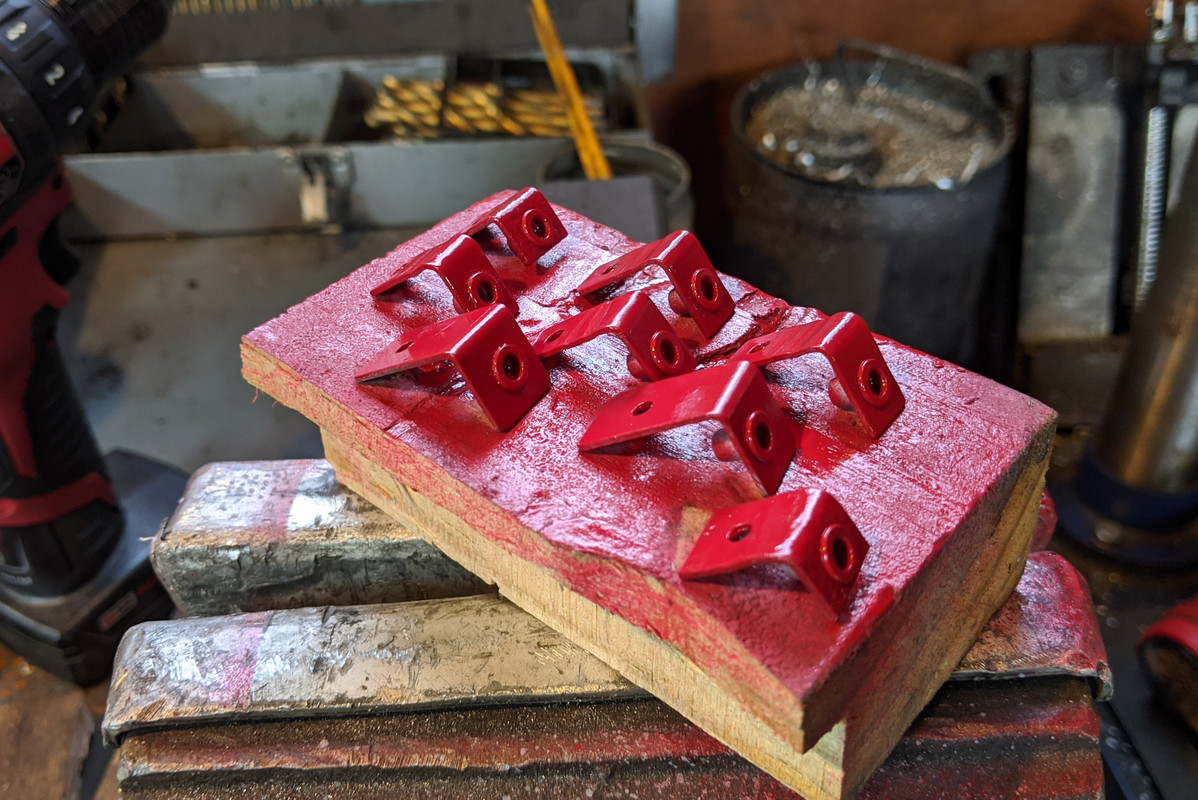
All ready to be riveted to the apertures

Made cardboard templates in two versions, flat, and with a contour to mimic the nose panel
Felt the creased panel made more sense, even if it's more work. The flat version just looks too plain. Had to make separate templates for L & R, they are just different enough that one is not reversible.
Cut from the basic template, then heated and creased the panels (clamped in a vice) for each side. some trimming required after the fact of course
four little "L" brackets will retain each panel
Took some small conduit brackets I had laying around & bent them into the required "L", added a M4 rivnut, and primed/painted.
All ready to be riveted to the apertures
Last edited:
Black-Tooth
Tony Natoli
Hey Hussein... its been awhile (my fault, I'm sure...
Do you think the Yellow striping sets off the car enough?
HA!
Love the Lexan covers... puts a nice finishing touch up front.
Now, with the clips... do you intend to do a "black-out" trim around the Lexan so the brackets don't show? Kinda like they do with modern windshields and the like.
You could try it both ways, first without the black out, and theb with (electrical) tape to see if you like it.
The car is looking great... Congratulations again and again!
lookforjoe
True Classic
Hey Hussein... its been awhile (my fault, I'm sure...
Do you think the Yellow striping sets off the car enough?
HA!
Love the Lexan covers... puts a nice finishing touch up front.
Now, with the clips... do you intend to do a "black-out" trim around the Lexan so the brackets don't show? Kinda like they do with modern windshields and the like.
You could try it both ways, first without the black out, and theb with (electrical) tape to see if you like it.
The car is looking great... Congratulations again and again!
Hey Tony - hope you & yours are all healthy & safe!
Yeah, it's busy busy now

I didn't even realize the Dallara had headlamp covers until Dom posted the link here
Like the original, I'm going to leave them exposed - in part because any edging will reduce the light output, and they are already well below "standard" height as it is.
Black-Tooth
Tony Natoli
Good to hear from you...
One last try, why not affix some tape to the outside of the Lexan and then stare and compare. I think the "look" would "outshine" any reduction in output... pardon the pun.
Out for now...
One last try, why not affix some tape to the outside of the Lexan and then stare and compare. I think the "look" would "outshine" any reduction in output... pardon the pun.
Out for now...
lookforjoe
True Classic
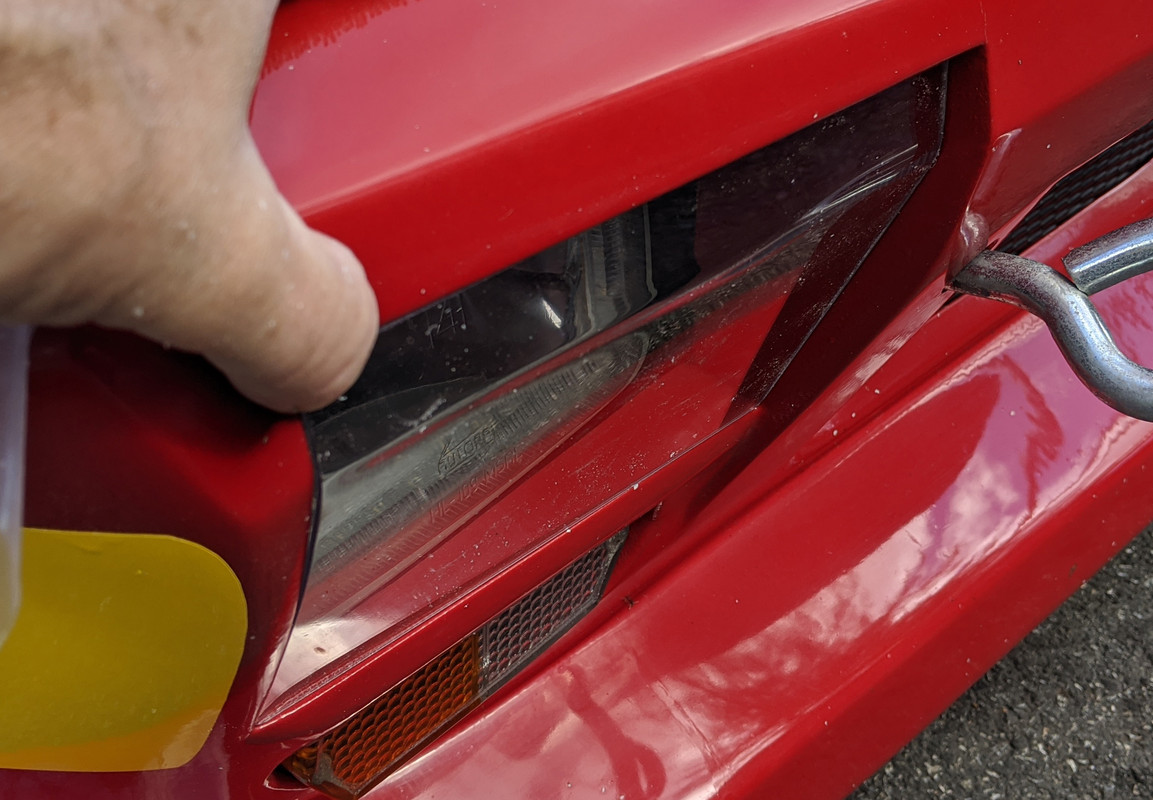
Installed the brackets & the panels this afternoon.


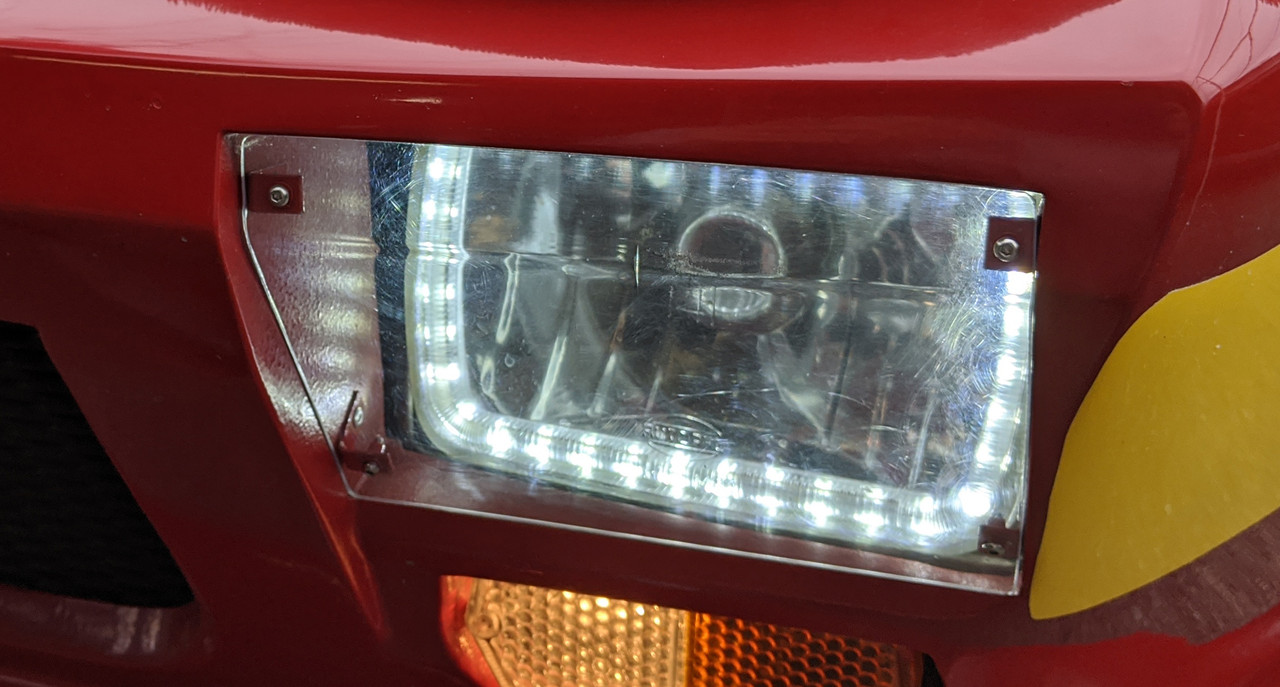

Tony - the brackets are too deep to cover - I would lose too much light output.
Tony - the brackets are too deep to cover - I would lose too much light output.
Black-Tooth
Tony Natoli
Well done... and I love the "crease" too. I noticed on the car Dom posted that those lights mounted quite a bit lower than yours.
Great work.
Great work.
darwoodious
Darin Nelson
Keep it raw, keep it real. More horsepower that way.
lookforjoe
True Classic
Well done... and I love the "crease" too. I noticed on the car Dom posted that those lights mounted quite a bit lower than yours.
Great work.
Thanks Tony.
Regarding the lights, mine are either the same height or lower than original. My nose is at least a couple inches longer, and the contour drops as it proceeds. I tried to get the H/L's as high as possible in the opening, and followed the fender ridge line where it transitions across the nose in terms of where it sits. I would say it's splitting hairs on that front

lookforjoe
True Classic
Moved this from the striping thread...
Took the cover apart, and tried the excess honeycomb I had from the Grille install


I think it will look better than the grid mesh.
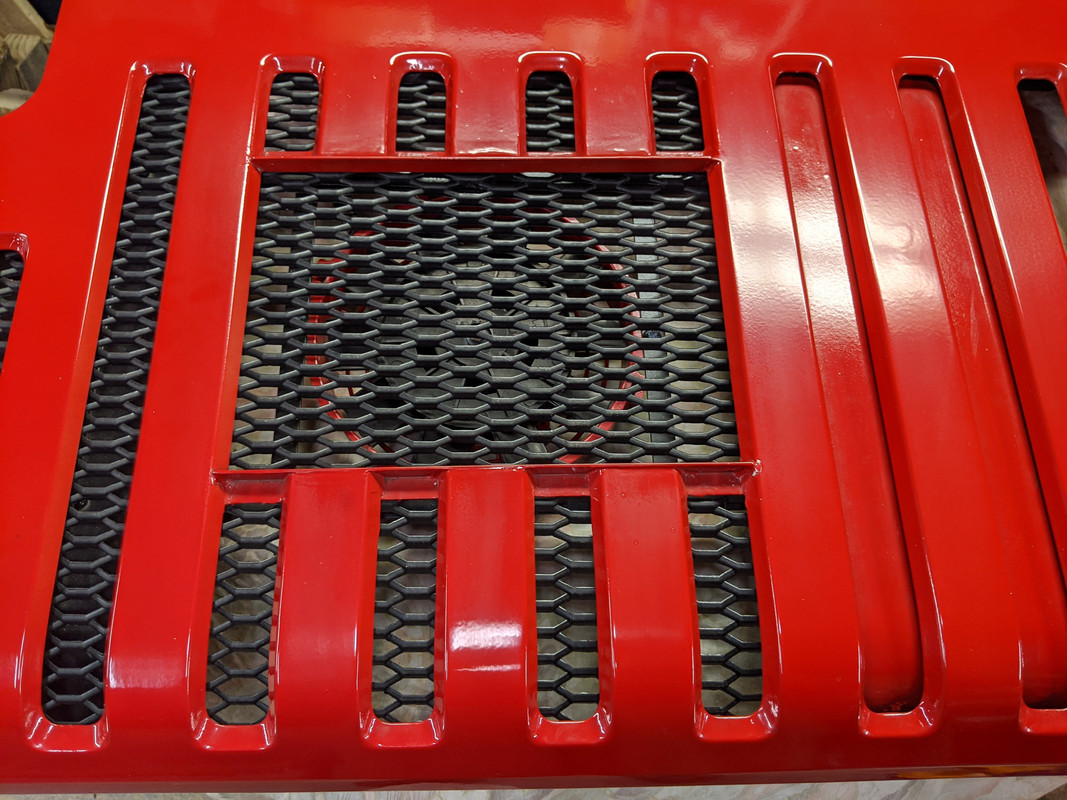
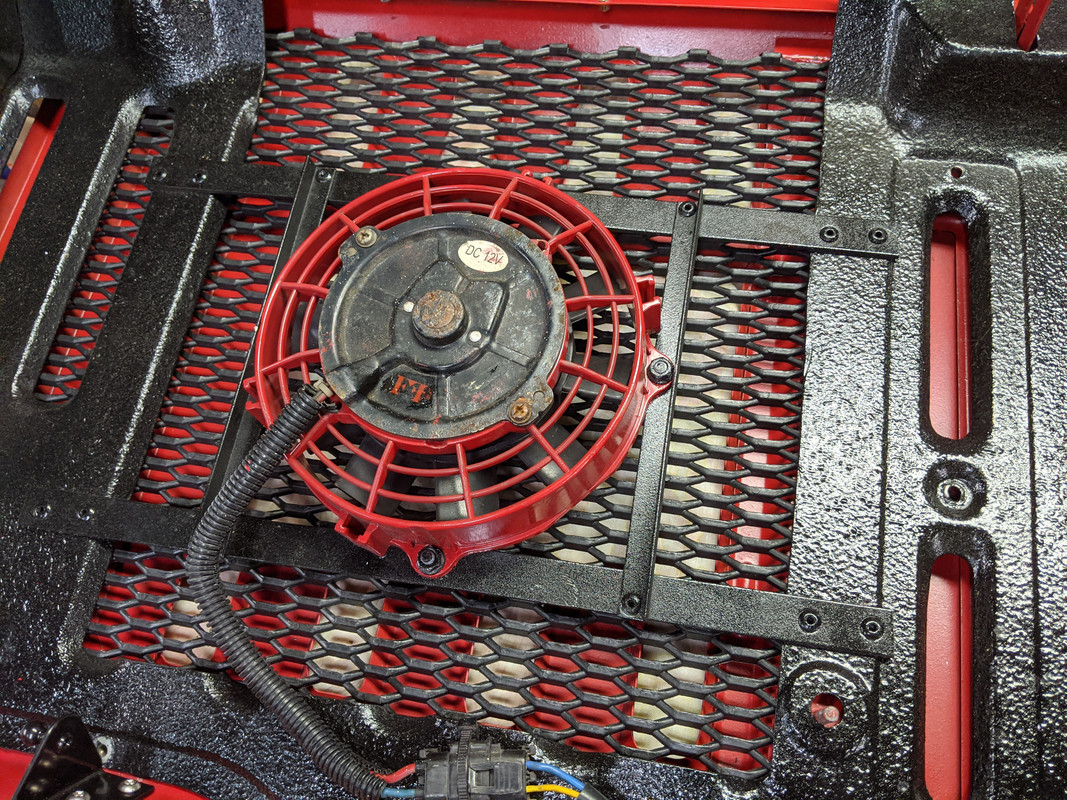
The only problem is I can't get the exact same mesh as this. Shame there wasn't enough left over to do this. The closest I can find is a little wider & deeper aperture, So I ordered that.
I had the same thought. Glad that you will be reinstalling it eventually.
O.K., now I'm nitpicking I know...but looking at the pic of your engine cover I noticed something that I'd want to slightly improve upon. Definitely a personal choice thing, nothing important, so take it with a grain of salt. I feel like the type of screen you have on the cover (see pic below) looks a bit like a farm animal coop. Perhaps switch to a nicer appearing type of mesh. Maybe a polished SS material, or a hexagon grid panel, or some other design of wire weave. There are several options to choose from other than generic galvanized hardware store stuff (unless it isn't what it appears to be). Sometimes the little touches make a difference and small details like this stand out to me.
View attachment 31014
Took the cover apart, and tried the excess honeycomb I had from the Grille install
I think it will look better than the grid mesh.
The only problem is I can't get the exact same mesh as this. Shame there wasn't enough left over to do this. The closest I can find is a little wider & deeper aperture, So I ordered that.
lookforjoe
True Classic
Car took a beating today.
First, I drove it to work this morning, so I could log the part throttle & warm up issues. Poured with rain, so I was able to confirm no water ingress.
Finally resolved the drivability issues earlier this afternoon after reviewing the logs. Had to go buy a new battery also - my MT-24F was about 7 years old & no longer likes to hold a good cranking charge.
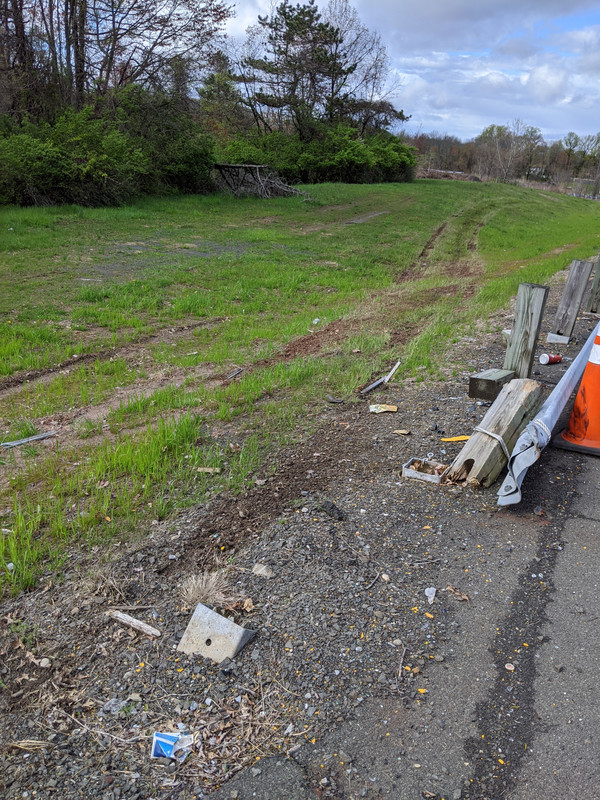
Coming home from the drive to confirm throttle tip in & part throttle issues were gone, I rode over some debris in the bend of the exit ramp for the NYS Thruway , and went sideways enough that I had to quickly decide whether to cut it hard & go right off the roadway onto the grass divide, or hit the guardrail.
Unfortunately there was the remnants of a post base where I left the roadway and it tore off the front sway bar and ripped out the oil pan (I found out after I stopped). The car dipped into the gully & slammed the nose hard. I steered it down the divide & back into the shoulder & turned it off. I looked under & saw all the oil gushing out. O don't know if I shut it down in time, probably 15-30sec from time of impact to shutdown. No injuries, just a little beat up from the nose dive


First, I drove it to work this morning, so I could log the part throttle & warm up issues. Poured with rain, so I was able to confirm no water ingress.
Finally resolved the drivability issues earlier this afternoon after reviewing the logs. Had to go buy a new battery also - my MT-24F was about 7 years old & no longer likes to hold a good cranking charge.
Coming home from the drive to confirm throttle tip in & part throttle issues were gone, I rode over some debris in the bend of the exit ramp for the NYS Thruway , and went sideways enough that I had to quickly decide whether to cut it hard & go right off the roadway onto the grass divide, or hit the guardrail.
Unfortunately there was the remnants of a post base where I left the roadway and it tore off the front sway bar and ripped out the oil pan (I found out after I stopped). The car dipped into the gully & slammed the nose hard. I steered it down the divide & back into the shoulder & turned it off. I looked under & saw all the oil gushing out. O don't know if I shut it down in time, probably 15-30sec from time of impact to shutdown. No injuries, just a little beat up from the nose dive
Last edited:
DanielForest
True Classic
Sorry to see that. Glad the flares did not get too much damages. You will have the oportunity to do a new front air dam. Did you have to call the tow truck? Oil pans are plenty.
Did you have to call the tow truck? Oil pans are plenty.Black-Tooth
Tony Natoli
I am really glad you are OK... What a day today... sorry to see this!
kmead
Old enough to know better
Dang that is a serious bummer. Glad you are ok and that the car in large measure is in one piece. Bet that made some noise.
I guess you will be able to consider the possibilities for what the front spoiler could be.
The anti roll bar ripping out, any sense of what that damaged of the unibody or did the fasteners just let go?
If you shut it down and there was still oil coming out then it’s likely you were quick enough.
Sorry and all the best. Unbelievable.