Hey Rodger. That looks REALLY good !!! Well done. Looks like you have learned another new skill. Tried the MIG function yet ? I think you will find it much easier than the TIG.
Hate to make more work for you.....but you really should think about bracing your fancy new header. To avoid cracking in the future.
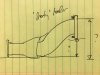
Look at the original RSX manifold. I think it too was a tubular design:
https://www.acuraoemparts.com/auto-...anual-engine/engine-cat/exhaust-manifold-scat
Note there appears to be a brace from the engine block to the end flange of the manifold ? Most all OE manifolds are braced like this. And with good reason - they would not do it otherwise !! It is there partially to take some weight and stress off the manifold, but mostly to quell the vibration. Otherwise the end of the header is like the end of a whip as the vibrations get amplified.
Generally, without a brace, the header will eventually crack where the tubes are welded to the header flange at the head. Usually a case of when, not if....
May not be an issue for you if you dont put many miles on it, but still....
Do you still have the original brace from the OE manifold ? Could you weld a bracket onto your new header and modify it to fit ? At least maybe think about it.......

 Oh well, live and learn.