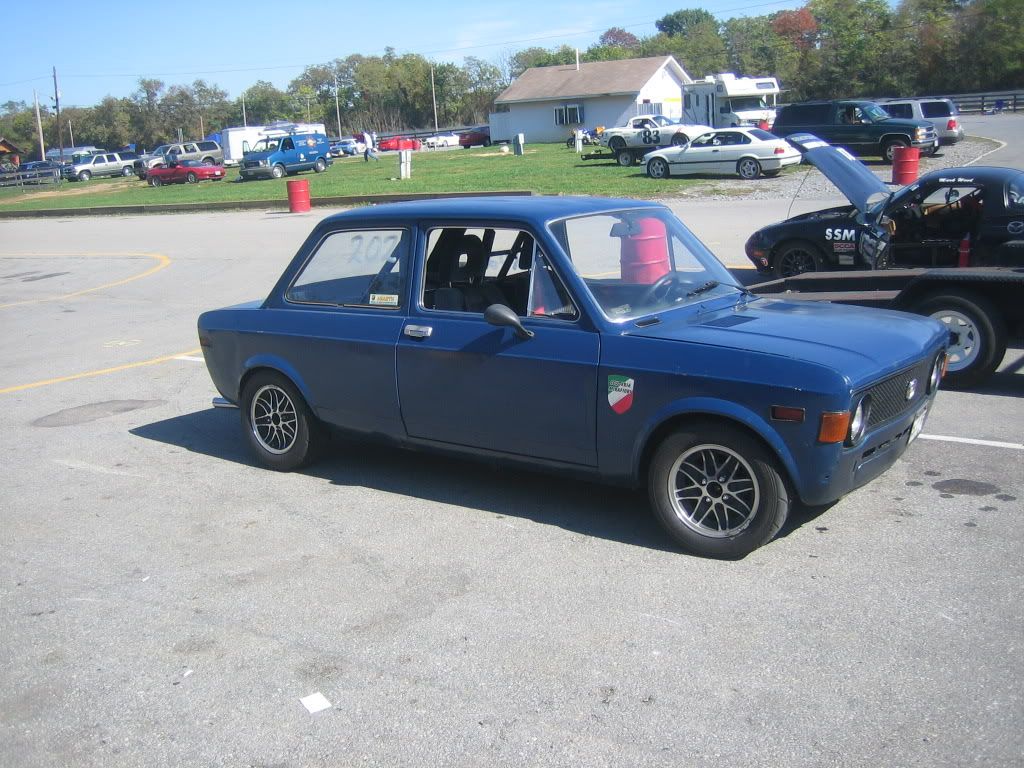
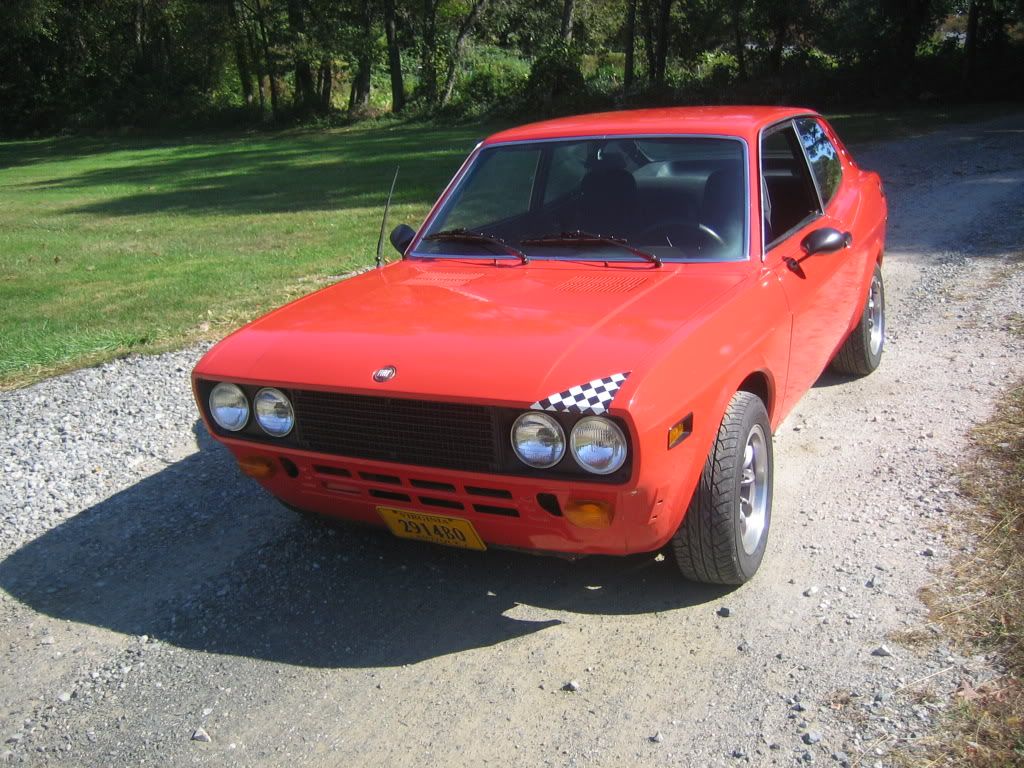
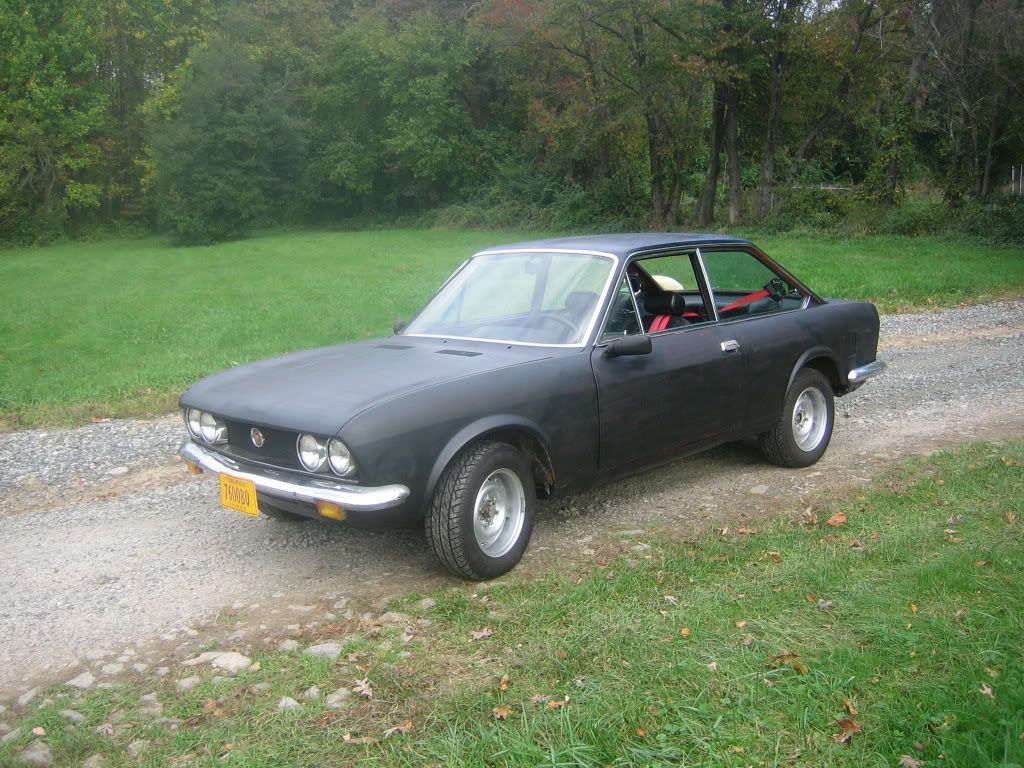
128 SL Coupe Project

128kid

Courtney Waters
I am putting together a web page to chronicle the revamp of my (formerly Carl's) 128 SL Coupe. The car is a long way from done but I thought you guys might enjoy seeing some of the stuff that has transpired so far, so I figured I'd roll it out in build-thread style. Here goes...
 
Background

Background

Sometime around October 2010, Carl listed his 1974 128 SL Coupe for sale on the Xweb forum. Carl had his eye on a 124 Coupe that would not require a bunch of fabrication, mostly mechanical mods that he was comfortable with. The 128 SL was a major project car – powertrain removed, interior stripped, and rusty. And we’re talking East Coast rust, but it was not NorthEast rust so I figured it would be salvageable… Carl was not giving the car away but the parts package made the whole project interesting, and he preferred that it go as a package to someone who could complete the project. Said parts included:

  • Engines – a 1300 with 1100 head, and a “track day” 1500 with big-valve head, supposed high-compression pistons, and a cam.
  • Transmission – standard 4-speed.
  • Wheels and tires – 13x6 Panasports in excellent condition with good used Sumitomo HTR200 185/60R13s.
  • Koni struts on all four corners. Used, but complete strut assemblies (not inserts) and so rebuildable! Fronts were rear X1/9 struts so already good for lowered ride height.
  • 4-2-1 Ansa header (or similar) and megaphone exhaust.
  • 4-point roll bar, bolt-in.
  • Miata seats.
  • The original, plus a spare car’s worth of: wiring, fuel tanks, doors, dashboards, interior trim, glass, etc.
While rusty, it looked reasonably straight and mostly solid in major structural areas. I already had three sedans so a coupe was enticing (not like I needed another project!), and I hate to see 128s go to the scrap yard. As if 128s aren’t rare enough, coupes are increasingly hard to find. If the rust could be repaired there were enough neat bits that I could throw a set of DCNFs on it and have a neat little “rat rod” coupe. Plus, it would be a great car to practice fabrication work on, and evaluate various techniques and/or products on, prior to digging into further fabrication & restoration on my sedans. Yep, a quick and easy project! Isn’t that always the plan?
 
Acquisition

Acquisition

October 31, woke early, grabbed a U-Haul trailer and drove up to Carl’s place in Virginia, inspected the car (uh, yep, it’s a project!), loaded all the bits, gave Carl some cash to fund his 124 venture, and then returned with my new prize (or squanderer of shop space).

1974 128 SL Coupe 003.jpg
1974 128 SL Coupe 001.jpg
 
Last edited:
Evaluation

Formula car rebuild/restoration and an insane work schedule kept me from giving the coupe much thought for about a year. Plus, my shop is constantly growing with the addition of new tools which usually requires additional projects. But those are other stories…

Almost a year to the day after dragging the coupe home I jacked it up to remove the suspension and start digging into the rust repair.

Left front corner, as received - no brakes, no CV-joints, Koni strut:

1974 128 SL Coupe 007.jpg


Right front corner, as received. Same as left:

1974 128 SL Coupe 009.jpg


Firewall. Generally, very good. A few spots have been treated with POR-15 but nothing major. Strut towers are mint. The windshield frame has had some Bondo repair but looks rust-free otherwise. Brake booster looks sad:

1974 128 SL Coupe 012.jpg


Left front inner fender and radius rod mount. This is going to take work! The black paint is POR-15. The battery tray usually resides here; it’s long gone and holes are patched with POR-15 brushed over fiberglass cloth.

1974 128 SL Coupe 013.jpg


Right front inner fender and radius rod mount. Not nearly as bad as the left.

1974 128 SL Coupe 015.jpg


The rest of the front end looks decent. The lower valance pinch weld is wavy (as most are) from getting caught on parking blocks or whatever, but not much rust and the panel is fairly straight. The bumper shock holes are banged up pretty good. Looking closely at the right headlight surround, it’s been smashed there and repaired but the damage appears isolated and does not extend to structural areas.
1974 128 SL Coupe 019.jpg
1974 128 SL Coupe 020.jpg


Now for a more detailed look at some of the good, the bad, and the ugly:

Left front corner:

128 Coupe Body Before Resto 003s.jpg


128 Coupe Body Before Resto 005s.jpg


128 Coupe Body Before Resto 009s.jpg


128 Coupe Body Before Resto 010s.jpg


128 Coupe Body Before Resto 011s.jpg


128 Coupe Body Before Resto 013s.jpg


128 Coupe Body Before Resto 034s.jpg


128 Coupe Body Before Resto 032s.jpg


128 Coupe Body Before Resto 041s.jpg


Right Front Corner:

128 Coupe Body Before Resto 017s.jpg


128 Coupe Body Before Resto 020s.jpg


128 Coupe Body Before Resto 022s.jpg


128 Coupe Body Before Resto 024s.jpg


128 Coupe Body Before Resto 042s.jpg


Left Rocker Panel and Floor:

128 Coupe Body Before Resto 038s.jpg

Oh my!

128 Coupe Body Before Resto 057s.jpg


128 Coupe Body Before Resto 037s.jpg


Right Rocker Panel, Floor, and Wheel Arch:

128 Coupe Body Before Resto 053s.jpg


128 Coupe Body Before Resto 025s.jpg
 
Last edited:
Cool Beans!

It's a whole lot more fun to watch someone else do this than doing it yourself. As further background, I got the stripped shell from Don Robinson. The plan was to install all the cool stuff from my 128 sedan trackday car which included the Konis, the 1500 motor, WHOA brakes and rear disc conversion.


Then I found another 128 SL that looked to be in perfect condition (but was warned that Bondo hid a lot of rust), bought it cheap, put everything in that car.


Drove it till the front track rod mount pulled loose, letting the axle pull out of the trans and had me parked on the shoulder of the Washington Beltway. Decided I was done with 128s, sent the really rusty SL to the crusher after pulling off all the parts and sold the "other" SL to Court.
So that I could go play with my 124 comfort zone, a coupe


Anyway, let the grinding and welding begin.

carl
 
Oh yes, there will be much grinding and welding...

And milling, and turning, and sawing, and bending, and bead rolling, and filing, and hammering... lots of hammering. Never mind all the spot weld drilling... and cursing ;)
 
And...

And milling, and turning, and sawing, and bending, and bead rolling, and filing, and hammering... lots of hammering. Never mind all the spot weld drilling... and cursing ;)

And bleeding. There's always some form of bleeding with these types of..."activities" going on. :hammer: :censored:
 
The Plan

Budget-conscious rebuild. I happily paid a good chunk of change for the car but I am realistic about what Fiats typically sell for so I want to keep this project in line with that, e.g. not lose my ass if I were to sell it in the future. My intention is to refurbish and reuse as much as possible, which I don’t think is different from most Fiat owner’s rebuild intentions. But I want it to be a nice ride that can be proudly displayed at local car gatherings or whatever. I am not afraid to spend money on the car; I just want to spend it in the right places – safety items, wear items, rust-proofing, and maybe a go-fast part or two.

Structural rust will be repaired to the best of my ability, as close to the original design intent as possible. I will be working on improving my sheet metal fabrication skills, basically using this car as an educational project before tackling similar repairs on my 128 sedans. I will attempt to make the repairs as seamless as possible, but if I cannot achieve concourse quality I will try not to let it bother me too much – ha!
 
Last edited:
Rolling Frame

Rolling Frame – Front

My shop is extremely cramped so I wanted to be able to move the body around to work on specific areas (left or right side), as well as provide clear access for me to maneuver around/under the shell to perform the rust repairs. I would have loved the luxury of room to move 360-degrees around the vehicle, and a stout chassis fixture to secure it to, but that wasn’t possible. The front frame mounts to the swing arm pivot points. The stanchions are sleeved where the bolt passes through. I fabricated those from scrap tubing and welded them up, then belt-sanded them to equal height. The cross-tube is 2 x 2 x .120 structural tube, cut to the outer dimensions of the body (for good stability without losing shop floor space). Caster mounting plates are made from .250 plate. I welded the stanchions to the cross-tube while bolted to the car to minimize fit-up issues. This required breaking out my old 110-volt flux-core MIG since the TIG extension cord wasn’t long enough!

128 Coupe Body Before Resto 001s.jpg


128 Coupe Body Before Resto 002s.jpg


128 Coupe Body Before Resto 044s.jpg


Note that the casters aren’t level with the ground at this point so they don’t swivel happily. I planned to build the rear end roller frame to level this out but that didn’t quite happen. Next time, I’d level the car with the rocker pinch weld horizontal and then start building the frames. Hopefully, next time I will have a proper rotisserie and not have to worry about it!


Rolling Frame – Rear

Not much explanation needed. Just a variation of the front.

IMAG0387s.jpg
IMAG0387s.jpg

IMAG0388s.jpg
 
Last edited:
Front Mounts Fixture

Front Mounts Fixture

Prior to cutting out the bad metal in the left front corner, I built a fixture to locate the suspension hard-points when the new parts are installed. The initial plan was to tie it into the front rolling frame but I later canned the idea to leave room for me to move around in the engine bay. I decided to tie into the crossmember mount and then take measurements off the rolling frame to verify things are square and level before final welding.

Mounting pads.

IMAG0542s.jpg


All tacked up.

128 SL Coupe Body Resto 2012-07-29 002s.jpg
 
Last edited:
Jigs and such

You know guys are serious when they spend more time making supports and jigs than actually working on the car!

If you have not done so, you should go on youtube and watch the "Project Binky" videos. Those guys made lots of locating jigs. It's pure car fab porn.

About your comments on leveling by the bottom of the rocker seams, I'm not sure they are a reference point....doesn't the factory manual give chassis measuring points?

carl
 
Yeah, I've watched all the Binky videos twice now. Those guys are awesome!

I think your right about the pinch welds not being a reference point. I'll have to look whether they rake the car at all in the chassis drawing. I was just thinking it would be an easy way to support the car while getting the front and rear casters level.

The fixtures and whatnot took a fair amount of work but have been invaluable in the project. In fact, I bet more time is spent on things that don't go on the car than the actual parts ;) You'll see why when the other photos go up.
 
Front Left Rusty Corner Removal

Drilling out spot welds. I use Blair spot weld drills (Rotabroaches).

IMAG0561s.jpg

IMAG0562s.jpg

IMAG0567s.jpg

IMAG0569s.jpg

IMAG0571s.jpg

IMAG0574s.jpg

IMAG0575s.jpg


Sand blasted to allow more accurate measurement, and avoid tetnaus! The black stuff is thick POR-15. It’s definitely durable stuff!

128 SL Coupe Body Resto 2012-08-25 010s.jpg


Used a 4-inch angle grinder with wire wheel to strip the undercoat. Then I lightly sanded the doubler surface to highlight the spot welds.

128 SL Coupe Body Resto 2012-09-30 011s.jpg


Doubler removed.

128 SL Coupe Body Resto 2012-09-30 016s.jpg


Back side of the doubler. Note a right angle drill was required to get to the forward most spot welds.

128 SL Coupe Body Resto 2012-09-30 018s.jpg


Cut plan for wheel well. I wanted to build the lower patch panel as mostly flat with the bumper mount dimple, then save the curved bits for the upper panel.

128 SL Coupe Body Resto 2012-10-06 005s.jpg

128 SL Coupe Body Resto 2012-10-06 008s.jpg

128 SL Coupe Body Resto 2012-10-06 009s.jpg

128 SL Coupe Body Resto 2012-10-06 013s.jpg

128 SL Coupe Body Resto 2012-10-06 011s.jpg


Final trim of valence support and wire wheeled all edges and mating surfaces.

128 SL Coupe Body Resto 2012-11-03 002s.jpg

128 SL Coupe Body Resto 2012-11-03 003s.jpg
 
Last edited:
Battery=rust

Amazing how much damage the battery causes. I have yet to see (on the east coast) a 128 sedan/wagon/SL that has not had major damage in that area. Fortunately the similar damage on my wagon was not that bad but still considerable. I had a front clip from a sedan that surprisingly had only surface rust and was able to make my patch panels from that. ONe of these days I'm going to have to get a spot weld drill bit, they seem pretty need and make more sense than just using normal drill bits and drilling holes through everything.

carl
 
Crazy thing was the radius rod mounting bolts were eroded to a point from the acid (at least, that's my guess). The right hand suspension mount (opposite the battery side) has significantly less rust. It still needs work but I'd say it's maybe 50% as bad as the left.

Spot weld cutters are a worthy investment, and they aren't very expensive. I keep them lubed as I cut and they last a long time. I would like to try out the solid ones (like a flat drill bit with a centering point) to see how they compare. Also, a right angle drill is very useful for getting to spot welds up in tight areas (like in the wheel well near the valence).
 
Great work there

Thoroughly enjoying your progress photos. Keep 'em coming! I've just finished the Project Binky's again for a second time myself. Waiting on their new episode like a junkie. I am preparing to dive into my rusty metalwork after I acquire a few more tools. Thanks for the tips!
 
Glad you're enjoying the project! We're just getting to the good stuff. I know what you mean about more tools. I always have a running list!
 
Valence Support Patch Fabrication

Or whatever it's called! :)

Part was made from 0.9mm (20 GA) sheet. With this many bends in one part, dimensional errors can stack up quickly. I made a bunch of test strips to practice the bends, figuring out appropriate dimensions between bends, how much to offset the brake fingers, and what shims were needed to get the bend radii to match the OEM parts.

The template and an assortment of tools used to lay out and make the flat pattern. I am fortunate to have a Pexto 52-inch stomp shear that handles up to 16GA steel. I used that to cut as much of the outside as possible. The Roper-Whitney hand punch (red case) was used to punch holes at the ends of each bend and then either tin snips or my vertical bandsaw were used to cut out the notches.

128 SL Coupe Body Resto 2013-06-08 004s.jpg

128 SL Coupe Body Resto 2013-06-08 005s.jpg


I missed out on photos of the bending process. I use a Roper-Whitney U-416 box and pan brake for bending up to 16GA sheet. First, the small flanges were all bent up at once. Then the long bends were made.

128 SL Coupe Body Resto 2013-06-08 006s.jpg

128 SL Coupe Body Resto 2013-06-08 007s.jpg


What I call the "toenail" dimple. Missed out on photos of this. Basically, all the lines indicate very shallow bends that I made in the brake to form a gradual curve. After bending, I did a bunch of amateurish hammering on a T-dolly to smooth out the bumps and make the little flange around the edge. It gets welded in later. Its purpose is to provide clearance for a captive nut that is welded to the radius rod mount (shown later).

IMAG0879s.jpg
 
Last edited:
Radius Rod Mount Fabrication

Radius Rod Mount Fabrication

Part will be made from 2.5mm (12 GA) sheet.

128 SL Coupe Body Resto 2013-06-08 001s.jpg

128 SL Coupe Body Resto 2013-08-07 002s.jpg

128 SL Coupe Body Resto 2013-08-07 003s.jpg

128 SL Coupe Body Resto 2013-08-07 004s.jpg

128 SL Coupe Body Resto 2013-08-07 005s.jpg


Trying to make this. The joggle is to clear the faceted sheet gusset where it slips between the frame rail and the radius rod mount.

128 SL Coupe Body Resto 2013-08-10 003s.jpg


Machining hammer form for joggle in curved rear flange.

128 SL Coupe Body Resto 2013-08-10 001s.jpg

128 SL Coupe Body Resto 2013-08-10 005s.jpg

128 SL Coupe Body Resto 2013-08-10 006s.jpg

128 SL Coupe Body Resto 2013-08-10 008s.jpg


Hammer form made from hot-rolled plate.

128 SL Coupe Body Resto 2013-08-08 001s.jpg

128 SL Coupe Body Resto 2013-08-10 002s.jpg

128 SL Coupe Body Resto 2013-08-10 010s.jpg

128 SL Coupe Body Resto 2013-08-10 011s.jpg

128 SL Coupe Body Resto 2013-08-10 012s.jpg


Rear flange curved to match frame rail. Short curved flange trimmed to final height.

128 SL Coupe Body Resto 2013-08-11 001s.jpg


Machining the captive nuts for the radius rod mount.

128 SL Coupe Body Resto 2013-08-11 005s.jpg

128 SL Coupe Body Resto 2013-08-11 007s.jpg

128 SL Coupe Body Resto 2013-08-11 010s.jpg

128 SL Coupe Body Resto 2013-08-11 013s.jpg
 
Last edited:
Back
Top