
You are using an out of date browser. It may not display this or other websites correctly.
You should upgrade or use an alternative browser.
You should upgrade or use an alternative browser.
RED X19
- Thread starter Janis
- Start date
lookforjoe
True Classic
That was a short 7 hours of sleep.
90 degree will likely look best also. More traditional and twin (2) outlets is a very good design.
That panel opening is well utilized for venting one’s oil cooler (upper left)
")
Dr.Jeff
True Classic
The more I look at it, the more I'm liking the idea of opening up that panel below, the bulkhead above it between the engine bay and the trunk, and the rear panel (between the tail-lights) to ventilate the engine bay out the back.That panel opening is well utilized for venting one’s oil cooler (upper left)
Dr.Jeff
True Classic
Those are clean cuts (especially for stainless). Makes the joints fit excellent. What did you use to make the cuts?
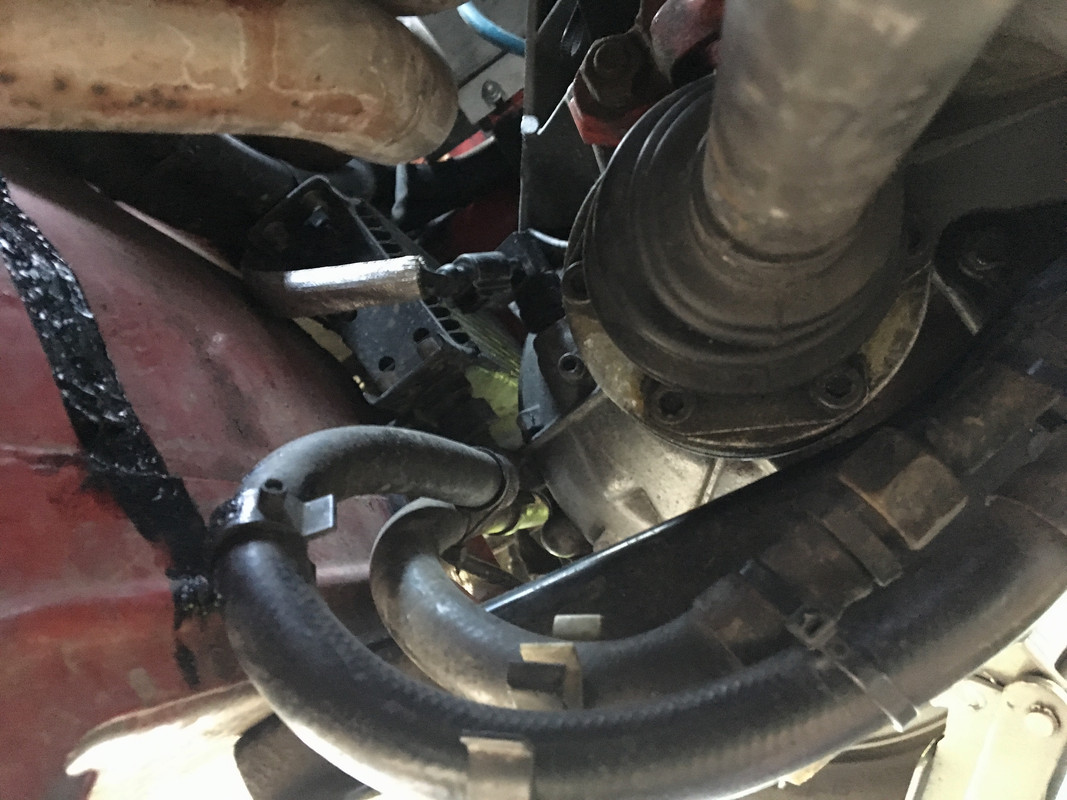
I think that piece fits onto the factory 90 degree housing (on the side of the turbo's exhaust housing)? I am making a similar looking part but it will attach directly to the exhaust housing instead of the factory piece. The original reason for making it is because I do not have the factory 90 degree part. But it turns out it will be a upgrade; I learned how to make it so the exhaust gas flows better, and it will allow the down-pipe to be included with it so everything fits the X much better (as I described earlier).
I think that piece fits onto the factory 90 degree housing (on the side of the turbo's exhaust housing)? I am making a similar looking part but it will attach directly to the exhaust housing instead of the factory piece. The original reason for making it is because I do not have the factory 90 degree part. But it turns out it will be a upgrade; I learned how to make it so the exhaust gas flows better, and it will allow the down-pipe to be included with it so everything fits the X much better (as I described earlier).
Janis
True Classic
With bandsaw, unfortunately it has hydraulic vice, had to put inside of stainless pipe another pipe to not smash it..Those are clean cuts (especially for stainless). Makes the joints fit excellent. What did you use to make the cuts?
I think that piece fits onto the factory 90 degree housing (on the side of the turbo's exhaust housing)? I am making a similar looking part but it will attach directly to the exhaust housing instead of the factory piece. The original reason for making it is because I do not have the factory 90 degree part. But it turns out it will be a upgrade; I learned how to make it so the exhaust gas flows better, and it will allow the down-pipe to be included with it so everything fits the X much better (as I described earlier).
Yes it fits onto factory 90* manifold
Dr.Jeff
True Classic
Better to explain with pictures. None of these are mine, just images I found online.
I don't have this part, so will make one:

Similar to what someone else did here:

But with one similar to this type design; separates the flow from wastegate until further down so the main exhaust exits easier:


Smoother and cleaner transition from turbo to downpipe.
I don't have this part, so will make one:
Similar to what someone else did here:
But with one similar to this type design; separates the flow from wastegate until further down so the main exhaust exits easier:
Smoother and cleaner transition from turbo to downpipe.
lookforjoe
True Classic
The extreme acute angle is really bad in that first pic for homemade turbo outlet - the exhaust is hitting a wall & going down - much better to have some space for the flow to transition out & down. Compare to both the casting and the stainless collector you pictured.
Dr.Jeff
True Classic
Agree, it was just a sample pic off the web. Actually that pic is misleading though. The top portion you see isn't the main exit from the turbine. It is just the dump from the internal waste-gate. The bit just below that is the larger port from the turbine. But they made it something of an open chamber rather than two distinct pipes. Mine will be separated and merge further down. More like in the last two pics (actually even further down than that before they merge).
I cannot use too big of a radius however because I will be retaining the AC system and the compressor is longer than the alternator. So limited space, but it will be as good as will fit. And it will be a smooth mandrel bend which is better than the "pieced together" one in the pic you referenced. The sample in the last two pics is a little closer to what it will be, except only 90 degrees (that one looks to be more than 90).
And yes, there will be plenty of heat management for the AC compressor and everything else.
lookforjoe
True Classic
Nice! Are you going to buy a panel kit or make your own?
lookforjoe
True Classic
Never seen pics of an actual Dallara
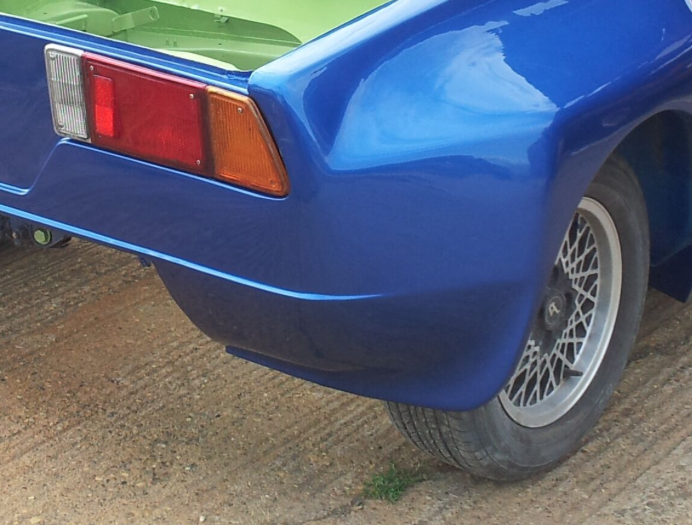
I went off Racheljf’s pics and online pics for examples of variances - with hers the rear panel flows out into the fender directly
And this one

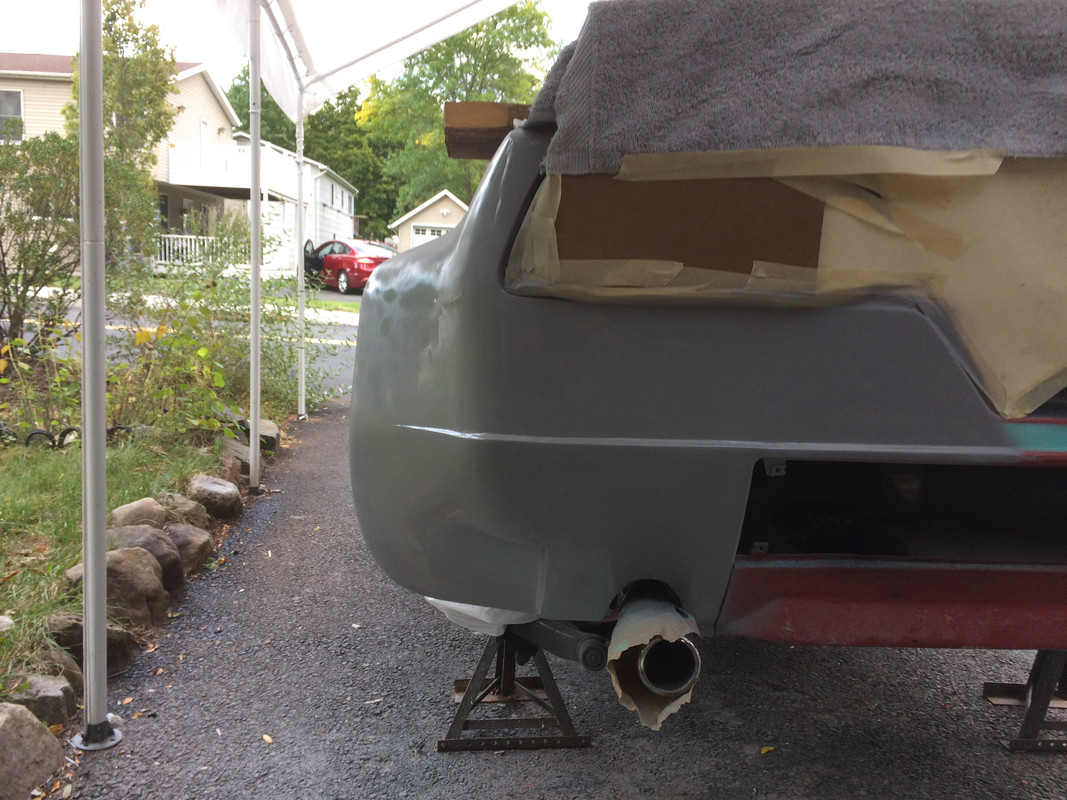
US kit (mine) does not - came like this
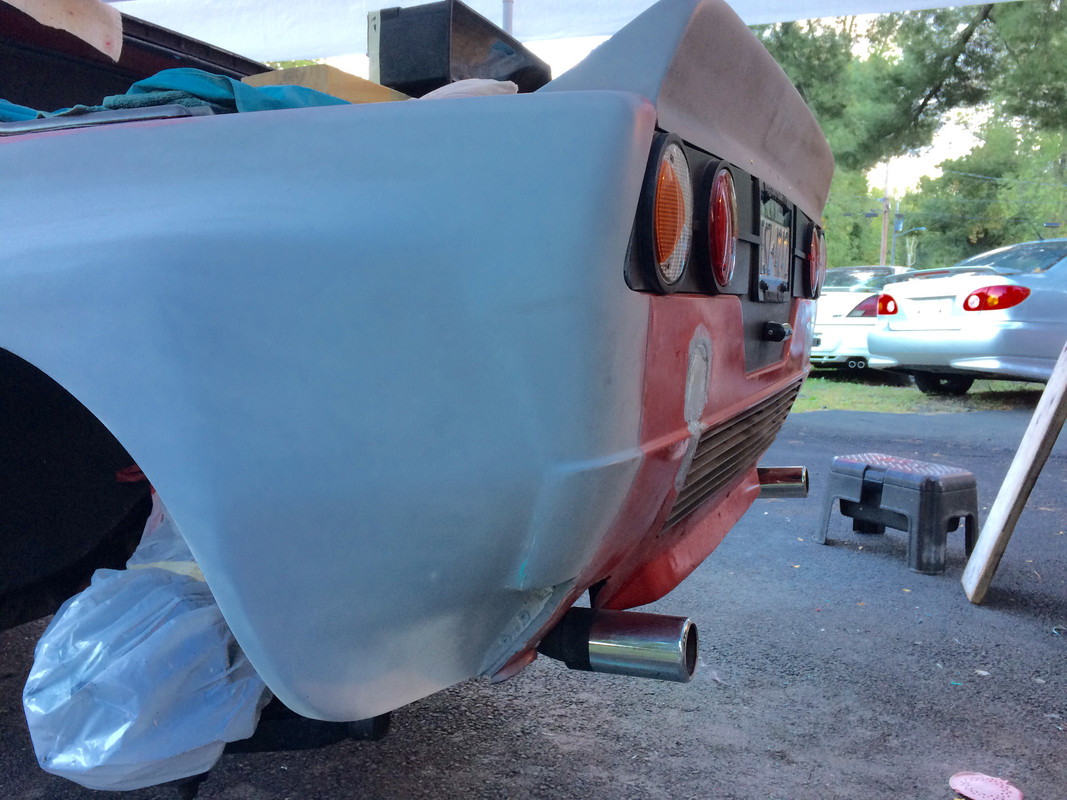
Compromise- I added the crease continuation to make it follow better
I went off Racheljf’s pics and online pics for examples of variances - with hers the rear panel flows out into the fender directly
And this one
US kit (mine) does not - came like this
Compromise- I added the crease continuation to make it follow better
Dr.Jeff
True Classic
I never noticed how much variance there is between all of them. Interesting to see, thanks Huss.
Janis, if you decide to make your own then you could design it exactly the way you like...even if different from the original Dallara. But it is a LOT of work to do from scratch, especially for the price of the kit (they seem to be more expensive here, I think due to shipping).
Janis, if you decide to make your own then you could design it exactly the way you like...even if different from the original Dallara. But it is a LOT of work to do from scratch, especially for the price of the kit (they seem to be more expensive here, I think due to shipping).
Janis
True Classic
I never noticed how much variance there is between all of them. Interesting to see, thanks Huss.
Janis, if you decide to make your own then you could design it exactly the way you like...even if different from the original Dallara. But it is a LOT of work to do from scratch, especially for the price of the kit (they seem to be more expensive here, I think due to shipping).
Most likely not so wide in the rear.. somethng between Dallara/944/UR quattro/M3 e30
Will have to getnew wheels that have in mind or make them out of cardboard.
If "Dallara conversion takes few years and 20k", if done properly, it is not for me. I will go with wannabe Dallara
200$ and one month.Anyway IIRC to pass MOT then have to have steel wings because they are not bolt on type..
I appologize to the owner of picture that have done with it
^edit
My sketch looks a bit too weird in the rear, will model in car from cardboard..
Last edited:
Dr.Jeff
True Classic
I don't think cardboard wheels will last very far driving in the rain. But I could be wrong.Will have to getnew wheels that have in mind or make them out of cardboard.
I like your modified image. Especially the side ducts and front end for the rear mounted radiator:
This may be too modern for the X1/9, but a like the style of fenders on the World Touring (WTCC) and World Rally (WRC) cars:
Wish I could get a kit for that price here. I'd do that.I will go with wannabe Dallara
Janis
True Classic
•UT Manifold/UT rail/non UT style injectors
There is not much space for adapters. And actually don’t see enough necessity for them, as lathe is out of order for a while
.Took off seats from Punto rail and sealed them into UT manifold. One end is done.
On the other end of injectors - just plugged it into 8mm ID hose.
Have to buy some better clamps, that seal equally all around..
*This isn’t tested yet with pressure. The weakest point is where hose is attached to injector, but I believe that it can easily took 8bar pressure. If You have another experience please say.
If manifold wouldn’t be already sealed to head, would drill a bit deeper holes for those “punto seats”