500 Abarth 1.4 Turbo swap.

I use relays to mimic the key switch of the Abarth for power on and start functions. Aux 1, Aux 2 and C/I ( crank interrupt) relays mimic the stock Fiat Abarth key switch. Two wires go to the key switch location to control the relays in the back trunk. Next picture is of the wheel sensor inputs. The ECU on this car is a learning ECU and needs to see certain things for it to run correctly. It needs to see the wheels turning.
Hi Tony, your posts continu to be extremely useful. I my swap I'm exactly at the same stage. I'll retain the ignition lock & switch assembly with immobilizer antenna, so I'll start the engine with the Stilo's key. But I'll also retain the X's lock to switch on the X's electric systems. This way I keep the steering lock and have the dded security of the immobilizer.

I had a question about the self learning: How does one know if it needs to see the wheels turning?

Yesterday I test started the 1.8 16v engine in my X with a very limited part of the Stilo's loom, so I know the immobilizer works (succes!). I have isolated the wheel speed sensors, but they were not part of the active part of the loom that was needed to unlock the immobilizer. For what I can trace, the wheel speed signal wires go directly into the ABS unit. It might be that the information is related further via a CAN-bus, but as the ABS unit is not in the X, I'm not sure how that could work. How are the wheel speed sensor wires routed in the Abarth?

Thanks in advance for any info you could share, Marc
The start of the conversation may be here:


There is also a bit about the electric fuel pump which could also be of interest to you.
 
Hi Tony, your posts continu to be extremely useful. I my swap I'm exactly at the same stage. I'll retain the ignition lock & switch assembly with immobilizer antenna, so I'll start the engine with the Stilo's key. But I'll also retain the X's lock to switch on the X's electric systems. This way I keep the steering lock and have the dded security of the immobilizer.

I had a question about the self learning: How does one know if it needs to see the wheels turning?

Yesterday I test started the 1.8 16v engine in my X with a very limited part of the Stilo's loom, so I know the immobilizer works (succes!). I have isolated the wheel speed sensors, but they were not part of the active part of the loom that was needed to unlock the immobilizer. For what I can trace, the wheel speed signal wires go directly into the ABS unit. It might be that the information is related further via a CAN-bus, but as the ABS unit is not in the X, I'm not sure how that could work. How are the wheel speed sensor wires routed in the Abarth?

Thanks in advance for any info you could share, Marc
Like Bob Brown I prefer to be a minimalist, however at times engineers have a different concept that I want. The Abarth platform, the complete wire harness and all modules were removed from the donor car, the engine installed in the test body and the engine started. Yeah! I suppose if I wanted to be in a hurry I could have pushed all of the modules and every electric connected solenoid and light into the back trunk of the X and let sleeping dogs lay. The solution was to remove 1 wire at a time, correctly by releasing the pins from the connector and then see if the engine would start. Some wires were easy, dome light, back up light, head light and so on and the wire harness was cut open and the wires were removed. I mean a bushel basket of wire is removed along with half of a 5 gallon pail of electrical tape holding the harnessed wires together. In answer to your question the boost is limited by the speed of the car, the speed of the car is calculated by the wheel sensors and there is a code that gets posted, engine cannot learn. The reverse engineering now comes into play because I do not have access to dealer diagnostics, so, start putting back what was taken off until the code clears along with the engine dropping off under load, because the ECU is looking for something.


Karl, what are you talking about? Radius tool? Do you mean donut. If so, the sheet metal blank is trued on the lathe, the centre hole is swagged. The blank is now put over the die and the punch is pressed into the die forming 1 half of the donut is made. Or am I way out there on this one. Explain to me what you are looking at?


TonyK

Grimsby Ontario Canada.
Not quite sure what you are referencing.

In my post above I was just linking one of your past posts around the rotors for the ABS system for Marc (my1stcar) and making reference to a post I made on his thread which suggested using an external pump as you had, which your past post about was inline with the ABS post.

I do recall a past post about how you first formed the toroids for the exhausts. Your technique is quite remarkable and effective. I continue to be impressed by it each time you have shown the steps.

My apologies, I didn’t mean to muddle :)
 
In answer to your question the boost is limited by the speed of the car, the speed of the car is calculated by the wheel sensors and there is a code that gets posted, engine cannot learn.
Thanks Tony, from what I found on the internet (see below what 4cardata has to say), I think the ECU of the Stilo is also self learning, but it's naturally aspirated so won't be able to play with boost, still can limit output otherwise, though.
You mention it posts a code, is that on ODB2, or a check engine light on the instrument cluster? (I think I found why I had no signal on my cluster during my test-start, I forgot to connect one connector, the loom has multiple loops closed by connectors).

Extract from 4cardata:

SELF-ADAPTATION​

The control unit is equipped with a self-adapation function which is designed to memorize any changes between the basic map and the corrections, imposed by the Lambda sensor, that could occur during operation.These changes (due to the ageing of the system and engine components) are memorized permanently allowing the adapation of the operation of the system to the gradual alterations in the engine and the components compared with when they were new.The strategy is disabled when the active charcoal filter scrubbing solenoid valve is open.If the control unit is replaced, the vehicle must be road tested to allow the engine to reach operating temperature and the control unit self-adaptation function to intervene (especially during idling stops).
 
Not quite sure what you are referencing.

In my post above I was just linking one of your past posts around the rotors for the ABS system for Marc (my1stcar) and making reference to a post I made on his thread which suggested using an external pump as you had, which your past post about was inline with the ABS post.

I do recall a past post about how you first formed the toroids for the exhausts. Your technique is quite remarkable and effective. I continue to be impressed by it each time you have shown the steps.

My apologies, I didn’t mean to muddle :)
Karl, cutting metal at different angles. Use template and mark on metal to be cut. Next find something that has a radius close to what the cut is. Next place it 3/16" away from the line to be cut. Then use plasma cutter to follow the line and cut to shape. Clean/grind edges and bend as required.

TonyK.

Grimsby Ontario Canada.
You could give our model shop steel guys some lessons. We never do deep draw work. Thanks
 
Where have I been? Have you ever had a month or a week even that everything around the home seems to break? Well I had that kind of time that lasted more than a few weeks. I know, not car related, but it is coming as I am back at building parts for this build, but endure through a run down.

I live in the country and have water supplied by a cistern that is fed from rain water gathered from the roof down spouts. From the cistern the water is forwarded 30 PSI through a pre filter of 20 micro's then a UV steril light a 5 micro polishing filter to a booster pump that increases the water pressure to 85 PSI. Well the control on the booster failed and I had used one and changed it out and all was well for a week and it failed and I had to find a flow switch and relay to control it and now I am back in business. The following week the UV light failed and the lamp was changed but the ballast packed it in as well after the lamp was changed. All simple stuff that took time spread out over days to get resolved.

Then there is my milling machine that was converted to CNC with a use in Manual mode option. The computer crashed that ran it, it was a 1997 PC running Windows XP. Stable but now not working. I found an ebay vendor that had a used Dell with XP 32 bit as required for Mach3 and had it shipped from Montana. Last weekend I finally said I have to get this done. When I changed the mill to CNC the X axis lead screw was worn and I purchased a custom made metric ball screw to replace it. All of the scales on the machine are imperial except for the new ball race and screw. In reality it really doesn't matter because the DRO ( digital read out ) show through Mach3 on the computer screen calculates out the movement of each axis and displace them in inches. The problem is the computer is down and now I have no idea of the motion of the X axis. I needed to get this resolved. The new computer was in a slim case and a bracket needed to be fabricated out of aluminum and adapted to the control cabinet of the milling machine. Along with a remote start button that can be activated from outside of the control cabinet. See pictures.

With this behind me it is on to hammer forming some parts. These have been shown before in Bob Martin's build but I will review as it is part of this build. The hammer forms are cast from aluminum that I did in my build. I will review the process as required. I also found in the hammer form box my front spindle and I can make the wheel sensor brackets and tone ring adapters as well. The part being made is for the exhaust pipe as it exists the turbo charger and pushes into the fuel tank well of the car body and is part of the fire wall. The part still needs to be trimmed and fitted to the test body, but I will attend to that after all of the parts have been made.

More to come.

TonyK.

Grimsby Ontario Canada.
IMG_0947.JPG
IMG_0948.JPG
IMG_0950.JPG
IMG_0951.JPG
IMG_0952.JPG
IMG_0953.JPG
IMG_0954.JPG
IMG_0955.JPG
IMG_0956.JPG
IMG_0961.JPG
 
Last edited:
The next part is for the turbo charger notch that will push into the passenger compartment on the shelf under the rear glass of the car. Again it is a fire wall component that is hammer formed and has a lot of change of direction in the metal. The metal I used here has a different ductibility than I normally use and in the process it teared. There is a lot of stress imposed in the sheet metal, the part is strong but in this case it needed to be repaired. On my car and Bob Martin's car the metal used did not tear. However a repair is simple to accomplish. The method of the repair is to make a small repair section and form it on the hammer form and then use the spot welder to secure it in place. The part when completed is test fit and will be welded and sealed with a seam sealer in the road car body.

TonyK.

Grimsby Ontario Canada.
IMG_0963.JPG
IMG_0965.JPG
IMG_0967.JPG
IMG_0969.JPG
IMG_0970.JPG
IMG_0971.JPG
 
The next part is for the turbo charger notch that will push into the passenger compartment on the shelf under the rear glass of the car. Again it is a fire wall component that is hammer formed and has a lot of change of direction in the metal. The metal I used here has a different ductibility than I normally use and in the process it teared. There is a lot of stress imposed in the sheet metal, the part is strong but in this case it needed to be repaired. On my car and Bob Martin's car the metal used did not tear. However a repair is simple to accomplish. The method of the repair is to make a small repair section and form it on the hammer form and then use the spot welder to secure it in place. The part when completed is test fit and will be welded and sealed with a seam sealer in the road car body.

TonyK.

Grimsby Ontario Canada.
View attachment 71210View attachment 71211View attachment 71212View attachment 71213View attachment 71214View attachment 71215
I have had those times.

Good recovery however. Congrats.
 
I have had those times.

Good recovery however. Congrats.
I had been working on this a bit a few weeks ago but had to attend a 5 day function in Nashville and Bob was kind enough to pick me and my wife Sarina up from there where we are currently at his home in Radcliff Kentucky, a 3 hour drive away. We will be here until Easter Saturday then take 2 connecting flights back to Toronto Ontario arriving home late Saturday evening.

Anyway, I completed the cover for the firewall with some sections of sheet metal and spot welded them together. The spot welder makes it easier as it clamps and welds all at the same time where I need the welds. It looks like something from the days of when men wore armour, but is coming along nicely.

See pictures.

TonyK at Bob Martin's in Radcliff Kentucky.

IMG_0973.JPG
IMG_0976.JPG
IMG_0978.JPG
IMG_0979.JPG
IMG_0988.JPG
 

Attachments

  • IMG_0995.JPG
    IMG_0995.JPG
    294.1 KB · Views: 76
I would suspect it will. Tony has two other threads on the same subject. This is his third and is being done a third way.

I suspect he has had a busy summer.
Indeed Mr. Tony K is a busy man. His focus is often shared between his work, hobbies and family members needs. This thread has been quiet for the summer but will resume soon. The subject car has been enjoying the summer and will make its way to Grimsby to receive the Abarth entity in due time and will be documented. Consider it a short hiatus. 👍🏻😁
IMG_4676.jpeg
 
Here we go again! The quest has continued! Just a couple weeks ago Mr. Tony K and I loaded up my X and headed down to its home for the next while! Interior was stripped before it's trip and engine has now been removed. Still, much much more to come as this build takes much love and care. Being only the third of its kind there is still much to be learned and improved upon also taking into consideration driver's input. The car has been placed on a fabricated cart which allows for easy movement from point A to B. Space is a premium in any shop! The engine will be offered for sale to any interested parties as it will no longer be required and should be enjoyed by someone. This engine has only 60k miles on it and has had a timing belt change along with many upgrades and goodies. More to follow in the coming weeks. **Update! Engine is now with its new owner. A fellow Xwebber who will give it the new home it deserves.**


trailer.jpg
dolly.jpg
rear removed.jpg
rear suspension.jpg
IMG_3043.JPG
IMG_3042.JPG
IMG_3037.JPG
IMG_3044.JPG
IMG_3047.JPG
IMG_3051.JPG
 
Last edited:
More progress! Also, engine and trans have been spoken for. More engine bay stripping and preparation. Modifications must be done to the rear ledge area and firewall so the glass must be removed. Engine bay is also treated to sandblasting and repainting afterwards. Some rust was revealed with the removal of parts in the engine bay near the usual trouble spots like the drainage tube area. Apparently, this car was shielded from the winter during its life as rust is minimal and disassembly seems to be going suspiciously smooth…Apparently X 1/9s make beautiful homes for mice as well. ( see pictures) A couple years ago I repaired the lower left bumper area and discovered a nest inside the frame rail which I promptly cleaned and coated. Apparently, someone else moved in afterward. 🤦🏼‍♂️ Anyway, enjoy! Also, quite surprised we didn't find any of those missing 10mm sockets...🤔
IMG_3101.jpeg
IMG_3118.jpeg
IMG_3115.jpeg
IMG_3107.jpeg
IMG_3114.jpeg
IMG_3116.jpeg
IMG_3117.jpeg
IMG_3105.jpeg
IMG_3106.jpeg
 
Last edited:
Next steps require the main positive battery cable to be removed, e-brake handle and cables, gas pedal and related tubing as well. Brackets in the engine bay will also need to be removed and or modified.
IMG_3119.jpeg
IMG_3121.jpeg
IMG_3120.jpeg
IMG_3127.jpeg
IMG_3123.jpeg
IMG_3124.jpeg
IMG_3125.jpeg
IMG_3126.jpeg
IMG_3122.jpeg
 
And no, the row of relays were not something that Tony added. That’s all this guy! 🤦🏼‍♂️ at least they’re somewhat neat…🤷🏼‍♂️ 
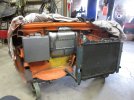
I fully intend to be scolded for my “custom” wiring…😬
 
Back
Top