
You are using an out of date browser. It may not display this or other websites correctly.
You should upgrade or use an alternative browser.
You should upgrade or use an alternative browser.
64 600D Hotrod
- Thread starter boxy02
- Start date
boxy02
True Classic
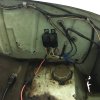
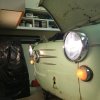
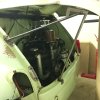
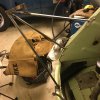
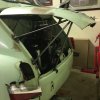
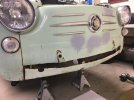
Worked on fixing wiring issues and replacing questionable connections under the dash, in the engine compartment and front trunk. Wired up my H4s and relayed them. Boy, are they bright! Also started welding my hood props. I experienced the learning curve on this one. I guess it’s like making pancakes, the first one is usually written off. The second set will be better. Also, wired & relayed a switch for the fuel pump. I’m trying to fix the little things here and there so I feel like I’m making some progress.
Also, wired & relayed a switch for the fuel pump. I’m trying to fix the little things here and there so I feel like I’m making some progress.Attachments
-
 17232EDC-F840-4D37-9410-2A8607D2C010.jpeg193.9 KB · Views: 100
 -
 68F16672-28C0-4417-A598-6408471A28A3.jpeg170.1 KB · Views: 99
 -
 256208A9-2DB9-4005-8F87-903EB9269CDF.jpeg178.3 KB · Views: 96
 -
 B2E8D6BB-6894-481C-9DD6-5C5BAD5FB6AB.jpeg195.9 KB · Views: 92
 -
 60EA5C82-54E3-4CC6-B196-2A574ADFBB1F.jpeg232.1 KB · Views: 104
 -
 471807A8-93F9-4D81-8A96-692FFCA76439.jpeg182.5 KB · Views: 98
 -
 00DED6F1-C77B-460C-B8CB-FD4936D2AAA3.jpeg171.3 KB · Views: 106

myredracer
True Classic
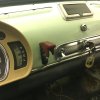
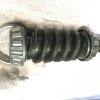
It's a Flowmaster HP-2 muffler. Sorry for not responding sooner.Where did you get the muffler (in the 2nd picture)? Brand?
boxy02
True Classic
No worries, thx for the info.It's a Flowmaster HP-2 muffler. Sorry for not responding sooner.
boxy02
True Classic
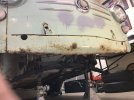
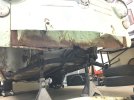
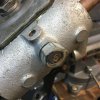
Finally began the repair of the rot in the front trunk. I sourced a front nose panel and the interior panel immediately behind it (with the spare tire relief) from Germany.
I had to cut 4” up from the bottom of the front panel to get to the good metal. Need to cut the inner trunk panel next, lots of metal missing from that one…
I had to cut 4” up from the bottom of the front panel to get to the good metal. Need to cut the inner trunk panel next, lots of metal missing from that one…
Attachments
boxy02
True Classic
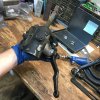
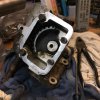
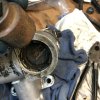
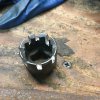
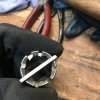
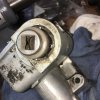
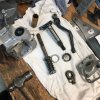
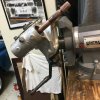
Removed, cleaned and resealed/adjusted my steering box. Came out nice and it’s pretty smooth mechanically. Had to make a tool to remove the worm gear shaft end bearing adjuster cap. The 8mm drain/fill plug would not budge, so I welded a 17mm nut on it to gain more leverage. Added gear oil to it and it’s now ready for installation after I weld in the front patch panels.
Attachments
-
 B6B75D43-E4C1-48D6-BDBD-FFE2E4A2A6BA.jpeg279.6 KB · Views: 69
 -
 BD7B7DF2-064A-46C9-827F-E413B24F75CB.jpeg267.7 KB · Views: 68
 -
 19133ABD-A97D-4D29-8971-7CBBF3137C59.jpeg216.2 KB · Views: 67
 -
 998F716F-C62D-42F6-9A01-692A0CBC1021.jpeg260.2 KB · Views: 67
 -
 89F2C8EB-36C5-4A7F-B972-42DC557066F3.jpeg193.1 KB · Views: 69
 -
 C6BA078A-F77D-4D9F-8383-851F988D6BF2.jpeg239.2 KB · Views: 65
 -
 F617D314-1FE3-4D1A-B734-9D5B5CB08FDB.jpeg176.2 KB · Views: 63
 -
 A542584C-C613-498C-93E2-0D026BF7A600.jpeg260.9 KB · Views: 67
 -
 8B86D867-FF61-4A03-AE8A-4630251D23F6.jpeg249.8 KB · Views: 69
 -
 D3B24A69-7BEA-4CD4-9815-701F2F74CF9C.jpeg295.2 KB · Views: 74