
tvmaster
True Classic
Couple of things: do you think ‘74 dashes crack BECAUSE holes are cut for radios, thereby weakening the dash above somehow? Amazing you have the uncracked unicorn though.
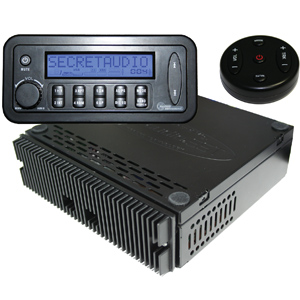
So this is Henk’s box, and it’s metal. You added that wrinkle finish - what’s the process for that exactly?
The points I marked up - are those gaps that were there, you added, or aren’t gaps at all and just a trick of the light?
Lastly - have you ever found a radio manufacturer who separates the user-interface panel from the amps/rear connectors, etc, by way of a single wire? The faceplate in the Alpine in my ‘74 disconnects from the unit. Wouldn’t it be smart if THAT was all that mounted to anyone’s dash, and all the rubbish inside was mounted anywhere else, under dash, frunk, trunk, etc.
That‘s got to exist somewhere you’d think?


 At least he didn't tear up the (uncut - uncracked dash) when he took it.