Eurosport body, K20 power

Interesting, didn't even think of that as an option but clears up a couple of niggling questions in my mind regarding the regulator documentation and the supplied plug. I was only thinking of supplying the fuel rail with the regulated pressure, not considering that the pressure could be regulated downstream of the rail. Perhaps this would have an advantage in a high horsepower situation?

Had I been aware of this option I would probably still done what I have done - seems a bit cleaner to me, less lines and clutter.
You can leave it as is, but if your new rail has an inlet and return you just have to plug the return port. That allows only one flex line for the feed instead of two - feed and return to regulator. Regulating downstream probably is optimal for a high flow, high hp application, but on stock builds I doubt it makes any difference.
 
Better to have the FPR handle the return - no reason to have line pressure to the rail. Much simpler fuel line routing this way. No advantage for high HP that I am aware of - I guess it depends on definition of high HP. Typically, that would simply mean larger ID delivery & return lines, larger ID rail, higher output or dual pumps to provide volume. I had to do that with my old wagon, and that was only 500AWHP - still used a FPR with return pre-rail.
 
Last edited:
Modern cars use constant pressure single line systems to keep from heating up the fuel by cycling it through the engine compartment, it also allows them to reduce the replacement of fuel filter as of often (Or ever in the case of Honda) as the only fuel needing to be filtered is the fuel to the fuel rail which is consumed, not constant cycling.

As I recall there is a Ford controller and sensor which is put inline to read the pressure at the end of run fuel rail. I believe it then communicates with a controller and regulates pressure by means of PWM. I will have a look around.

Yeah - Volvo went to that around 2000. All the FoVo's like my C30 have no filter (that you can service) as a result. There is a fuel pump module that regulates volume on demand. The fuel pressure sensor is mounted on the end of the fuel rail.

Too complicated to integrate in a swap, IMO the heating aspect is just another reason to have the return off the FPR vs the additional heating from return after the rail.
 
Last edited:
Final engine install is done!

PXL_20210305_033001097.jpg
 
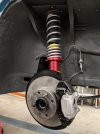
Coilovers are 90% done. Still need to find some bump stops that will fit and will have to cut down the dust boots somewhat, but will wait until after initial installation and I can determine the maximum compression allowed re fenders etc.

Many thanks to @lookforjoe and @rx1900 for assistance with this part of the project. Amazing number of vehicles have contributed parts for this:
  • Fiat - the brackets (knuckles) that bolt onto the Fiat suspension.
  • Volkswagen - strut tubes
  • Volvo - steering bearings
  • Ford - top mounts
  • Porsche - dust boots
  • Strut inserts are Koni
  • Springs are variable rate from QA1
  • Sleeves and bottom perches are Bicknell
  • Top bearing holder/spring perch for the front is from Kaplhenke Racing/Luxe Steer
  • Top perch on the rear I made from a couple large thrust washers and welded on a lip.
  • Reinforcement plates were cut out of stainless
PXL_20210313_011423740.jpg
 
Coilovers are 90% done. Still need to find some bump stops that will fit and will have to cut down the dust boots somewhat, but will wait until after initial installation and I can determine the maximum compression allowed re fenders etc.

Many thanks to @lookforjoe and @rx1900 for assistance with this part of the project. Amazing number of vehicles have contributed parts for this:
  • Fiat - the brackets (knuckles) that bolt onto the Fiat suspension.
  • Volkswagen - strut tubes
  • Volvo - steering bearings
  • Ford - top mounts
  • Porsche - dust boots
  • Strut inserts are Koni
  • Springs are variable rate from QA1
  • Sleeves and bottom perches are Bicknell
  • Top bearing holder/spring perch for the front is from Kaplhenke Racing/Luxe Steer
  • Top perch on the rear I made from a couple large thrust washers and welded on a lip.
  • Reinforcement plates were cut out of stainless
View attachment 44530
Look great! Which Koni inserts did you use?
 
Excellent job. 🏆

Are the Ford top mounts the same ones discussed in other threads - from a Focus? I'm curious how well they mated to the top spring perches. Did you have to make some sort of filler/adaptor or modify anything? I have a similar set of coilovers that I fabricated to fit the stock X1/9 top mounts. But I'd prefer to use better top mounts, so seeing how those Ford items worked for your coilovers will help a lot. ;)
 
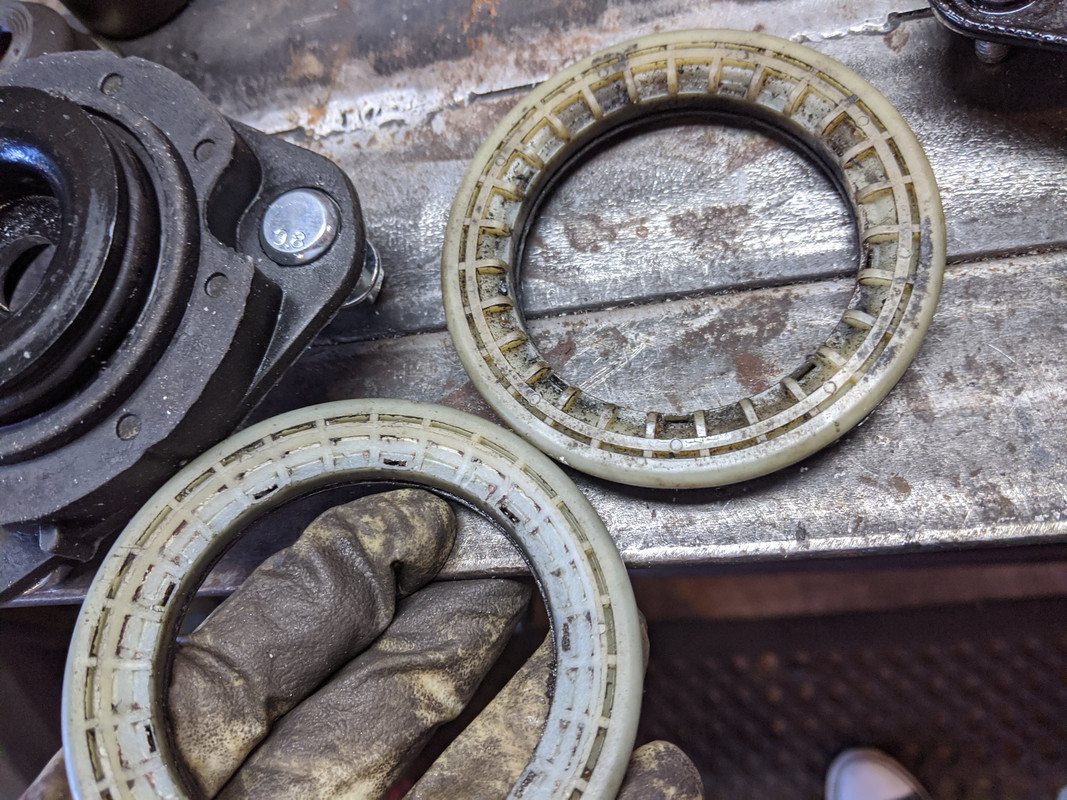
These are the same ones @lookforjoe and Jovani (maybe others?) used and wrote about. They have an inside lip, 70mm OD and ~5mm high over which their supplied bearing fits.

For the front, the Volvo bearing (SKF 3530341) fits nicely over that lip after removing the little ribs. I also trimmed some of the rubber away to reduce the height by ~1mm - probably not necessary but the bearing was not sitting flat. That bearing also snaps into the Luxe Steer spring perches which have an ID of 2.5". So the bearing is centred on the mount by fitting over the lip, and the perch centers the spring.

Front Mount 1.jpg


Front Mount.jpg


For the rear of course no bearing is required, just a spacer with an ID of 70mm, OD of 90 - 95mm, and ~5mm thick. I my case I found some thrust washers that worked. Although not required, I welded a lip around the outer edge of the thrust washers as I like the idea of positive centering of the spring at the top.

Rear Mount.jpg
 
Nice job. But with the time spent and all efforts, did you really save some money? Wouldn't it be cheaper and better to buy fully adjustable plug and play coils?
 
@Mark Olson - I figured out the difference in the seating - on mine, I shaved that middle ridge down so the bearing sits flush in the mount. You've achieved the same result modding the mount lip, so it's all good

IMG-20201015-165150.jpg


Screen Shot 2021-03-13 at 6.46.18 PM.png

I'm afraid the Volvo/Kaplehenke parts are on me :D I had a spare set of the SKF bearings from my old V70, and I had Kaplehenke Coil overs on that, so I already knew the bearing plate would work with the 2.5" springs specified for the X1/9 coil over setup.

V70-AWD-00080.jpg


Nice job. But with the time spent and all efforts, did you really save some money? Wouldn't it be cheaper and better to buy fully adjustable plug and play coils?

I'm sure Mark will chime in on this - I can say this comes no where near the $2500 or so a full set of coil overs goes for. I wouldn't buy any that come with generic/ no name / unknown inserts. This way, you can also tailor the springs to your own liking. For my part, it's more satisfying to make them. Having spent $$$$ on coil overs & had to then buy multiple spring sets to dial it in, it's way cheaper to make your own, if you have the equipment.
 
Last edited:
Nice job. But with the time spent and all efforts, did you really save some money? Wouldn't it be cheaper and better to buy fully adjustable plug and play coils?

Not cheaper, I probably saved ~$600 USD doing my own compared to the single adjustable Konis available for the X19. And I wouldn't pay the $900 extra for double adjustable anyway. But if a person doesn't enjoy the work, sure it would be best to just buy them. For me, the time doesn't count for much, what else am I going to do during these covid times? This is a hobby for me, and while I will enjoy the end result, I enjoy the process just as much.
 
Not cheaper, I probably saved ~$600 USD doing my own compared to the single adjustable Konis available for the X19. And I wouldn't pay the $900 extra for double adjustable anyway. But if a person doesn't enjoy the work, sure it would be best to just buy them. For me, the time doesn't count for much, what else am I going to do during these covid times? This is a hobby for me, and while I will enjoy the end result, I enjoy the process just as much.
Yeah, cuz it's fun. @Mark Olson picked doing this bonkers custom strut setup (and the other things) as the stuff he wanted to do. I have spent far too much money on my stupid car but I don't care - it's fun and it's what we do. I still maintain a spreadsheet on what I've spent. I've heard from others "don't do that - you'll just end up with regret!". They're probably right but that is NOT why we do this - we do this for purely irrational and emotional reasons, and I'm OK with that...
 
Got a few things done over the last month.................

Mounted the front suspension:
Front Suspension.jpg


And some of the rear - waiting for new toe link ball joints before I finish this:
Rear Suspension.jpg


Engine Harness wiring and routing to the dash:
Engine Harness.jpg


Wiring at Spare Tire 1.jpg


Wiring at Spare Tire 2.jpg


Wires to Dash.jpg


Working on wiring from the front of the car to the dash:
Wires on Shop Floor.jpg


Ordered wheels from Performance Alloys in the UK, 15x8 for the rear, 15x7 for the front. Japan Racing JR10 gold - won't arrive till June sometime:
JapanRacing-JR10-Gold.png


Mounted the front sway bar, thanks to @rx1900 for the nice design and parts. I bought a used bar, and after getting it cleaned up I found it was badly deteriorated where one of the bushings go. So......to the scrap bin it went. I have ordered a new Nolathane bar, waiting for it to arrive.

I also cut and welded up the header, and got it surfaced. Need to add a piece after the collector for the O2 bung, and then a flange. Will have the header ceramic coated (it is not stainless), and will go with stainless exhaust from the flange to the muffler to the tailpipe.
 

Attachments

  • Front Suspension.jpg
    Front Suspension.jpg
    199.6 KB · Views: 126
Last edited:
Looks like a lot of work has been accomplished. ;)

I like those wheels.
A suggestion for the exhaust header; have it ceramic coated on the inside as well as the outside, to keep it from rotting away from internal rust. Also adds that much more heat management.
 
Back
Top