Still not sure why the door handles are black though.
In 1985 and beyond, I am pretty sure that Bertone produced all of the X1/9's with black trim and bumpers, instead of the stainless steel and chrome, which included the door handles and the trunk/engine compartment release handles. Yours does have stainless steel trim around the windows, windshield, and sail, however. I am not sure when the total transition to black trim occurred, but knowing Bertone, it was sometime between 1985 and 1986.
 
Check the trailing underside of the passenger side of the runklid, there might still be the original paint code sticker.

The Bertones progressed from brightwork to blacked out. I don't remember which year when the bumpers went from bright to black, but I know that an '85 should have black bumpers. Also should have bright molding all the way around the greenhouse. My '86 has bright molding around the windshield and the base of the side windows, but the molding around the back edge of the sail panel and targa bar is black. An '87 would have that same black molding around the rear edge of the targa bar and sail panels, plus the windshield molding would be black.

As far as paint goes on the Bertones, if the car is a high-waisted two-tone, the top color is the "majority" or "predominant" color in that all of the parts that don't show yet were painted (say, under the carpets, under the passenger compartment rear bulkhead vinyl cover, etc) have that color, as if the entire body shell were first painted that color, and the side color is only the added accent color, which who knows may have been painted right over the majority color on the paint line.
 
Last edited:
Unfortunately I don't think I have the original window sticker, but I'll keep digging. I've already gone through most of the literature.
I forgot to take a picture of the VIN/Manufacture Data plate in the frunk. Not very easy to handle a camera with one arm. The VIN is ZBBBS00A0F7154081 so it's definitely an 1985. I think according the the Data plate in the frunk it was built in either April or May of '85.

Check the drivers side door jamb MFD/Vin plate located right above the engine/trunk release levers.
That will give us the build date and 54081 should be an early off the line for MY 1985.
1985 builds started 54038.
 
Last edited:
Nice! I like the black & red combo. Car looks decent so far from your pics. Dug into the usual rust areas yet for further evaluation?
 
In 1985 and beyond, I am pretty sure that Bertone produced all of the X1/9's with black trim and bumpers, instead of the stainless steel and chrome, which included the door handles and the trunk/engine compartment release handles. Yours does have stainless steel trim around the windows, windshield, and sail, however. I am not sure when the total transition to black trim occurred, but knowing Bertone, it was sometime between 1985 and 1986.
My '85 (build date 5.85) has chrome sail trim and windshield surround, but black bumpers, door handles and trunk / engine lid release handles.
 
You bought the "Dobbs Ferry" car! I looked at it over the Christmas holiday (on a bitter cold day), but was holding out for a '74. Congrats! I love the color combo. Good luck with it. You've got a real gem.
 
Nice! I like the black & red combo. Car looks decent so far from your pics. Dug into the usual rust areas yet for further evaluation?

So far so good - looked under the carpets and the floor pans are amazingly rust free, as are inside the headlight pods, strut towers, and trunk wells. I took out the trunk shelf and engine access panel to remove all of the fiberglass insulation - very minor surface rust on the trunk floor and firewall in a few places. Sanding and painting should fix that.

Check the trailing underside of the passenger side of the runklid, there might still be the original paint code sticker.

The original paint code sticker is there - if I'm interpreting it correctly (might not be though), the car was originally all black.
IMG_20180414_153113.jpg


Today I was able to tackle quite a few things with the help of my girlfriend.

-Replaced the shifter with a 8/10 stock one
-Replaced the antenna with one from MWB. It's not the best fit, but it looks better than the non-stock one that came with the car. Also found some surface rust on the inside of the antenna hole. I'm going to address that when I find a better fitting antenna.
-Also replaced the water pump and alternator. I originally thought the alternator bearings were bad, but it turned out to be the water pump bearing - the water pump shaft had about 0.25" of radial slop. I can't believe it wasn't leaking. I've never seen a bearing that bad - my guess is the water pump to crank belt was over tightened and prematurely wore the bearing. The alternator was in usable shape, but since I had already bought a new one, we changed it out anyway.

New (stock) shifter. Looks so much better than the weird one that came with the car.
IMG_20180414_153024.jpg


MWB antenna - not a perfect fit, but better looking than what was on the car.
IMG_20180414_153055.jpg


It's nice having a girlfriend who's a mechanical engineer . . . doesn't complain about getting dirty or wrenching ;)
IMG_20180414_152900.jpg
 
Does anyone have any advice on the best way to refresh/restore the leather on the seats and door cards?

I've already stitched up the split seams in the seats. The rest of the leather looks to be in decent shape, however there are plenty of cracks (not tears) and general fading. The door cards don't have any cracks, but are faded. The pictures throughout this thread show the condition pretty well.

Using leather filler and red leather dye seems to be the recommend method when researching on the internet. Finding the correct color dye might be hard...

Just don't want to end up ruining the interior since this seems to be a rarer color. Don't really want to restore the seats with new leather either as they're really not in bad shape aside from the fading and cracking (and that's too expensive for me atm).
 
Over the past few weeks I've started the process of re-dyeing the red leather interior of the car and fixing the cracks and tears throughout. It took a lot of researching and digging to try and find a suitable method that wouldn't damage the leather more, would have the results I was looking for, and would hopefully last.

The leather in my car was faded, and the seats had spots of bad cracking and a few tears, but IMO the leather was saveable. If you want a perfect final result, your only option is to reupholster the interior with brand new leather. I'm not looking for perfect, I'm just looking for a significantly improved appearance while also repairing and reinforcing all of the existing tears and cracks (so the leather doesn't degrade more to the point where reupholstering is the only acceptable option.)

The process I settled on goes something like this:

1) Remove as much of the dirt and old dye as possible by scrubbing the leather with acetone. Once you think it's as clean and dye free as you can get it, scrub it over two more times with acetone. You want as much oil and dye removed from the leather as possible to allow for the new dye to penetrate the leather deeply. Otherwise, it will just sit on the surface and flake off in a short period of time.

(My driveway ended up looking like a murder scene during this process - mountains of dye soaked red paper towels. I found using paper towels was better than using rags, as the dye being removed would quickly clog the pores of the rags.)

2) Once all the acetone has evaporated, use 320 grit sand paper to sand back the deeper cracks to get them as flat as possible. Don't worry about being too aggressive.

3) Once the sanding is complete, repair any tears by gluing in leather backing beneath the tears with leather adhesive. Allow time for the adhesive to fully cure - some can be accellerated using a heat gun.

4) Fill in all cracks with leather filler. Also use leather filler to fill in on top of the repairs made in step 3. Leather filler often comes in various colors. It's ideal to use something similar to the dye you will be using, but it doesn't have to be exact. Leather filler cures quickly with heat, so apply a small amount at a time and cure it with a heat gun. Add more a little at a time, if needed until all the cracks are flush.

5) If you want to retain a leather texture over your filler repairs, you can use a textured leather imprint sheet to create a texture in the top layer of filler as you cure it with a heat gun. If it doesn't come out to your liking, you can always sand it back and try again.

6) Lightly scuff the entire surface you will be dyeing with 320 grit sandpaper.

7) Spray on very light coats of leather dye. Wait at least 10 minutes between coats. Leather dye is not paint; unlike paint which will mainly stay on the surface, the leather dye will permeate the leather. Spraying very light coats will allow the leather to suitably soak up the dye. Heavy coats will result in the dye drying on the surface before it has a chance to penetrate the leather - this will result in peeling. Spray as many coats as needed to get the color you are looking for.

8) Allow to cure for a few days. For high use items like seats or steering wheels, allow the dye to cure for about 2 weeks before handling. After the leather has cured, apply ample amounts of leather conditioner to get the moisture back into the leather that the acetone stripped out. This will prevent the leather from drying and cracking.

My results so far:

The door cards weren't too bad. The drivers side had a few places that needed small amounts of filler, but structurally the condition of the leather was quite good - just faded, especially at the top. I don't have good pictures of what they looked like before, but there are a few shots earlier in this thread where they can be seen.

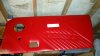
Immediately after applying the last coat to the driver's door card.
20180801_192712.jpg


Before shot of the fading and oil staining on the steering wheel. The general condition of the steering wheel was good, so I didn't use any filler.
20180801_192823.jpg


Driver's door card finished and installed.
20180801_192023.jpg


Steering wheel finished and installed. I'm going to have to carefully go over the stitching with black dye once the red cures. I couldn't figure out a way to mask off the stitching and still get a good finish on the rest of the steering wheel, so the process of returning the stitching to black will be addressed later . . .
20180802_191307.jpg


Passenger's door card finished and installed.
20180802_191323.jpg


Overall shot
20180802_191315.jpg


Next step is to start working on the seats. Both seats are a lot worse than the door cards and steering wheel. The drivers seat will need a lot of filler. And each seat has a tear that will need to be reinforced, glued, and filled. I estimate each seat will take 1-2 days to complete.

Some before shots of the seats:
20180801_192818.jpg


20180801_192918.jpg


20180801_192941.jpg


I've started on the drivers seat - got about 30% of it scrubbed before I ran out of acetone. I'll update as I make more progress.
 

Attachments

  • 20180801_192712.jpg
    20180801_192712.jpg
    156.8 KB · Views: 125
Last edited:
Nice work and thank you for sharing the process you researched, and then modified in actual use, to get such great results.

Really looking forward to seeing the seats.

Thanks for sharing
 
The interior is looking really good.
I could do with a redye of the seats in my car. Same colour. Where did you get the dye to do this?
 
Congrats on the buy. Score another one for the "Jersey guys"! Looks to be a great car. Good luck on the work, and I hope your recuperation time is short.
 
The fact that there are a lot of decorative stitching lines in the stock Bertone leather may work to your advantage when it comes time to fix the holes in the backrest. You might be able to get a local auto upholstery shop to install a "patch panel" and use the decorative stitching lines as real panel joint lines. Tell them to match the grain/texture as closely as possible, it doesn't matter if the material is leather or vinyl. The color is not so important since you are going to re-dye to a uniform fresh color anyway.

Keep in mind that Henk in the Netherlands may still have NOS Bertone red leather seat skins, for a price that, after you add up all of the materials and labor for the filling and refinishing, might be more competitive than you would think. Henk's website is in transition with his move to a new location, but you can always reach him via email.
 
The interior is looking really good.
I could do with a redye of the seats in my car. Same colour. Where did you get the dye to do this?

I used red Duplicolor Vinyl and Fabric Paint. While the bottle doesn't mention leather specifically, I found online a bunch of people who claimed they got good results on leather after scrubbing it down with acetone first and then applying multiple very light coats and waiting ~10 minutes between coats. We'll see how true that it. Apply ample amounts of leather conditioner after it's cured for a few weeks is key too.

Congrats on the buy. Score another one for the "Jersey guys"! Looks to be a great car. Good luck on the work, and I hope your recuperation time is short.

Thanks - I'd say I'm 99% healed. My shoulder is still a little stiff, but I have all of my movement and strength back. Took about 6 weeks to heal plus another 3 weeks of physical therapy.

The fact that there are a lot of decorative stitching lines in the stock Bertone leather may work to your advantage when it comes time to fix the holes in the backrest. You might be able to get a local auto upholstery shop to install a "patch panel" and use the decorative stitching lines as real panel joint lines. Tell them to match the grain/texture as closely as possible, it doesn't matter if the material is leather or vinyl. The color is not so important since you are going to re-dye to a uniform fresh color anyway.

Keep in mind that Henk in the Netherlands may still have NOS Bertone red leather seat skins, for a price that, after you add up all of the materials and labor for the filling and refinishing, might be more competitive than you would think. Henk's website is in transition with his move to a new location, but you can always reach him via email.

I've known about Henk's NOS seat skins - what was holding me back (other than not being able to afford them atm) was the only red leather Bertone sets he has on his site have the rectangular X1/9 logo in the headrest, while my seats have the circular Bertone logo. I'm quite partial to that Bertone logo lol. But the first part of your comment got me thinking - since my headrests are in good shape, I could maybe have an upholstery shop transfer the head rest section over to Henk's NOS seat covers. It's definitely an idea. Maybe I'll contact him and see if he has the other style in stock as well . . .

I just finished the drivers seat - I'm working on the post now. It came out decently, but far from perfect. The couple of panels that were really far gone look the worst and have the most flaws, but they are considerably better than how they were in my opinion. Assuming the color stays, which only time will tell, it'll hold me through to when I can entertain buying a set from Henk.
 
I finished the drivers seat today. It was a process. Took about 3 days working off and on.

I went through 2 gallons of acetone and several rolls of paper towels removing as much as the old dye as I could from the seat and door cards.
20180803_185713.jpg


Next step is to sand down all the cracks and tears with 320 grit sandpaper so the edges are as level as possible with the surrounding leather.

Left side of the head rest sanded down.
20180803_195520.jpg


Lower seat sanded down.
20180803_195531.jpg


Left side bolster sanded down.
20180803_195513.jpg

Next I addressed the tear in the side bolters. First step was to place leather backing fabric beneath the torn area. I added a couple of layers to try and build up the area since it appeared as if some of the inner foam had worn away.
20180803_200402.jpg

Next leather filler/glue was used to glue the backing material in place. I also glued up a small hole in the left side headrest panel. Glue was also added on all of the deep cracks to reinforce them so hopefully they won't tear further. I didn't take any pictures of this process since you can't really see the glue that well, as it is clear. The glue was left to dry overnight.
20180803_203956.jpg

Next I added red leather filler on all of the damaged areas of the seat. I applied an extremely small amount at a time - just enough to create a film over the cracks. Each coat was cured with
a heat gun. Most of the areas on the seat needed 2-3 coats, while I needed about 6 coats to fill in the large tear in the left side bolster.

Leather filler applied to left side bolster.
20180805_200114.jpg


Leather filler applied to left side of lower seat.
20180805_200125.jpg

Leather filler applied to middle/right side of lower seat.
20180805_200138.jpg

Leather filler applied to left side of headrest
20180805_200157.jpg
 
After all of the filler was cured, next step was to sand everything down smooth. I found that 320 grit sand paper was not coarse enough to even out all of the ridges the leather filler created on the surface of the seat - it kept getting clogged. So I used 150 grit sandpaper to sand back the filler, and then 320 grit to finish. Unfortunately, the 150 grit sandpaper was a bit too coarse and I ended up having to reapply filler in certain areas.

The pictures I took were in between the 150 grit and the 320 finishing grit.

Left bolster after sanding with 150 grit. I had to reapply filler in a few spots.
20180805_214020.jpg


Left side of headrest after sanding.
20180805_214041.jpg


Middle of lower seat after sanding.
20180805_214129.jpg


Left side of lower seat after sanding.
20180805_214057.jpg


Finally it's time for the dye. I contemplated taking the covers off of the seat frame, but settled on masking off the black backside of the seat, and frame. Unfortunately this would prevent certain parts of the lower section of the seat from being dyed, but the lower sections of the seats were in good shape with no/minimal fading; plus the only time anyone would ever see the lower sections is if the seats were out of the car. . .

Seat after the final coat of dye was applied.
20180806_192145.jpg


Before and after of the left lower bolster:
beforeafter1.jpg

Before and after of the left side of the headrest:
beforeafter2.jpg

Before and after of cracking on the lower seat section
beforeafter3.jpg

It's far from perfect, but it is considerably improved. It's no longer the eyesore it once was. I think the passengers side seat will come out even better because it has minimal cracking compared to the drivers seat. That will be my project over the coming week. Now I have to wait about 1.5-2 weeks for the dye to cure before I can add leather conditioner. It's going to be hard not being able to drive the X.

Shots of it in the car:
20180806_195350.jpg


20180806_195407.jpg
 
Last edited:
Since I had to wait 10 minutes between coats, I decided to pass the time by refinishing the air filter container. Nearly all the paint was gone and it was very rusty. Finished pic:
20180806_192126.jpg


I'll post the final results when I finish the passenger's seat and I'll keep you guys updated on the quality/longevity of the finish. The driver's seat came out about as well as I was expecting it to, which is far from perfect, but a huge improvement from where it was.
 
Back
Top