K20 project off to a good start

Rodger

True Classic
Epilogue, February 2, 2021. This thread documents my 5 1/2 year journey to do a K20 swap on a 1981 Fiat X1/9. It didn't start out to be that, but it turned out to be a great adventure. I learned a ton about automotive repair, restoration, and fabrication along the way. This thread is part 1 of the build. I started a part 2, when issues with Photobucket not hosting photos anymore created havoc with a lot of threads on this and other forums. I have since gotten rid of all of the Photobucket links, so all of my photos are now hosted on Xweb. There may be a few broken photo links, but they are from postings by other forum members that I can't edit. There are a few other related threads that I created as part of this project that are not in the main build thread. Here they are:
Part 2: https://xwebforums.com/forum/index.php?threads/k20-project-off-to-a-good-start-volume-2.32624/
Custom instrument cluster: https://xwebforums.com/forum/index.php?threads/marshall-electronic-gauge-install.28204/
Air conditioning custom install: https://xwebforums.com/forum/index.php?threads/air-conditioning-retrofit.25483/
Sound system install: https://xwebforums.com/forum/index.php?threads/sound-system-install.30509/
Rotisserie build: https://xwebforums.com/forum/index.php?threads/budget-rotisserie.26511/

I hope future K20 swappers get some useful ideas from my adventure. Feel free to PM me with questions or reply to any of the threads. :)
--------------------------------------------------------------------------------------------------------------------------------------------------------------

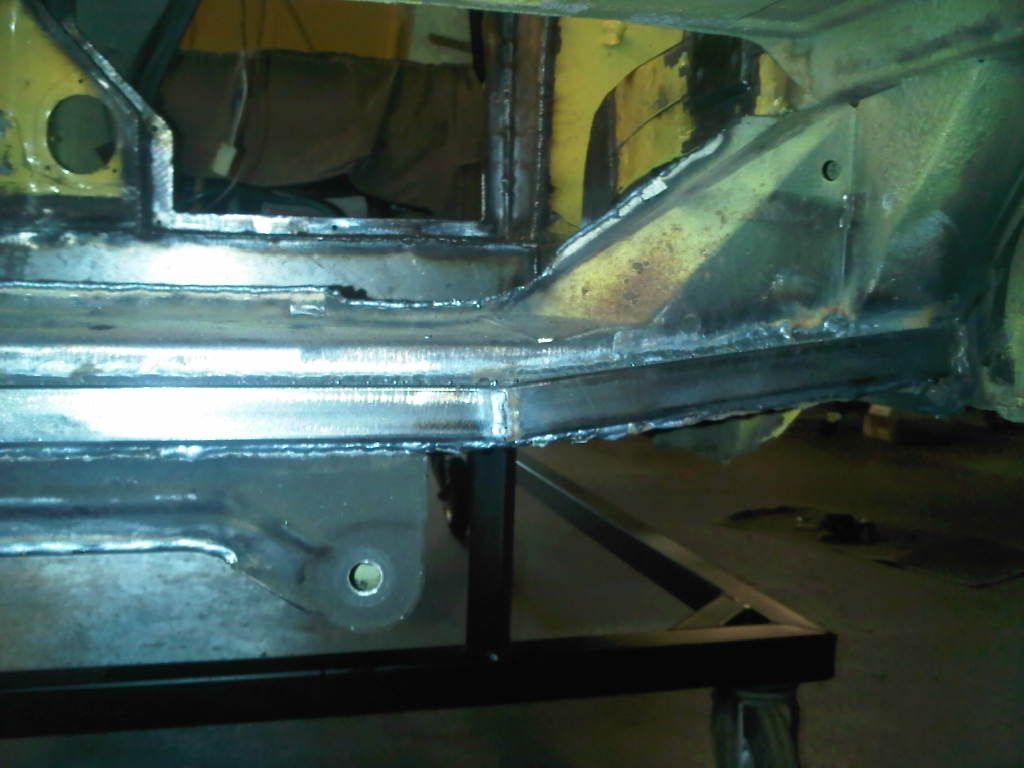
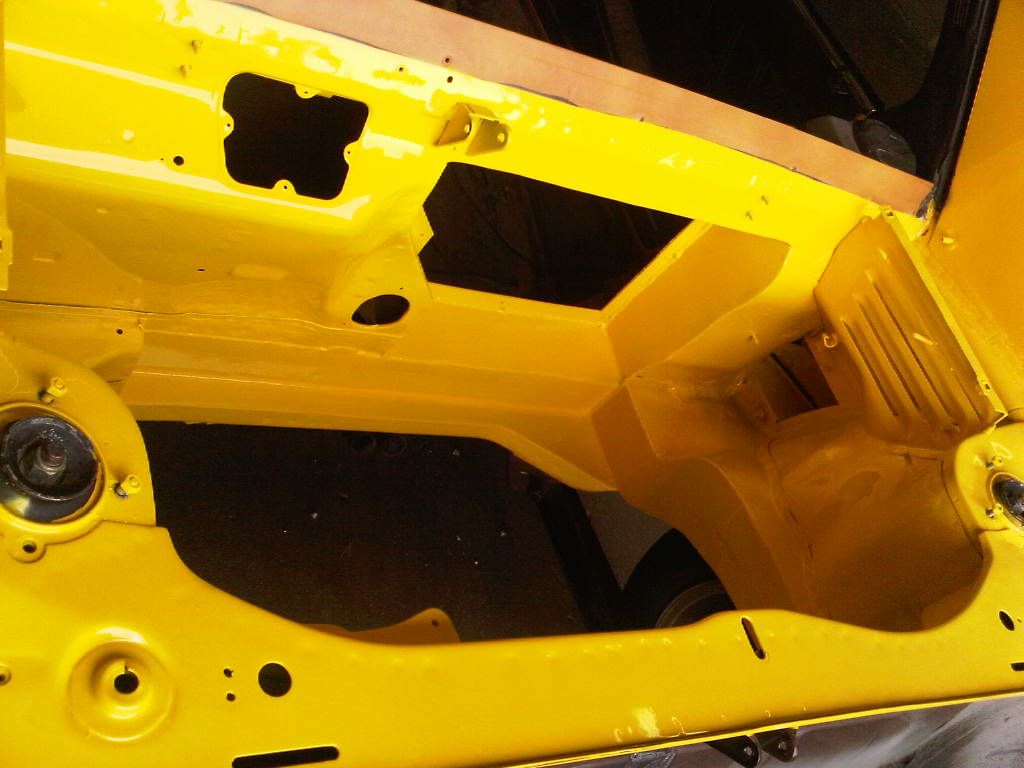
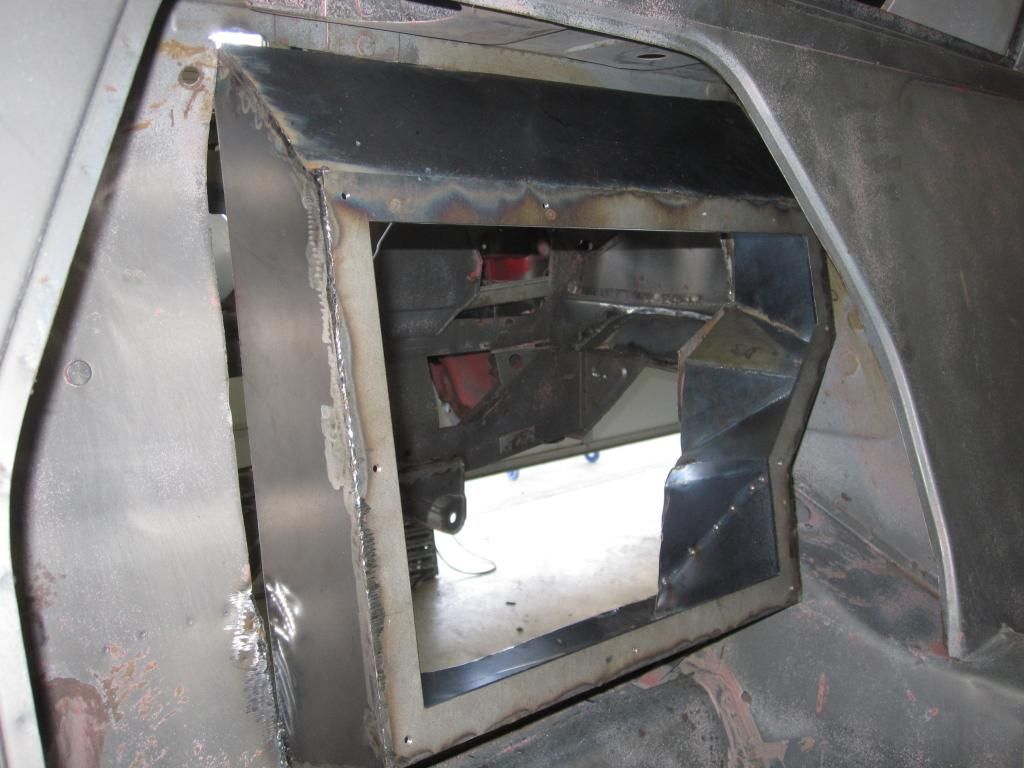
My '81 shell was already at the body shop when I decided to turn it into a K20 conversion two weeks ago. I ordered the 1 Stage kit and some Koni coil overs from Matt and it's on the way. I hadn't even started to look for an engine when I get an email last Thursday from Gerald (Roobus) that he found a wrecked 2002 RSX Type S on Craigslist right here in Olympia. Turns out it was only about 15 minutes from my house. The engine fired right up and sounded great. I bought the whole car that night for $3K and had it towed to the body shop the next day. They had dropped the engine out by end of business on Monday and were already busy cutting up the firewall and frame rails. No turning back now.

Initial prep work 07.JPG
IMG_0934.JPG
IMG_0933.JPG
Initial prep work 08.JPG


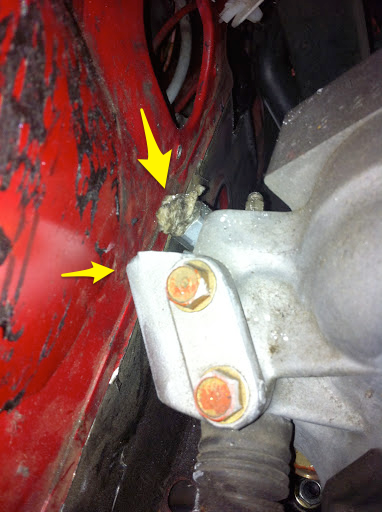
Went up to Gerald's this afternoon to take pictures of his K20 and to go for a ride. Holy sh***, that thing really get's up and goes. :shock: It will take me a while to get mine together as I have to rebuild the whole car but I am really pumped. I can't thank Gerald enough for finding the engine for me and for sharing his knowledge of his K20.
 
Last edited:
Sausage, Laws, and K20s

I suppose I will never get used to seeing this phase of the K20 conversion, where significant portions of the engine compartment and structure are cut out.

I just don't have the confidence that it can ever be put back as strong as the original structure. But I'm no automotive or structural engineer, so what do I know.

I guess for me, I have to add "K20s" to that proverbial list of something one should never see being made!:eyepop::shock::)

Best of luck with the conversion!
 
Last edited:
Yes, the first cuts are squirm-inducing....

The first cuts look like you're destroying the car.

And to leave it like that, it would have no strength.

Once the replacement panels are welded into place on every box section that was intruded into, you get a little more sense of security.

IMG06597-20130424-1453_zpsef0ed2ce.jpg


Then seam-welding the pick-up point brackets and the rear transverse cross member assembly.

If you consider that from the factory, all of these panels are just spot-welded together, the seam welding alone performs a tremendous improvement to structural rigidity and spreading the load across the chassis.

IMG05009-20120817-2001_zpsa050306a.jpg


The final result is good and strong:

IMG11204-20130521-1257_zps1ab96ff2.jpg


-M
 
Very Nice

Having owned a 2002 RSX-S for 8 years, I have always wondered what my X would do with a K20.
I will follow your conversion with envy :)
Good luck!
 
I second what Matt says. Yes metal leaves but you add metal back and your seem welds (done right and per Matt's readme) and it's stronger than before. There are more gussets replaced here as well so no need to worry. I kept the custom subframe/engine cradle attached pretty much the whole time and while I welded metal back to minimize any flexing, etc of the body.

Looking forward to this conversion thread as well...!
 
Good score on the RSX!

That's the way to do it...hear it run before you pull!

Does Midwest Bayless give instructions or templates on the notches required? I would love to see everything involved in prepping the engine bay.
 
I took a ride in Jim McKenzie's K20...

and it scared the hell out of me. VERY stable acceleration. Very fast. Never felt anything like it, especially in an X.
Sets you back in your seat quite securely. Surprisingly smooth shifting between gears as well. I'd love to own one but
that level of toy is out of my budget range, unfortunately. No twisting or instability that I could detect.
 
maybe

it's just that I'm a scary driver :)

But you are correct, with Matt's design no flex or roll at all.

Matt those pictures look vaguely familiar, am I right?
 
From your pics...

...it looks like you have a nice rust-free shell.
No rust to be seen inside the cut members. These areas can really rust, at least over her in salty Europe.
 
I got lucky with it

I found it on ebay in Northern CA. It had sat outside for years and had a couple of surface rust areas but I had the seller take several pictures of the usual areas and they all looked good. Buying a car sight unseen on ebay was definitely a risk but I took a chance. I was very pleased as I stripped it, how good the body was.
 
Progress report

The K20 kit arrived from Matt and it is exquisite. The quality of the fabrication and welds of the subframe and engine mounts is amazing. The shifter mechanism blew me away with how well thought out it is. And the custom axle shafts to go from the Acura inner CV's to the Fiat outer's are the icing on the cake. Kudos to Matt for a first class product. Here are some pics of the shifter.
IMG_1014.JPG
IMG_1012.JPG
IMG_1013.JPG


The shell went off to the media blaster for several days but as soon as it was back, the shop had the subframe installed and welded together, and the engine in place to check clearance on the cuts that they had started. Just need to open up a bit more on the left frame rail for the transmission and a little more on the firewall to give better access.

After media blasting 03.JPG
After media blasting 02.JPG
IMG_1067.JPG
IMG_1065.JPG
IMG_1063.JPG
IMG_1062.JPG

Here are some pics of the shift mechanism installation. There is a frame that is welded to the tunnel and then the shift mechanism is bolted to that with small Allen head screws. The shop spent a lot of time checking the console position before welding the frame.
IMG_1070.JPG


I should mention the body shop that I am using. It's called Resurrection Auto Body in West Olympia. It's owned by Shawn Patrick and his love is doing restoration and custom work on older American cars. I found out about him through a friend of mine who is into the local hot rod scene. His only experience with a Fiat before mine was a paint job on a 124 Spider that he did a few years ago. The guy who is doing most of my car is Kris, and he is really loving the whole project. He seems to be really getting into the appeal of the X1/9 and I may end up selling him my '79 once I get this project done. Needless to say, he wants to do a K20 on that one. Shawn's nephew Donnie also works there and he is a total Honda nut, so he is loving this as well. He will be a great resource when it comes time to figure out the wiring.

That's all for now.
 
Last edited:
BZ

In spite of my blasphemy about cutting the shell to make room I have gotta say that Matt's kit just OOOOzzzes quality.


bravo-zulu.jpg


Will be following this with interest
 
Be sure you have them check the tank outlets for clearance (around the sub frame) and the handbrake cable cover (the one that holds the pulley wheels).

Looking great and moving along FAST!
 
Thanks for the tips.

I am waiting to get my gas tank back from the radiator shop doing the cleaning and sealing. From what it looks like from underneath, it seems like there should be plenty of room, but I will definitely check. Thanks.
 
Keep the pics and progress reports coming!

Even though I can't imagine doing this conversion myself (I love the sound of Italian engines too much, what is that...?!?!?) I'm really enjoying this thread. :)

Cheers,

Rob
 
Progress report 2: closed up frame rails

Dropped by the body shop on Friday. Kris had closed up all of the frame rails and enlarged the cut on the driver's side to clear the transmission. We also decided to open up the firewall opening a bit more to give better access through the "box" in the spare tire well. Matt's kit includes the frame and cover for the box, so once we got the opening finalized, Kris started making the box. Lot's of trial fitting as there are lot of angles, plus the sides taper from the frame to the firewall opening.

IMG_1095.JPG

Right side

IMG_1096.JPG

Transverse frame rail below opening in firewall

IMG_1097.JPG

Continuing to the left just short of the original fuel pump location

IMG_1098.JPG

Left side

IMG_1101.JPG

Final firewall opening

IMG_1102.JPG

Box

IMG_1104.JPG

Trial fitting of box in spare tire well

IMG_1106.JPG

View from the engine bay

I also spent couple of hours playing with set of Euro bumpers mounted to Doug Martin's custom made mounting brackets to get the final position nailed down and to locate where to drill the side holes in the fenders to attach the blades. I definitely would not want to do this after the car was painted as there is a lot of fiddling to get them right.
IMG_1087.JPG
IMG_1092.JPG

 
Last edited:
Looking good...

I am curious why you opted to build the opening box so it slants down at the top?
IMG_1104_zpsi66zdpgw.jpg


Hard to say if you are losing important room (to service the engine). Maybe the top of the alternator. IF you have to service the water pump, you will use the panel opening to get at at least 4 of the water pump bolts (there are like 8 bolts that attach the pulley cover).

Also when you test fit the engine, be sure to have the clutch slave cylinder ATTACHED to check it's clearance against the fuel tank firewall. It is tight. I opted to switch to a banjo swivel fitting and it saves about 3/8".

Pasted_Image_3_8_15__10_17_AM.png


Pasted_Image_3_8_15__10_19_AM.png
 
Back
Top