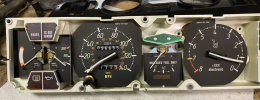
I had downloaded this same 3D file and was planning to print them out and install them on a instrument cluster Jeff was good enough to provide. I read about a guy who did it, he uses the original base, gently preyed off the needle then super glues in the printed needle to the old base.

I think FDM will work but will move to a .2mm print head.

Hmm, I think you downloaded a different file. I made these models myself. Correct, the base is the original base, you only need the needle. I'll report back when I print some in FDM white and will also do a set in SLA. The SLA ones shouldn't need much post processing.
 
Last edited:
Wouldn't be tres cool if they can print the needles with glowing material like the stuff in watches and gun sights?
That glow in the dark resin is available, but as a casting resin. I haven't seen it as a print material.. Would probably be of limited value though, as it needs to 'charge' in the light and only glows for a short time. Plus gauges are backlit anyway...
 
I had to print a few things at work today, so I added a speedometer needle to the mix. The black base is as it came from the printer, the needle has two coats of white Rustoleum bonding primer. This is done on a Stratasys polyjet machine. I don't think these part are all that well suited for the more common FDM machines (the ones using ABS or PLA filament).

The center of mass is a mm or so away from the pivot point according the SolidWorks; a bit more than that after I painted the needle. The needle fits on the original injection molded base as well as on the 3D printed one. STL files attached in case anyone wants to play with these.

View attachment 25329
Oh man, you have access to a Polyjet? Those are absolutely phenomenal. Prototyping Solutions was here a few weeks ago and showed off some of the extremes of what can be done with Polyjet... it's incredible.
 
Since interest was basically zero in going in as a group to have new needles molded, I've moved forward with printing my own. I know previously I was skeptical than FDM would work, but after many, many, many attempts and fiddling with settings I finally got good prints coming out. Here's the results:

2021-10-28 16.38.02.png


2021-10-28 16.38.17.png


2021-10-28 16.38.30.png


1635465507700.png


As with my first print, perfect fit and weight! I'm going to do some final surface finish cleanup. I'll try fine sanding and acetone. I think sanding will probably suffice. Total print time was 6 minutes per needle.

For the 3D print recipe, I found that ABS printed better/smoother than PLA. 240 deg extrude with a 115 deg table. I also needed to use a brim to keep it from lifting off the table after a couple of layers. I'm super happy with the results.
 
Here's the procedure and final result:

I marked the existing needles in their resting position with some tape.

1635475049456.png
1635475088860.png


Then firmly pulled them off. The Tach needle took a significant amount of force, I was concerned I was going to damage the tach. I then did some final sanding of the needles to get them as pretty as possible with 2000 grit sandpaper. Very easy.

1635475213702.png


Using a Dremel tool with a small bit I ground off the staked plastic and pulled off the needle from the black bases.

1635475288539.png
1635475313892.png


I put the new needles on the black bases and heat staked the posts with a soldering iron.

1635475420842.png
1635475435348.png


Then it was a matter of carefully positioning them and pressing them back on the spindles.

1635475810296.png


You need to be careful not to push them on too far. I found that they can go down far enough to interfere with the Phillips Head Screws.

1635475869181.png


BEFORE
1635475569290.png

AFTER
1635475580758.png


The whole process took less than an hour, including removal and reinstallation of the instrument cluster from the car.

1635475616441.png
1635475629322.png


KICK. ASS.
 

Attachments

  • 1635475470243.png
    1635475470243.png
    475.6 KB · Views: 84
  • 1635475475869.png
    1635475475869.png
    475.6 KB · Views: 85
  • 1635475480509.png
    1635475480509.png
    475.6 KB · Views: 88
Back
Top