Performing Honda K24a3/AST5 6spd Conversion

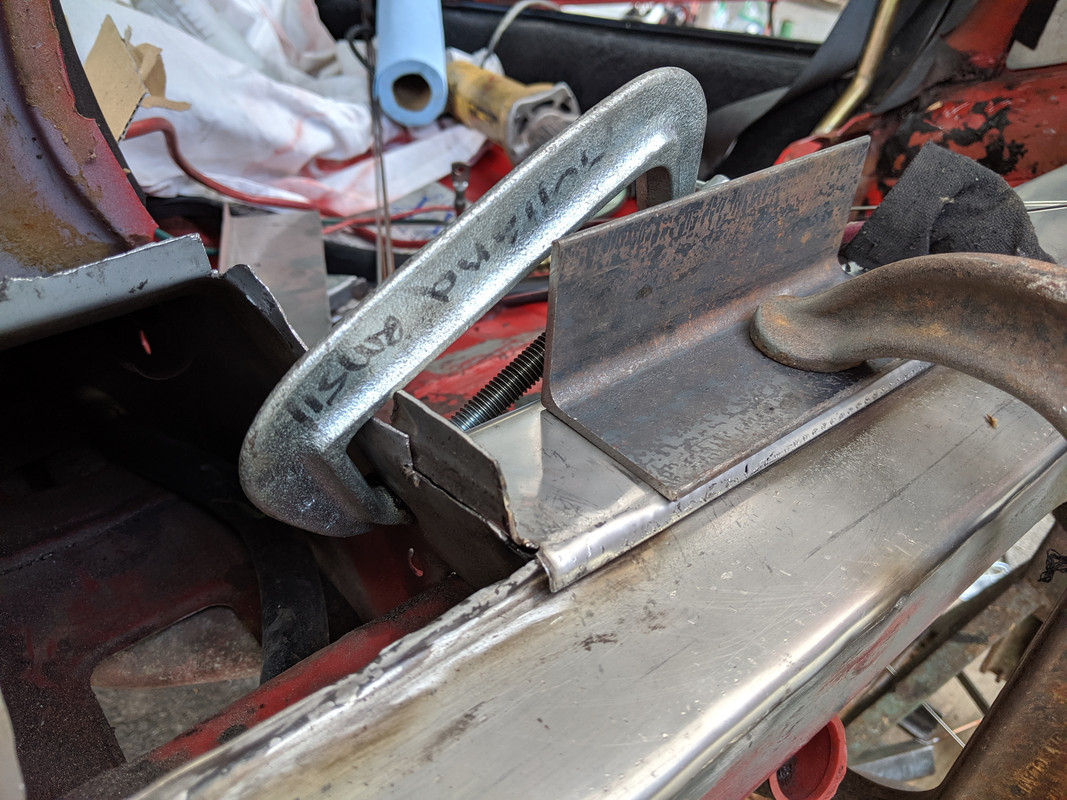
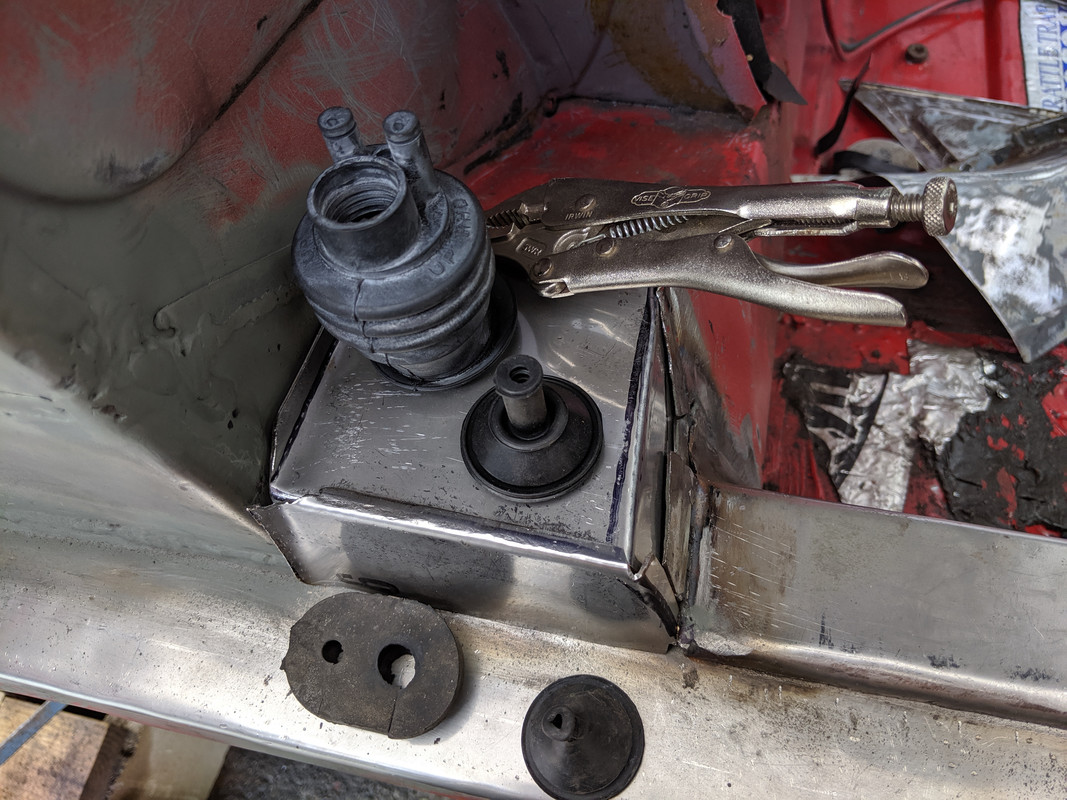
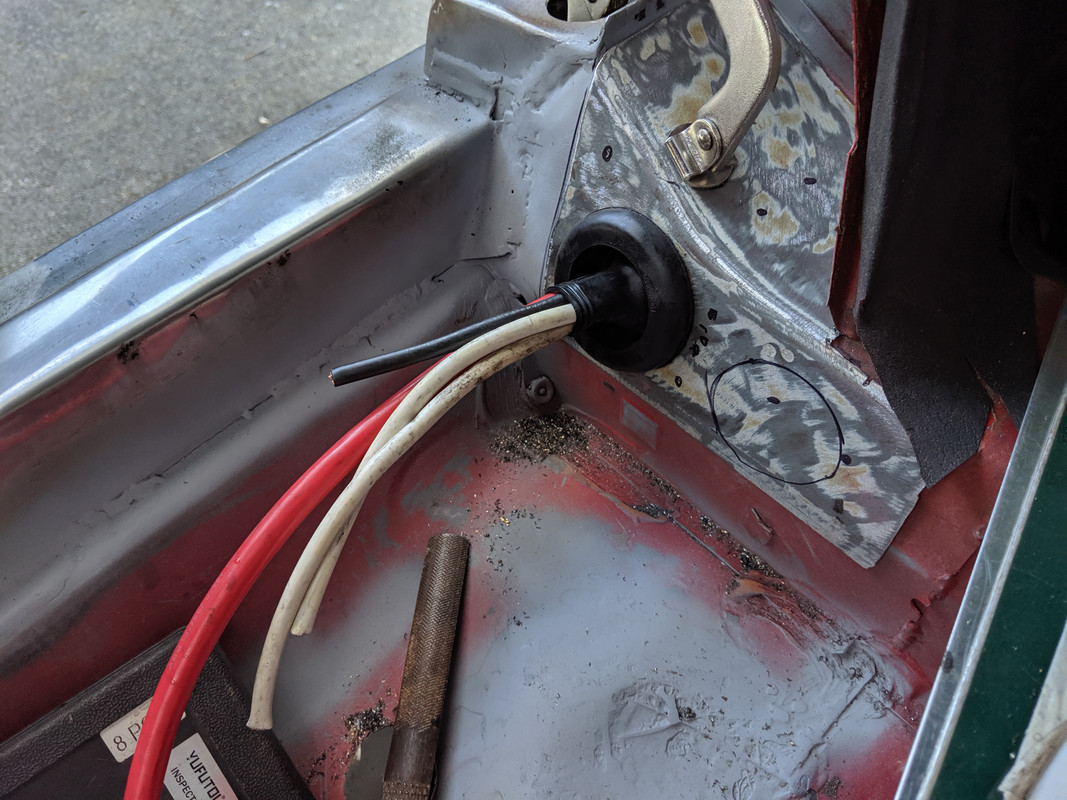
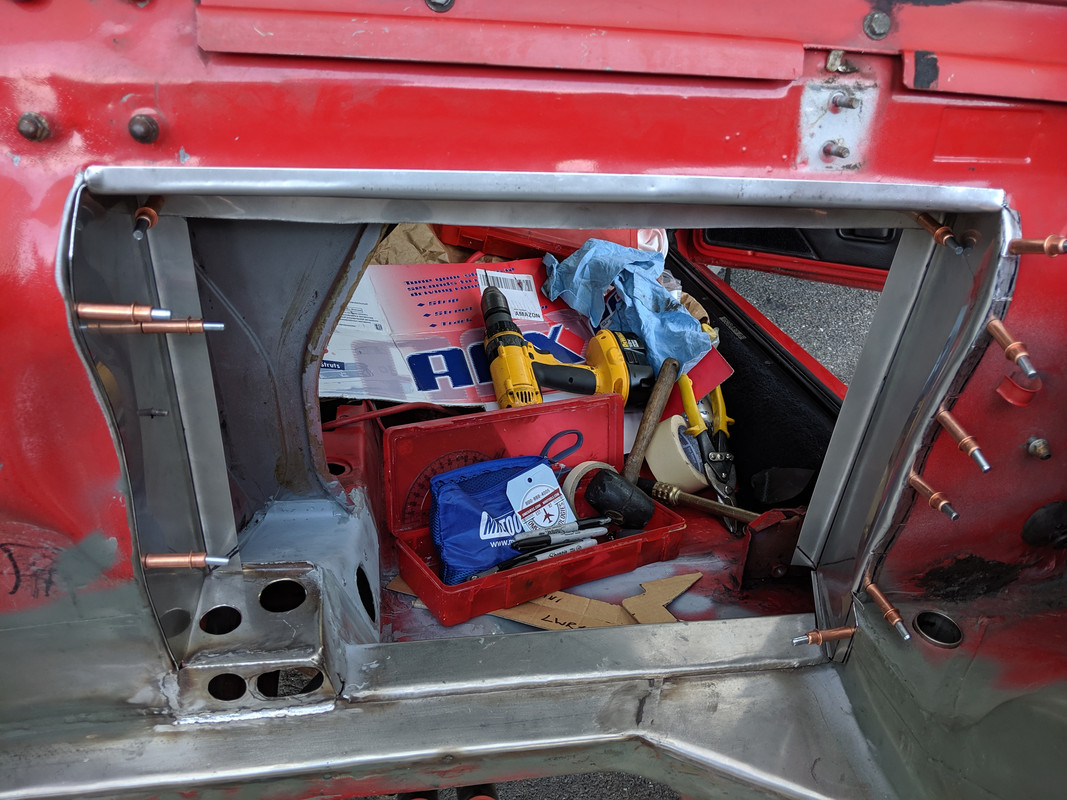
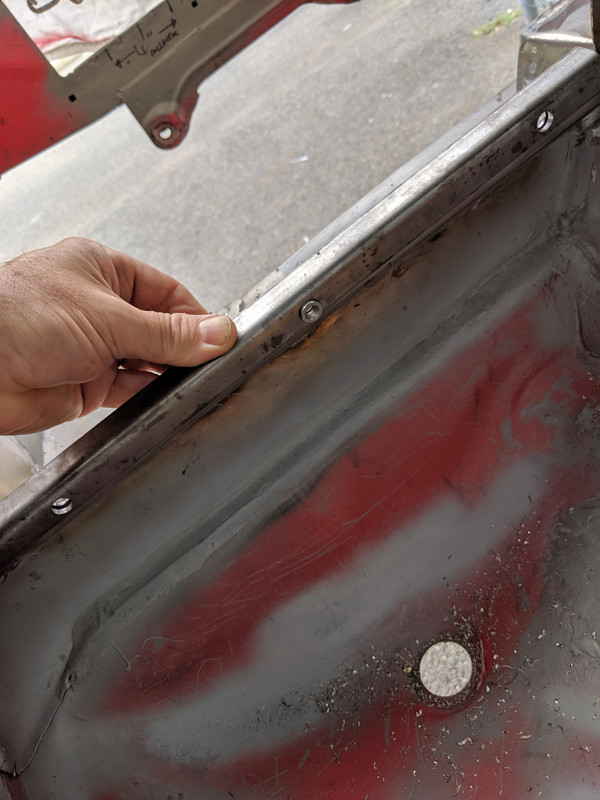
Nice find on the filler neck body seal.

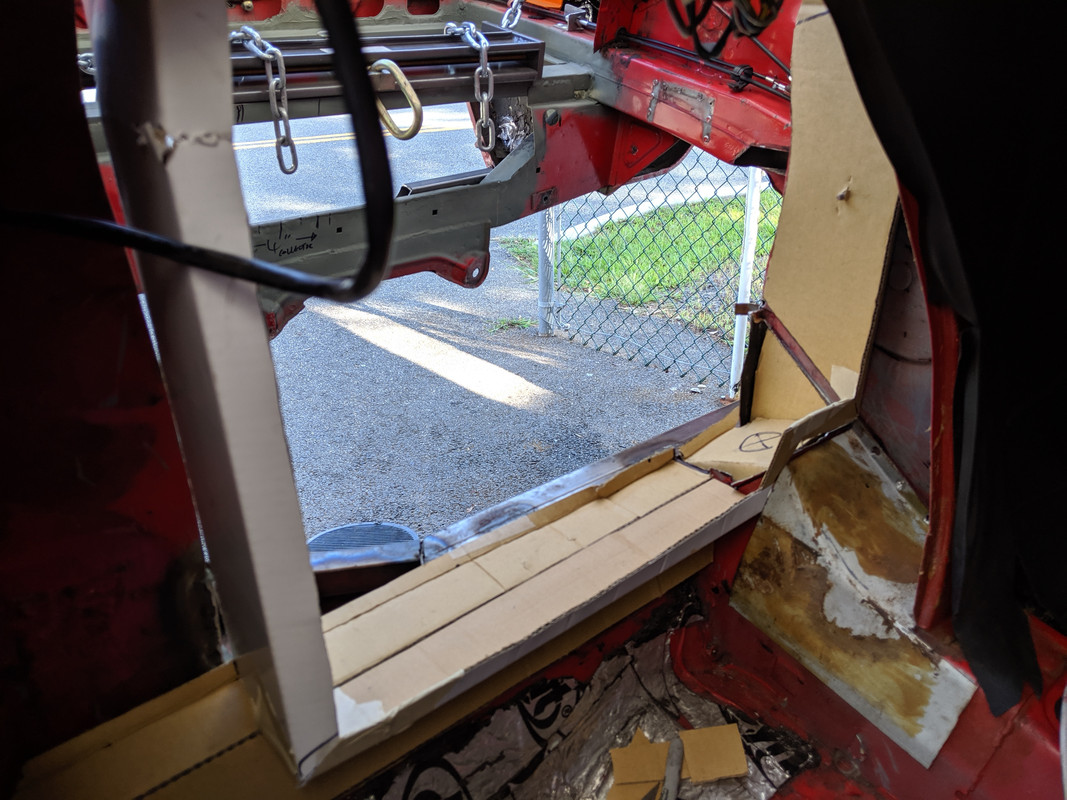
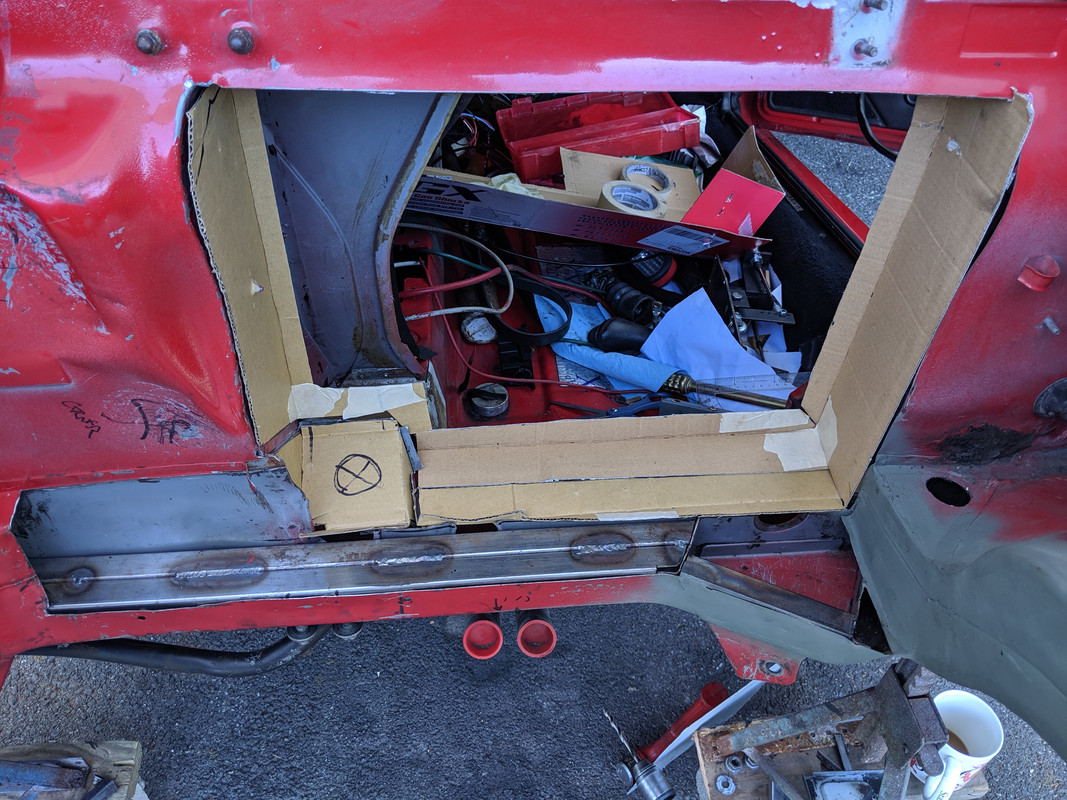
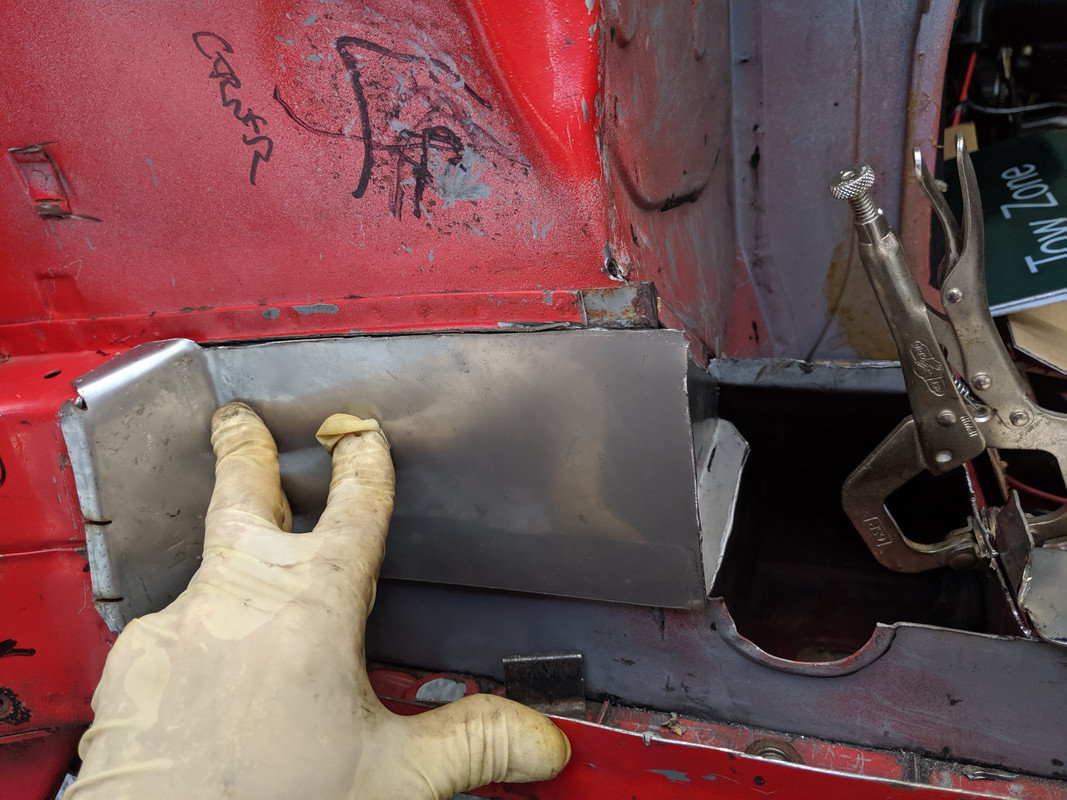
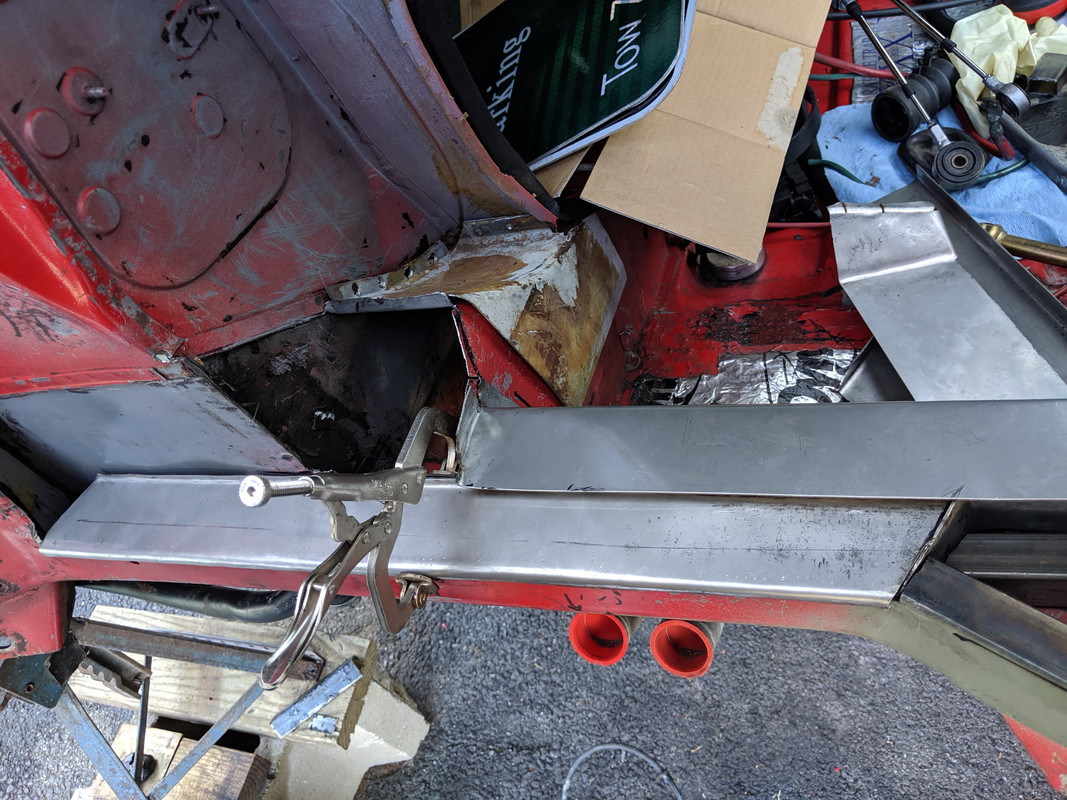
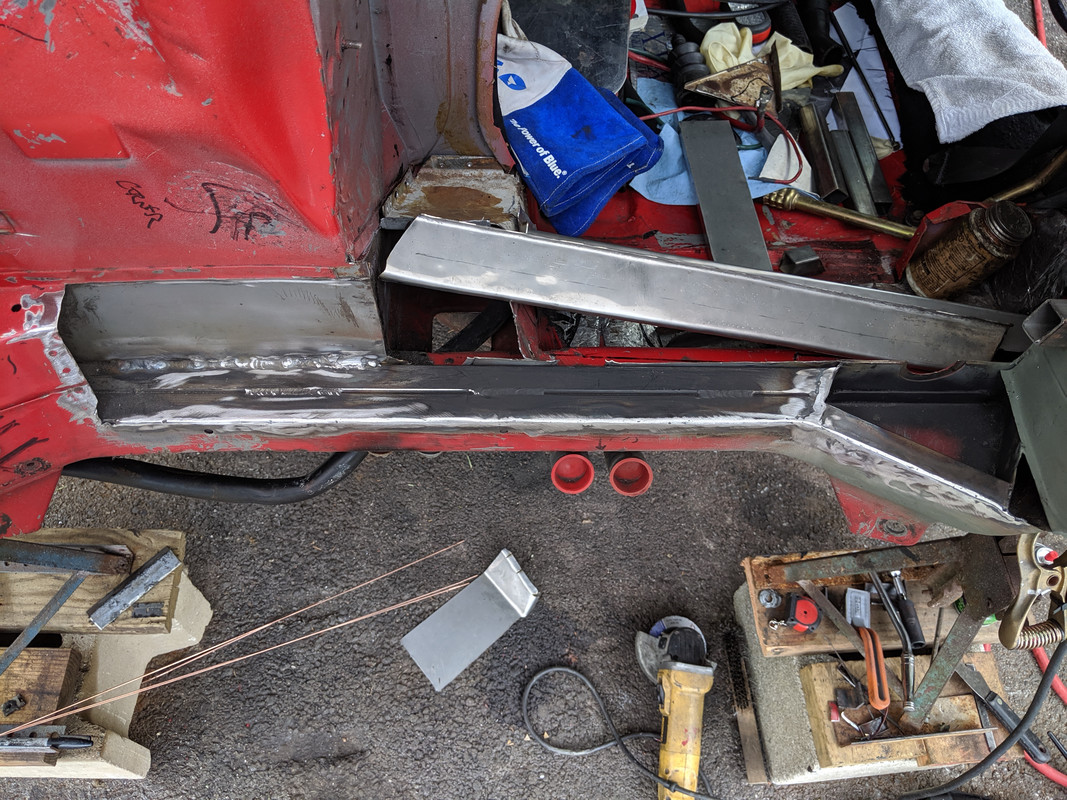
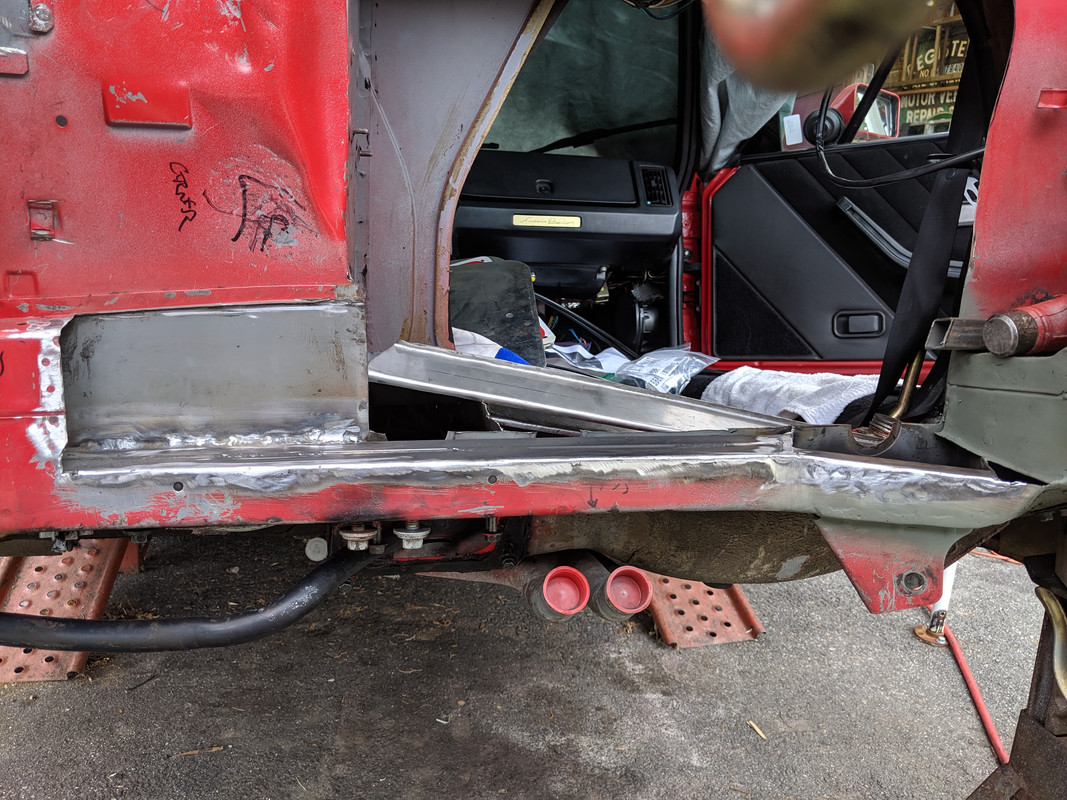
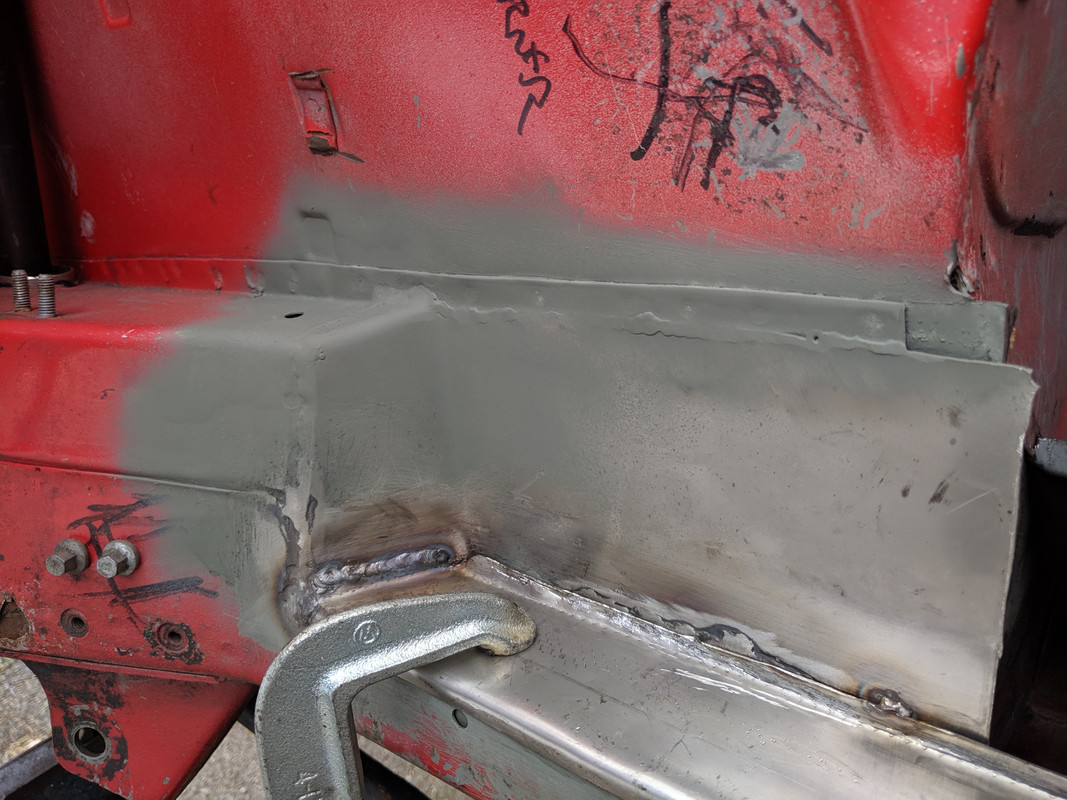
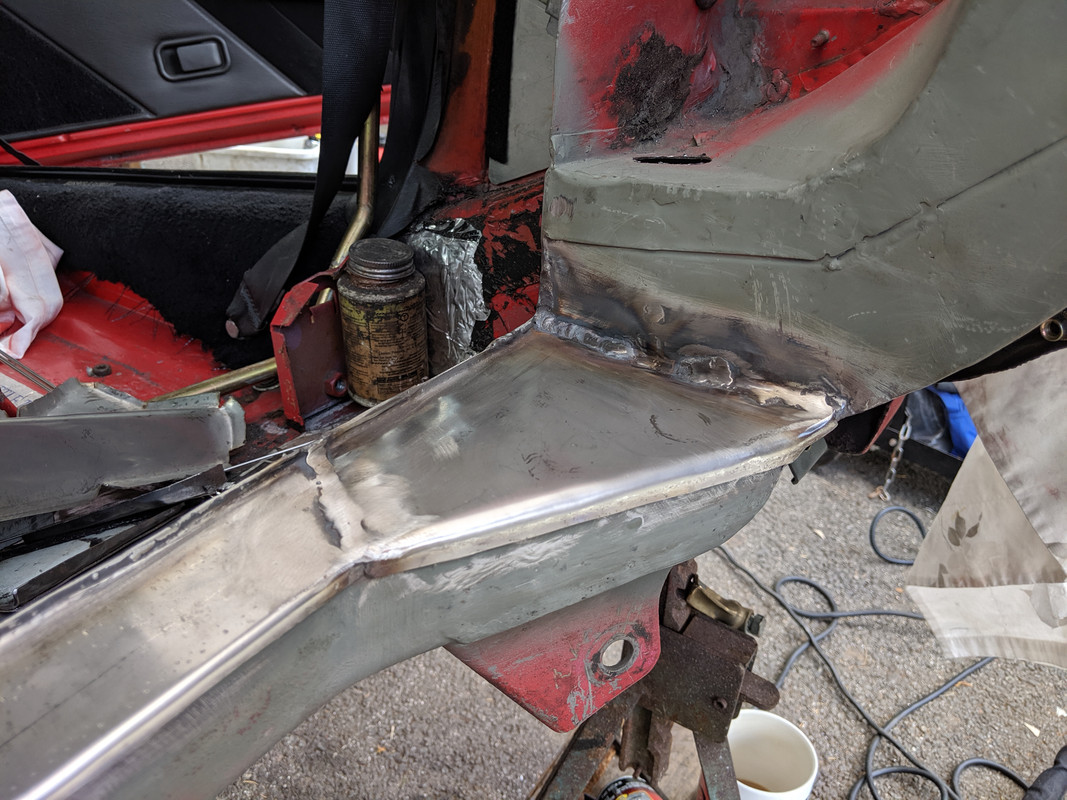
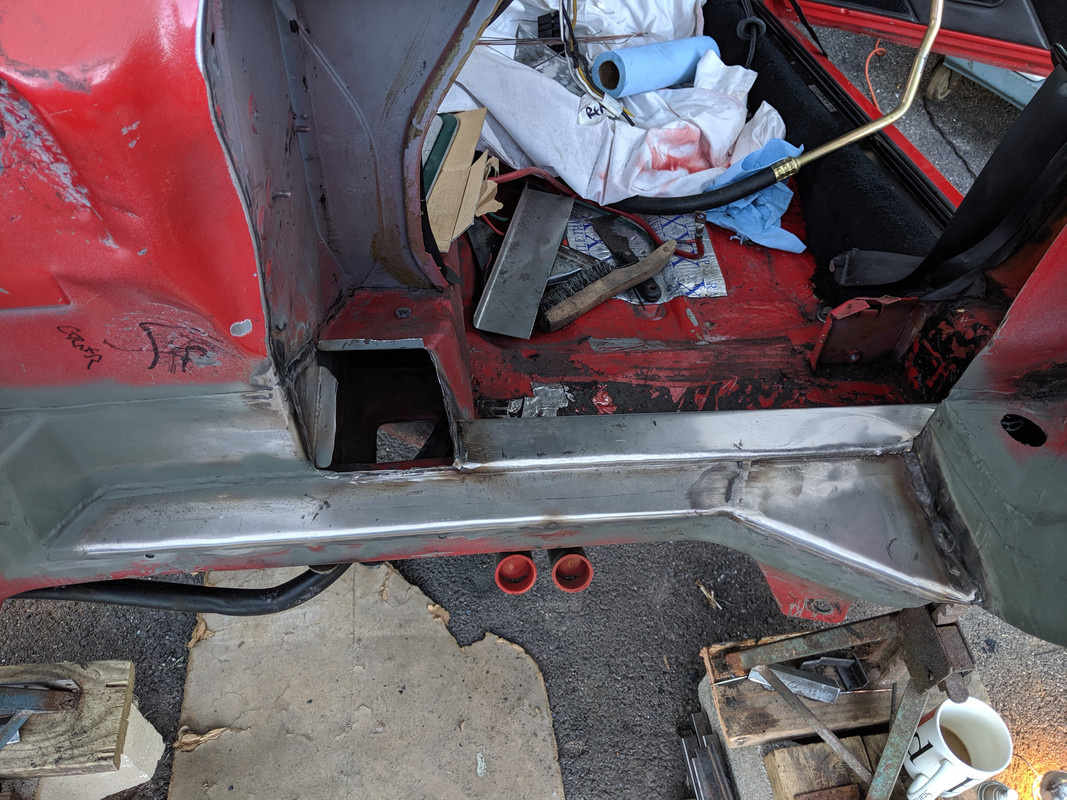
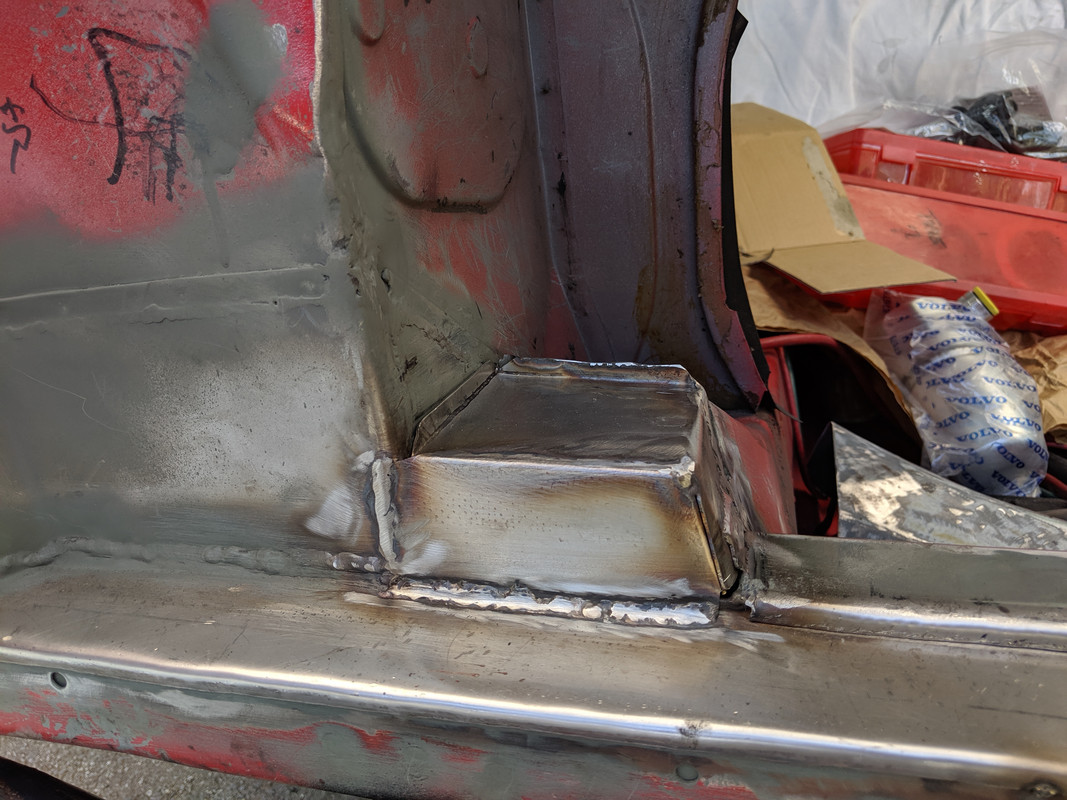
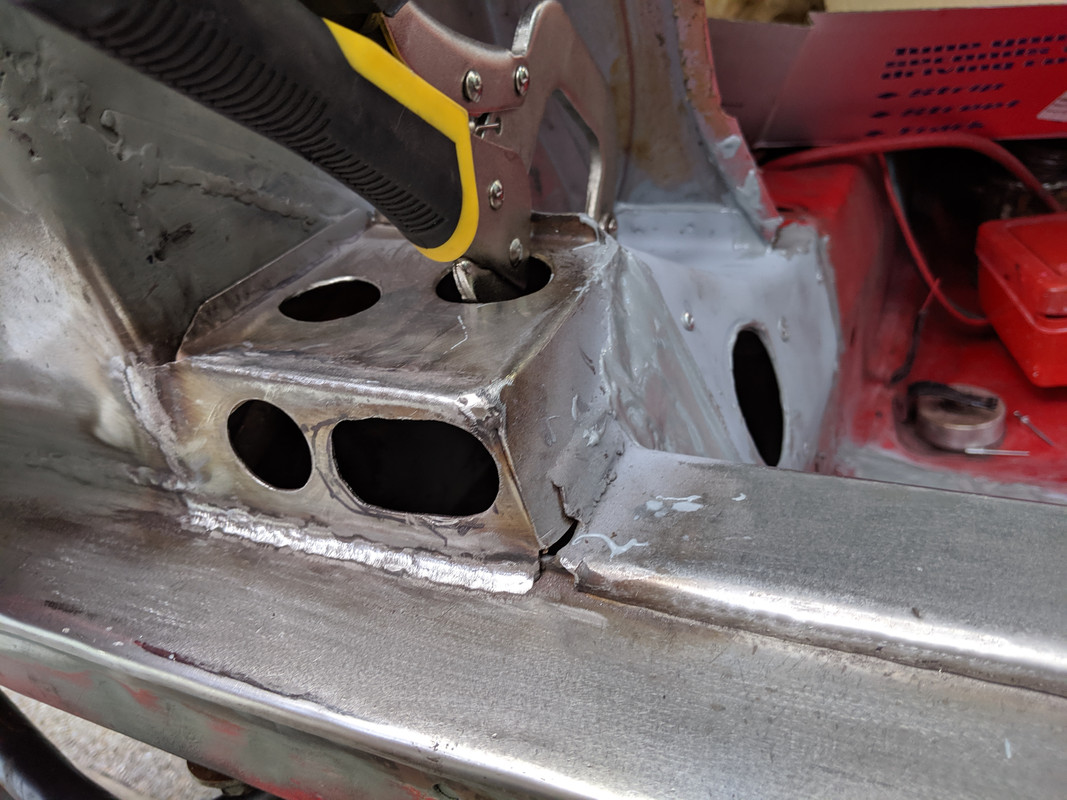
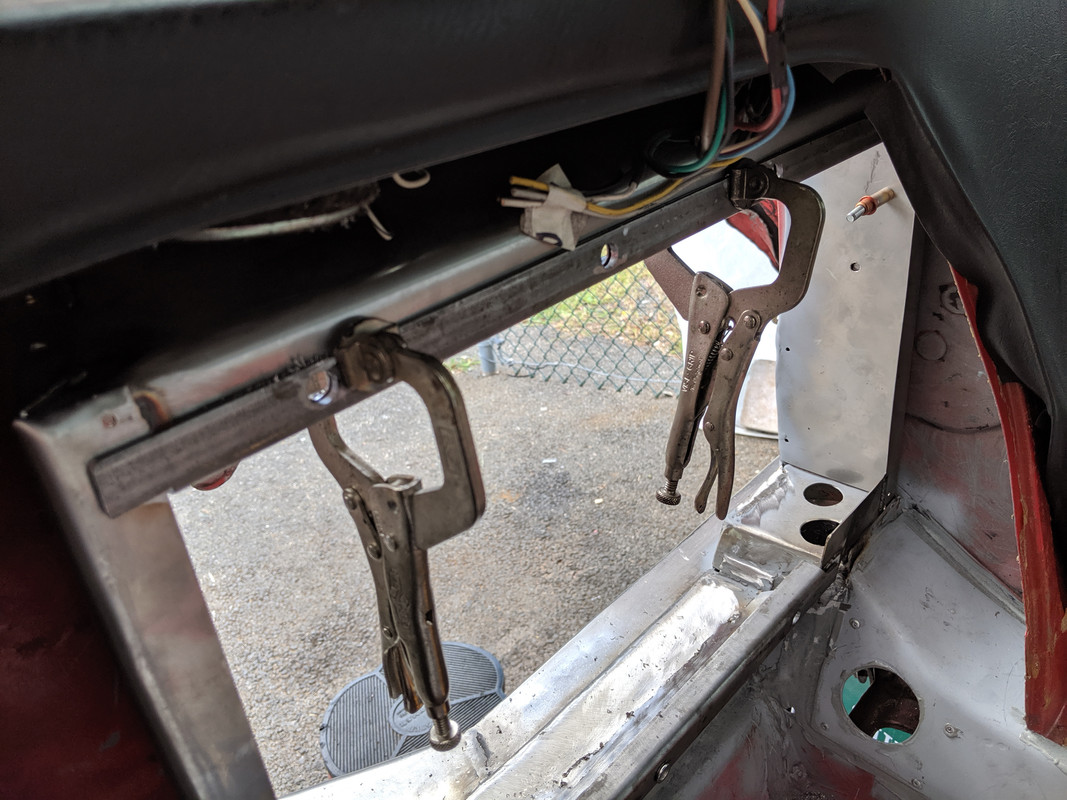
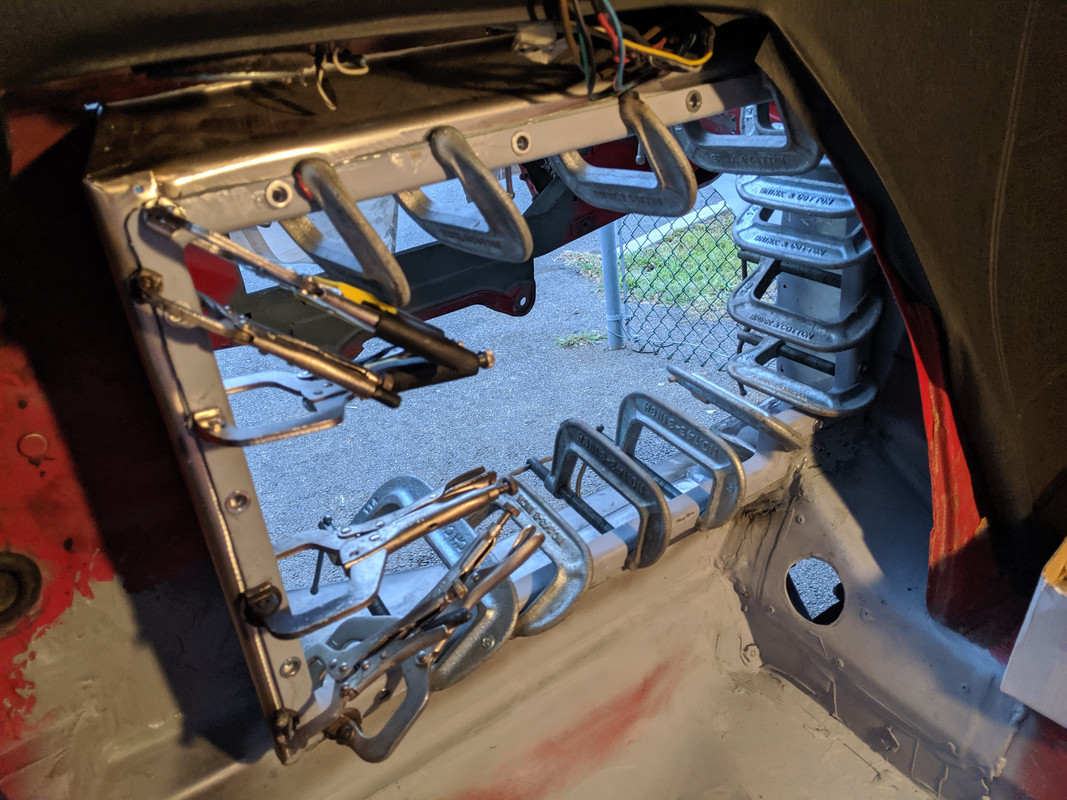
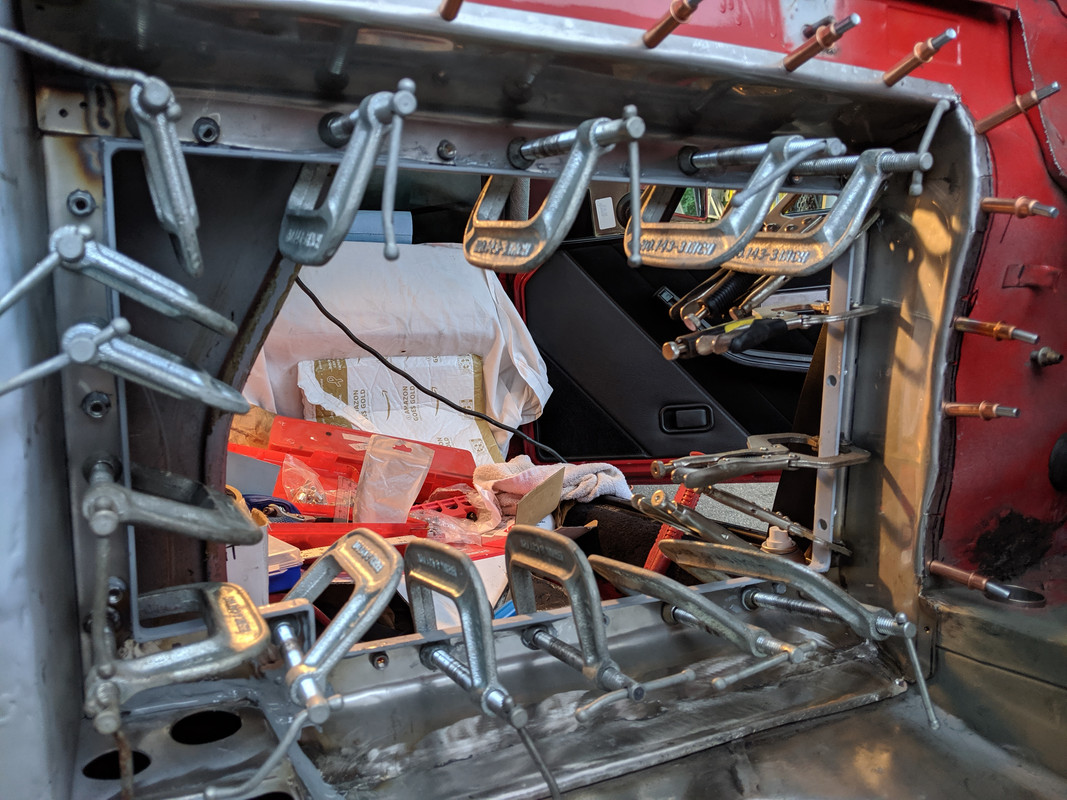
Getting that all welded together looks like fun. How do you intend to join the horizontal area to the vertical area at the right? You have created a strong left to right beam, transferring that load into the side and triangulating for torsion would be of value. Perhaps a surface which closes off this box with a vertical leg which is welded to the vertical using both plug and seam welding along the edge?

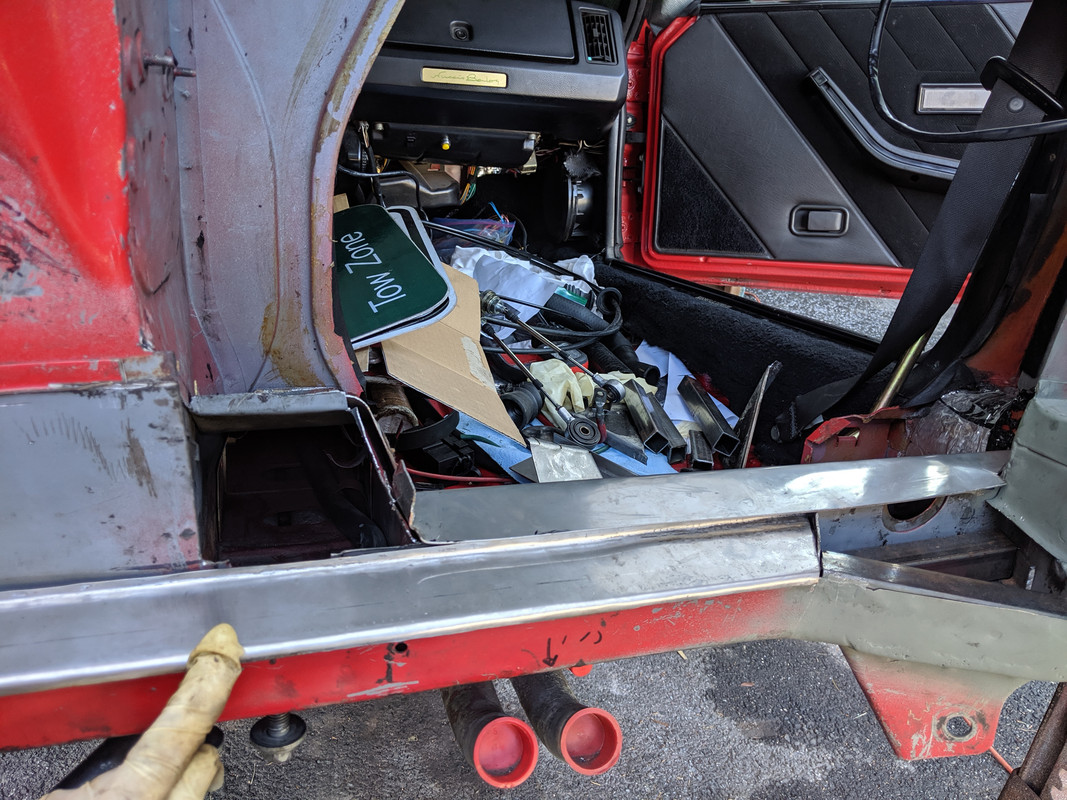
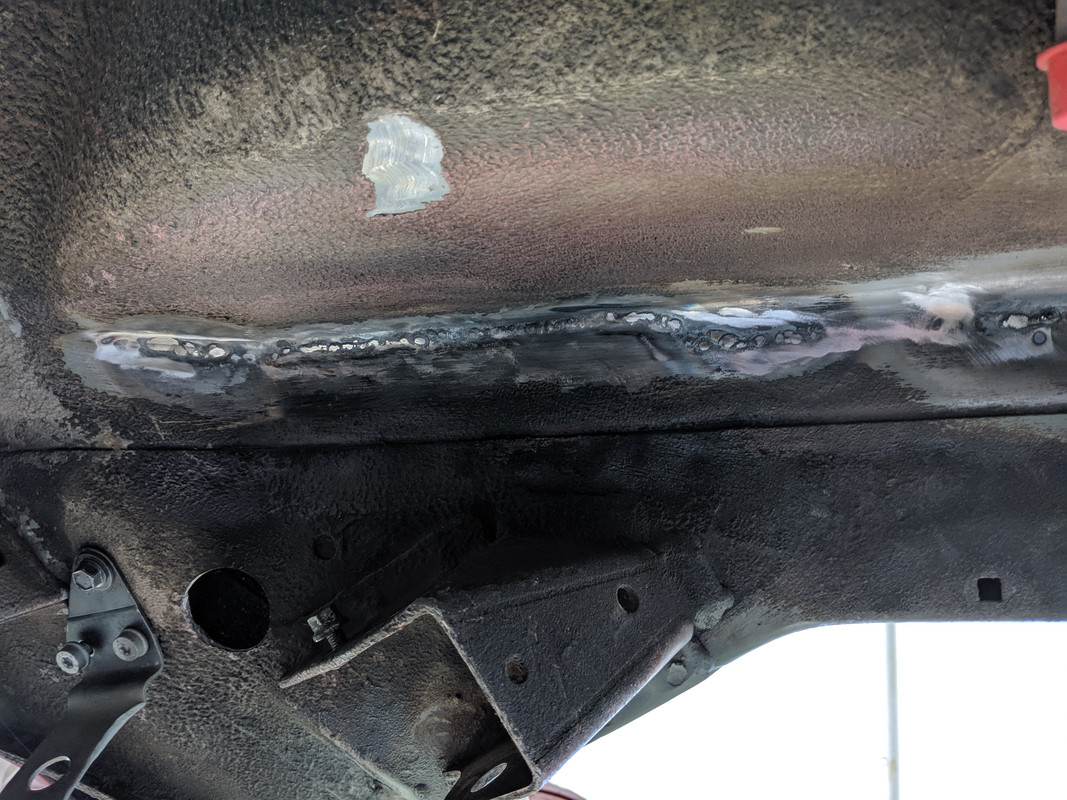
I would want to make some ports to spray a Fluid Film like product into those cavities from above and below. Some of your more northern neighbors swear by this stuff to prevent rust over the long term. This fall I will be doing the ‘new’ Jeep and whatever I end up buying as my daily for the next 20 years to augment the existing rust proofing of both.

https://www.fluid-film.com/

Not sure what you mean without markup on a pic :D 
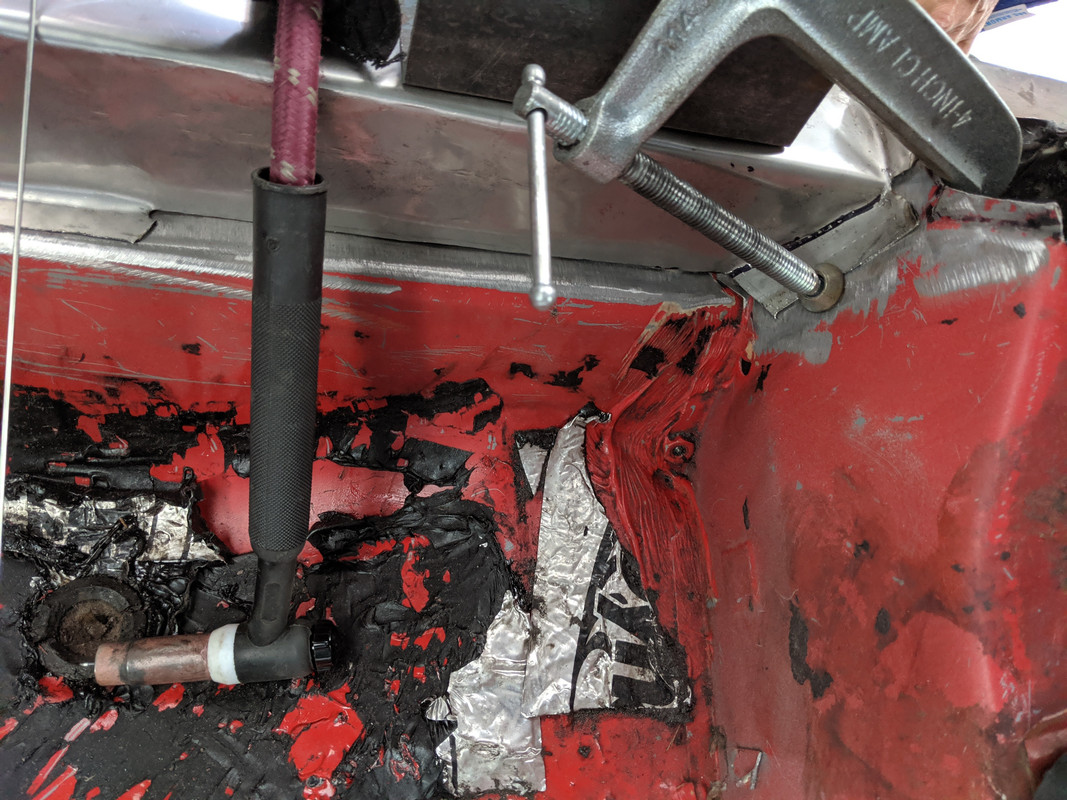
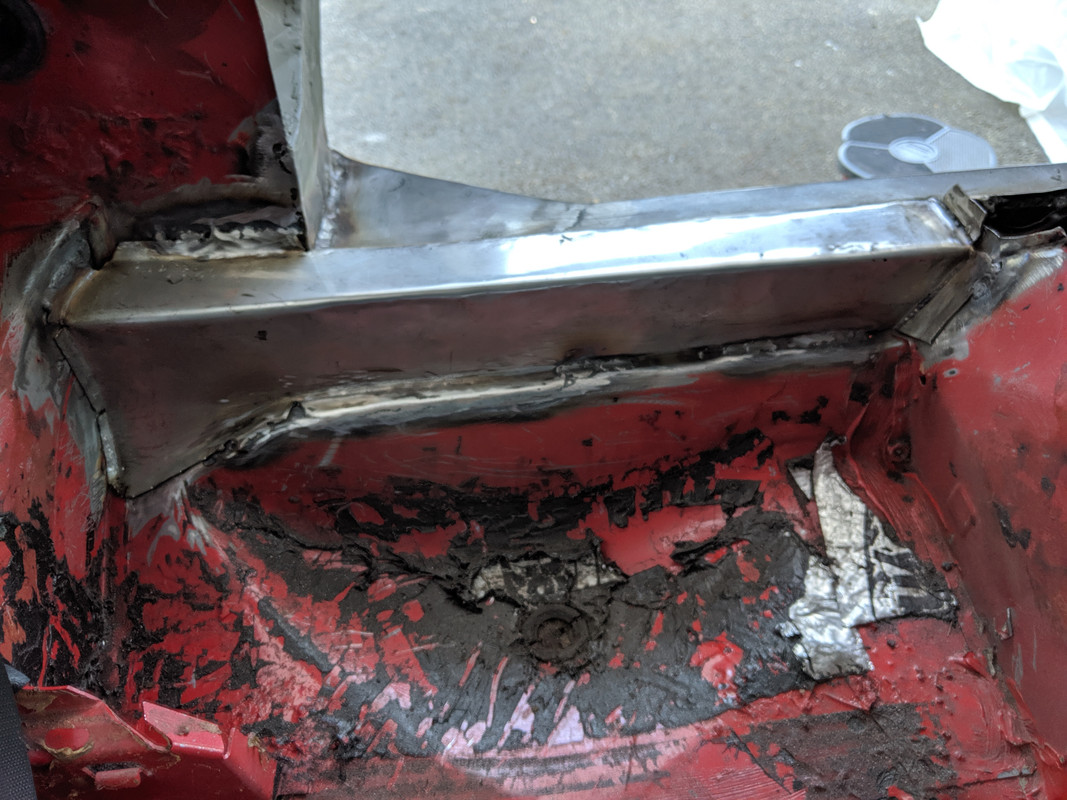
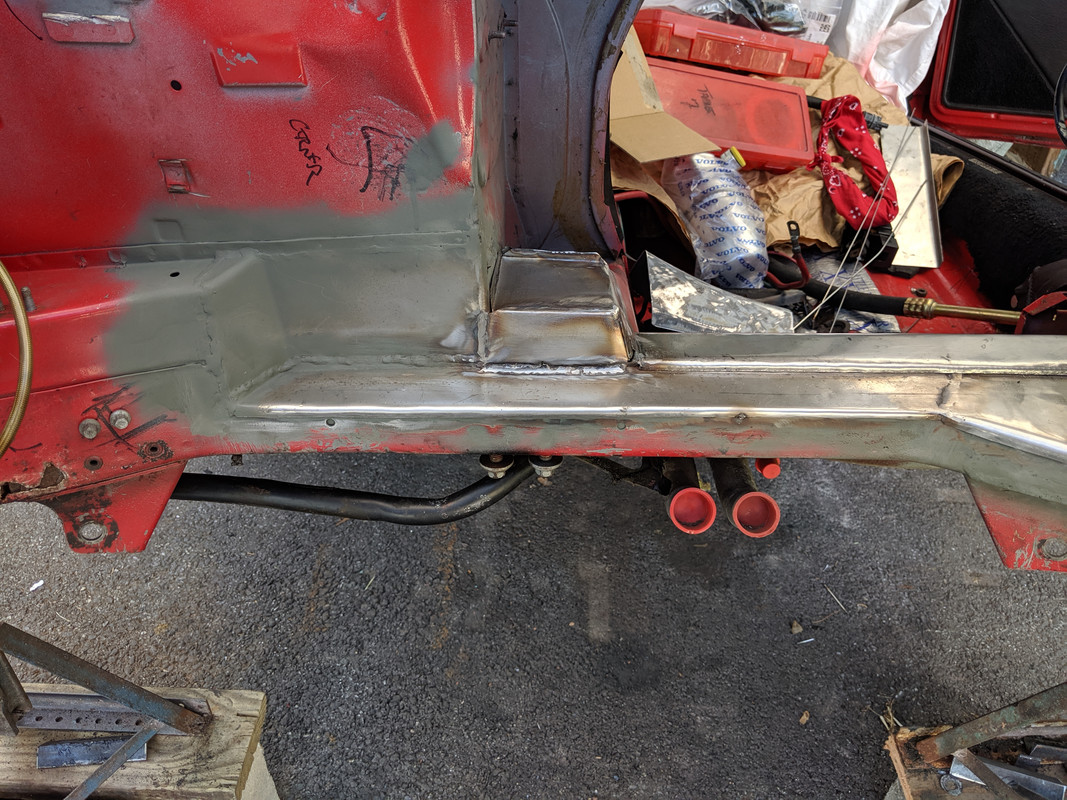
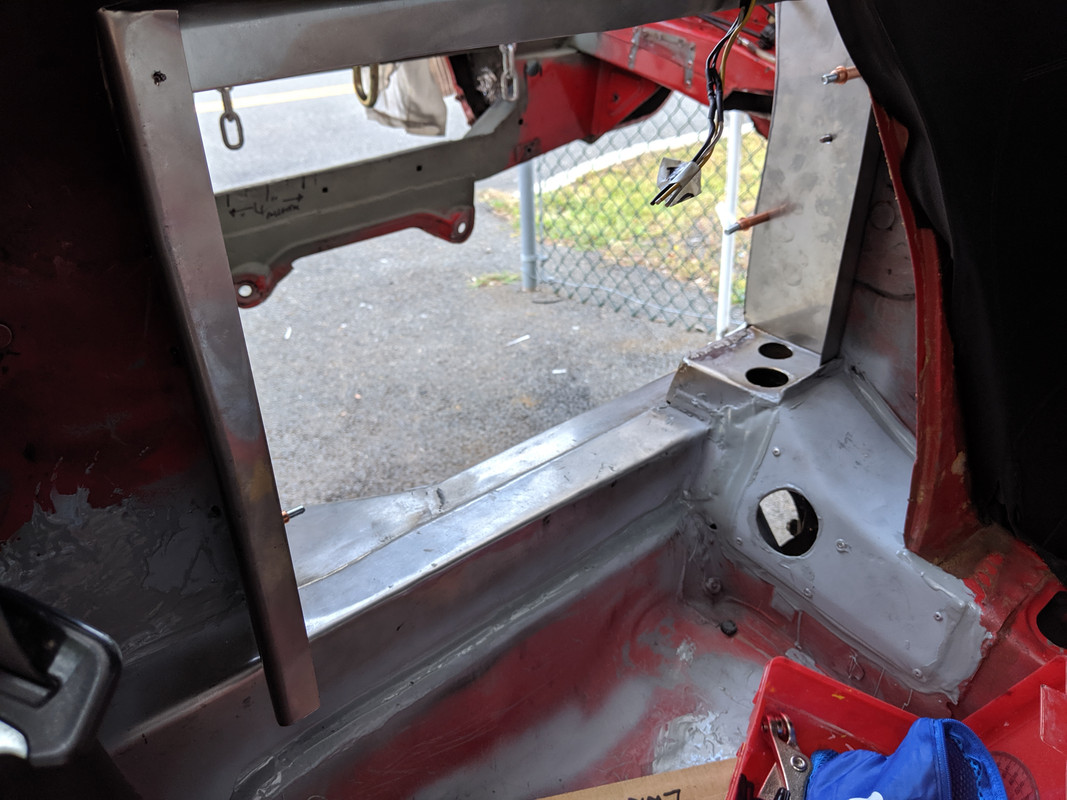
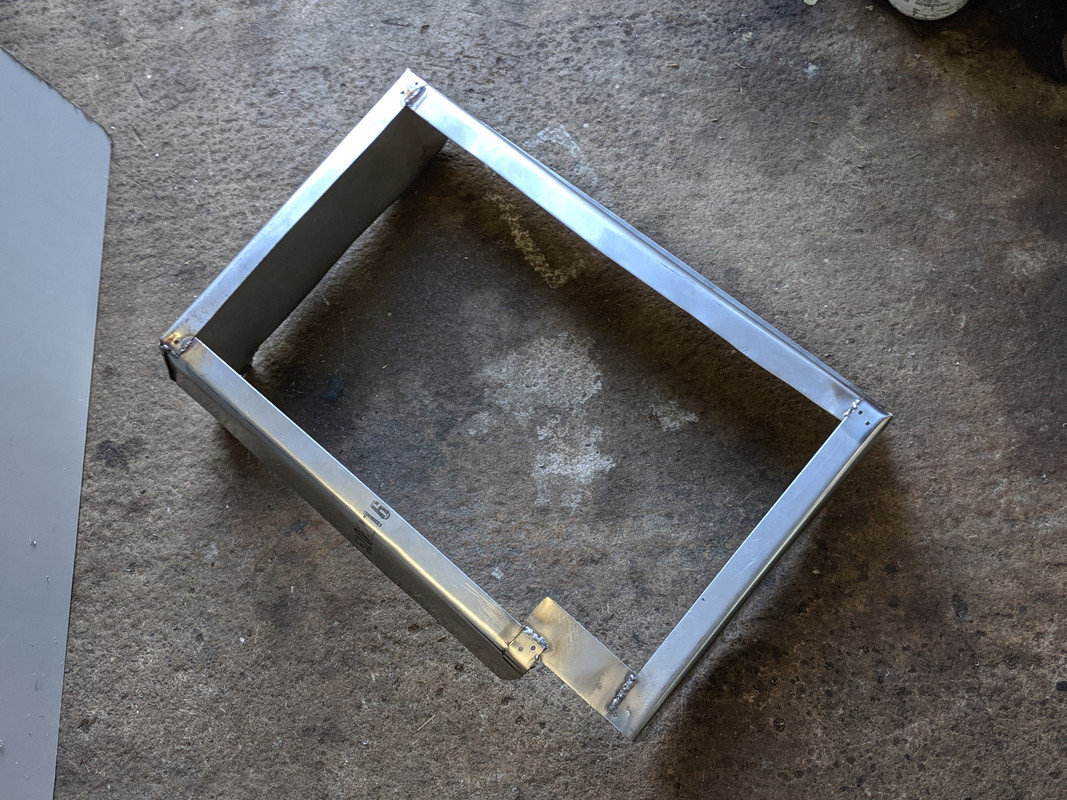
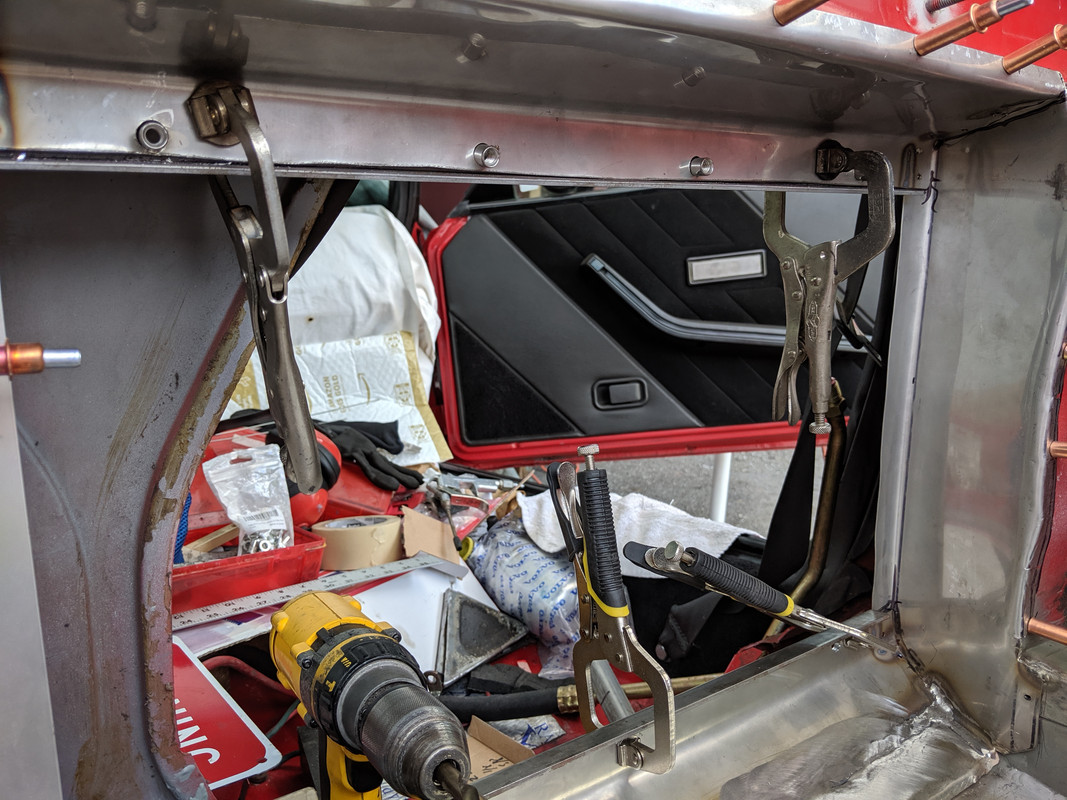
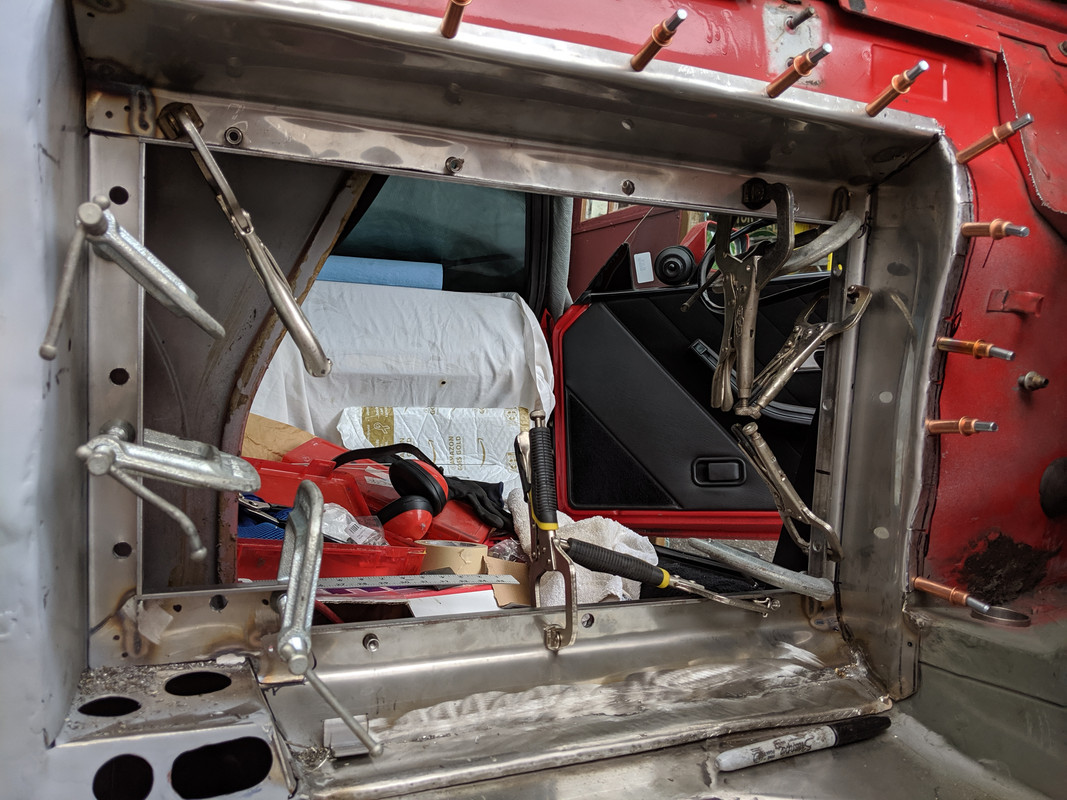
I'll be adding another brace in the right to make a "Y" out of the continuation. The cover will be in two sections, so a short piece welded to the vertical seam and the right side end, then a long section also welded to the vertical & then running from that over to the left side.

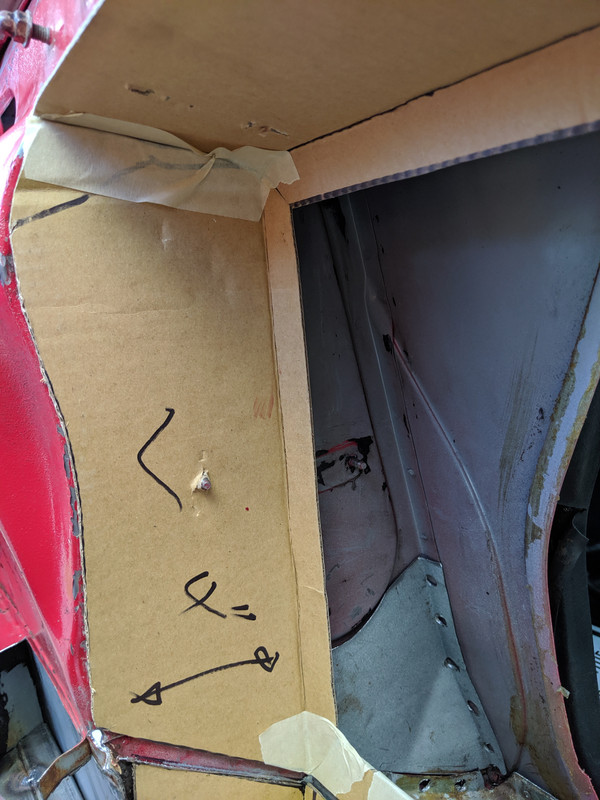
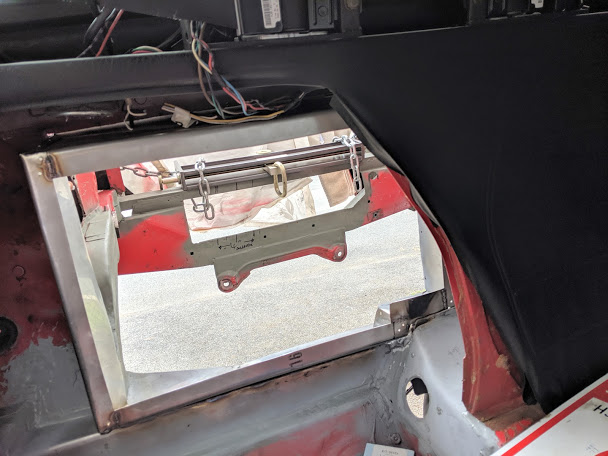
There is at least an inch or so depth below that inserted box section to the lower plate, which has several openings through which I can spray cavity wax. I bought a KBS product. I actually still have some Volvo product from the '80's, comes in several stages, but the original gun is a real pita to clean. I can heat it & apply in semi-liquid form in the more accessible areas though.
 
Last edited:
........
Going to add an inner box section like this, and reconfigure the center area where the harness/ bat cable come through. removing that outer wall makes the clutch slave bleeder readily accessible, and the set-back will move the harness off close proximity to the intake support bracket. I also want to make the aperature as shallow as possible. Only glitch is I didn't measure how far the alternator and the intake runners protrude into the cavity :(

IMG-20190901-170113.jpg

+1,000,000
 
Got a couple hours in after work, focused on the templates for the chassis and aperture frame. Has to be approx 4" total depth for the alternator to clear. White panel was cut from parts car to double-wall the tunnel there.

IMG-20190903-160122.jpg


IMG-20190903-160246.jpg


top will taper down about an inch from the outside - in to clear speakers

IMG-20190903-162132.jpg


IMG-20190903-162518.jpg


IMG-20190903-162522.jpg


IMG-20190903-162532.jpg


IMG-20190903-163554.jpg


outer panel templates

IMG-20190903-170937.jpg
 
Worked on the SS plates based off my templates. I'll weld the outer ones first, since the inner has to go over. Had to form these by hand (as opposed to with the sheet metal brake), so there are dents in the flats from that process :(

IMG-20190904-163331.jpg


IMG-20190904-163404.jpg


IMG-20190904-172705.jpg


IMG-20190904-172759.jpg


IMG-20190904-172807.jpg


Panels will overlap
IMG-20190904-175232.jpg


IMG-20190904-175855.jpg
 
Last edited:
Things are really coming together in the metal shop of Carrozzeria Göteborg :)

Thank you, Dan.

Welded the underside of the brace section, then inserted and welded it in place, after I welded new captive nuts for the subframe in the middle. The original nuts I had previously retapped to M12x1.5, as the fine threads were damaged. That and the insert took the 3 hours I had available after work :(

IMG-20190905-175629.jpg


IMG-20190905-175717.jpg


More tomorrow.
 
Last edited:
Great work, I really wish I could bend metal and weld!

This really is a great performance. On so many levels :)

Thank you.

Reasonably productive today. After I finished the inner seams on the outer panel I set yesterday, I started with the inset panel at the end of the tunnel - it was a nightmare to weld in - getting the right angle for the torch was very difficult here. MAde a bit of a mess of it.

IMG-20190907-163030.jpg


After that I got the right side cap made & welded, with the 1" square tube inside.

IMG-20190907-163024.jpg


Then I cleaned up the well area and clamped the panel in for welding the inner box section. Also a pain to weld.

IMG-20190907-171806.jpg


IMG-20190907-171812.jpg


IMG-20190907-171822.jpg


IMG-20190907-183958.jpg


blistered through the underside. Was hard to keep a smooth flow along the bottom edge & avoid it pushing through

IMG-20190907-183919.jpg


Just have to do the front (outer) edges now, then these panels are done. Next I want to take care of the tunnel end plate.

IMG-20190907-184251.jpg


IMG-20190907-184305.jpg
 
Last edited:
I took a bike ride with my brother this morning, and took a fall off the edge of the woods trail, avoiding some pedestrians. Hit a rut in the dirt & couldn't get my foot out the pedal strap quick enough to stop the fall, so I landed squarely on my back & right shoulder. I wear a Camelback water pouch, so that acts as a great buffer, but I did put my neck out. So, I worked on the tunnel end for just a little bit today taking it easy to avoid straining anything more than I already had. I decided to square it off rather than run the diagonal section, to make sure I had enough surface area to add a few harness / cable / access points. What I'm probably going to do is run a 0 or #1 battery cable to the tunnel end or spare well area, then run the stock Honda starter/alt cables into the cab & join them together through a high amp fused block.

IMG-20190908-142635.jpg


IMG-20190908-142645.jpg


IMG-20190908-160442.jpg


Vertical is just tall enough to fit the stock Fiat battery cable grommet
IMG-20190908-160456.jpg


IMG-20190908-160451.jpg
 
Worked on the wiring pass throughs.

0 cable will come from front, enter well area. Honda cables will come from motor, though outer grommets, through same inner grommet as main cable, then go to a fused bridge. Cut the mottled panel from the parts car to double-skin that area.

IMG-20190909-170904.jpg


IMG-20190909-170605.jpg


IMG-20190909-183613.jpg
 
Worked a little on the aperture framing today. Have to make the lower joining panel, then figure out what of it I can weld with it out of the car.

IMG-20190910-175823.jpg


IMG-20190910-175842.jpg


IMG-20190910-175857.jpg
 
Got the lower panel sorted today. Angled upwards to prevent water accumulation. I angled the right side panel further out on the inside, to compensate for the inner cover panel mount flange.

IMG-20190911-163322.jpg


IMG-20190911-163325.jpg


Pulled out the pieces and reassembled.

IMG-20190911-165301.jpg


IMG-20190911-165309.jpg


Got the sections tacked together enough that I can try to refit it & if that's all good, I'll seam weld it & add another plate thickness to the inner flange to give it additional substance.

IMG-20190911-173925.jpg


IMG-20190911-173930.jpg
 
Last edited:
Only had a short time on it today. The framework doesn't easily fit back in, since it's wider on the inside :D I manhandled it back in. I'll have to deal with adding the opening reinforcement in-situ.

IMG-20190912-170447.jpg


Got the left side welded in, and most of the lower ridge, which is a mess :( I'm going to have to take some time to clean that up.

IMG-20190912-170458.jpg
 
Worked on cleaning up the nasty seam

IMG-20190913-150924.jpg


Then I started on the inner lip of the opening. I don't want to leave it single edged, as I'm sure I will cut myself on it at some point in the future. I chose to add a narrow section angle iron. Got the top & bottom sections cut & drilled for riv nuts before I had to pack up & get one of our cats to the vet. Going to weld the sections as one, then bond that to the lip, with the riv nuts securing the frame while the body epoxy sets.

IMG-20190913-162111.jpg

IMG-20190913-162120.jpg


IMG-20190913-164240.jpg
 
Got the frame opening/panel mount finished today

IMG-20190914-135358.jpg


tacked the sections together
IMG-20190914-143217.jpg


removed, finished the welds, ground clean & primed expect for bond surface. Size compared to MWB panel.

IMG-20190914-162137.jpg


IMG-20190914-162201.jpg


Applied epoxy bond, pressed in place, installed riv-nuts, then clamped to set. Used many clamps as the aperture sheet metal flexes fairly easily.

IMG-20190914-182626.jpg


IMG-20190914-182638.jpg


IMG-20190914-182754.jpg

Before I take on this job it is clear I need to buy more clamps :)
 
Before I take on this job it is clear I need to buy more clamps :)

The issue here is that I elected to make the opening wider on the inside than out, so I couldn't assemble the "tub" outside the car & then install. Doing it that way, I would have just welded the angle flange in place :D
 
Got the frame opening/panel mount finished today


tacked the sections together


removed, finished the welds, ground clean & primed expect for bond surface. Size compared to MWB panel.


Applied epoxy bond, pressed in place, installed riv-nuts, then clamped to set. Used many clamps as the aperture sheet metal flexes fairly easily.


IMG-20190914-182754.jpg
And I thought I had a lot of clamps!
 
Back
Top