Performing Honda K24a3/AST5 6spd Conversion

@Vagone - every time I scroll past your rust pics it makes me cringe - I forgot to clarify that on mine it was just peeled paint. I just had to clean the surface rust off & prime it for now. I think if I was faced with what you have, I would walk away.

PXL_20210307_163146021.jpg


This morning I had a little time to get the left side patches done - still have to do the outer reinforcement
, so I painted it with zinc weld-thru primer for now. I'll grind down the welds inside later.

PXL_20210307_162821488.jpg


Got the right skin tacked in place

PXL_20210307_162941414.jpg
 
@Vagone - every time I scroll past your rust pics it makes me cringe - I forgot to clarify that on mine it was just peeled paint. I just had to clean the surface rust off & prime it for now. I think if I was faced with what you have, I would walk away.

View attachment 44220

This morning I had a little time to get the left side patches done - still have to do the outer reinforcement
, so I painted it with zinc weld-thru primer for now. I'll grind down the welds inside later.

View attachment 44218

Got the right skin tacked in place

View attachment 44219
Aaagh, lucky it was just paint damage and not the holy cancer. Wait until I post the pics of the nose damage I found below the bondo...

I believe we have the same TIG unit the Eastwood TIG 200. What amperage are you using on the skin pieces? I have having a heck of a time trying to fill old repair holes that a body shop used a slide hammer with large wood screws. But even at 20-30 amps I still can easily blow thru the steel. Using a copper backer helps some, but not enough. I am using 1/16" filler, but I only have 3/32" tungsten. I'm guessing I need to order 1/16" tungsten to match (as recommended on the chart). But I am also trying to fill areas that have rust damage and are paper thin in some places.
I've had some success trying the MIG, with .023 solid wire and the lowest voltage settings, but it also can blow thru with a 1/4 second bursts.
I'm about to bust out the old Acetylene rig I haven't used in years and the smallest tip I have hidden away somewhere and braze it with brass.

I'm using 28-30amps, with 1/16 tungsten. The 3/32 is just too much. I also converted to water-cooled torch - not that I need it for these small pieces, but is does make handling the torch easier on the longer/heavier runs that it looks like you will be running into.

This is the tungsten I have been using
Thanks again as always. I kind of figured that was the issue. I tried different grind angles, but it didn't help much. I found that if I dipped the rod in the arc when it starts, then made a mole-hill around the hole, I could then remove the rod, and swirl the arc, moving and blending the puddle around the edges. The mole-hill would absorb more of the heat. Then I come back and flap-disc grind down the hill. Worked some of the time but it is tedious. Just ordered the 1/16" rods.
I've been pretty happy on the thicker parts, like the suspension pickup point reinforcement, using the flux core .032 wire MIG and cleaning up the micro splatter. I was hoping to use the TIG to just do the body repairs and modifications. Its a new welder and process for me, so a bit of a curve there too. I learned Acy-Oxy welding - brazing plus stick in high school, and have used it since. Mig for about 20 years. Soldering since I was about 10, so the principles are good, just adjusting technique... But I'm just a hobbyist, not a pro by any means. It may be months or a year between needs to weld up something.
UNADJUSTEDNONRAW_thumb_3553.jpg
UNADJUSTEDNONRAW_thumb_3552.jpg
UNADJUSTEDNONRAW_thumb_3561.jpg
 
Thanks again as always. I kind of figured that was the issue. I tried different grind angles, but it didn't help much. I found that if I dipped the rod in the arc when it starts, then made a mole-hill around the hole, I could then remove the rod, and swirl the arc, moving and blending the puddle around the edges. The mole-hill would absorb more of the heat. Then I come back and flap-disc grind down the hill. Worked some of the time but it is tedious. Just ordered the 1/16" rods.
I've been pretty happy on the thicker parts, like the suspension pickup point reinforcement, using the flux core .032 wire MIG and cleaning up the micro splatter. I was hoping to use the TIG to just do the body repairs and modifications. Its a new welder and process for me, so a bit of a curve there too. I learned Acy-Oxy welding - brazing plus stick in high school, and have used it since. Mig for about 20 years. Soldering since I was about 10, so the principles are good, just adjusting technique... But I'm just a hobbyist, not a pro by any means. It may be months or a year between needs to weld up something.

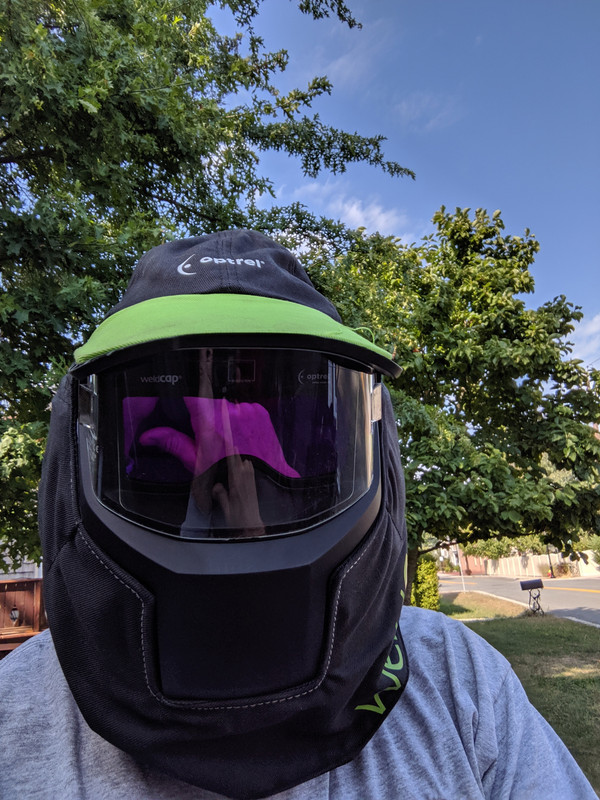
I have had to do this also- working in the wheel well (I didn't remove all the suspension, just the strut & brakes) is tricky for me - my regular helmet is too large, so I'm using the Optrel, which has a cap. The problem with that is, no venting, and I'd say they didn't design it with any consideration for ppl who have to wear eyeglasses. Add the low garage temp, and both my glasses & the mask fog frequently if I don't control my breathing (in the warm weather it's still an issue - just caused by sweat instead). The angle I have to strike an arc at is often less than ideal (the water-cooled torch size is a factor here also), and in those cases, pressing the rod against the butted panels & striking the arc on the raised surface, works to get a puddle started.

IMG_20190923_143937.jpg


I have a cheap MIG, however I wouldn't trust it (or my weld skills with it) at all on expanses of sheetmetal. I also started with oxy/acetylene as a teenager in high school. My problem is also that I can go the good part of a year without welding much, and then I have to refresh my memory on technique. Same problem with paint, I'm going to have to start all over when I paint the rear spoiler & deck lid, I don't remember any technique from when I painted the car 2 years ago.
 
Last edited:
Reassembled the HVAC box - should be going back in in a couple weeks or less at this point.

PXL_20210308_155527549.jpg


Left side repair ready for the strut plate reinforcement - after I seam weld the top horizontal junction

PXL_20210308_170413875.jpg


Got a little welding done on the right repair panel - welded two studs in the bottom left that retain the fuse panel bracket

PXL_20210308_224507673.jpg


added two rivnuts in the upper frame section lower edge to retain the fuse panel bracket

PXL_20210308_224415437.jpg


I focused on making the bracket for the fuse panel, it's been bugging me. I found a fuel filter bracket I had ordered years ago for my old V70 wagon - cut it up & welded a tab to create the 165mm on center span needed for the fuse panel. All the extra wiring loom flows nicely behind it - plan is that leaving enough loom length there so I can remove & pull the panel up if I need to access it at any time in the future.

PXL_20210308_201350128.jpg


PXL_20210308_224630108.jpg


PXL_20210308_224638351.jpg
 
Last edited:
Hopefully back on this Friday - bracket fits OK - now I have to decide how to route the AC line once the wiring is in

PXL_20210309_223804863.jpg


Not sure yet if I'll need to drill a new hole for the AC line - might be too cramped in the stock pass-thru with all the extra wiring

PXL_20210309_144953066.jpg
 
Completed the welds on the right repair panel, and put the strut back in place to check clearance off the proposed reinforcement

PXL_20210312_220008134.jpg


Definitely plenty of room - glad I checked anyway

PXL_20210312_215957956.jpg


got a start welding the right side in place

PXL_20210312_225754273.jpg
 
  • Like
Reactions: NEG
Finished welding the reinforcements - I used the MIG for this, TIG doesn't work for "spot" welding . Pretty sure I'm done welding now, so it's going to be time to put everything back together moving forward :D

PXL_20210313_171231351.jpg


primed both sides, then caulked

PXL_20210313_180937366.jpg


then slapped some paint - these will get Rocker Schutz & undercoat, so doesn't need to be pretty. Hosed the wells down with turps to remove residual crud from the surface of the undercoat

PXL_20210313_210314177.jpg


PXL_20210313_210237433.jpg


primer & 1st coat inside
PXL_20210313_210751888.jpg


PXL_20210313_210135053.jpg


Figuring out the brake line brackets

PXL_20210313_214821162.jpg


never took a pic looking into the rad tub from the front...

PXL_20210313_210405448.jpg
 
Last edited:
Only time for a couple little things - brake line brackets installed, struts & brakes back on. After that, I did refit the rad & AC condenser to check the short AC line layout with the altered rad offset - I will have to remake the #8 hose :(

PXL_20210315_190106372.jpg


PXL_20210315_193746373.jpg


PXL_20210315_195827347.jpg
 
Reworked the #8 hose to the condenser, required a #8 FOR 90º elbow due to the rad/cond re-alignment. I'll work on the #6 hose to the evaporator soon
PXL_20210316_205314721.jpg


ran the hose along the rail instead of along the water pipes - since the dogleg end of the stock hose is gone

PXL_20210316_205308013.jpg


The other end, I had to cut & splice a new section where the original was sliced in the accident

PXL_20210316_205242810.jpg


PXL_20210320_191856127.jpg

#8 straight MIOR was needed here to attach to hose running to compressor.
PXL_20210316_205249904.jpg
 
Last edited:
#6 line with orifice tube figured out. Have to remove & crimp fittings.
Fuse panel installed.
PXL_20210317_210430748.jpg


PXL_20210317_210228506.jpg


PXL_20210317_210329771.jpg

PXL_20210317_210329771.jpg

PXL_20210317_210316594.jpg
 
Last edited:
Had dentist appt. today, so not much time on the car. Made the bracket for the Fan relay, crimped the #6 hose....

PXL_20210318_204736234.jpg


PXL_20210318_204749126.jpg


Check everything fits. I'll have to rework the carpeting for the frunk around all this

PXL_20210318_205611185.jpg
 
Cleaned up, primed & painted the HVAC opening yesterday, and a couple spots tucked up in the steering rack tub. Put the dynamat on the DS floor pan. Got stone chip on the center tunnel cover.

Today, I got the HVAC box back in (NOT fun), heater hoses and AC lines reattached to the evaporator.

PXL_20210320_184015140.jpg


PXL_20210320_184026117.jpg


Had to make a modified feed hose to bypass the original heater valve

PXL_20210320_181446714.jpg


Orignal clamps are still good, so I use them.

PXL_20210320_183043353.jpg


After that, I got the undercoat on the floor & tunnel cover

PXL_20210320_191308754.jpg


PXL_20210320_191315951.jpg
 
Last edited:
I know you know this but it bears saying. Your opening from the radiator box will be a force feed line of water both from the radiator area towards the wheels and the opposite direction from the wheels back through to the radiator box.

What means are you using to hold the down spout tubing to the two openings such that they don’t come off and blast your new electrical system with copious amounts of water?

Yes- I am still considering methods for retaining the tube in the tub cowl. Right now it is an interference fit between the EPDM lip seal, and the silicone tape wrap on the metal tube. I just need to add something to stop the tube potentially walking backwards, although the concertina section creates tension against the tub, so I'm not sure it will move as is. I might just drill two small holes 180º apart & use a hitch/ cotter pin - as long as it stays where it is, it is sealed there. In the outer ducts, I am adding closed cell foam to create a seal around the rectangular tube.
 
Worked on the lights on chime. Figured out I can use the Volvo relay from the 90's models (9148748), so it will chime if the lights are left on

PXL_20210321_224101046.jpg


Had to put the dash back in place to figure out where there is room on the DS to position the relays - will work on the underside flat of the dash cross support

PXL_20210321_152743423.jpg


PXL_20210321_152802218.jpg


Relays wired

PXL_20210321_214904055.jpg


test chime


all tucked away

PXL_20210321_215025378.jpg
 
Last edited:
Only had time to start cleaning up the sheet metal in the corner of the dash - removed the wiper motor & left side transmission, then ground away the rusted edges & did the best I could to strip the surface rust. Royal PITA to get in there AND see it at the same time...
PXL_20210323_210432639.jpg


PXL_20210323_210146687.jpg


PXL_20210323_210208724.jpg
 
Last edited:
Very odd failure. Is that another hole to the left on the inside?

That looks like a job for some of that epoxy to bond a piece of steel over all of that. I need to do something similar to the space above the fuse box which was rusted out in my ‘87. Mine rusted I believe because of the supply hoses to the masters collecting dirt etc and holding moisture on the steel for years.

Fusor its called?
 
Last edited:
Back
Top