Preparing For Dallara Body Kit

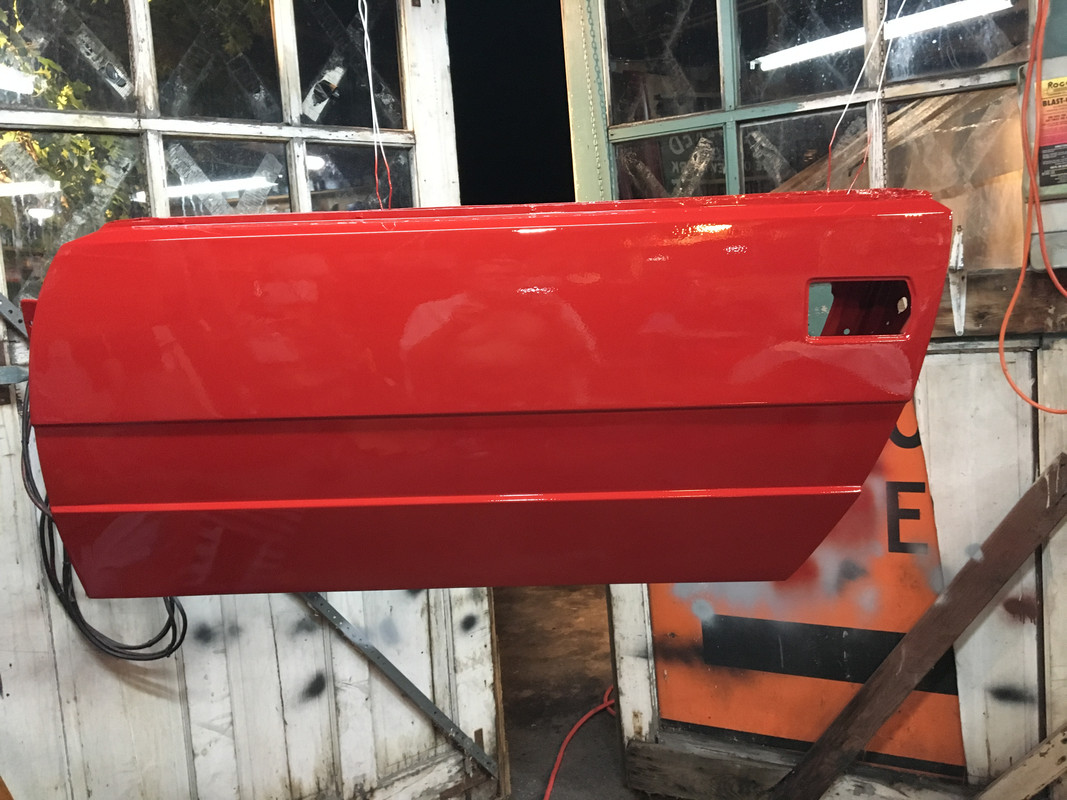
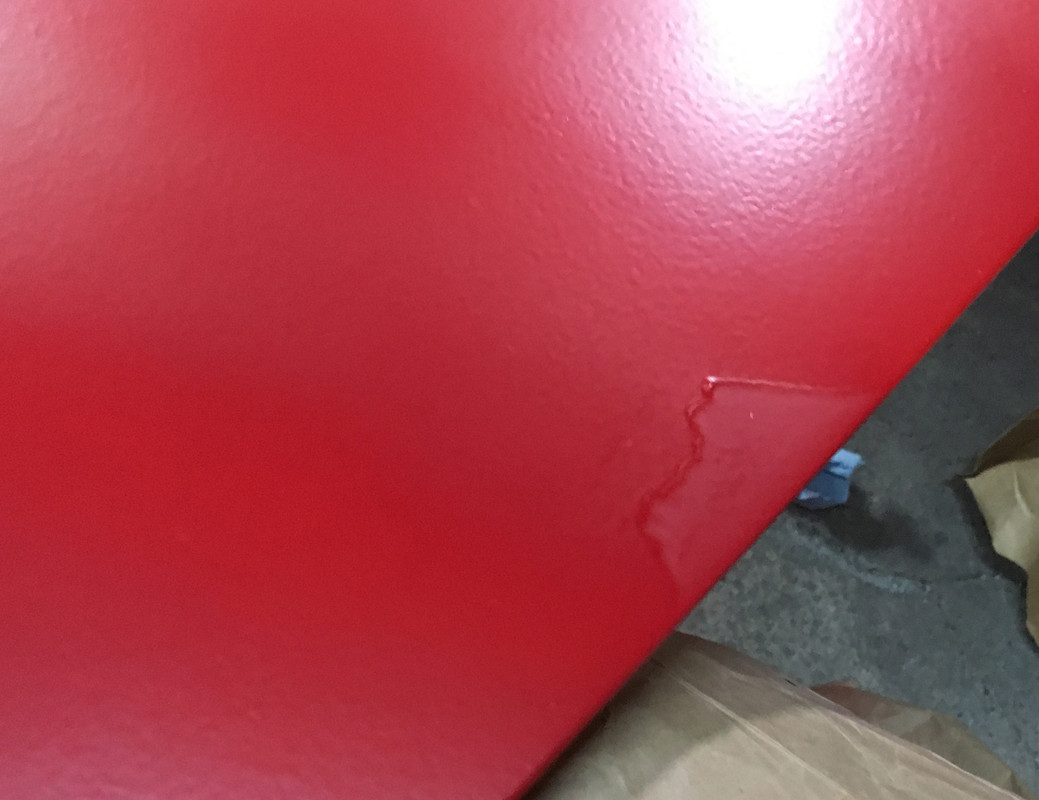
Looking good Hussein. Can't wait to see it painted.....

You & me both :D

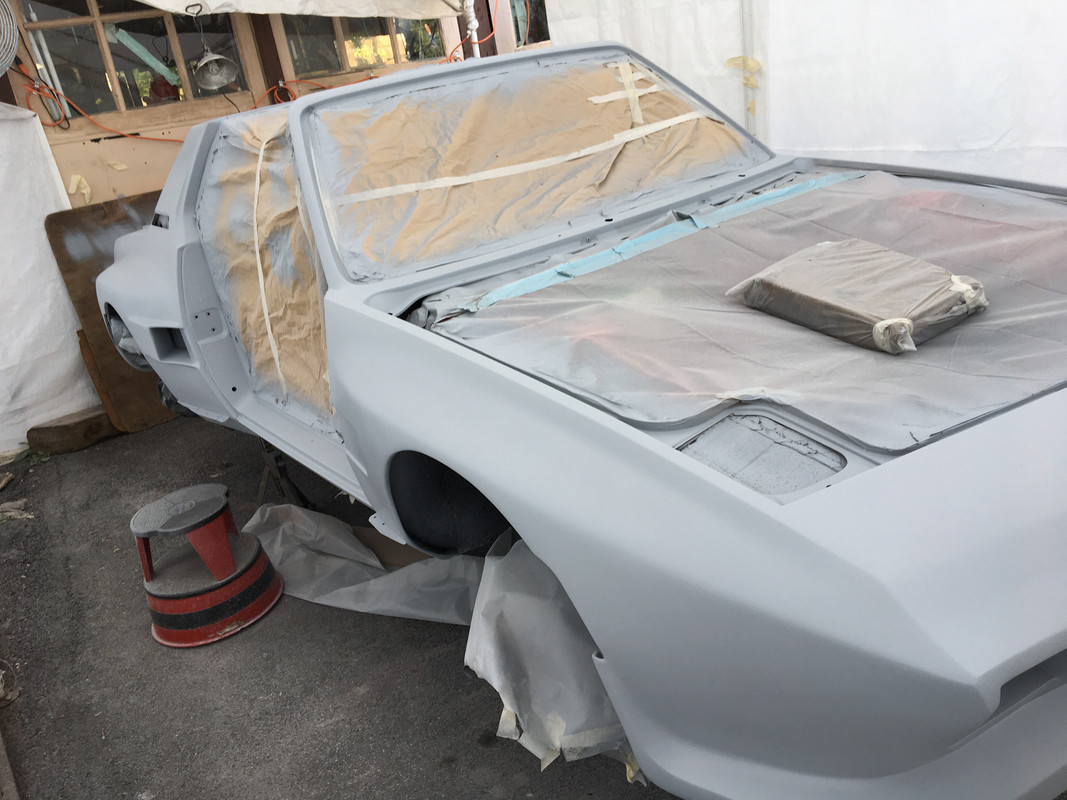
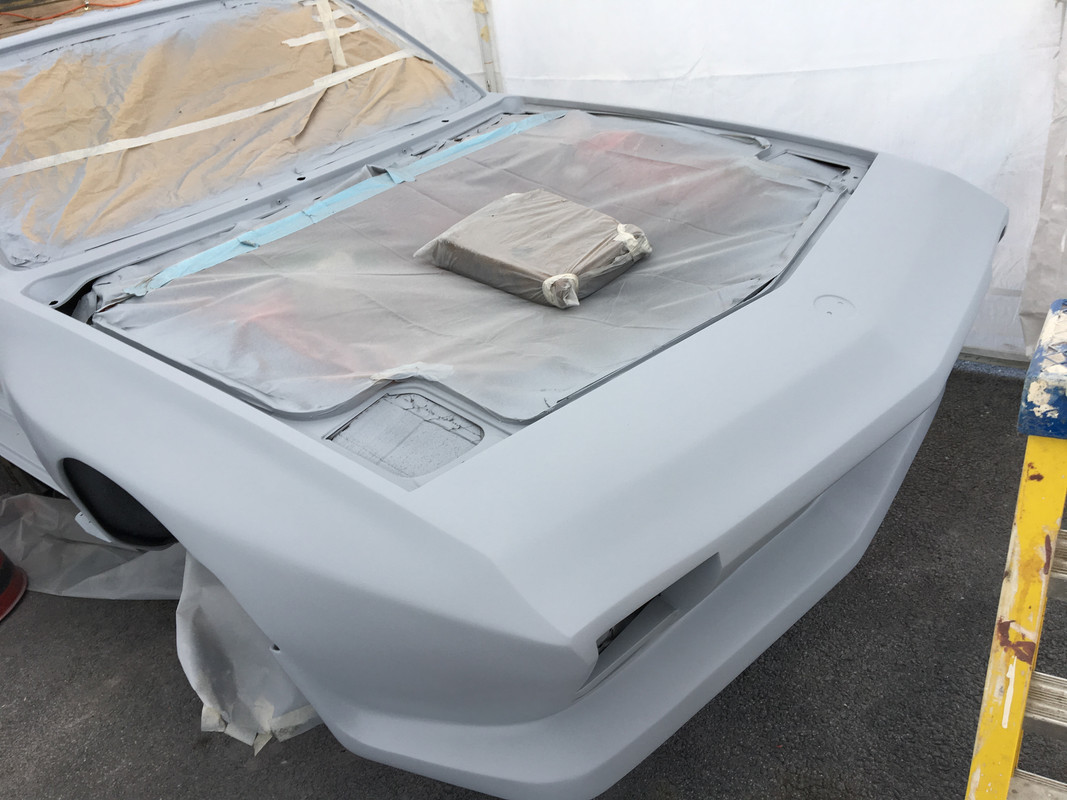
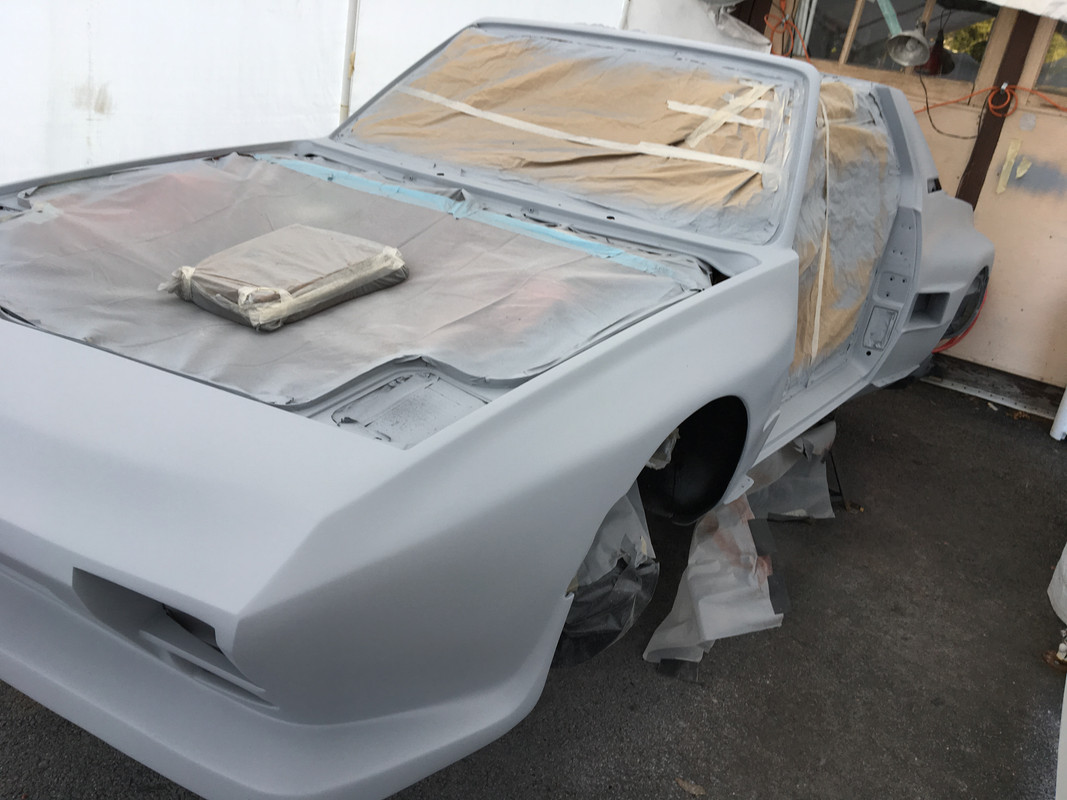
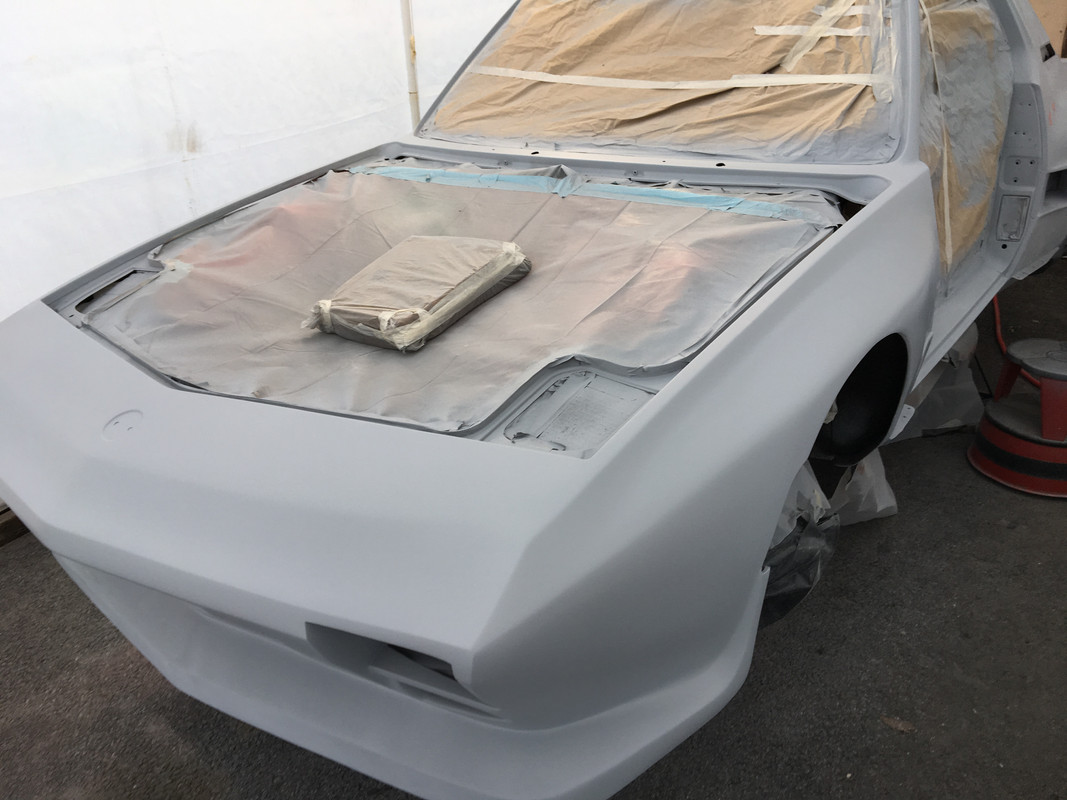
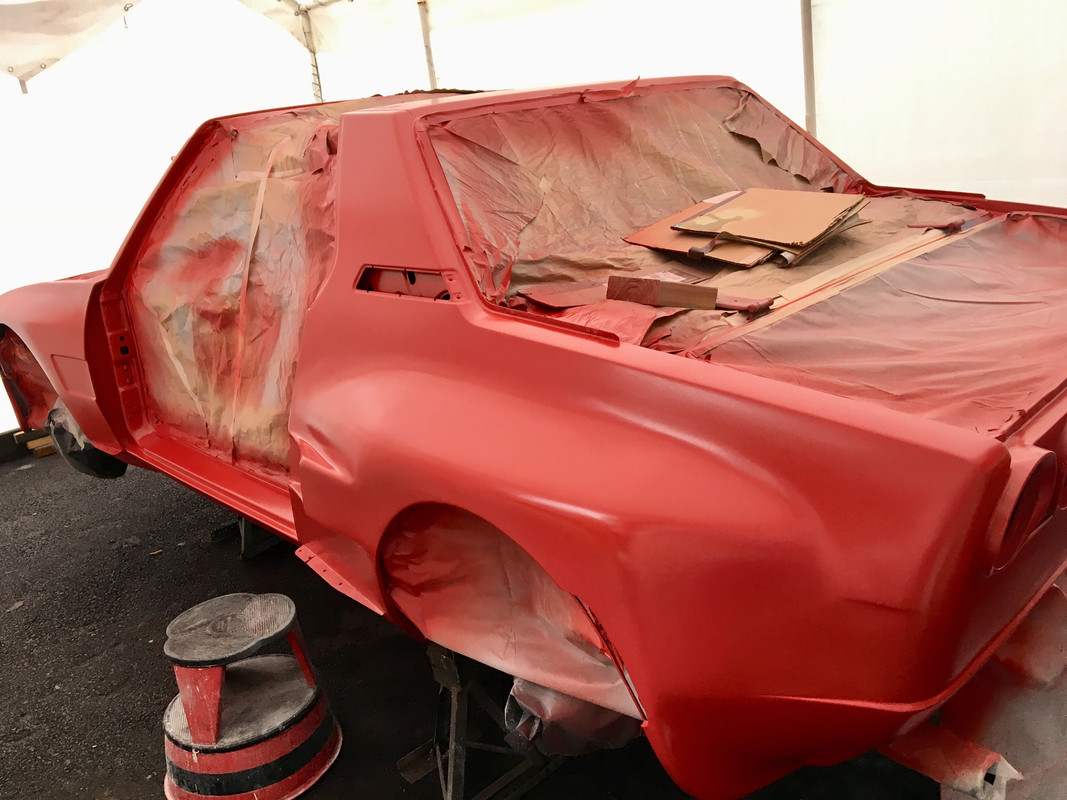
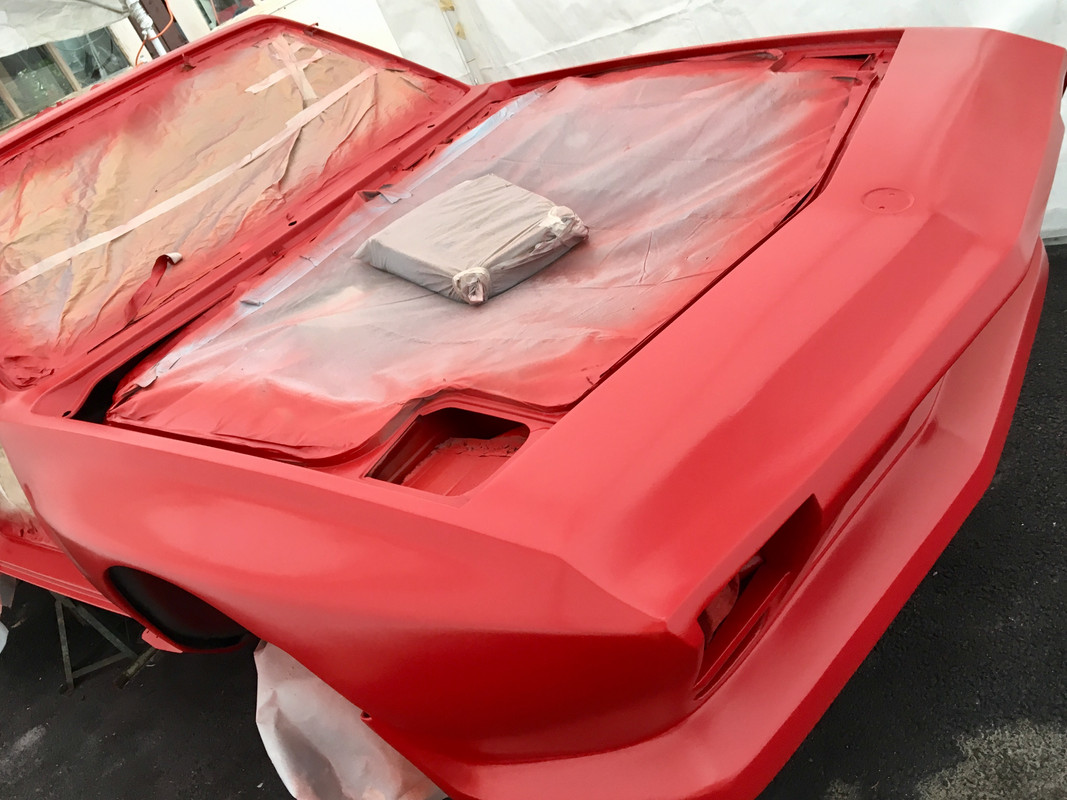
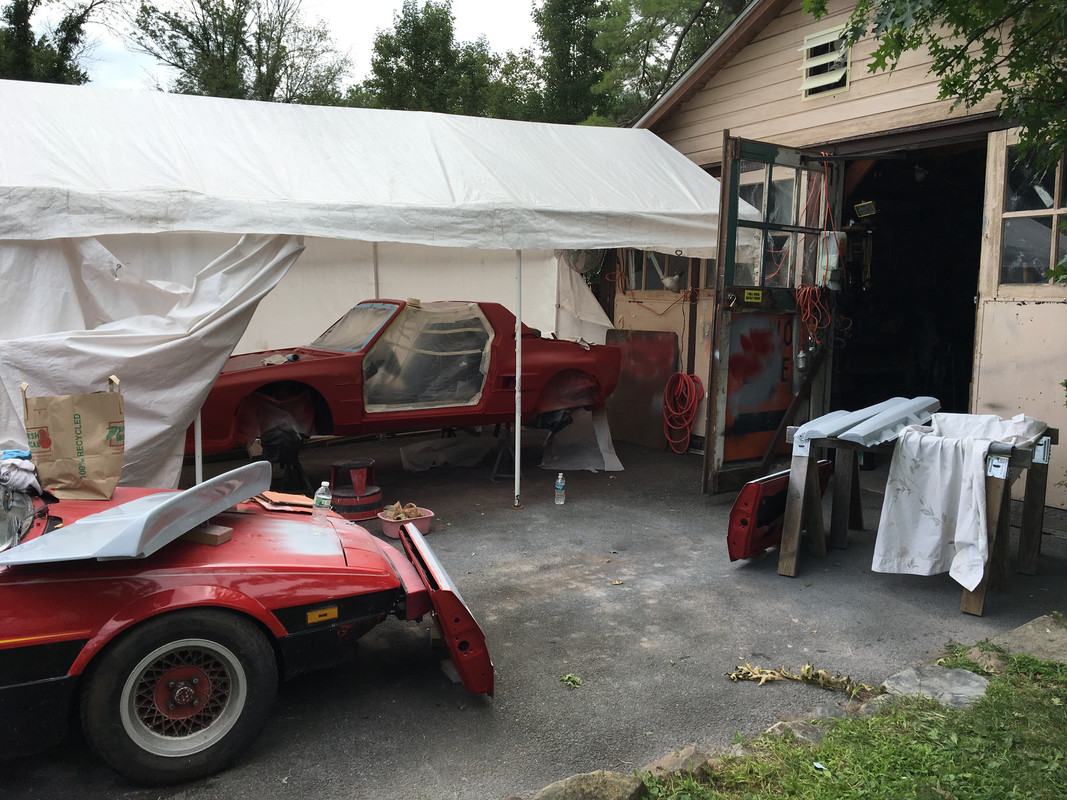
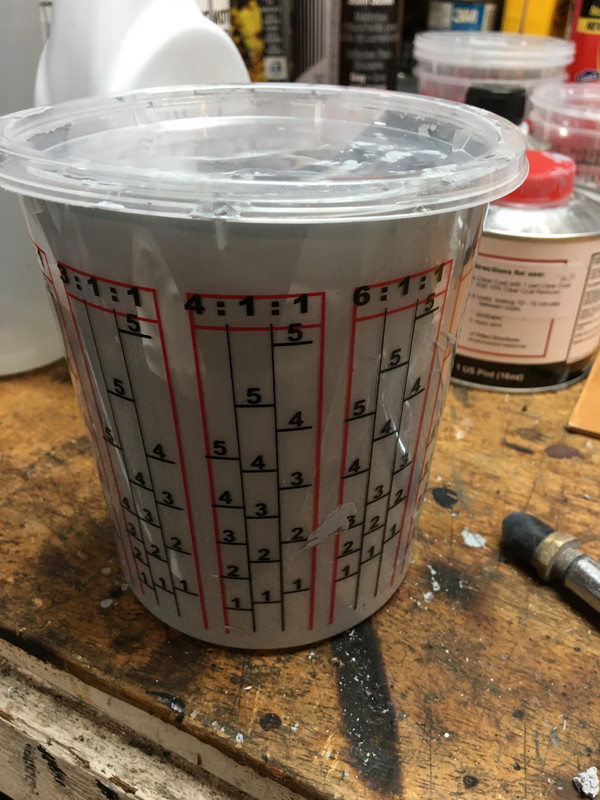
Fun and games today. First time using the gun & mixing the 2K primer. Several problems.

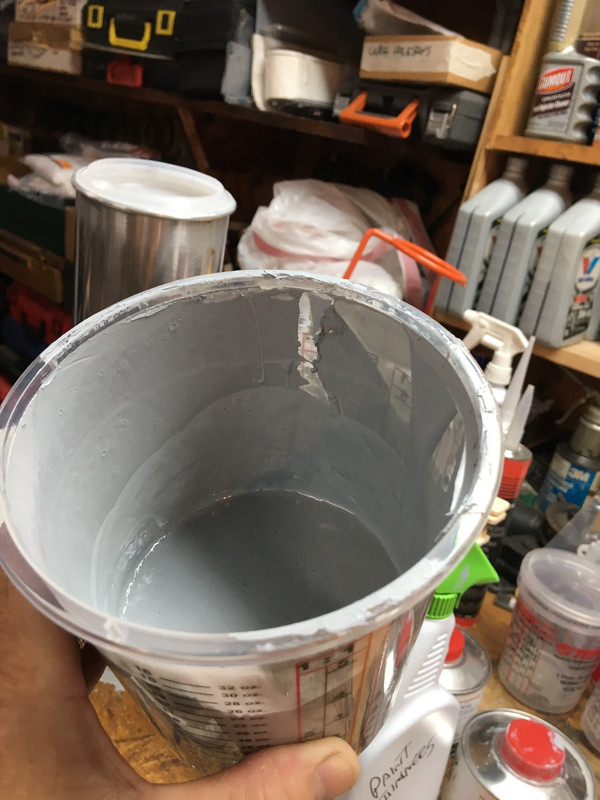
Mixed the primer, 4:1 (I thought) in this marked measuring cup:

Dallara_Strip00089a.jpg


Checked the nozzle fan spread, the gun pressure & volume on a test card. Seemed to be going OK, if a little awkward getting the volume up, then the spray seemed a little erratic - like it was choking & releasing.

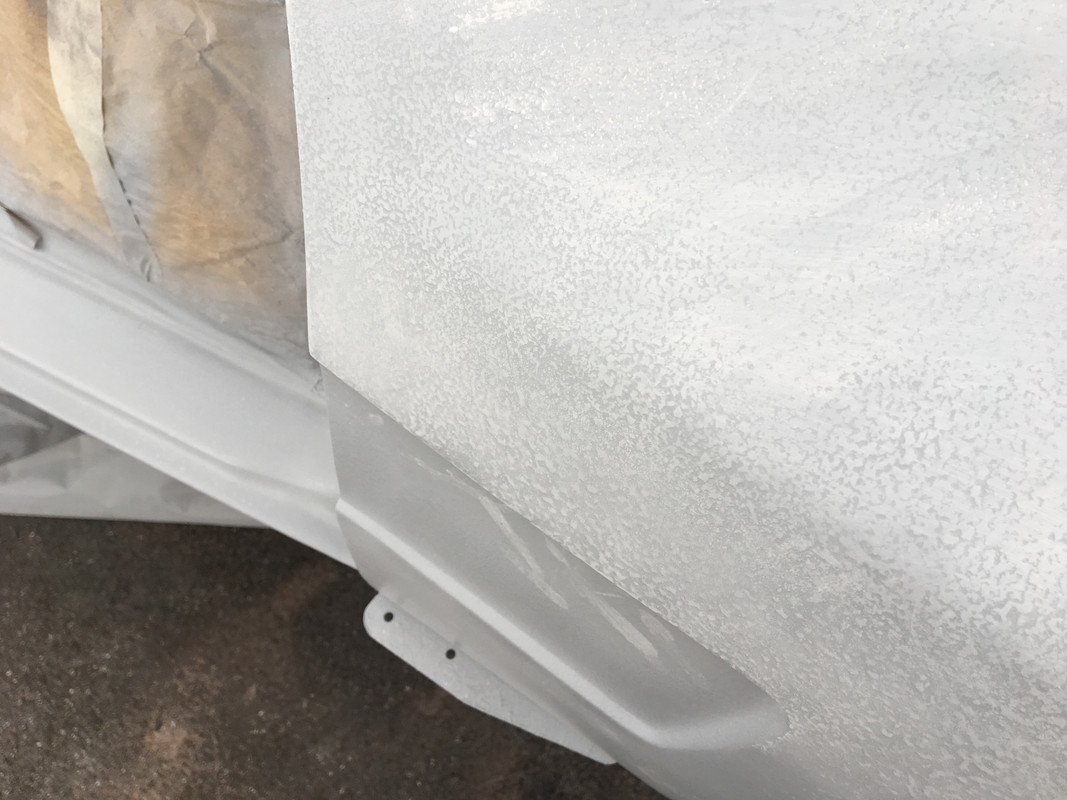
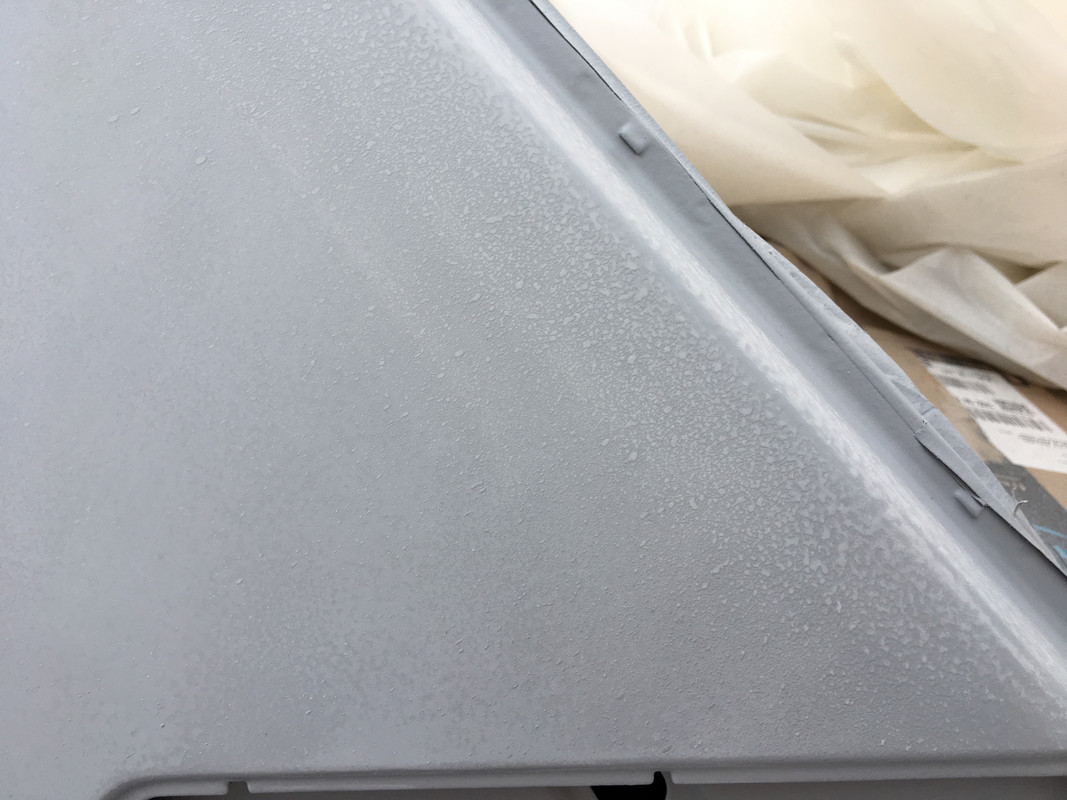
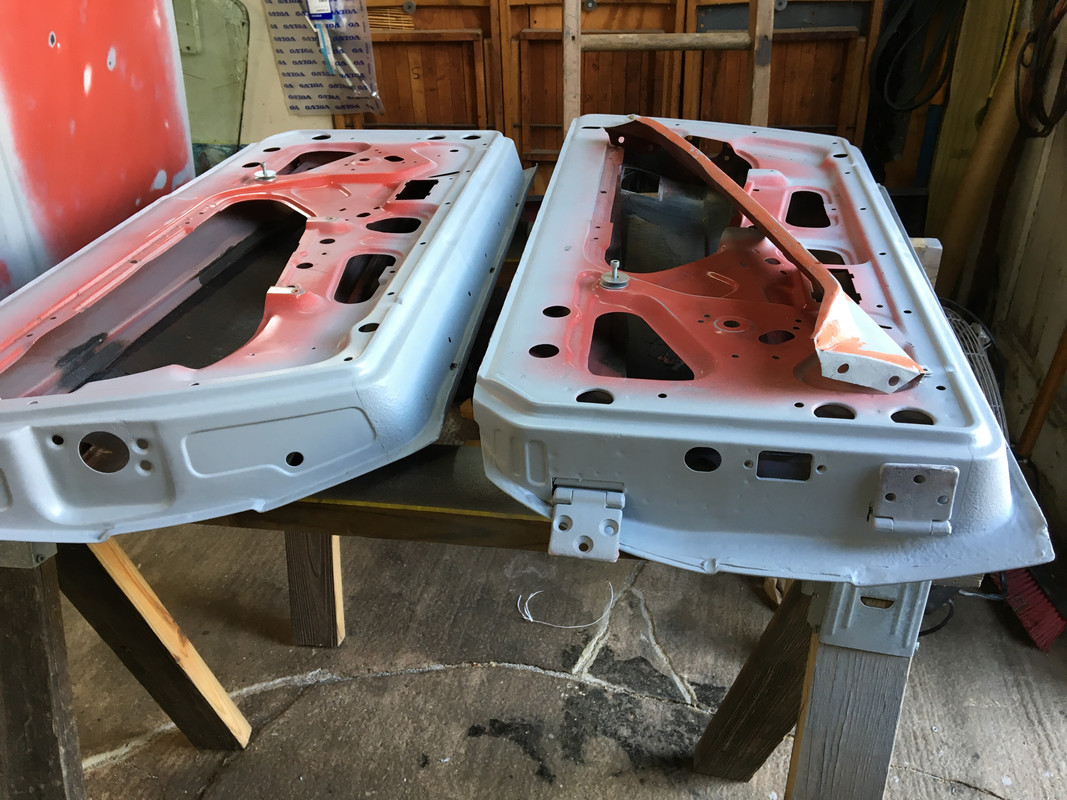
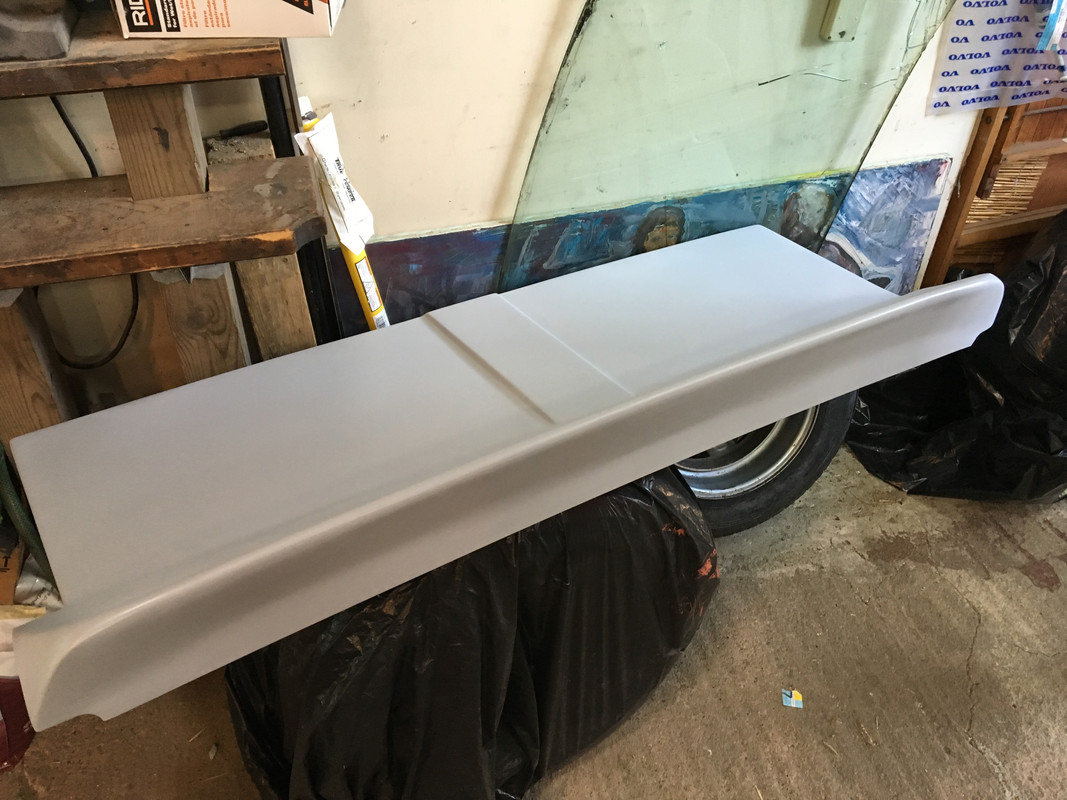
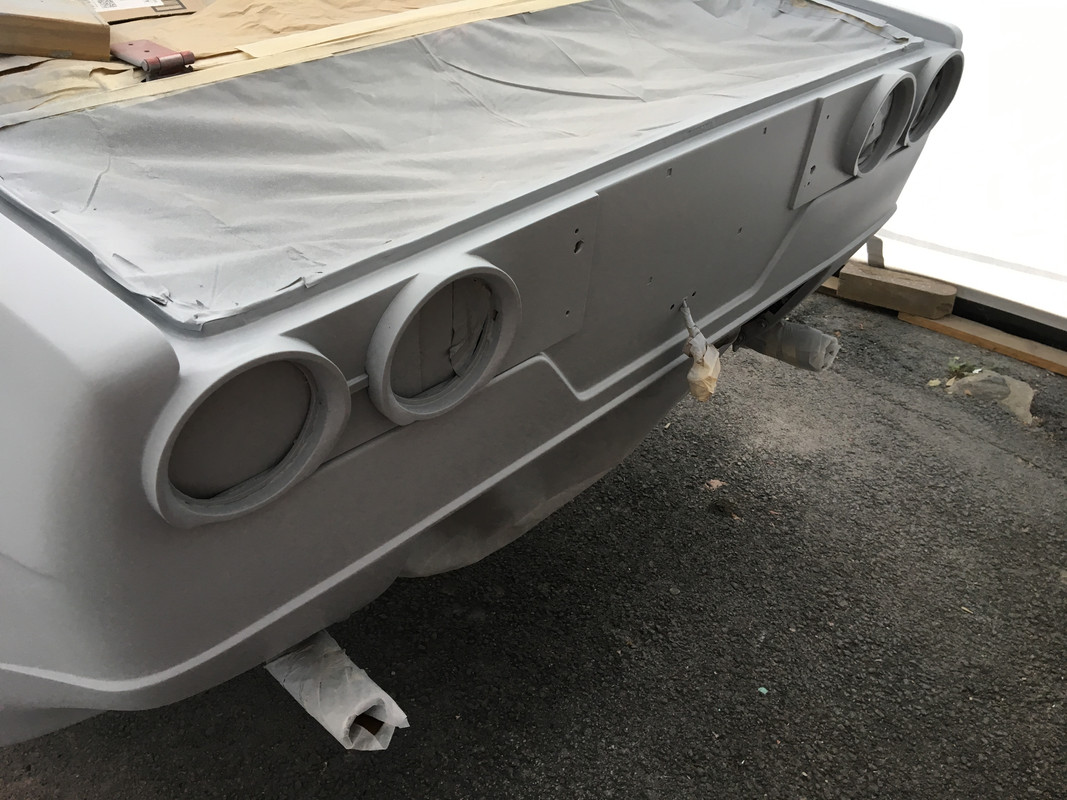
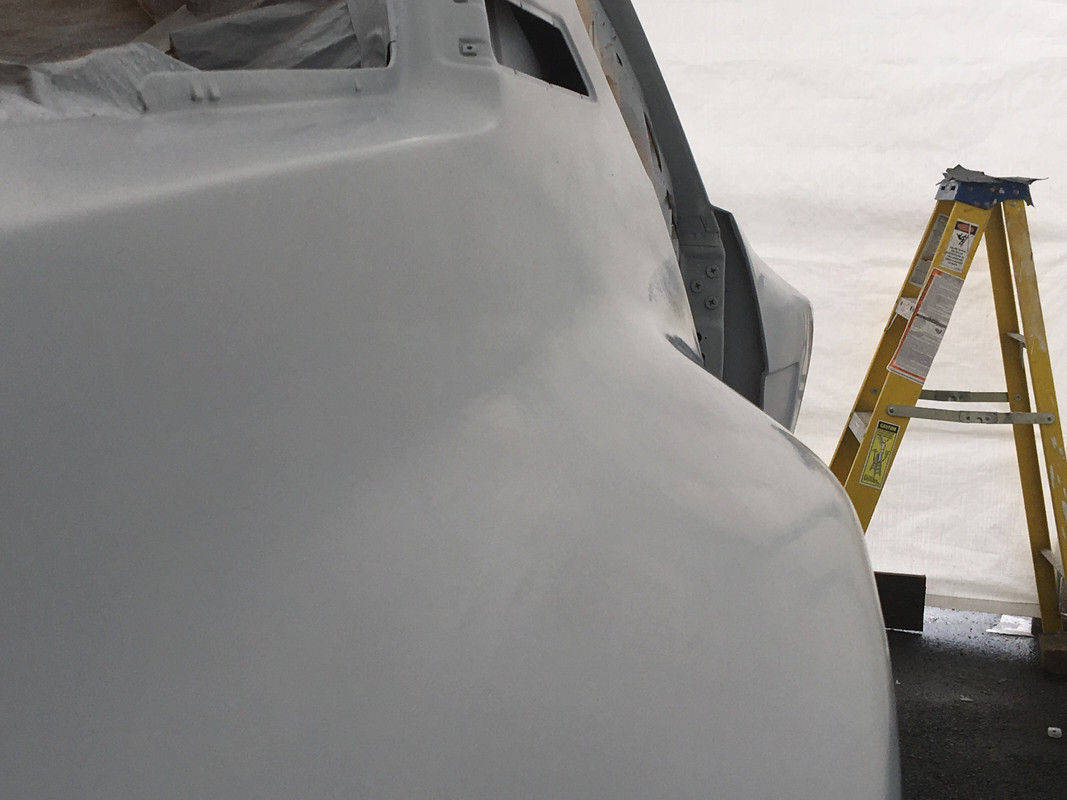
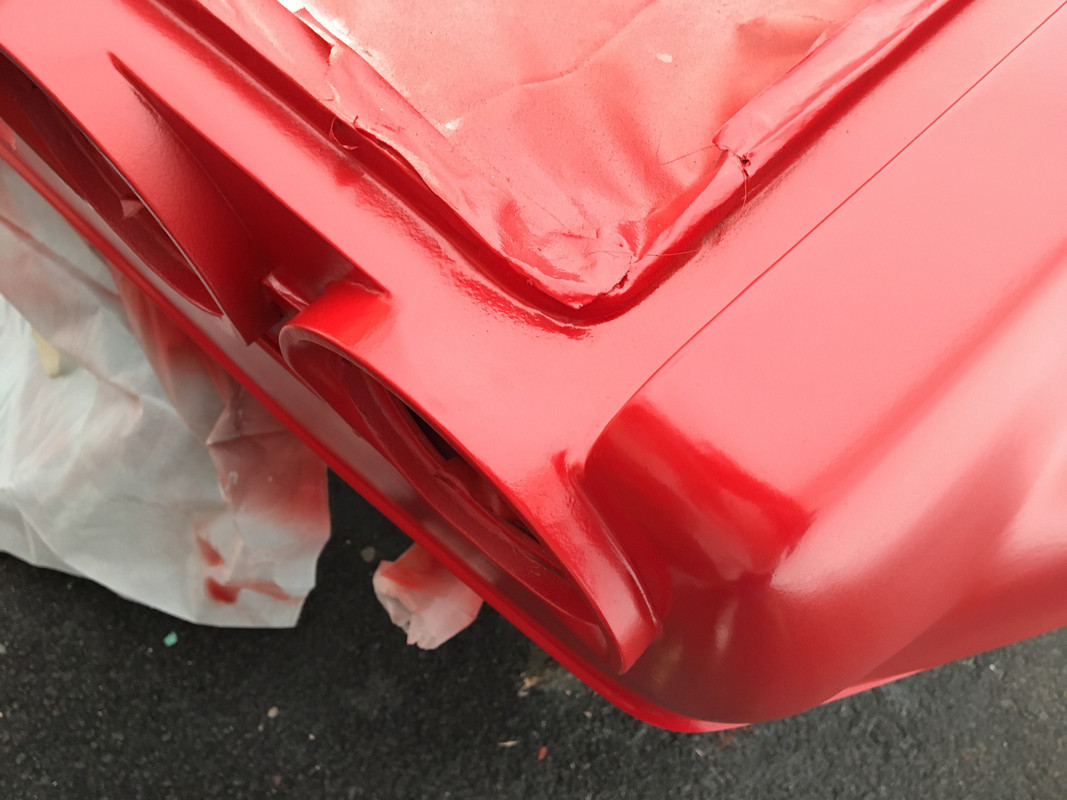
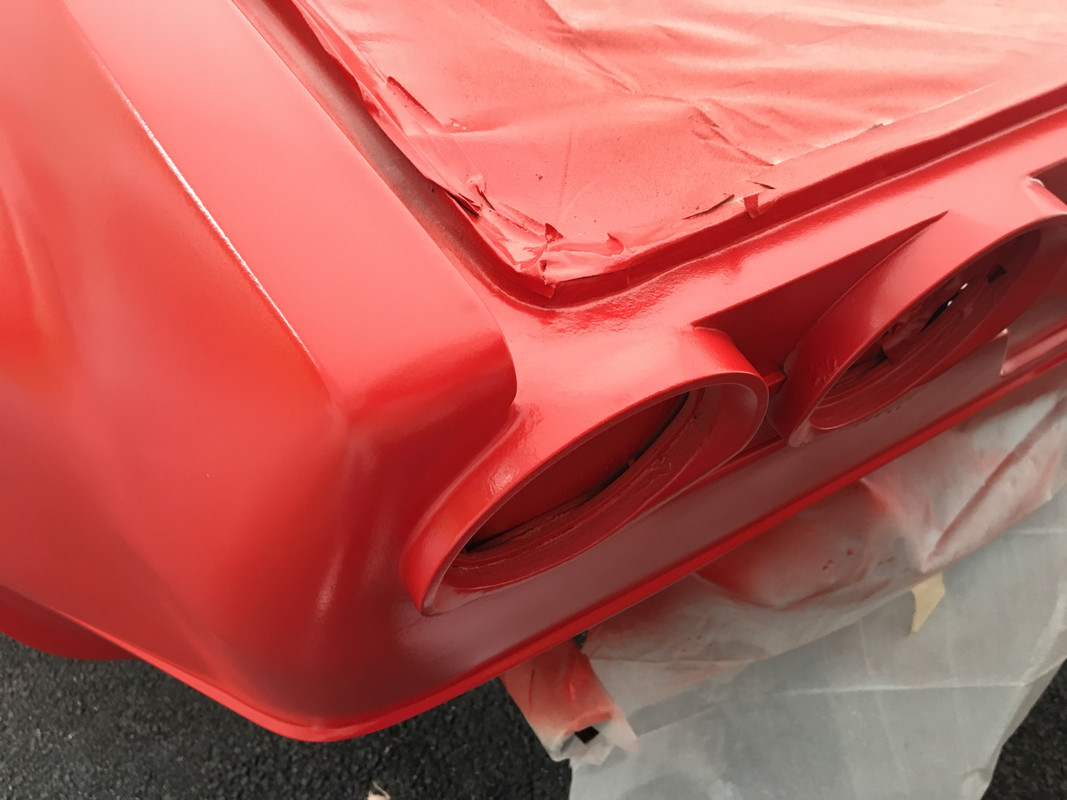
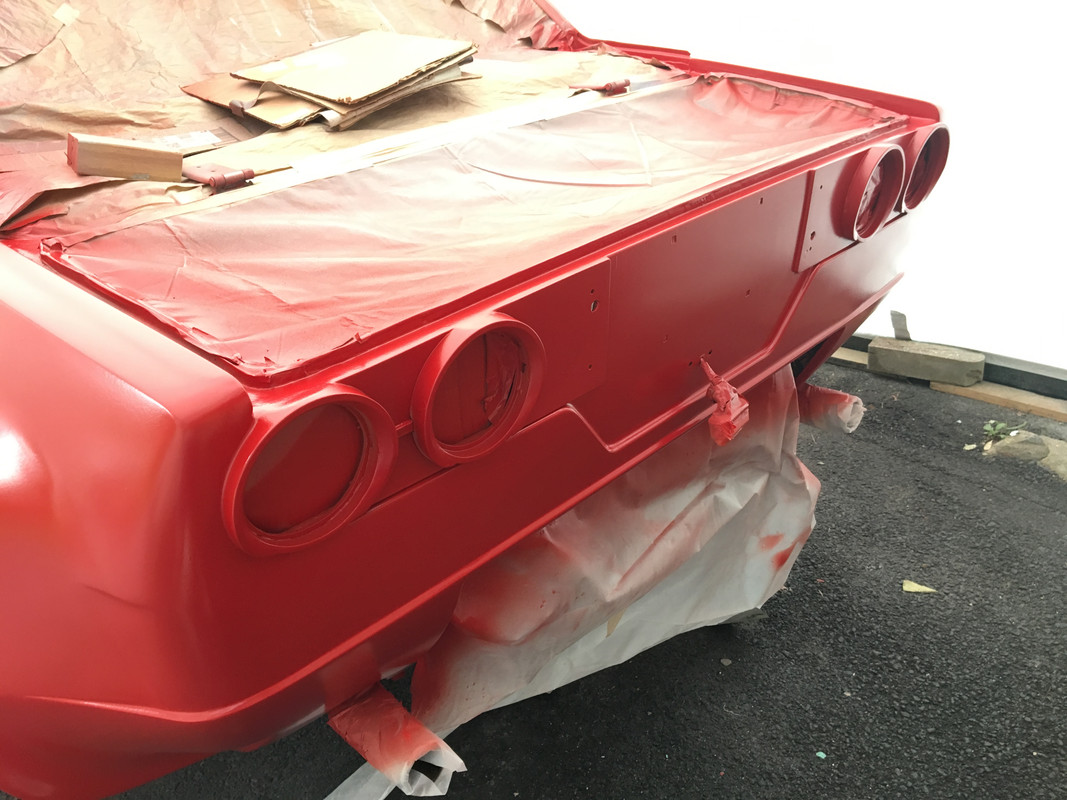
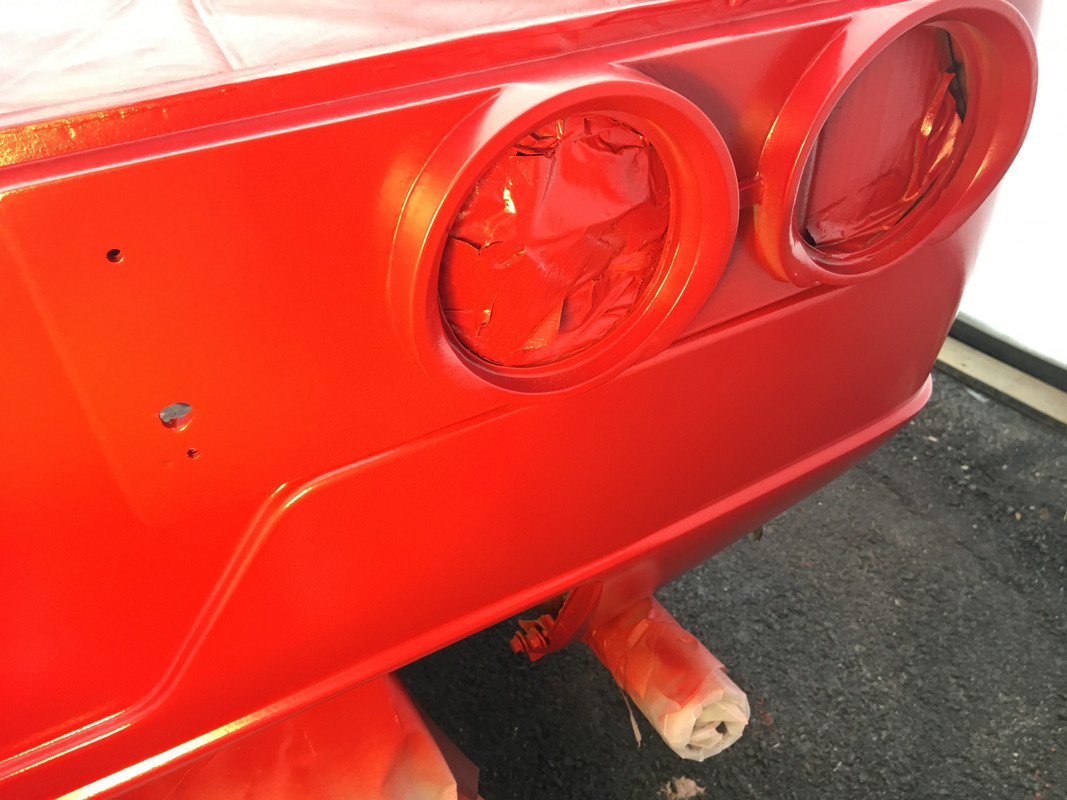
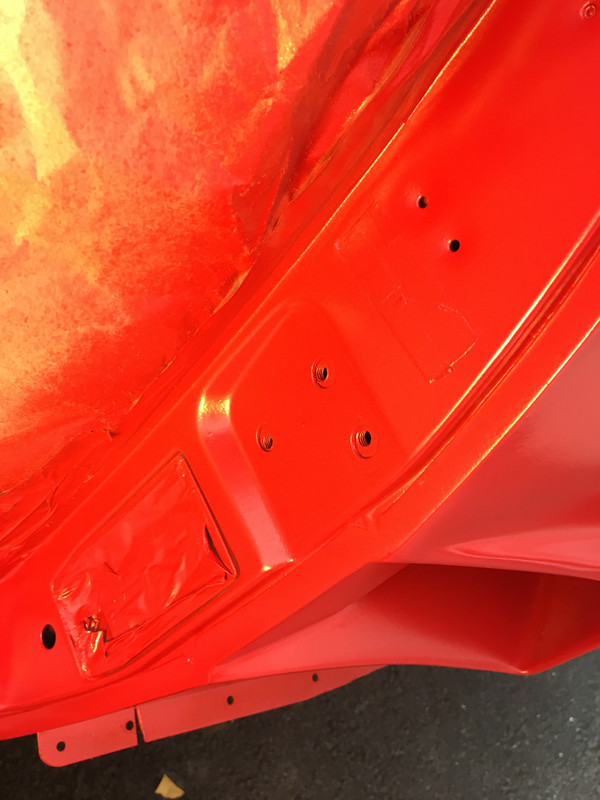
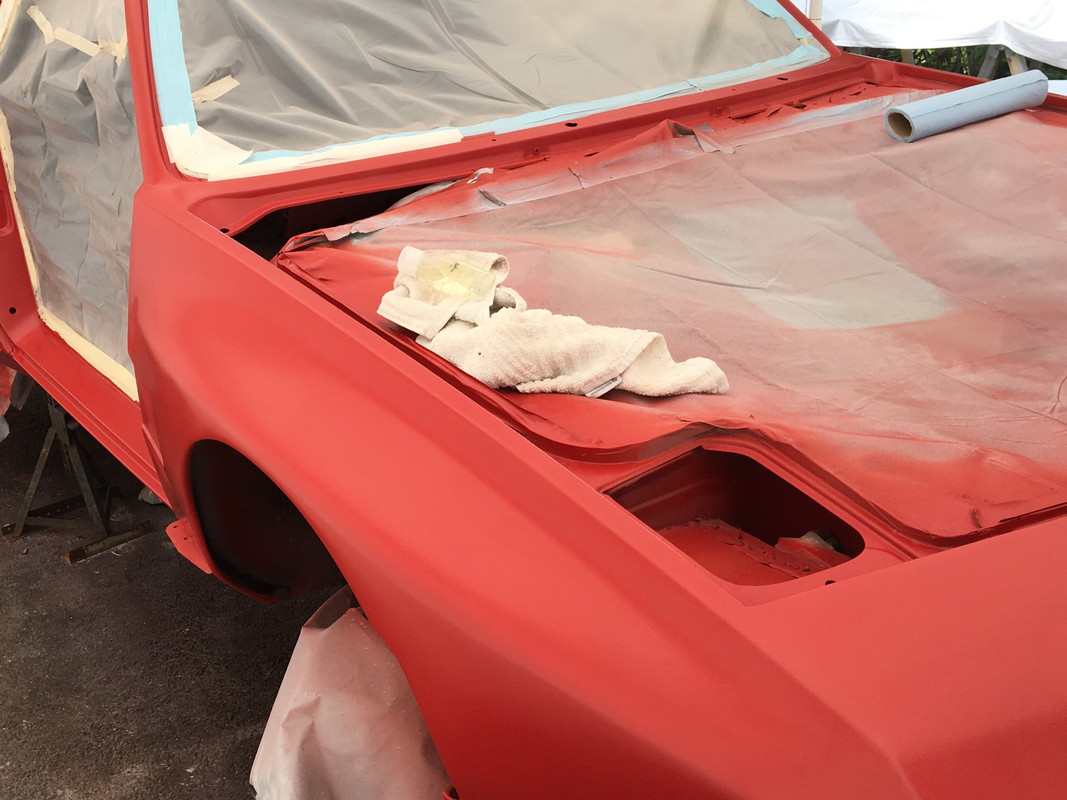
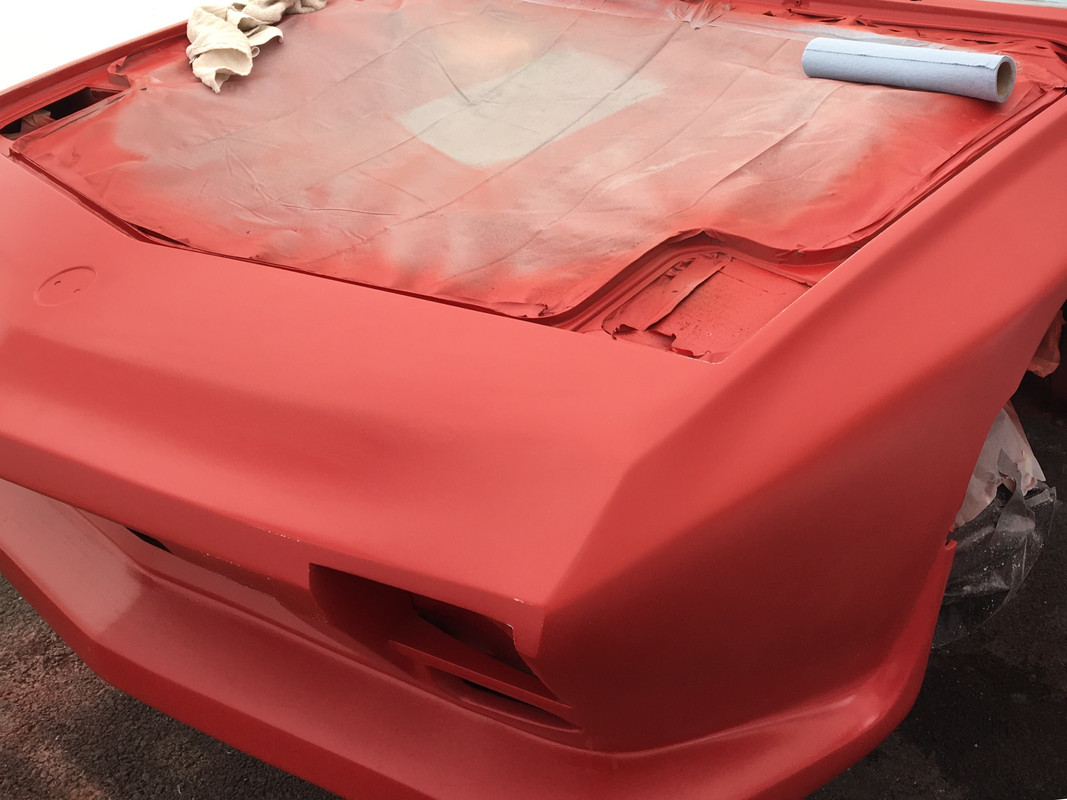
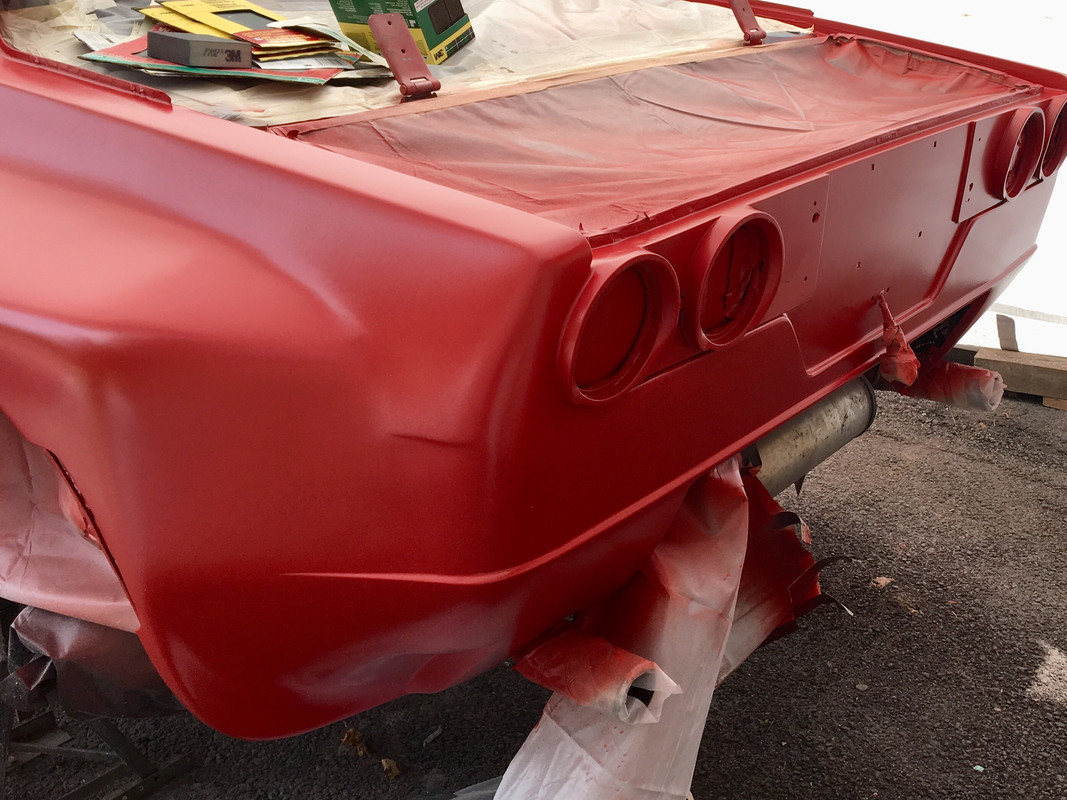
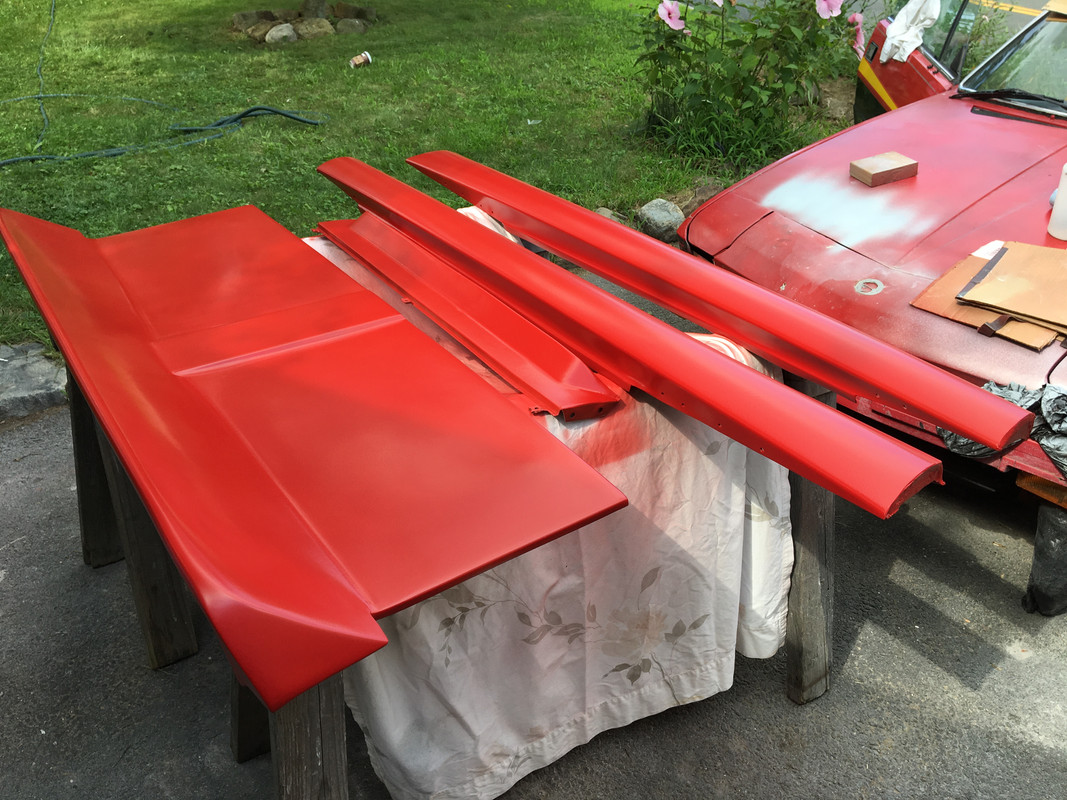
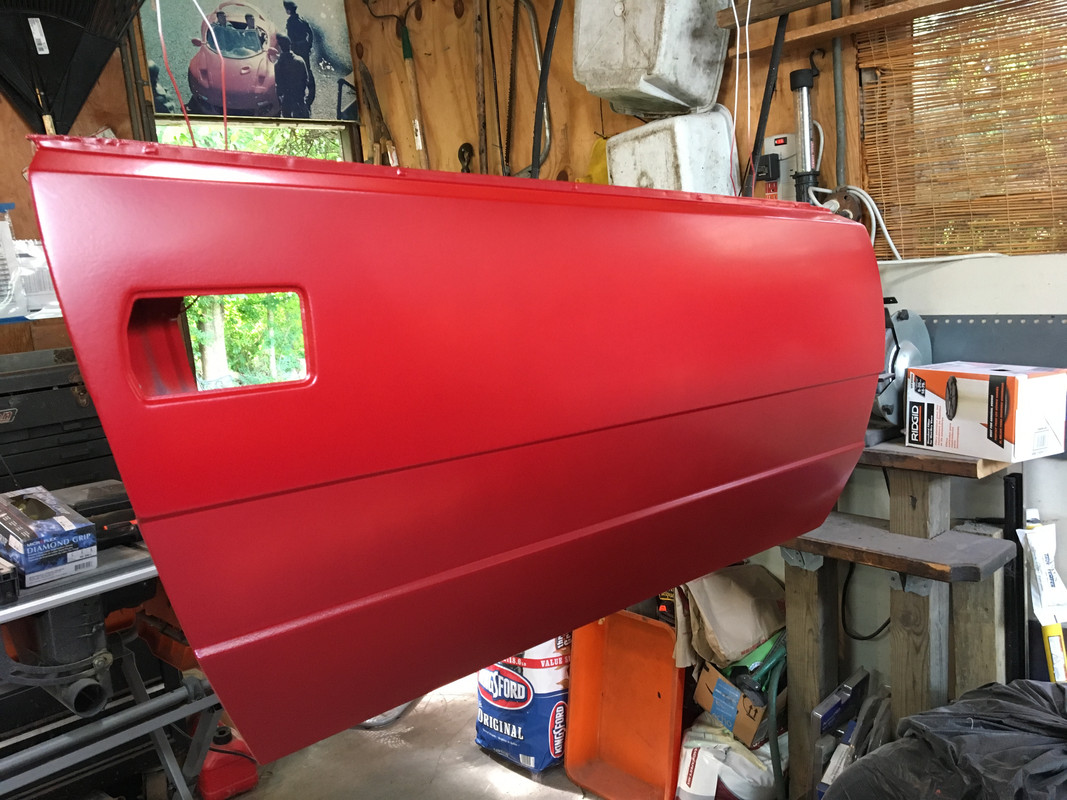
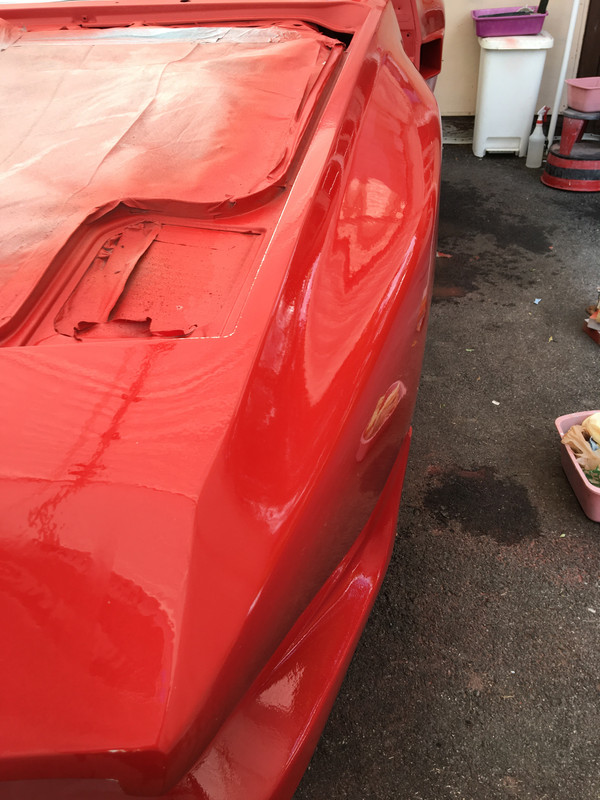
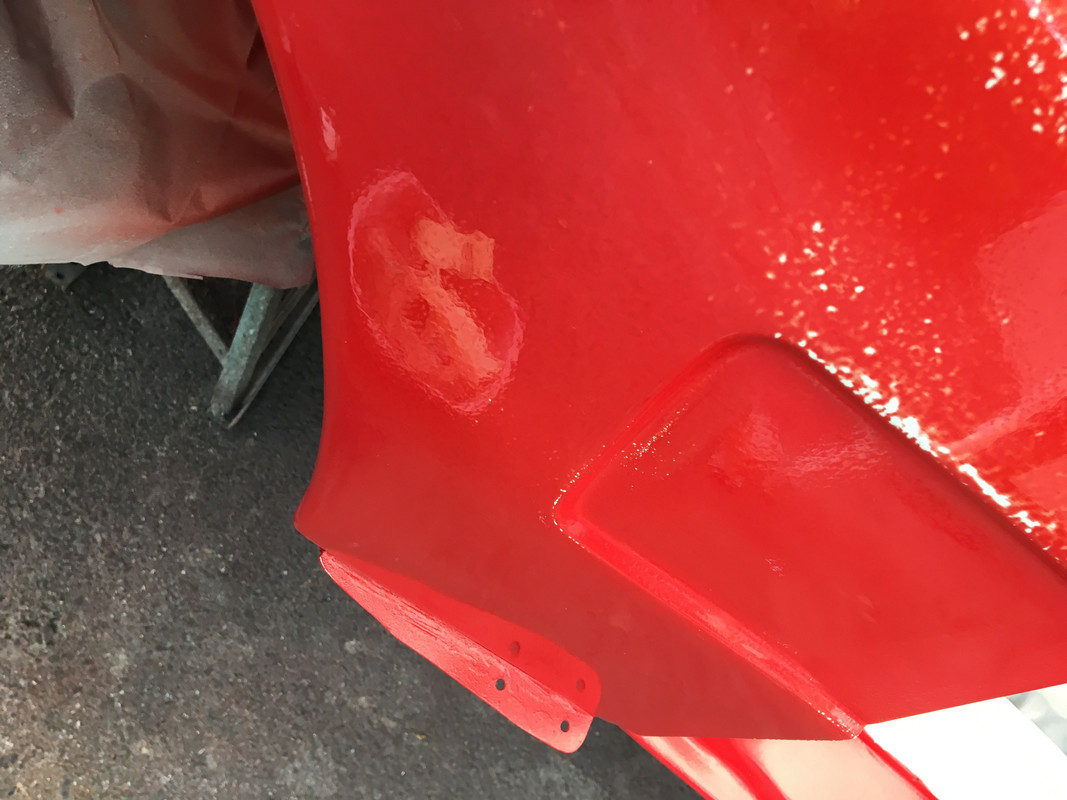
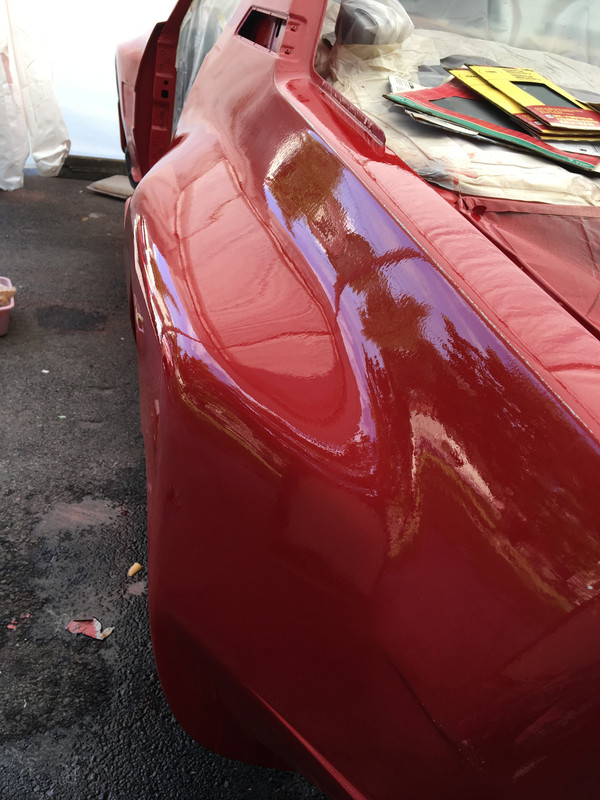
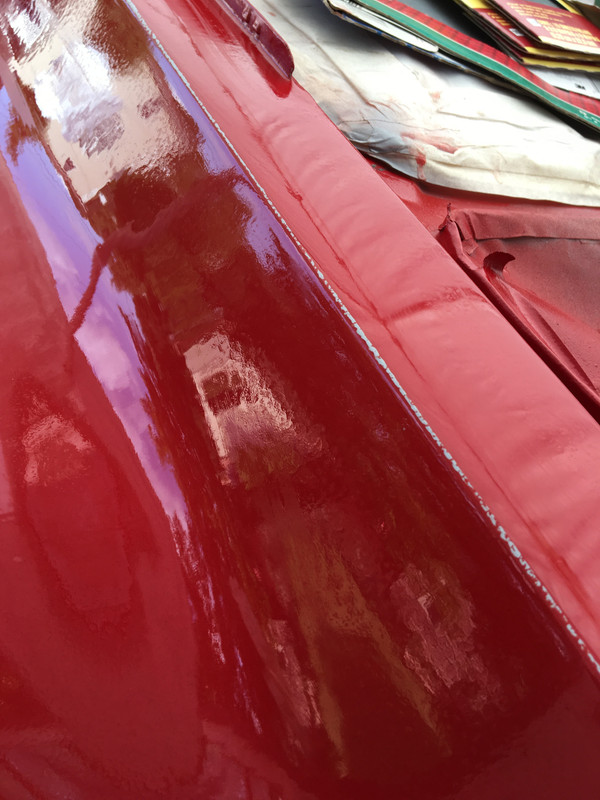
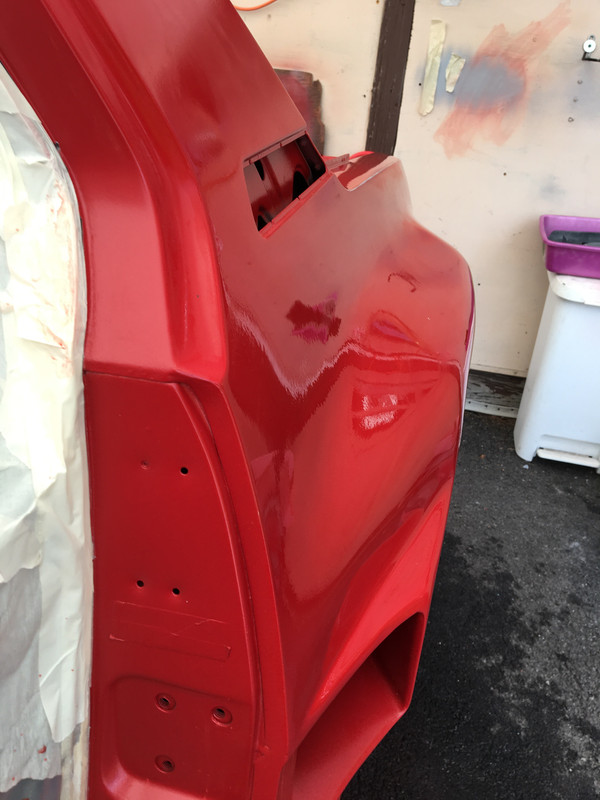
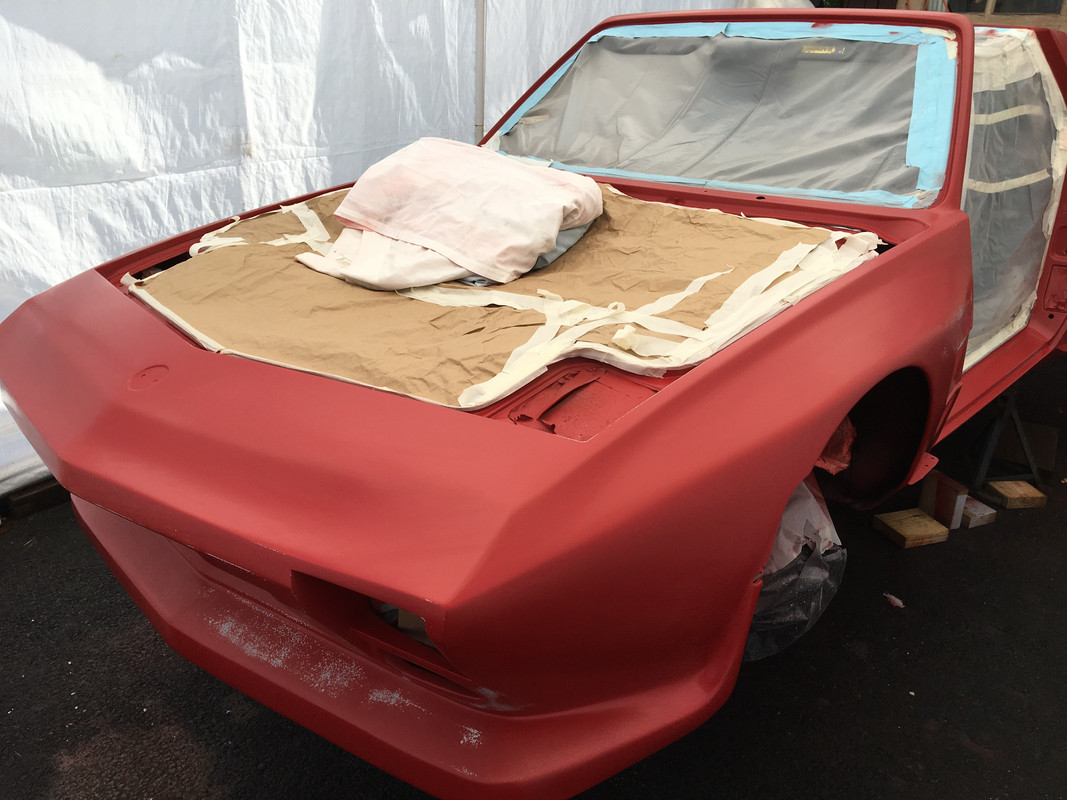
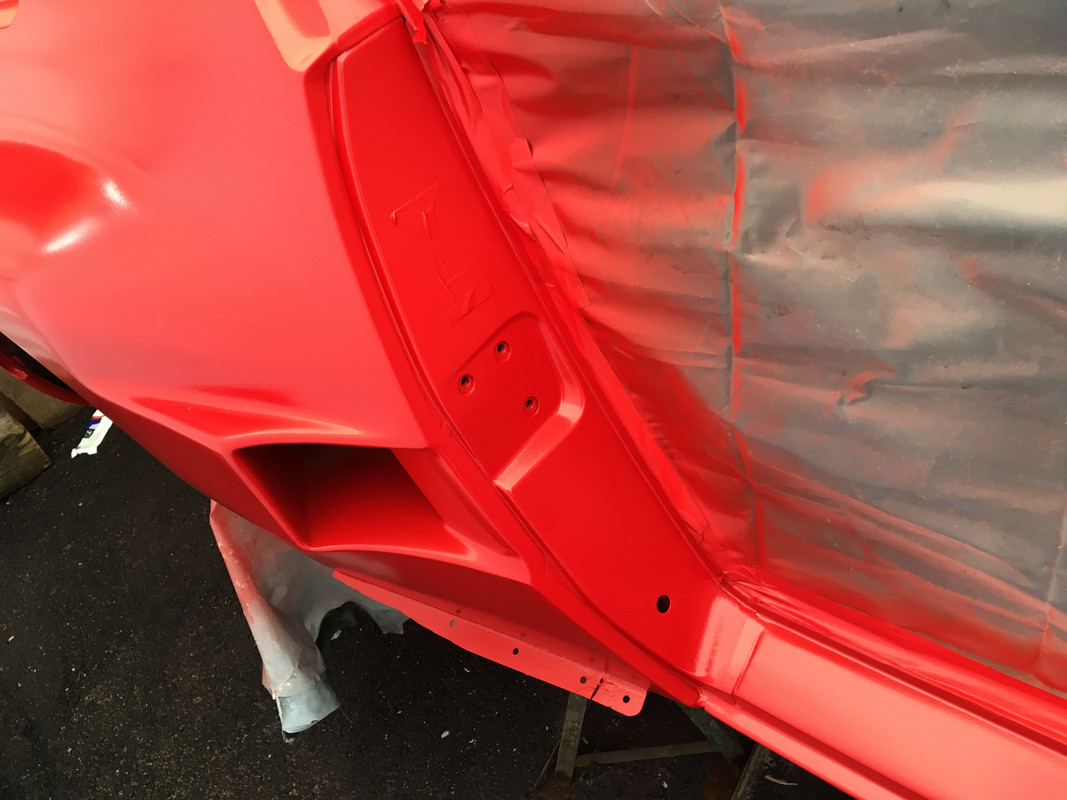
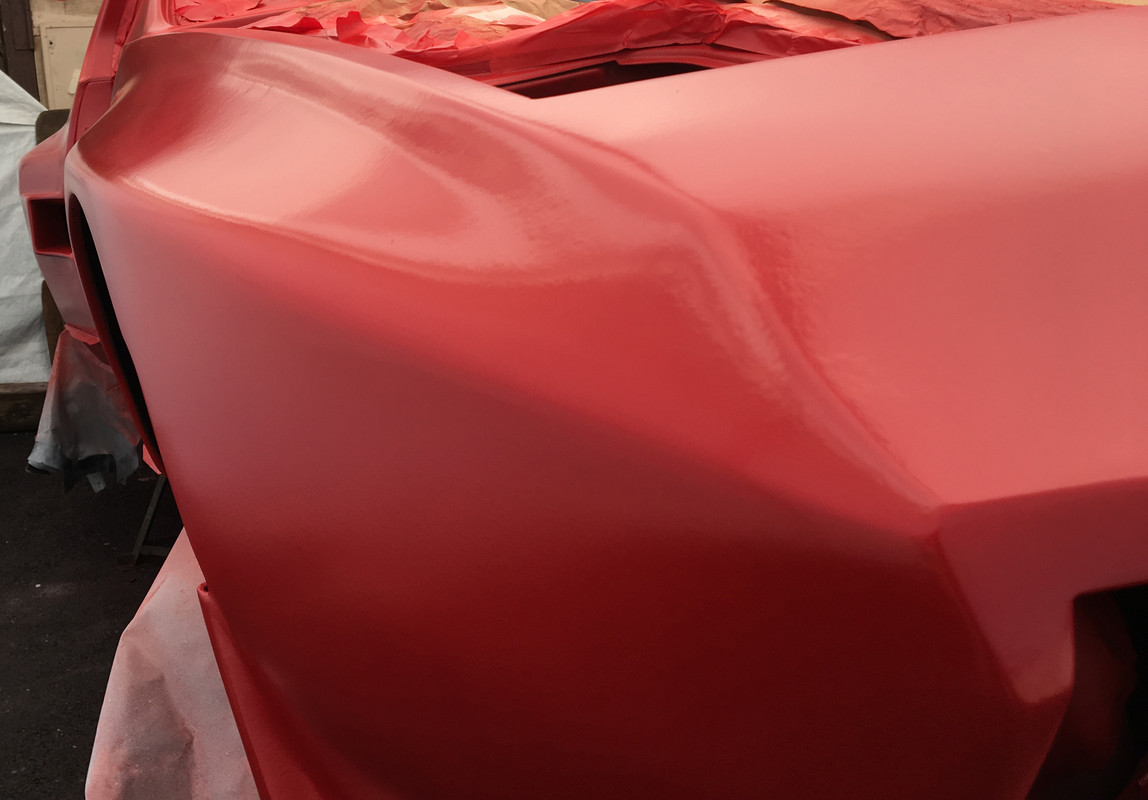
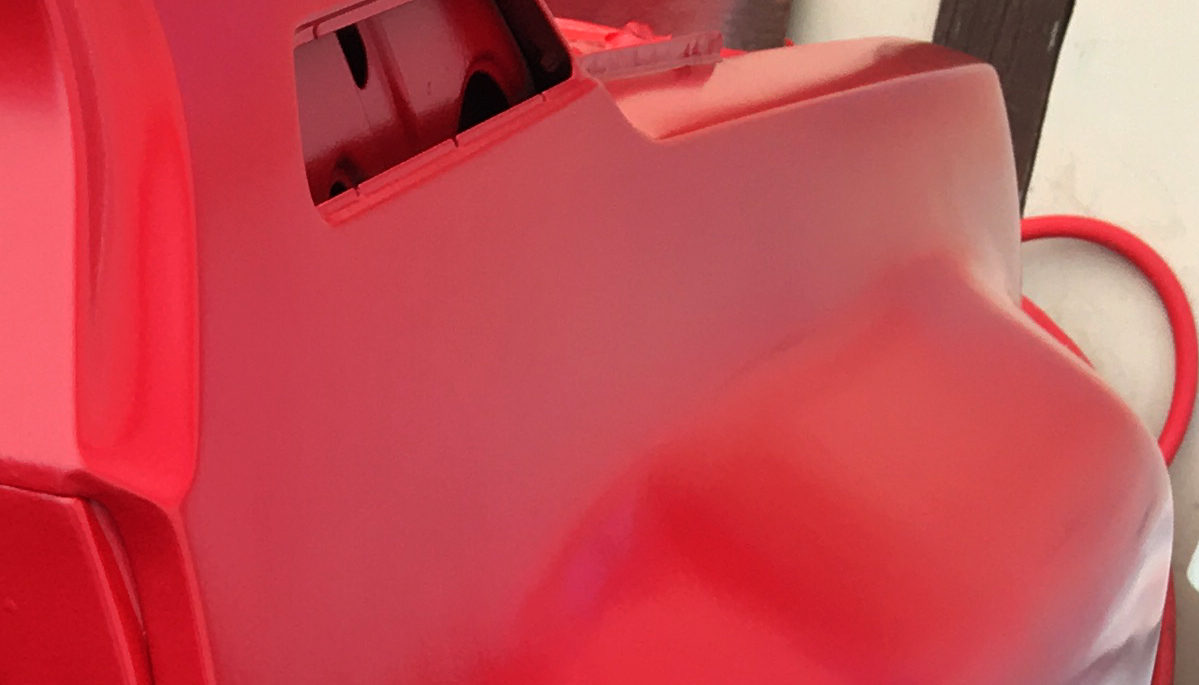
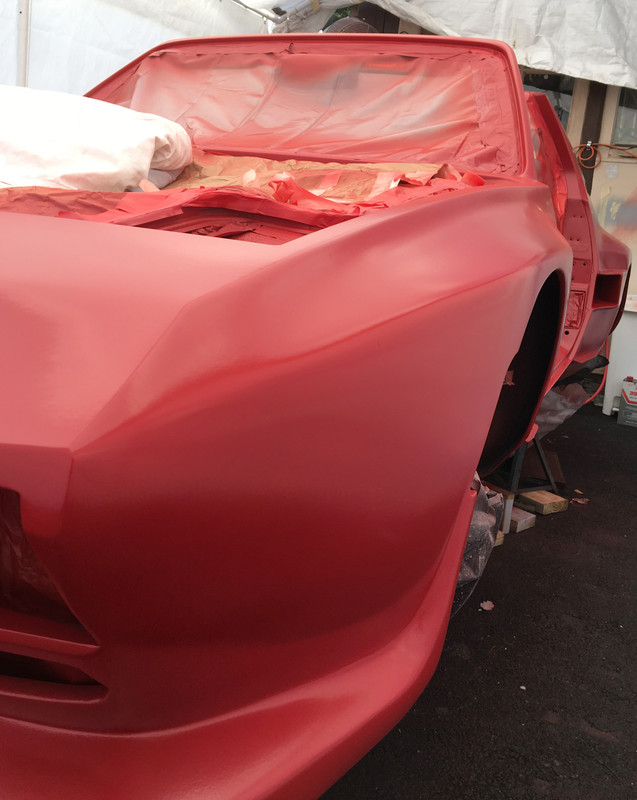
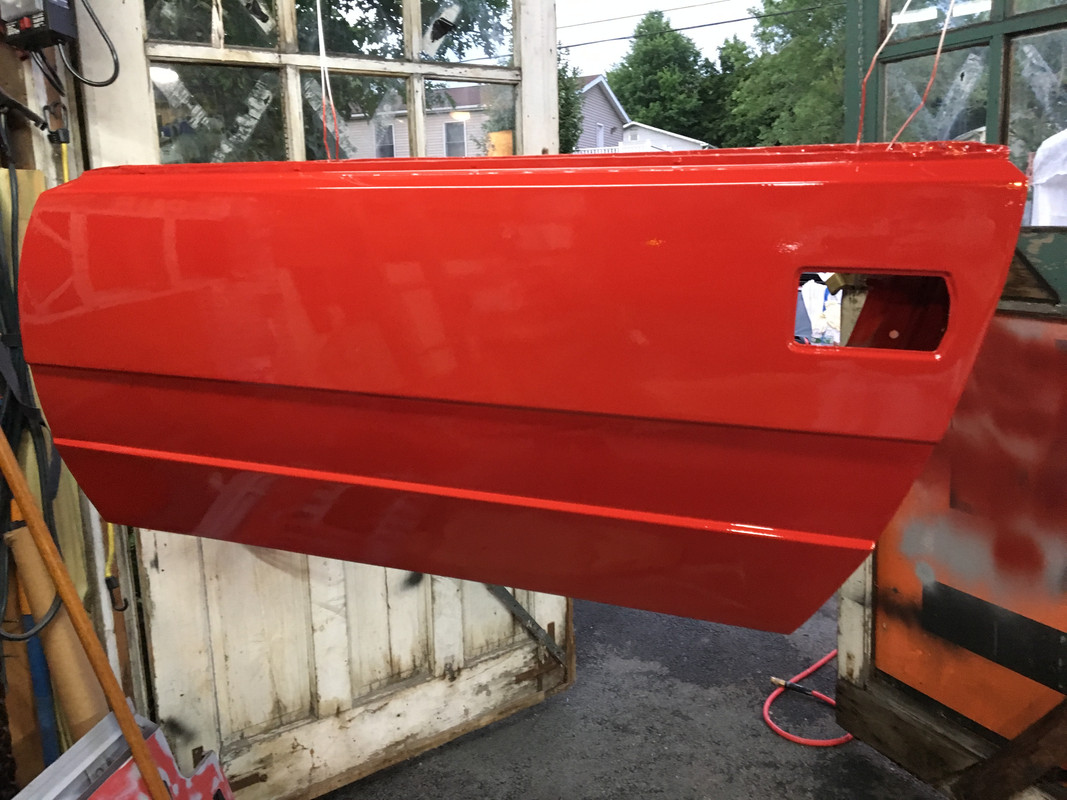
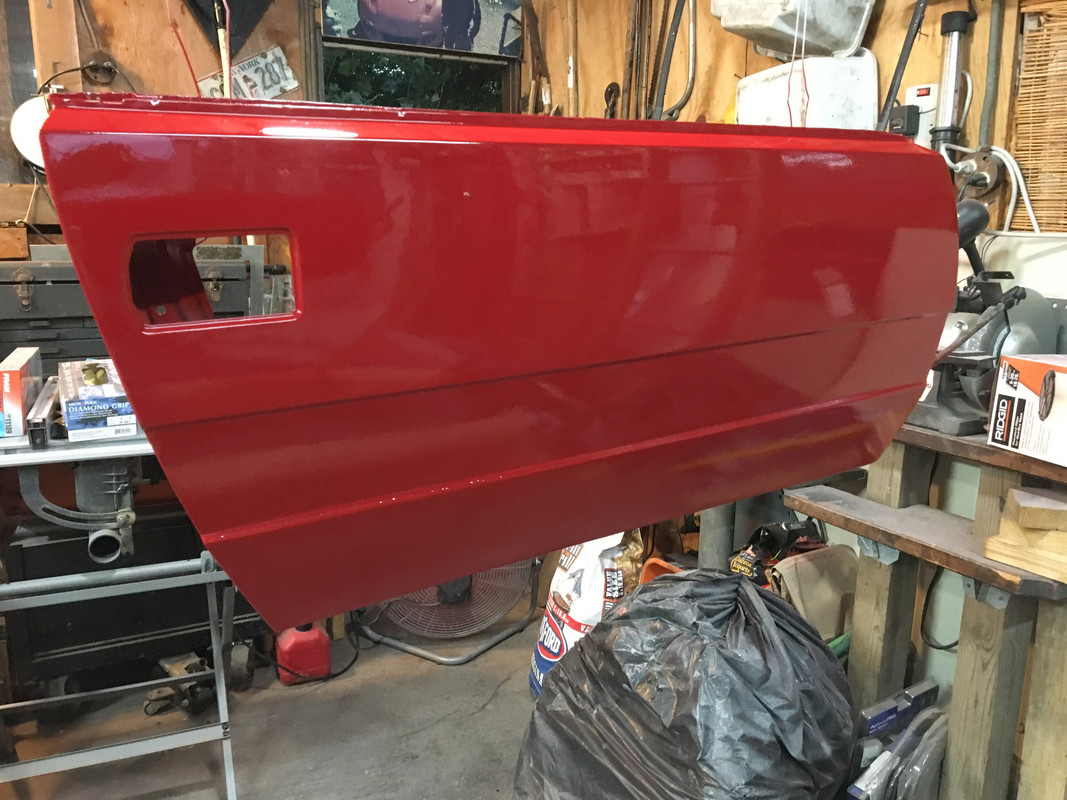
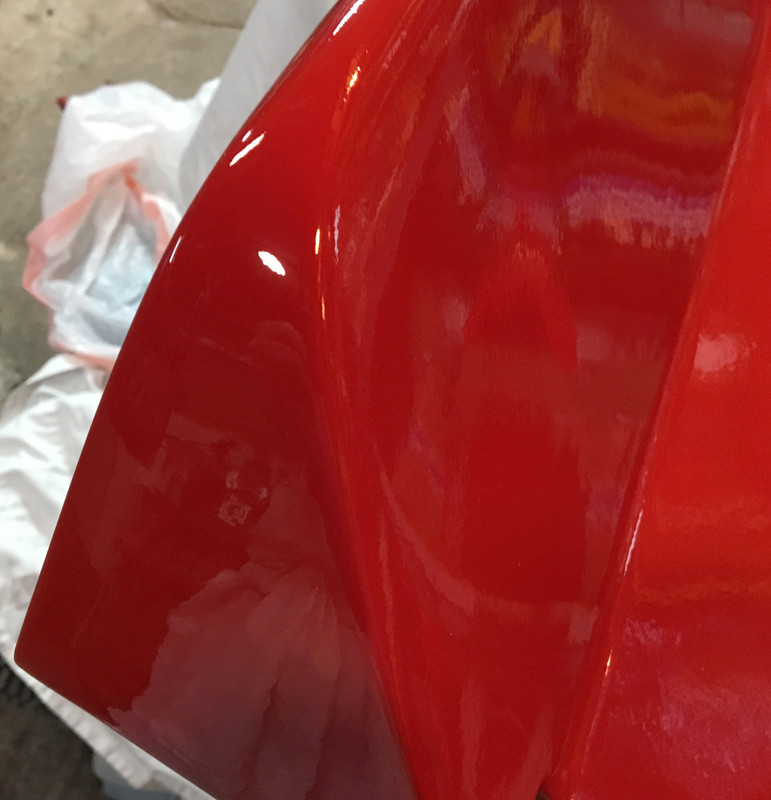
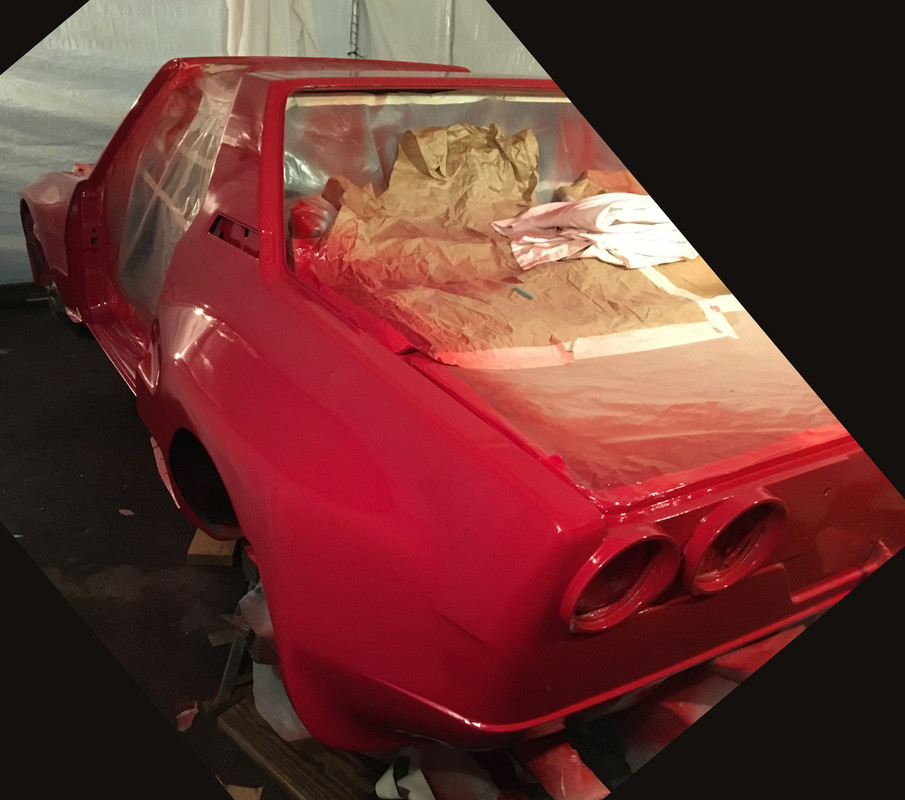
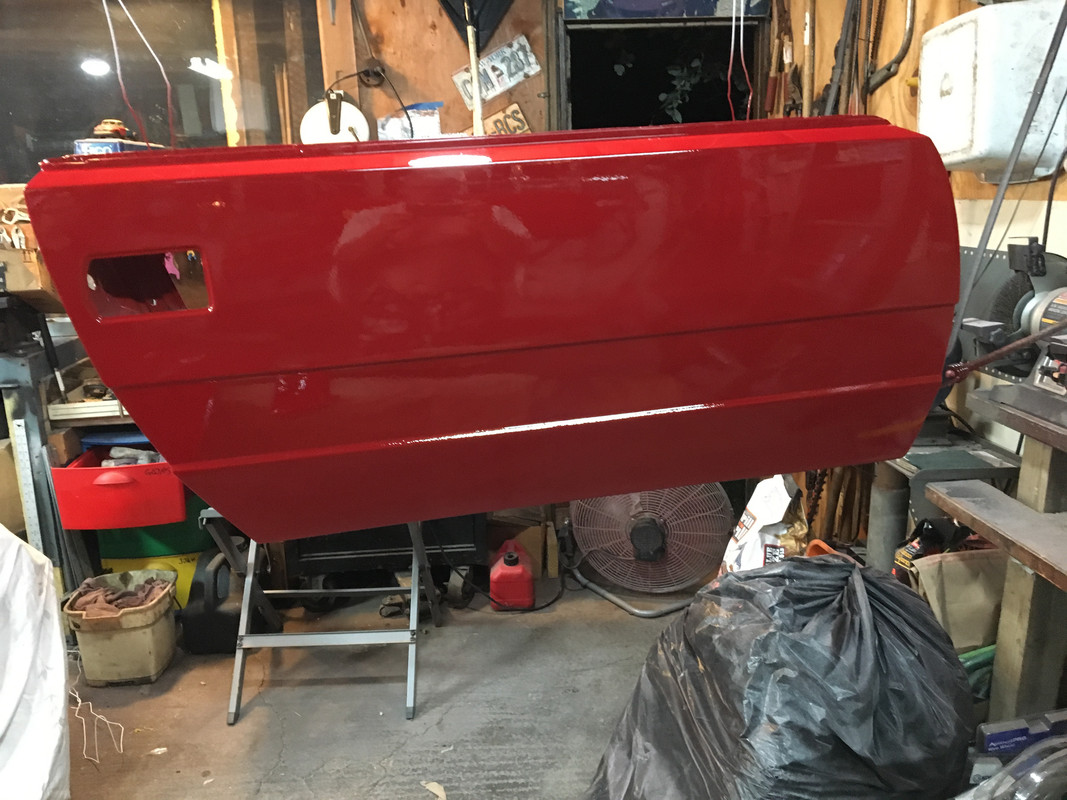
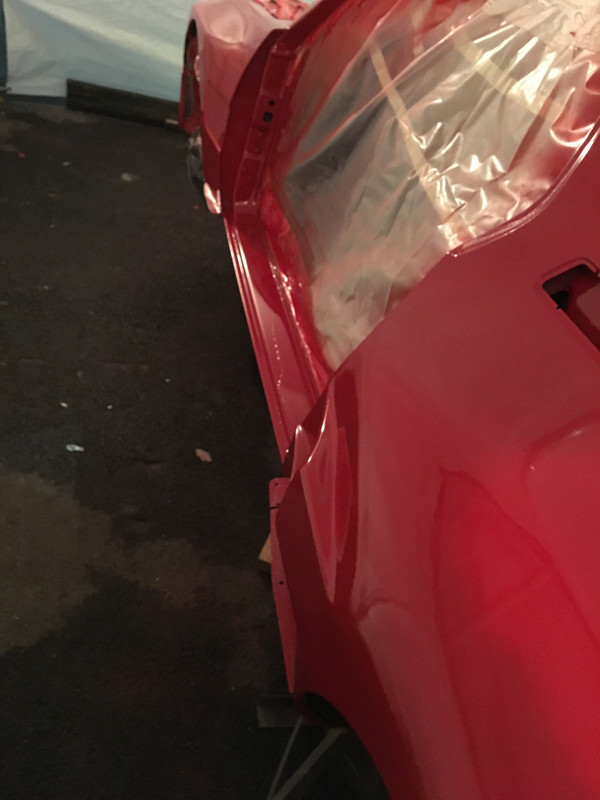
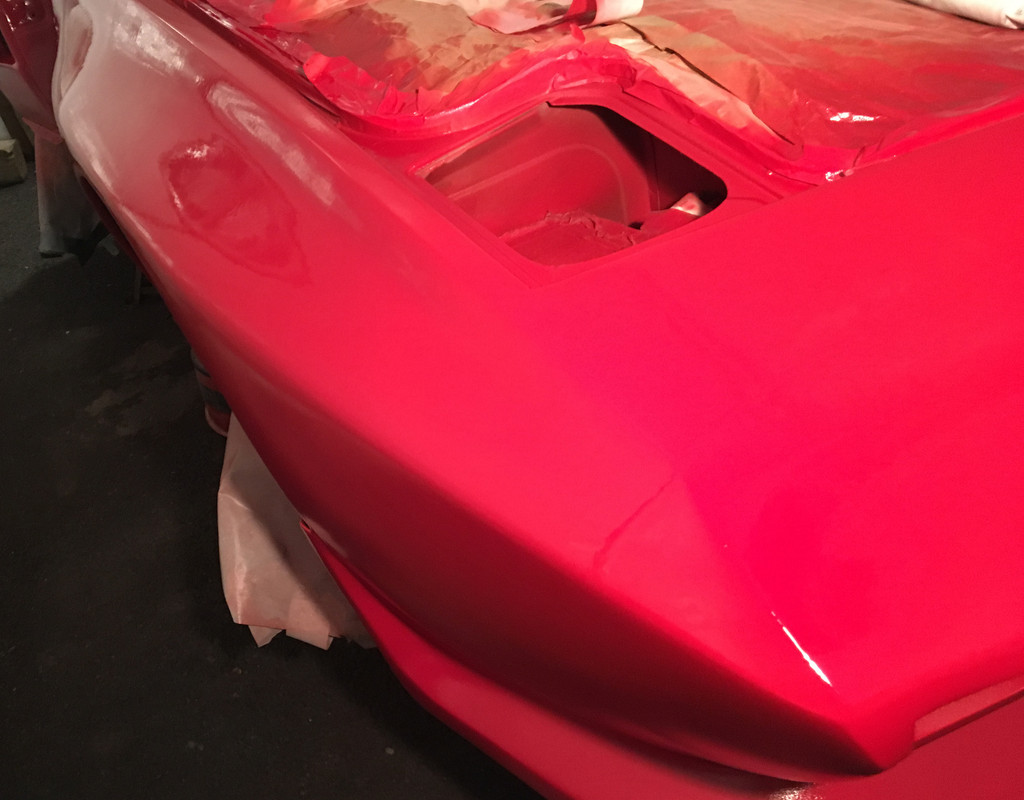
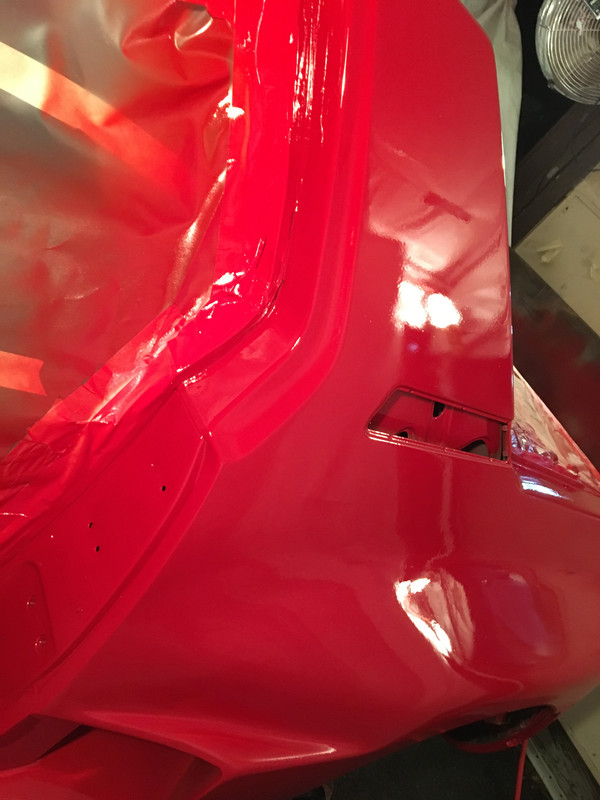
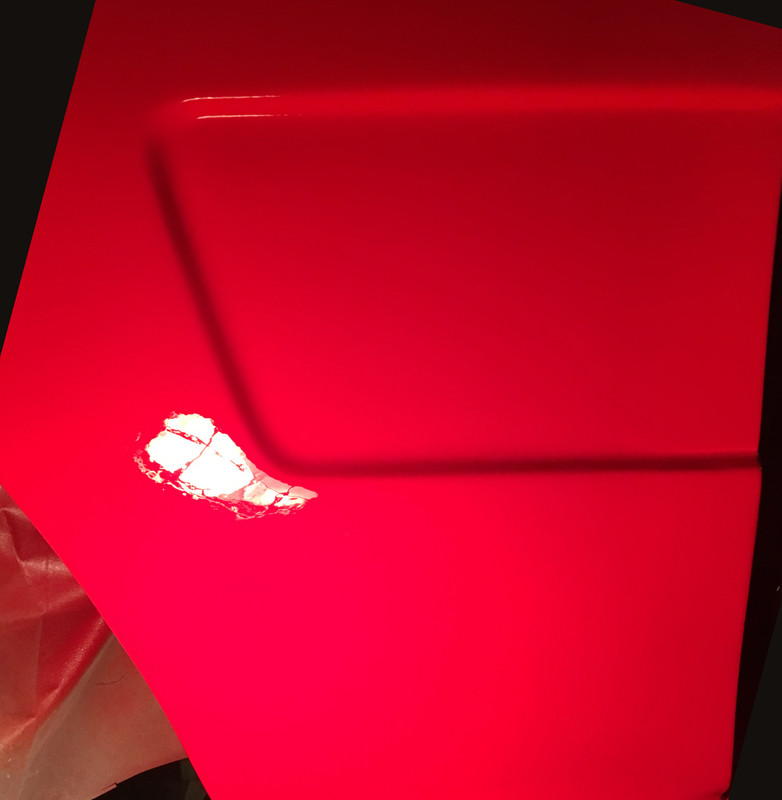
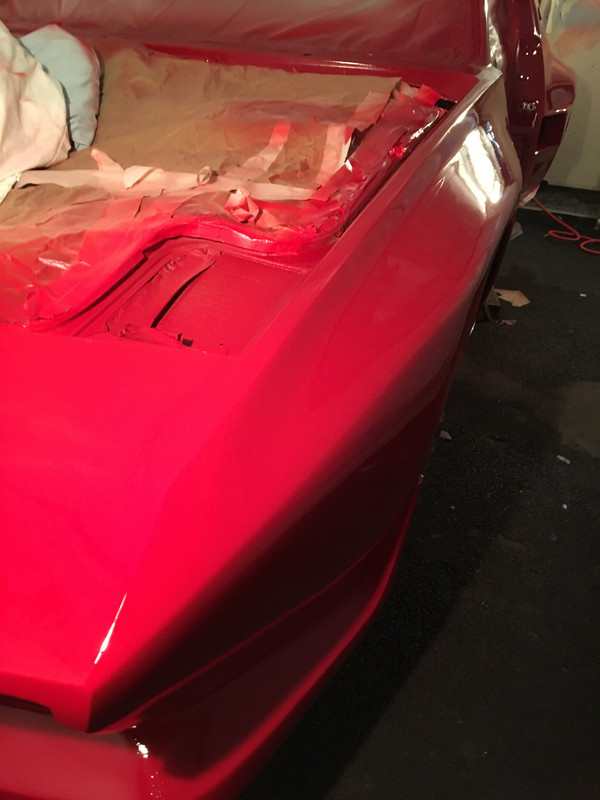
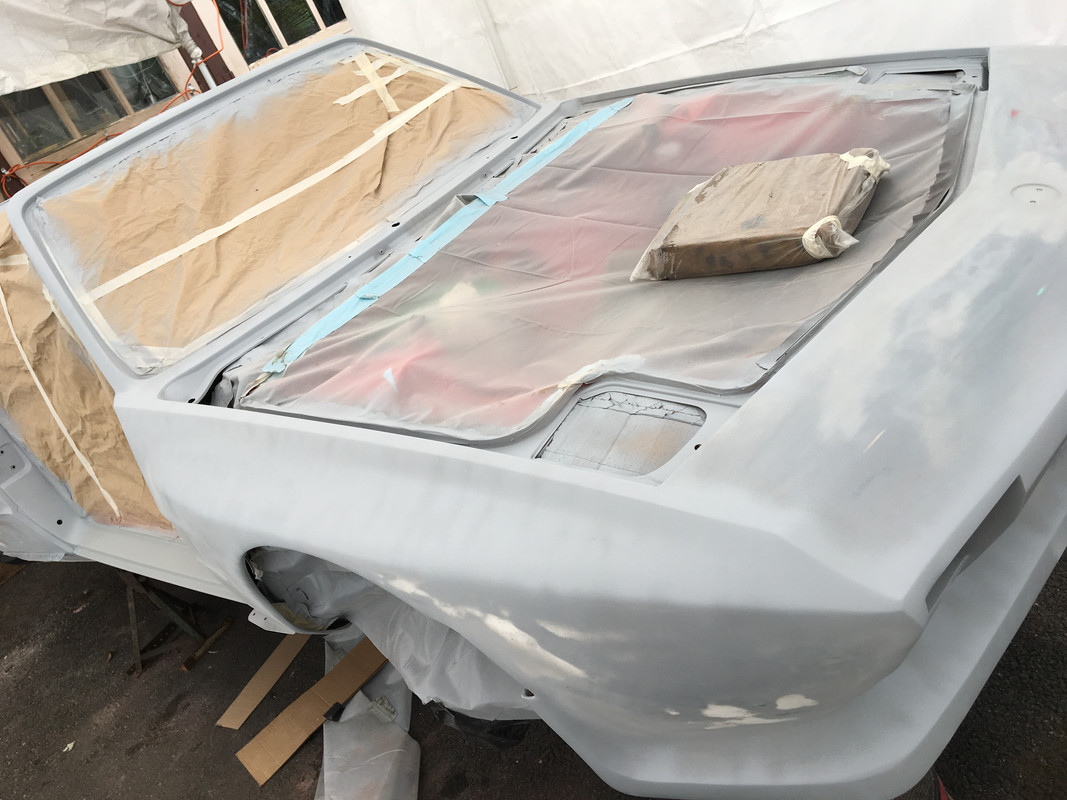
Got the targa, windshield frame, door jambs & sills, DS quarter shot before that started to get bad

Dallara_Strip00093.jpg


Dallara_Strip00092.jpg


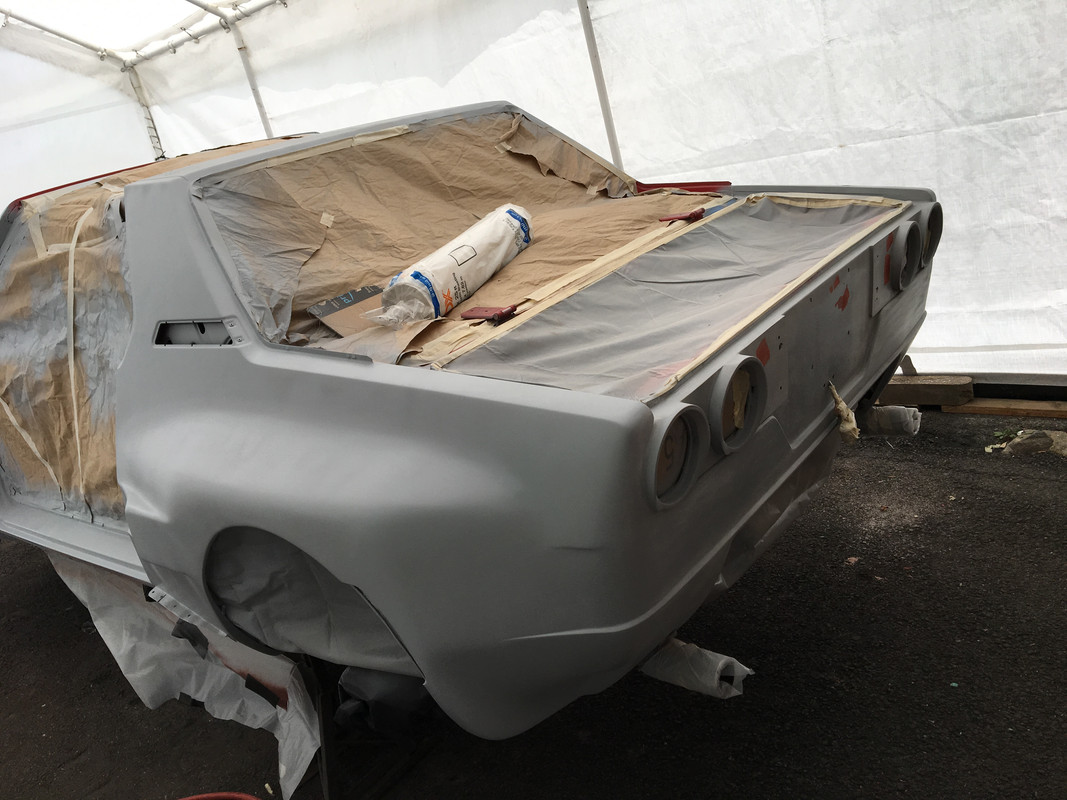
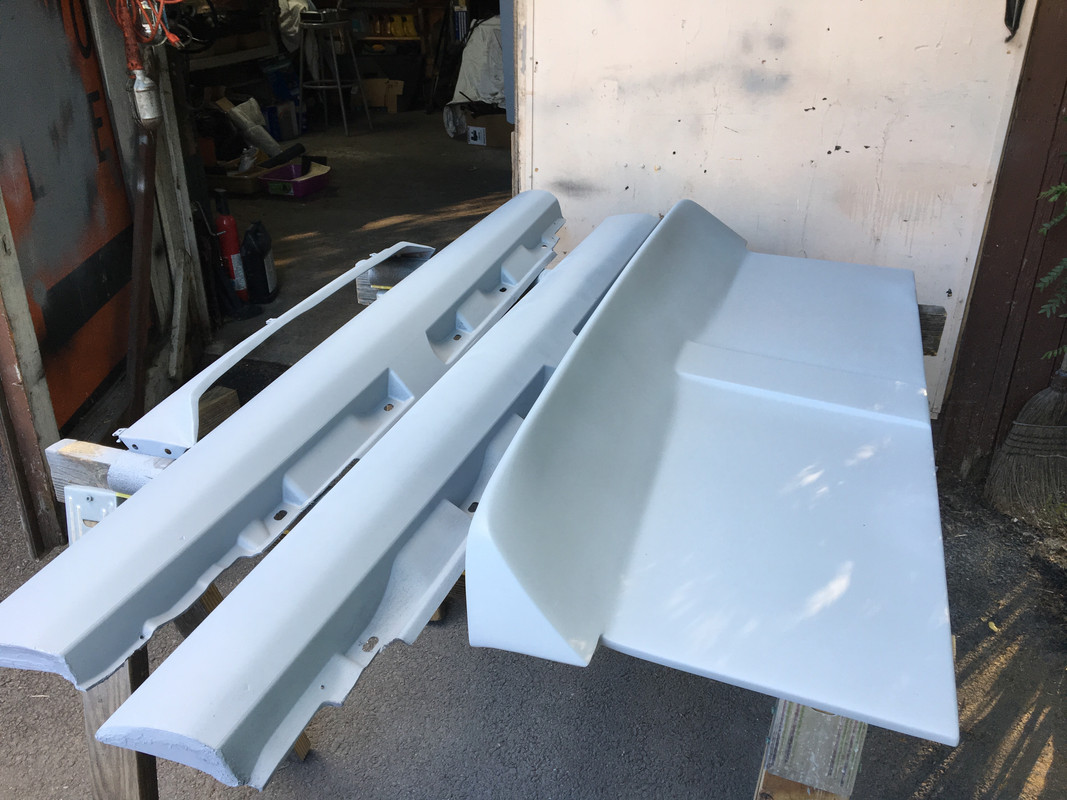
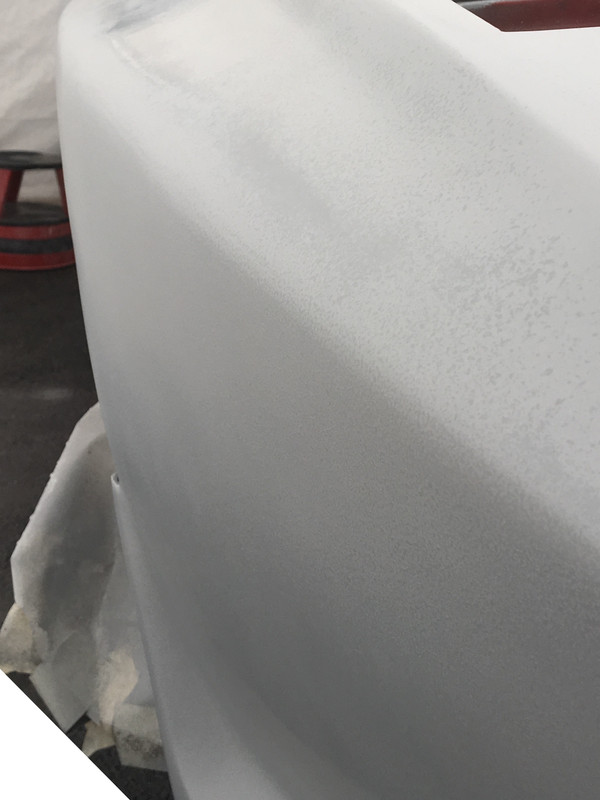
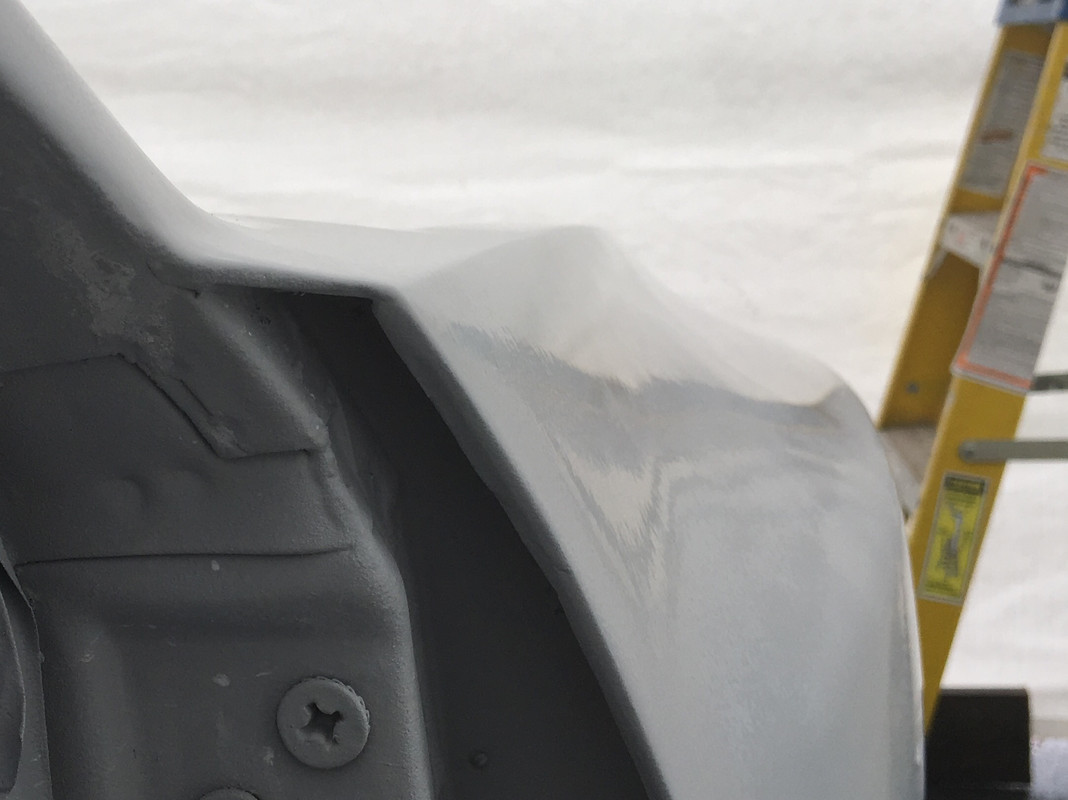
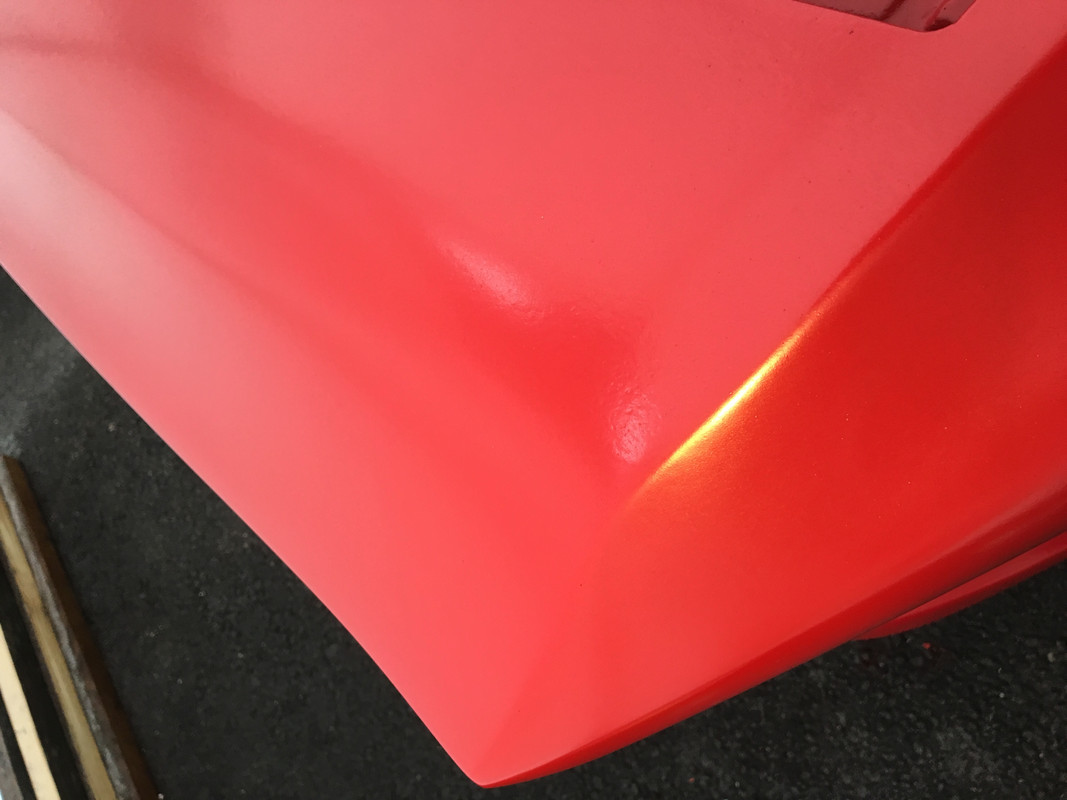
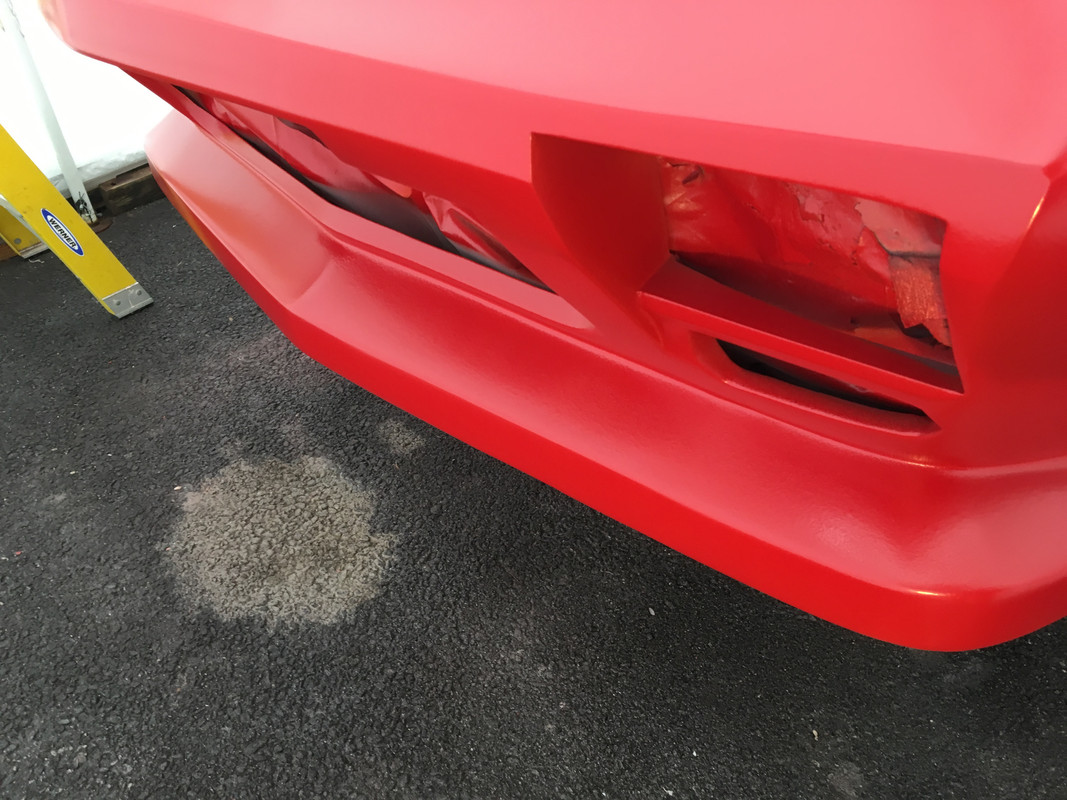
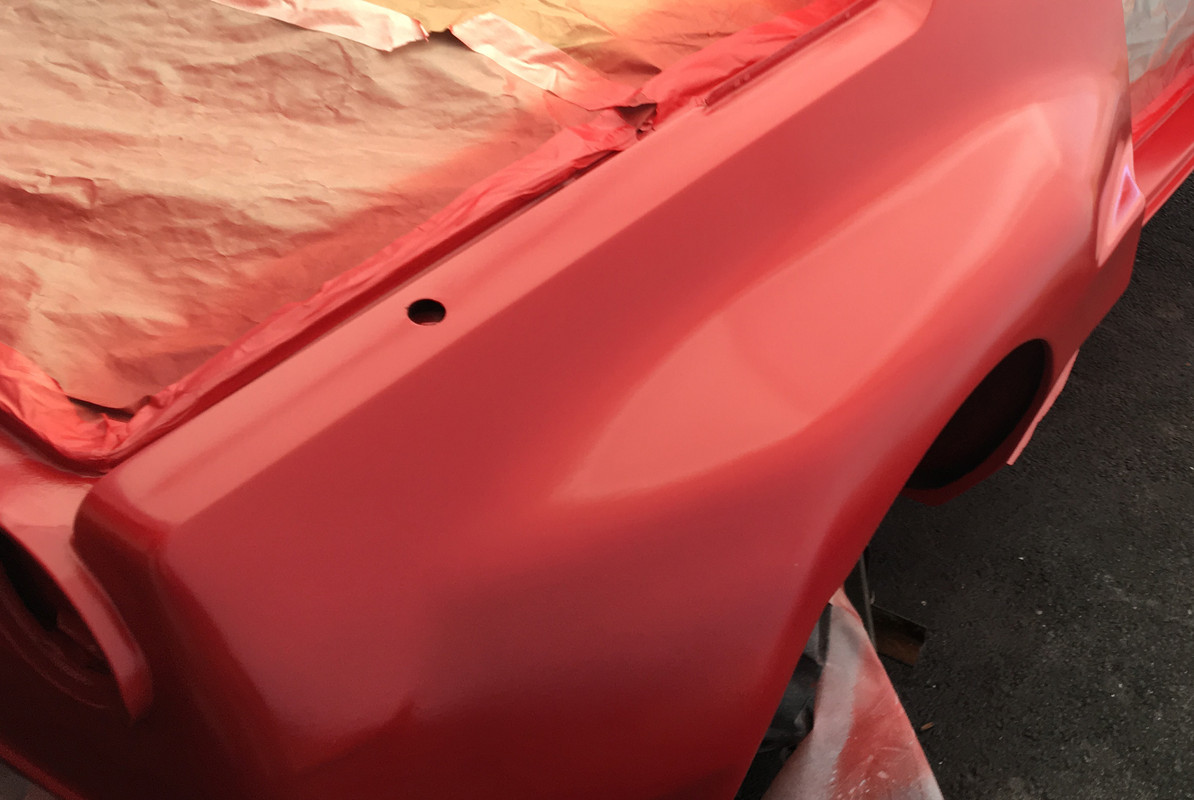
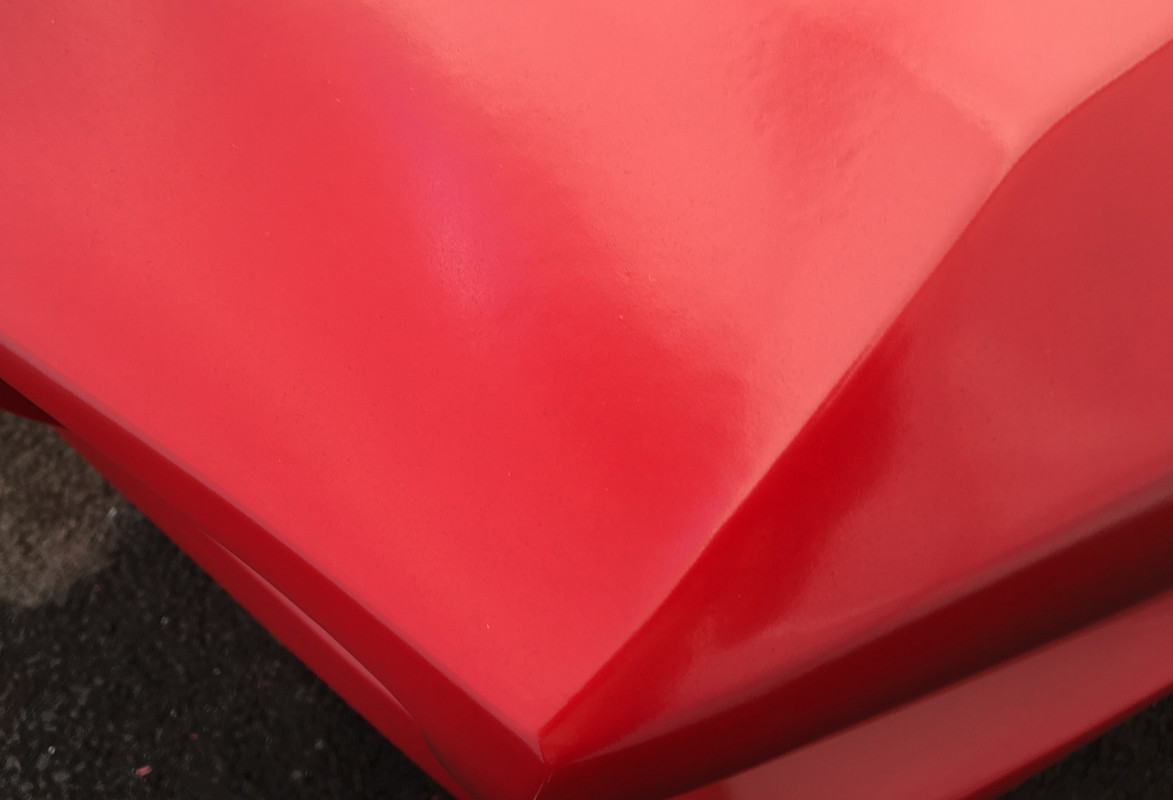
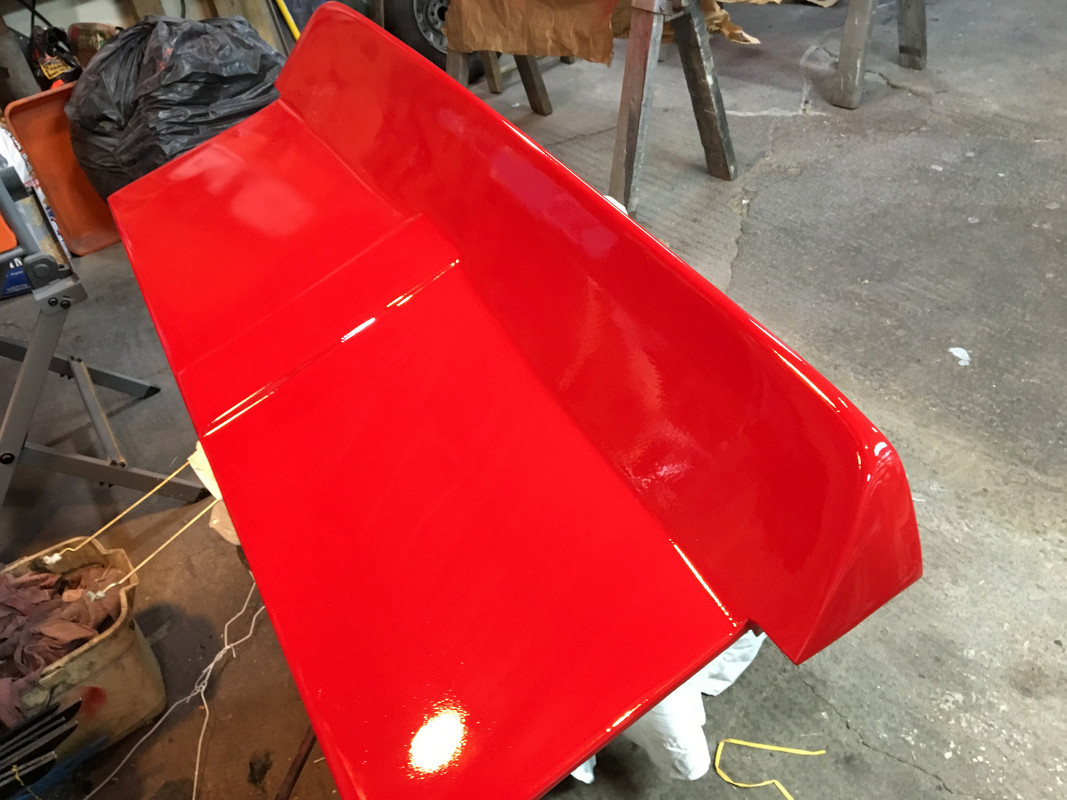
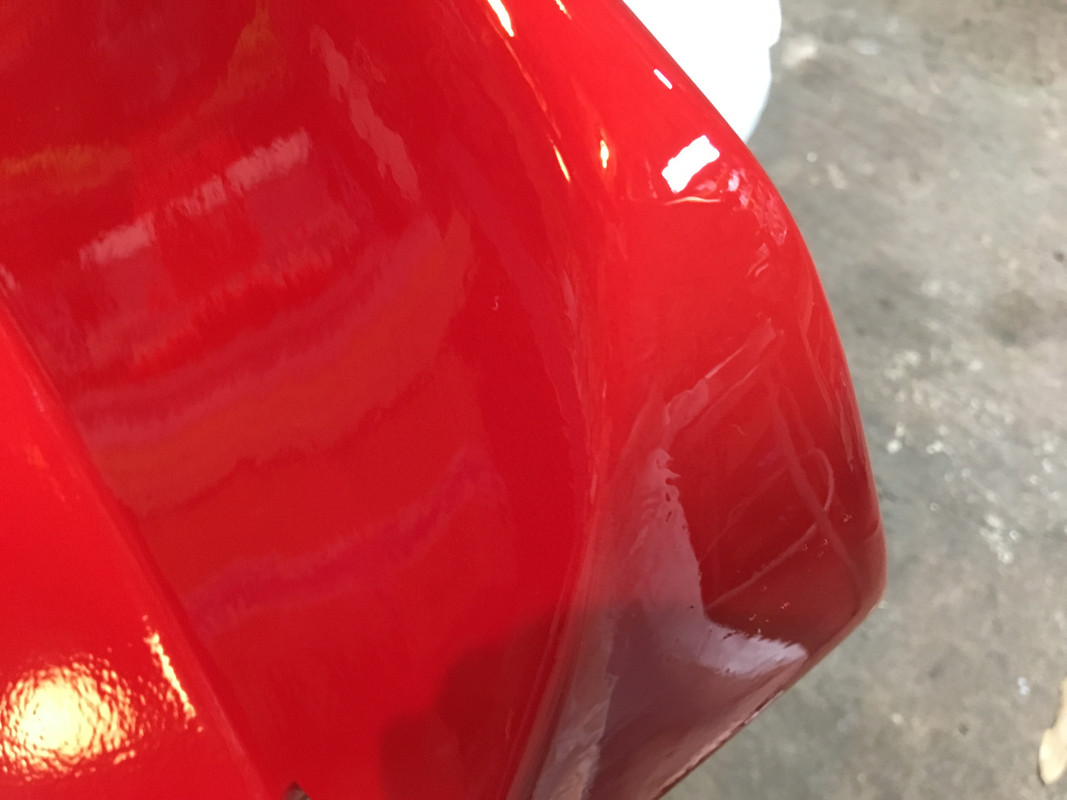
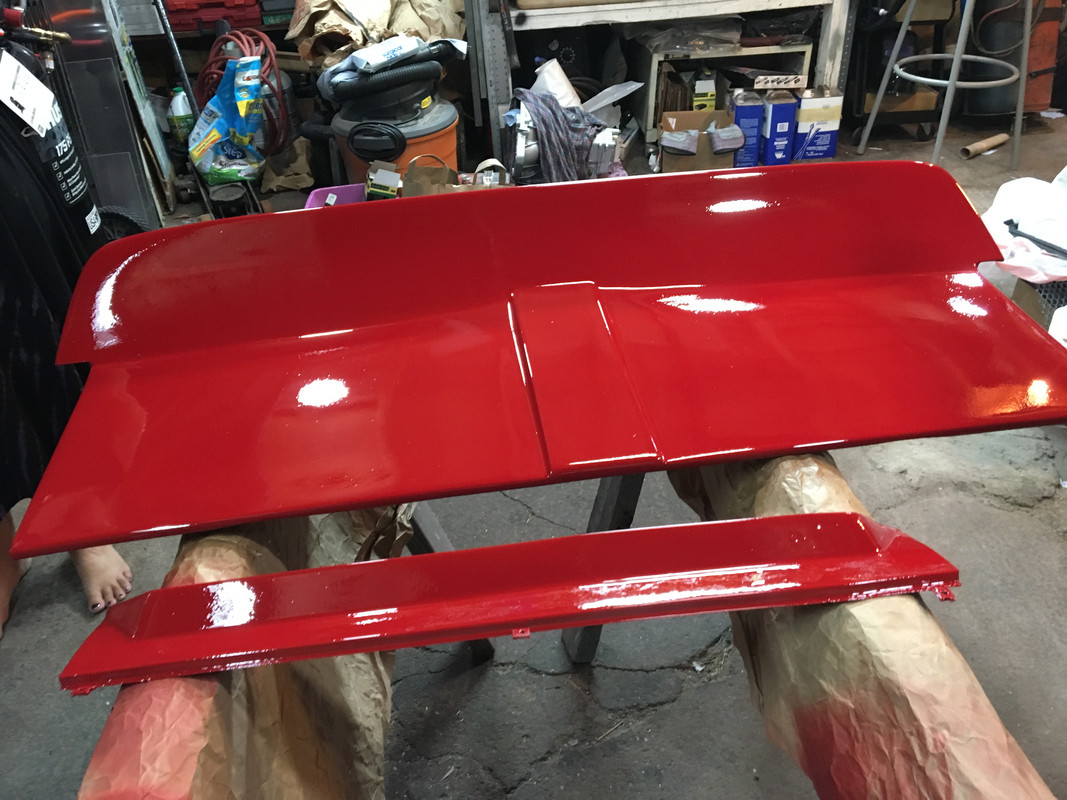
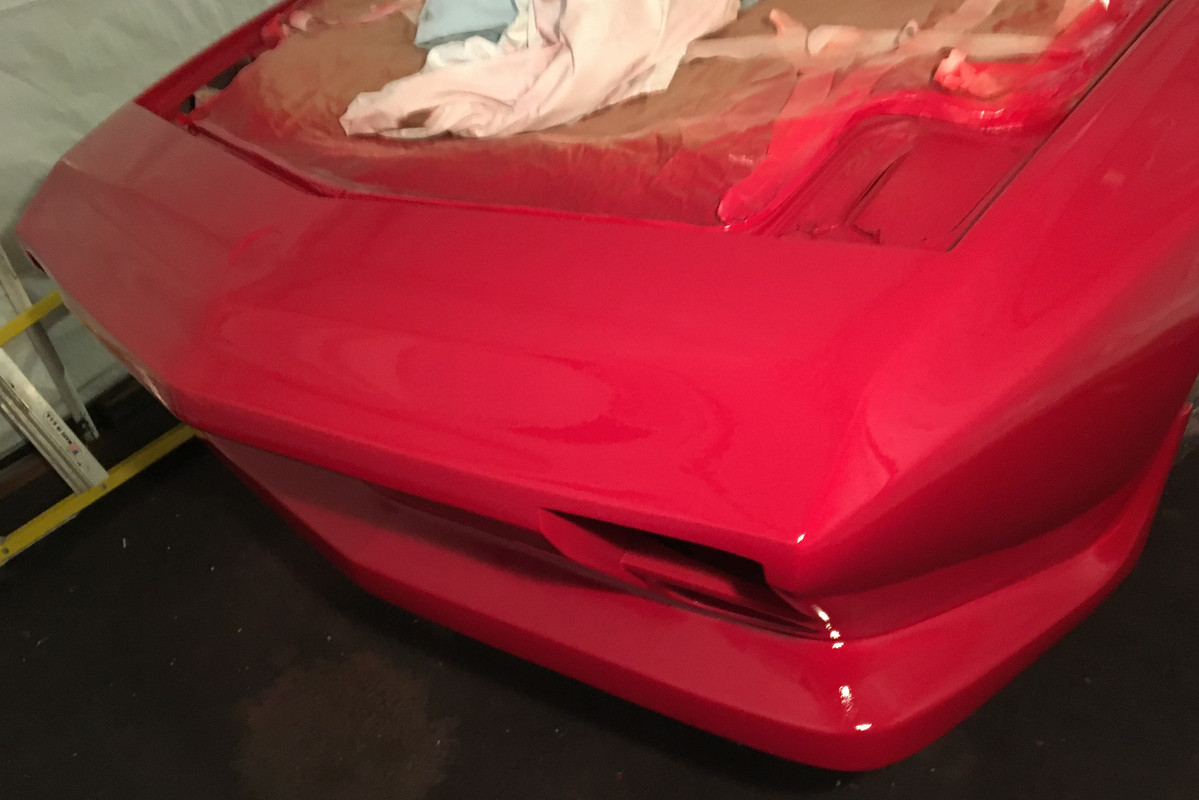
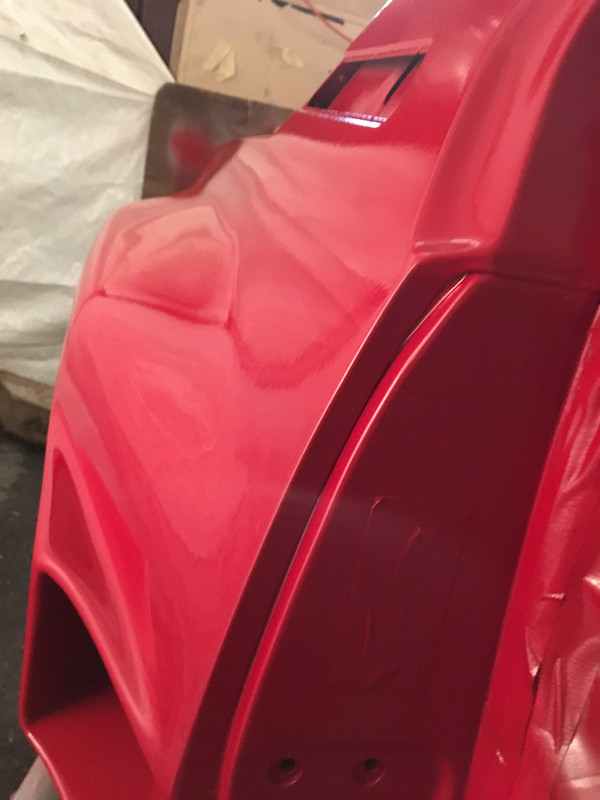
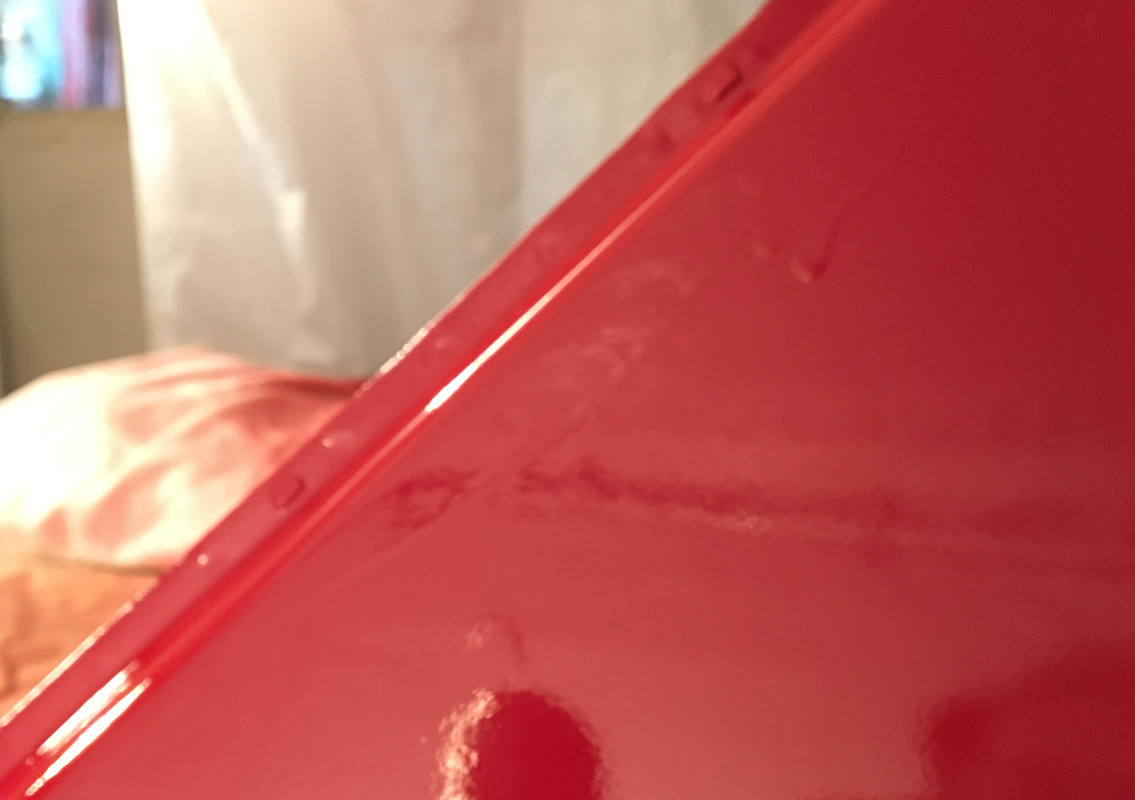
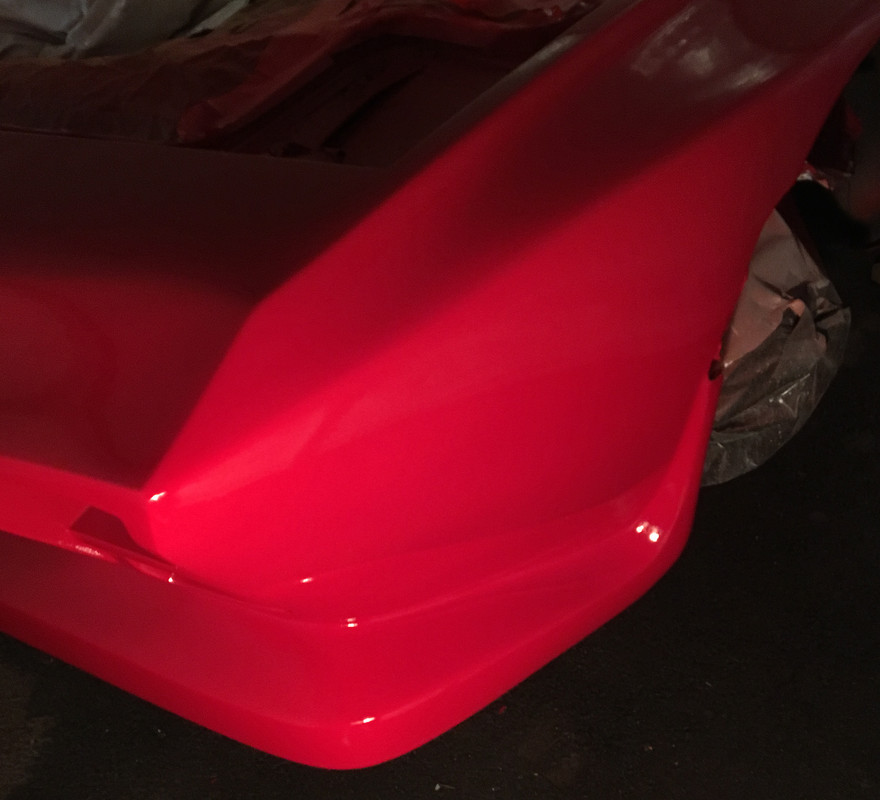
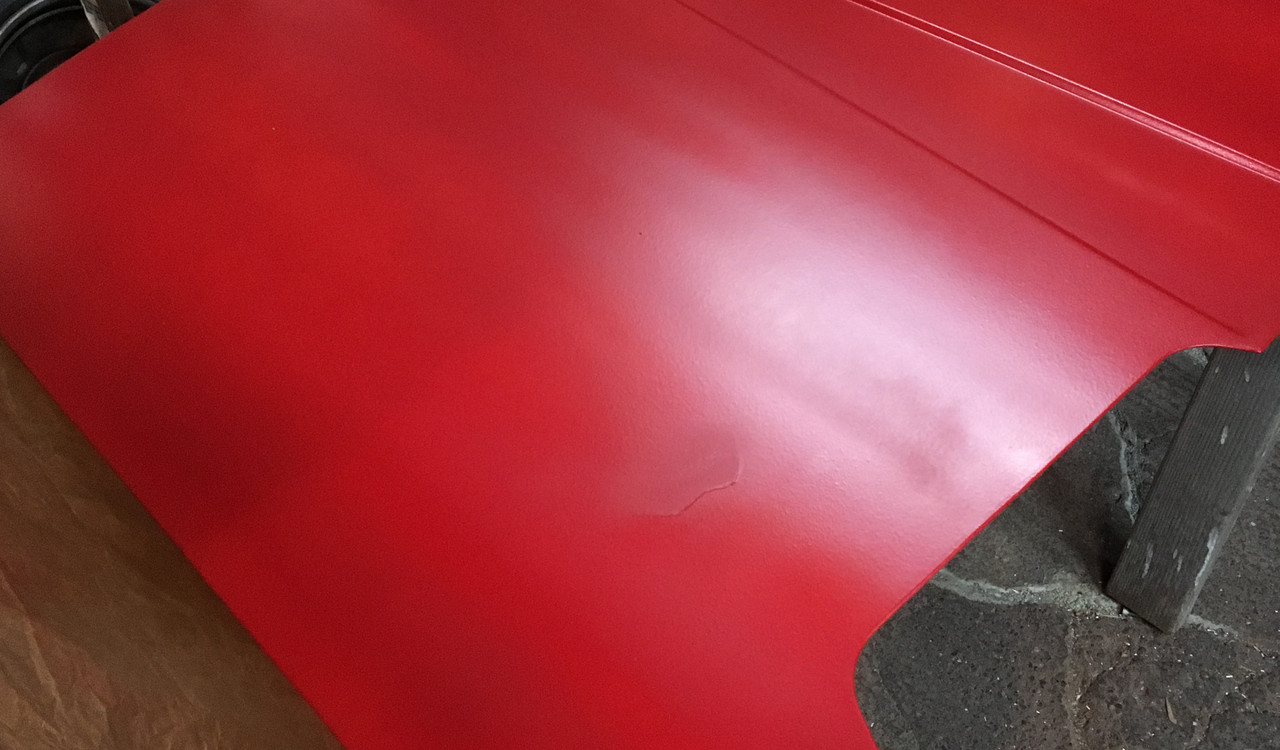
The front fender caps and spoiler got heavy orange peel so I stopped.

Dallara_Strip00091.jpg


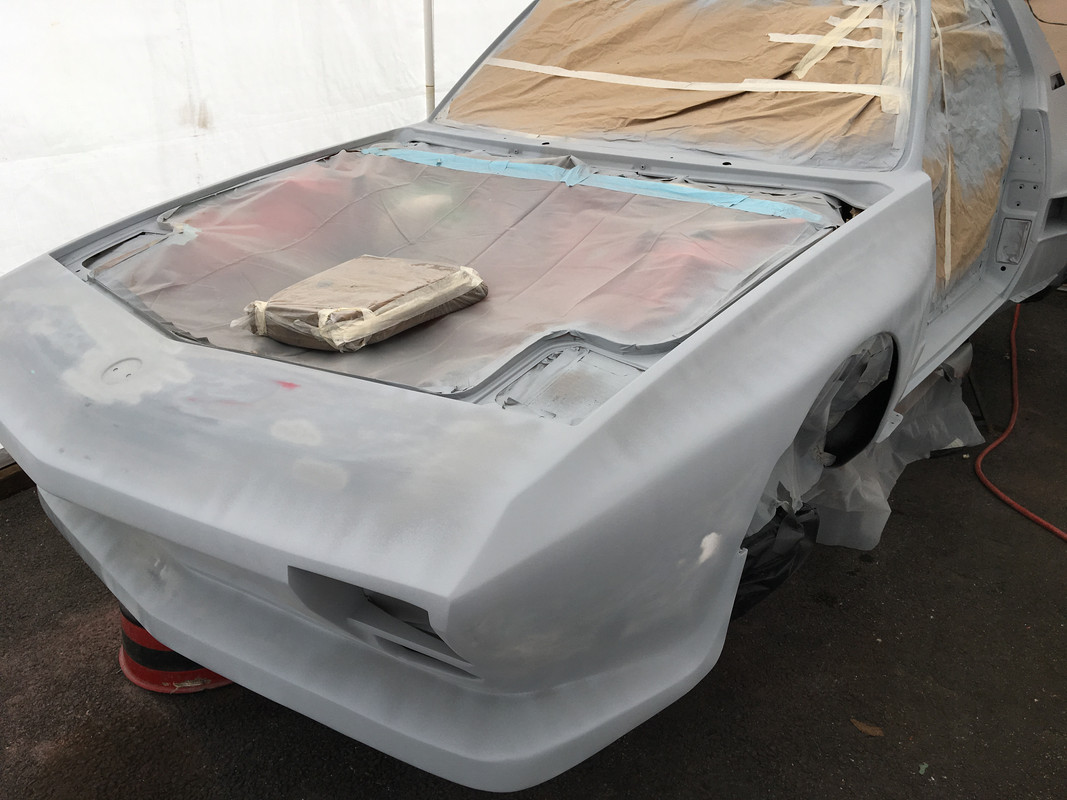
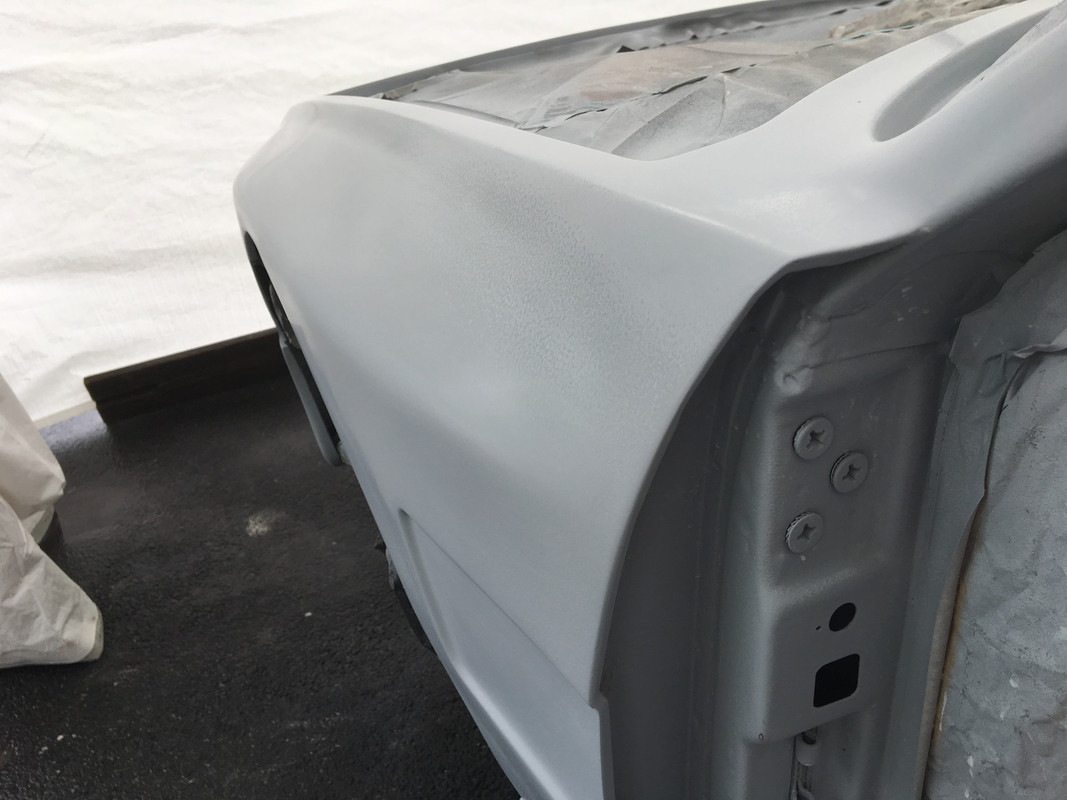
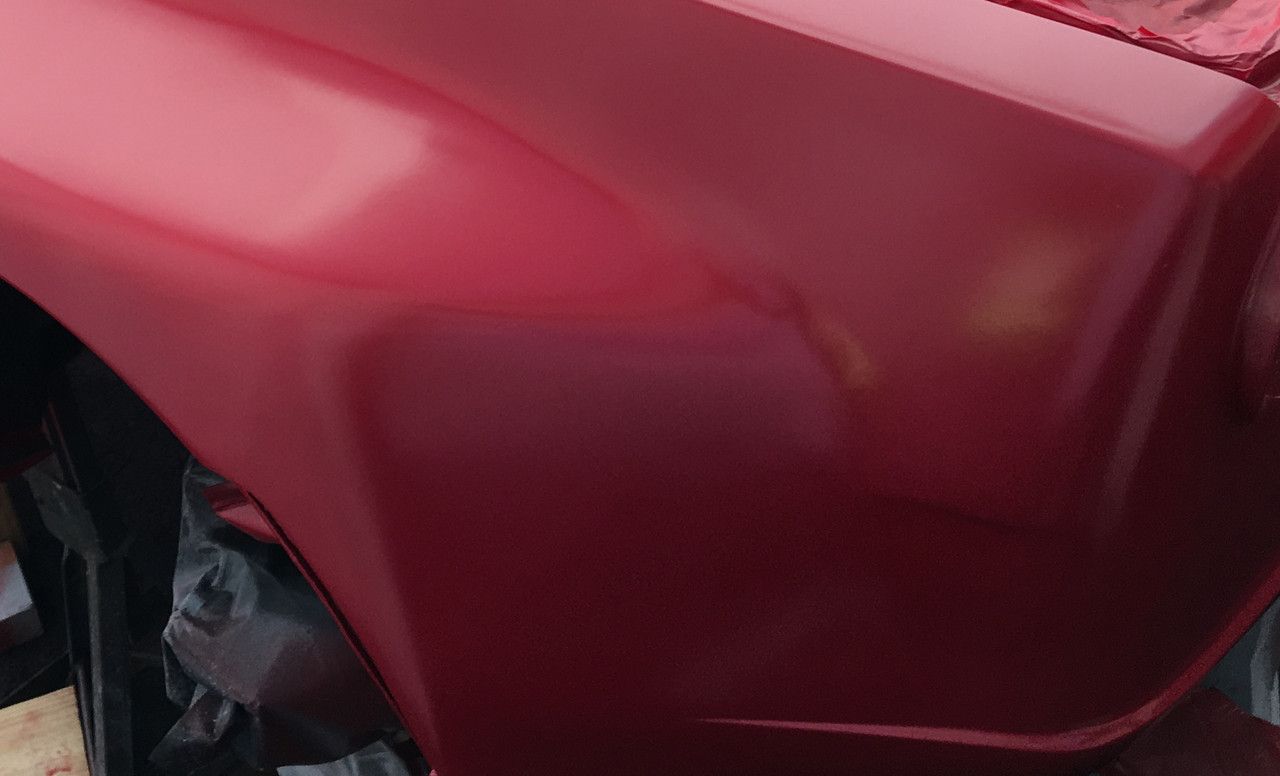
you can see the banding along the top of the fender where the spray was uneven flow
Dallara_Strip00090.jpg


Then I found out that the thinners I had bought didn't work to clean the gun - it just coagulated. When I took the gun apart, the inner plastic filter was completely clogged (Primer setting to quickly?). Had to run out & pick up some proper laquer thinners.

I think I mixed the proportions wrong - pretty sure I put 8oz (instead of 6) activator to 24oz primer, so I'm assuming it started getting thicker too quickly in the gun. The primer I poured back out of the reservior hardened in less than 1/2 hr. They said it should have a pot life of several hours.

Dallara_Strip00089.jpg


I lost about 12oz of the primer mix. The other problem, was that in use the gun nozzle pressure gradually dropped from 30psi to 20, with the compressor running pretty much continuously (20 gal tank, 25ft hose). I think I will need to mix & spray smaller quantities to avoid this.

Hopefully tomorrow goes better. assuming the thunder showers hold off. Thunder showers today started about an hour after my fiasco, so I didn't get to try a new batch.

At the very least I can sand it back down.
 
Last edited:
Ouch.... isn't that always the way! I'm sure you'll get it figured out. Rain, rain, stay away, until another day :) I wanna see this!!!!!!
 
i use 1.7 tip gun to spray the 2k or epoxy primer , and you need a bigger then 60 gallon compressor to spray it nice ,
 
Tried the 1.8 gun. Mixed a 24oz primer, 6oz activator batch, to see if that helped in terms of pot life. Paint came out heavy, compressor is not able to sustain volume or pressure. Fan nozzle started clogging.

scuffed this to show the peel finish. It's not hard work sanding, at least.

Dallara_Paint00005.jpg


Dallara_Paint00008.jpg


Much more sanding in my future. Even with this, it's so much easier to use than rattle can, and a much harder surface.

Went out & bought a 30gal compressor (Husky) - listed as suitable for HVLP. Mixed a new smaller batch (12oz/3oz) & shot the door frames & the trunk lid, went back to the 1.4gun for this. Also did most of the rear panel, and one rocker cover, at which point the paint became harder to shoot (almost empty reservoir) - this all took about an hour, so that is the time limit before the paint thickens too much it seems, in this temp weather anyway.
Line pressure didn't deviate significantly from my 30psi base setting, which is good news. I did run the compressor for the better part of an hour pretty much straight, which is not recommended, reading the manual they say 50% duty cycle for longevity.

orange peel on right side door frame is from previous sealer.
DallaraPaint00006.jpg


DallaraPaint00007.jpg


Other issues are that I sweat profusely, and even with a full paint suit, I drip out my gloves & the sleeves - have to be very careful leaning over to do gutters, etc.

I think I did another small batch with the old compressor / large tip, but I've lost track now. In any event, I need to go back to the 1.8 tip for the primer, now I have consistent line pressure.

Had a great chat with Chris (Huey) tonight. Very helpful indeed on the nitty-gritty details.

Weather looks clear from here through Tuesday. I did break down & order a Devilbiss GTI 620g to do the base & clear, so unless the cheap gun operates more cleanly (no fluttering) with the thinner base when I do the door jambs & frames, I will hold off shooting the main panels until that arrives Tuesday.
 
Last edited:
Spent a little time this morning & made a manifold to link the two compressors - read that it may help assist the primary compressor. Check valves in both outputs so that they don't simply fill the other tank. can't say it did anything, but maybe I need to play with the output pressures. I left both cranked up to 150.

Anyway, spent most of the morning & early afternoon sanding all the heavy (and uneven) orange peel off the body from the last attempt. Had to spot putty a few low spots that turned up in all the fender-to-fibreglass panel ridges.

Once that was done, I prepped it & shot (with the 1.8 gun) two primer coats over the areas I either sanded significantly, or hadn't primed before. Also got one coat on the hood, and the other rocker panel. The problem is with all my screw-ups, I don't have enough primer left to do the second coat on the hood, trunk, and rockers. Only have about 12-14oz left. I'll have to go buy another 1/2 gallon tomorrow to finish the doors, hood, trunk & rockers.

I had switched back to the 1.8 gun, after watching a couple videos by "The Gunman" - he talks non-stop & now having some practice, most of what he says now makes sense to me. He talked about just cranking the fan & volume way up for primer, to get it on as quickly and completely as possible. One video was a comparison of a cheap gun (much the same as mine) to a Devilbiss. Further reinforced that I won't use my cheapo to shoot the clear coat :D
With the larger nozzle, the paint flowed much better (and quicker) so no issues with clogging due to paint hardening in use. I did only mix about 16oz batches, that worked well, albeit more work cleaning the gun inbetween mixes.

The plan is to wet sand (600 grit?) the body tomorrow, and hopefully shoot the base in the jambs, gutters, etc. I really, really want to be done priming tomorrow. Leaving for Orlando on Thurs. for a week, so it will suck if I don't get the paint & clear done before we leave. :(

DallaraPaint00011.jpg


DallaraPaint00010.jpg


DallaraPaint00012.jpg


DallaraPaint00013.jpg


DallaraPaint00014.jpg


DallaraPaint00016.jpg


DallaraPaint00015.jpg
 
Last edited:
Happy to see your progress, even with the trial & error you had to deal with, that's how we learn best.
I was going to recommend "The gunman". I use to watch and learn from few sources, saw that the gunman approach suits me the best,
he is clear (after get pass that heavy accent :)) and straight to technical tips and tryouts.
A few point to add, if i may.
1. Check your compressor CFM rate. It's important specialy in continuous-demand devices like a spray gun.
You mentioned it's says it suits a spray gun, but there are few types of those, and not always with the same CFM rate.
2. In this phase, i would use a 400 grit wet send. It will leave a good base to the next level that you need to sand in any case.
Those layers are thick enough and 400 still leaves a nice surface.
3. Wheather has it's effect on the mixing ratios.
Just few quick tips in a middle of a work day, probably will think of some more...

Good luck.
 
Be careful about sanding grits. If it is a solid colour 400 will be okay, but if it is metallic then 600 or 800 would be better. The metallic will show the sanding scratches in 400 paper only after the clear is on the car. Then a redo is the only way to go.

TonyK.

Grimsby Ontario Canada.
 
To be safe, better use p600 even if solid color. I finished on Mini with 400 and can see in few spots marks of sandpaper.
 
My remark about the 400 wet sand, is while still applying base coat layers.
We all know it's not one shot, and there are always some filling and another coat to do, at least once.
Those coats are still thick and needs a good grip to the surface.
I agree that when going to top coats, it's better using 600~.
 
Thanks for the tips!

So, I got up nice & early & got about a quart of 2K primer/activator from a local body shop. with that I did all the remaining primer coats - hood (2nd coat), doors (2 coats), rear lower valance, rocker covers (2 coats).

Got to wet sanding by around 10:30. Took until about 2 pm. I thought it felt pretty good (used 600 grit).

DallaraPaint00018.jpg


DallaraPaint00019.jpg


DallaraPaint00020.jpg


DallaraPaint00021.jpg


Decided to paint the base coat on the windshield frame, targa bar, door jambs, trunk & frunk gutters door frames, backside of hood. Ended up continuing & applied base to the whole body.

Got a couple of runs - one on the rear, one on the right windshield post. I had the volume set too high initially. Driver's fender cap has a bunch of dust in it, so that will have to be cut back again.

DallaraPaint00024.jpg


Looks a little orange-peely over the fender flare :( Bunch of imperfections all over. Looks like I'll be sanding again. I didn't realize base cgood be sanded without recoating - I assume it depends on thickness of base.

DallaraPaint00025.jpg

DallaraPaint00026.jpg


DallaraPaint00027.jpg


Some dust here :(
DallaraPaint00034.jpg


DallaraPaint00035.jpg


DallaraPaint00036.jpg


DallaraPaint00037.jpg


DallaraPaint00038.jpg


Red looks warmer under light

DallaraPaint00032.jpg


DallaraPaint00033.jpg


New red compared to original (albeit sanded) red on engine cover

Dallara_Paint00030.jpg
 
Last edited:
Well, its not horrifying.

:D

Seems you got carried away a bit running directly to color. I would give it a day to shrink before going back into it, the harder the paint is the better the sanding will be. Work carefully with the drips despite this being catalyzed things can be a bit funky in the depths of them.

No one will forget that color going by them.

At this rate you could get it to FFO in Orlando still.

Exciting! Can’t wait to see the finished article.
 
Spent quite some hours wet sanding the base (with 600 grit) on the body, and the primer on the doors, the trunk and the rocker covers. Tempted to use something coarser on the body panels, it's taking so long to get the peel out :(

DallaraPaint00052.jpg


DallaraPaint00039.jpg


DallaraPaint00040.jpg


Didn't get to the tail panel. That's gonna be quite fiddly.
Dallara_Paint00042.jpg


Painted these with the new Devilbiss gun. Used less paint & better coverage, I think. Just felt like the flow was "cleaner". Still need another coat on the doors and trunk, ran out of time.

DallaraPaint00043.jpg


DallaraPaint00044.jpg


DallaraPaint00045.jpg


Wet down the DS panels to see how it looks. Front looks mostly OK, should be able to respray base tomorrow after a little more sanding.

Dallara_Paint00047.jpg


The rear edge needs more work

DallaraPaint00050.jpg


Rear panel has much work to do. Don't know what I thinking, shooting the base over these. Just got carried away :D

DallaraPaint00048.jpg


DallaraPaint00051.jpg


DallaraPaint00049.jpg
 
Last edited:
Sorry for the extra work. It will be worth it. Where the surface is flat it looks very good after wetting.
 
Looking good overall. It's frustrating for sure. There are parts that I've had to paint several times. The passenger side door on mine gave me total fits. I had it looking great until I burned through the base coat when wet sanding the clear (total idiotic move on my part, I knew better!) and had to repaint it. The second time, the paint didn't lay right and had to sand it back down. The third time, the paint crackled for some unknown reason. Ended up having to take the whole thing down to metal and start over. Now the paint looks great but the door has some nasty waves in it -- I should have smoothed it out with filler first. I guess I'll be redoing the door this winter.

The hardest part is the base coat because that's where mistakes can't be simply sanded out. Primer and clear coat can be wet sanded to smooth, remove dust/bugs, etc. Base coat can be sanded but then has to be resprayed once you sand it, which means the paint has to lay absolutely correct. Clear coat is forgivable so don't worry about making mistakes there.

I love those tail lights! I have a thing for round tail lights and would love to do that on my car.

Sorry I missed your text yesterday, feel free to call me today. I have a busy morning at work with lots of meetings but after 2pm today, I'm pretty much wide open.
 
Heavy rain & severe thundershowers with brief interludes of sunshine until 2:30 pm, so I stayed in my canopy. Had to go out in one of the sunshowers & tape up the canopy roof - it was dumping water on me while working. Not pleasant. I sanded away at the base coat used a scotch sanding sponge pad, then 400 & 600. Using 600 alone was taking way to long. After that, the sun came out & no more rain forecast, so I did all the base coat over on the body, and did the 2nd layer on the doors, trunk, and lower rear valance. The hood is another story. Not a good one.

Dallara_Paint00053.jpg


Dallara_Paint00054.jpg


Dallara_Paint00056.jpg


Had runs over on the left under the taillamps that I sanded out.
Dallara_Paint00059.jpg


Feel pretty good about the overall finish after the respray, using the Devilbiss gun.

Dallara_Paint00060.jpg


Dallara_Paint00061.jpg


DallaraPaint00062.jpg


DallaraPaint00063.jpg


DallaraPaint00064.jpg
 
Last edited:
Since I'm really pressed for time (leaving for Florida in the AM) I decided to get at least one clear coat over the whole body, and the doors, valance & trunk lid. I was planning on doing the final base coat & clear with all the panels back on the car, but no way that was happening.

1st clear coat: Good overall. With all the rain, there was less dust & bugs initially. Use full fan & 4 turns on the volume, kept nozzle about 3" off the panels. Mixed about 21oz, + 10% reducer. I sweat too much to work longer than it takes to shoot that volume of paint. Have to get the suit off, change my shorts (3x) & shirt (6x), drink water & suit up again for next batch. Went through 3 sets of respirator filters using the red. Looks pretty nice for 1st coat, I think.

Whats somewhat funny is that I was sure this Volvo color was warmer/more orange than the original paint. I used one of the old doors to test the spray pattern for base & then clear and, in the evening light at least, the color looks really close to original :D

DallaraPaint00065.jpg


DallaraPaint00066.jpg


DallaraPaint00067.jpg


DallaraPaint00068.jpg


DallaraPaint00069.jpg


Was dark by the time I got to the body. Was not sure I should proceed, but it's gonna get sanded anyway.

Dallara_Paint00070.jpg


Ran out of clear right about here.
DallaraPaint00071.jpg


next batch (21oz again) - shot the doors & trunk with 2nd coat before finishing the 1st coat on the body. In part because I got a couple heavy runs & wanted them to set up as much as possible before I went back. Turned the paint volume down 1/2 a turn incase that was the problem.

DallaraPaint00072.jpg


DallaraPaint00073.jpg


Wife asking if I'm done yet (9pm)
DallaraPaint00076.jpg


DallaraPaint00077.jpg


Nose looks great for 1st coat, I think. Hard to photo
DallaraPaint00078.jpg


DallaraPaint00079.jpg


Sag on DS rocker - I had the nozzle rotated to do the vertical jambs & forget to turn it back before I shot this :(

DallaraPaint00080.jpg


DallaraPaint00081.jpg


DallaraPaint00082.jpg


Sag on the PS sail

DallaraPaint00083.jpg


DallaraPaint00084.jpg


this was previously the worst orange peel area

DallaraPaint00085.jpg


Not the easiest to see in the low light - won't have time for daytime pics until I get back from FL.

DallaraPaint00087.jpg


Nose / spoiler cut lines good pretty good to me

DallaraPaint00088.jpg


I'm glad I got at least the one coat of clear on. Plenty of sanding to do on when I get back. Looked very clean going on, but still got dust & a couple bugs in the mix. Hopefully get all that out & then do the 2nd coat next week.
 
Last edited:
Looks good, lots of work to come. Hopefully things will shrink back a bit as it all hardens completely.

So you mention the hood and then don’t mention the hood. Did it come undone and fall down or did you back into it when it was wet paint and smear it with a fine imprint of your backside?

Enjoy your time away its looking good. Not bad for a first timer.

I know that when I get to this same stage in the future I will be like a newby as it has been so long since I have done this so all of this is a good lesson for me.

Painting an X poses some difficulties for sure due to the ins and outs but it also offers some benefits as well due to it having few large horizontal surfaces and as has the hood is removable and can be painted without leaning far across the car.

It is a good thing I didn’t take up boxing as I don’t have much reach and at 5’6’ can’t compensate by leaning far out either.

In any case, impressive work, enjoy your time away and when you come back you wil have plenty to do. Idle hands and all that.


Forgot to post the pics of the hood. I had the hood setup tilted nose up off the garage wall so I could shoot the edges, then in theory work across the panel. I should have left it hanging the way it was for the primer :( I couldn't get a clean close sweep on it because of the way I placed the sawhorses. I also am running out of base (since I had to reshoot the body)! Only have about 18oz of base left now, so really only enough for one good coat. I have to sand it back down to get rid of the runs I put in it, and it looks horribly banded - like a bad rattle can job. I hope I have enough base to get a clean coat over it, I'm sure if I end up buying more paint it's not going to match & the hood will stick out like a sore thumb. Not that I'm projecting or anything :D

DallaraPaint00089.jpg


DallaraPaint00090.jpg
 
Nice job! I feel your pain on the hood, I've been there. Large panels are a challenge to paint because you have to keep a wet edge to avoid striping. But you'll get it. Can't wait to see the finished product.
 
Back
Top