
The spring on my targa top latch broke. I found the following items for the repair:
Spring. The diameter of the wire is close to the original. The diameter of the spring is a bit bigger, but did not cause and problems:

 www.mcmaster.com
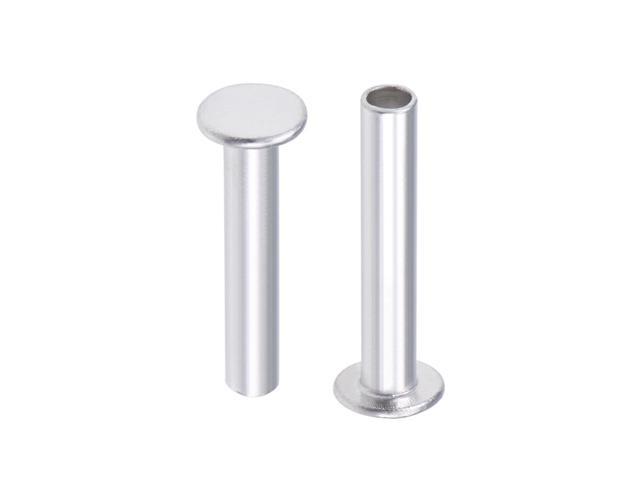
Rivet. M5 x 28mm Aluminum Flat Head Semi-Tubular Rivets. The diameter is correct, but I had to shorten the rived 3mm with a file.
 www.newegg.com
I later noticed Midwest Bayless is also selling the rivets:
 www.midwest-bayless.com
5mm rivet tool made for an air tool, but works great with a hammer:

 www.aliexpress.com
Latch after repair:

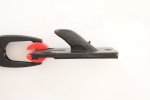
The driver side, rear corner of my targa top was a bit looses, even after adjusting the hook receiver as far back as it would go. The hook was somewhat chewed up:

This moldable rubber has a 30 minutes working time and cures in 24 hours. It was easy to work with (says my wife).
I had my wife do the work as she is artistic and I am not. She shaped a wire by bending it inside the hook receiver in the car to know the limit of how much material she could add:

I am quite pleased with the result. The cured rubber has just the right amount of stiffness, and it is somewhat slippery so it easily enters when putting the top on. The top fits snugly. Time will tell if it is also durable.


Spring. The diameter of the wire is close to the original. The diameter of the spring is a bit bigger, but did not cause and problems:
McMaster-Carr
McMaster-Carr is the complete source for your plant with over 595,000 products. 98% of products ordered ship from stock and deliver same or next day.
Rivet. M5 x 28mm Aluminum Flat Head Semi-Tubular Rivets. The diameter is correct, but I had to shorten the rived 3mm with a file.
50 Pcs M5 x 28mm Aluminum Flat Head Semi-Tubular Rivets Silver Tone - Newegg.com
Buy 50 Pcs M5 x 28mm Aluminum Flat Head Semi-Tubular Rivets Silver Tone with fast shipping and top-rated customer service. Once you know, you Newegg!
I later noticed Midwest Bayless is also selling the rivets:
Targa Top Latch Rivet PAIR (Fiat Bertone X19 All) - NEW
Targa Top Latch Rivet PAIR (Fiat Bertone X19 All) - NEW
5mm rivet tool made for an air tool, but works great with a hammer:
9.2US $ 8% OFF|[bkx-m5] Free Shipping 5mm Semi-tubular Rivet Gun Head Pneumatic Riveter 5mm Half-hollow Rivet Clincher - Rivets - AliExpress
Smarter Shopping, Better Living! Aliexpress.com
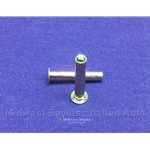
Latch after repair:
The driver side, rear corner of my targa top was a bit looses, even after adjusting the hook receiver as far back as it would go. The hook was somewhat chewed up:
This moldable rubber has a 30 minutes working time and cures in 24 hours. It was easy to work with (says my wife).
I had my wife do the work as she is artistic and I am not. She shaped a wire by bending it inside the hook receiver in the car to know the limit of how much material she could add:
I am quite pleased with the result. The cured rubber has just the right amount of stiffness, and it is somewhat slippery so it easily enters when putting the top on. The top fits snugly. Time will tell if it is also durable.
")