
You are using an out of date browser. It may not display this or other websites correctly.
You should upgrade or use an alternative browser.
You should upgrade or use an alternative browser.
What did you do to your X1/9 today ?
- Thread starter Eastep
- Start date
Dr.Jeff
True Classic
Do you mean about using these wheels? The obvious gain is their width, at least to help fit the new wider fenders you are planning. Or did you mean another type of gain?can't see any rational gain on this mod
Dr.Jeff
True Classic
I suppose if he is making new wheel adapters, then he could tap them with any thread pitch. Just so long as he then uses the same pitch studs. Bolt these adapters to the factory hubs with bolts matching the hub's thread pitch. Then mount the wheels on the newly added studs (on the adapters), using matching lug nuts for those studs. But I'm just speculating.
Stoney#1
Stoney
You will never have to many tools! When you work alone most of the time all tools are important and most of the time you will find a use different than what they were designed for, yet get the job done safely. Remember the use of the engine hoist to pull on accelerator so I could get spring clip installed?I bought a small scissors lift used for motorcycles to put on top of a moving dolly to lift the transmission and allow me to move it sideways into place. As I do everything pretty much by myself I tent to over invest in tools to assist me in getting the job done.
I also bought some of those trailer scissor jacks (rated to 7500lbs each) to lift it 24” up and two sets of 6ton jack stands to hold the X up in the air higher.
I also have a beam to hold the engine up from above that sits on the strut towers.
I know, overkill.
I love tools also, no matter the cost. If you doubt that, ask my wife

Stoney
Tom Ginefra
True Classic
When I bought my car it had NO BRAKES. Today I started the brake system overhaul. Rebuilt the front calipers. Right front was seized completely. Amazingly, (thankfully) no rust or scoring on either of the pistons or calipers. Just a lot of crud. Air trick worked "perfectly", to remove pistons (thank you X-Web contributors). I had to soak the right side pretty good with penetrating oil and wound up grabbing the edge of the cup with channel locks and rotated the piston a little bit at a time until I could use compressed air to push it the rest of the way out. Once it was unstuck it popped out as easy as the left side. I count myself lucky that they weren't as bad as I thought they were. I wire wheeled all the crud off the calipers and polished (as best I could) all the surfaces where the locking blocks come in contact with the caliper and bracket. Also applied hi-temp anti-seize to same surfaces. Installed new pads and MWB stainless flex lines. Not nearly as difficult as I thought it was going to be.
Note: I had to slightly enlarge the hole on the bracket to get the new stainless fitting to pass through, before I could clip it in place. Otherwise, very pleased with the components from MWB. Rears are next. and then...the dreaded Master Cylinders!!!!!
Note: I had to slightly enlarge the hole on the bracket to get the new stainless fitting to pass through, before I could clip it in place. Otherwise, very pleased with the components from MWB. Rears are next. and then...the dreaded Master Cylinders!!!!!
Dr.Jeff
True Classic
Rebuilt the front calipers.
Don't speak too soon....Not nearly as difficult as I thought it was going to be.
Rears are next.
AKimball92
True Classic
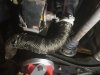
I took apart the rear half of my newly built engine to address a coolant leak. Sunday, I filled the engine with all fluids, oil in engine and trans, and coolant. All when well but the coolant leaked everywhere. It turns out my previous waterpump leaked like crazy, also a couple hose connections, but those are minor, pesky but minor. I did waste a full bottle of coolant concentrate. I should have started with water only stupid me. Coolant was leaking through the hole on the exterior side seen in the middle picture. It appears the water is leaking through the o-rings. A whole new assembly was ordered.


stupid me. Coolant was leaking through the hole on the exterior side seen in the middle picture. It appears the water is leaking through the o-rings. A whole new assembly was ordered.
Last edited:
Dr.Jeff
True Classic
AK, your engine bay is looking like - well, an engine bay again...looks good. Interesting the old pump has a stamped steel impeller instead of what I have always seen, a cast iron one. One theory is the shape/design of the cast impeller is more efficient than the simpler stamped one, but likely not by much. The leaking seal would be this part (not worth trying to replace, despite the fact they are readily available):

AKimball92
True Classic
That's really interesting Jeff as I don't even see that part on my pump. Also, with the slight rust on there it would be hard to press off. I tried to move the metal seen at the top of mine and it didn't budge. If anything I'll have a new one and can work on the old one at a later time to see if I can get it to work as well. I did not know that internally they were repairable.AK, your engine bay is looking like - well, an engine bay again...looks good. Interesting the old pump has a stamped steel impeller instead of what I have always seen, a cast iron one. One theory is the shape/design of the cast impeller is more efficient than the simpler stamped one, but likely not by much. The leaking seal would be this part (not worth trying to replace, despite the fact they are readily available):
View attachment 14257
The engine bay looked a lot more like an engine bay before Sunday
... Also, if it were running I could drive it about the yard and water the grass!Dr.Jeff
True Classic
Just for kicks I tried to disassemble one of my old pumps. Things broke before coming apart. Like you said everything was rusted solid. I would not bother trying to rebuild it. But that is how "rebuilt" water pumps are done; fully disassembled, blasted clean, the seal and bearing replaced, and new impeller installed. With some vehicles that is common but not with others (and Fiats seem to be on the "others" side). It surprises me that so many sources even sell the replacement seals.
ecohen2
True Classic
Rod Midkiff
True Classic
Did most of a peddle box change today (bad break Master) We had planned on doing both Break and clutch but ordered clutch slave instead.. clutch Master was working ok before and re-bleed easy.
Only had one break line break (gotta see about getting patching pieces) Anyone have suggestions.
what I would like to find a metric compression fitting. I have a nice chunk from another peddle box that I can screw into the junction box on the top of the picture.


Only had one break line break (gotta see about getting patching pieces) Anyone have suggestions.
what I would like to find a metric compression fitting. I have a nice chunk from another peddle box that I can screw into the junction box on the top of the picture.
nichol01
True Classic
I was doing the exact same thing this past weekend. The only difference is you are smiling. No smiles in my shop. I'm pretty sore today.Did most of a peddle box change today (bad break Master) We had planned on doing both Break and clutch but ordered clutch slave instead.. clutch Master was working ok before and re-bleed easy.
Only had one break line break (gotta see about getting patching pieces) Anyone have suggestions.
what I would like to find a metric compression fitting. I have a nice chunk from another peddle box that I can screw into the junction box on the top of the picture.
View attachment 14455
View attachment 14448 View attachment 14449 View attachment 14450 View attachment 14451 View attachment 14452 View attachment 14453 View attachment 14454
AKimball92
True Classic
Did most of a peddle box change today (bad break Master) We had planned on doing both Break and clutch but ordered clutch slave instead.. clutch Master was working ok before and re-bleed easy.
Only had one break line break (gotta see about getting patching pieces) Anyone have suggestions.
what I would like to find a metric compression fitting. I have a nice chunk from another peddle box that I can screw into the junction box on the top of the picture.
If you are looking for the hard line fittings they were recently discussed here. All you need is the proper flaring tool.
https://xwebforums.com/forum/index.php?threads/brake-line-nut-replacements.33258/#post-299843
I purchased some just in case but have not used any. Mine joints seal for now although many are very rounded or grooved by vice grips.