What did you do to your X1/9 today ?

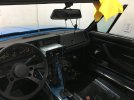
So I cleaned the contacts on the back of the tachometer, ('75 ver 1 or 1.5, CA model) but tach still hangs/stops at about 3000 RPM.

It's smooth up and down, and fairly accurate until then. Is there something I can clean or adjust on the inside of the tachometer or is it not user friendly? I don;t want to pop it apart and break anything.

Thanks everyone,
 
Got the rebuilt heater/Fan motor box and all associated water lines in today. Ran the car, nothing leaks, valve works...aaaand exhale.
BTW, used the "Lada" heater core. Fits good, very inexpensive. Shipped from east of Checkpoint Charlie in 10 days. Used weather strip foam from the hardware store, a new valve and elbow joint from Matt. All in for well under $100 with all shipping.

Still, glad it's over with.
 
HI everyone got passenger door interior done and did the back panel , the third picture is when I was cleaning before painting the panel it was dirty !!
 

Attachments

  • C3871EA7-73E3-4E26-8B44-A5A4CFD34AF5.jpeg
    C3871EA7-73E3-4E26-8B44-A5A4CFD34AF5.jpeg
    204 KB · Views: 123
  • 0ED31E96-F143-475C-A456-695988437130.jpeg
    0ED31E96-F143-475C-A456-695988437130.jpeg
    234.5 KB · Views: 135
  • 6E2FCCB0-4CCE-4949-B109-610D4CAAA780.jpeg
    6E2FCCB0-4CCE-4949-B109-610D4CAAA780.jpeg
    246.6 KB · Views: 116
It's funny that there are still some Lada's left, I live in Canada and remember when the first Ladas arrived here, the guys that were driving them off the car carriers had to keep a pocketful of relays when they went to take them off the boat. Apparently the black market in Russia was such that after the vehicles were placed aboard ship the workers removed the relays to sell on the black market, hence they arrived without some electrical components, too funny !
 
Today worked on upholstery under targa sail ,installed rear window ,
 

Attachments

  • B4B5FF59-D4F1-4C87-A465-5578BF095A65.jpeg
    B4B5FF59-D4F1-4C87-A465-5578BF095A65.jpeg
    250.8 KB · Views: 92
  • 07535E77-2D12-497A-989C-351B9B4D0A40.jpeg
    07535E77-2D12-497A-989C-351B9B4D0A40.jpeg
    189.8 KB · Views: 90
  • 889262FC-D42A-4424-B550-7B2964C292B5.jpeg
    889262FC-D42A-4424-B550-7B2964C292B5.jpeg
    234.6 KB · Views: 87
New T10 LED's for the cluster and fiber optics, swapped turn signal flasher and now they work fine, but now the emergency flashers are melting its 8 amp fuse. :/ Tomorrow replacing the cigarette lighter with LED voltmeter/USB. Cool gadget.
Got a bunch of small parts from Ladapower.
 
I replaced my crap old carbutetor for one I bought from a member (thanks, John!) I had to replace the throttle linkage and do some very minor mods to make it fit. Not not only does the car fire right up and not backfire, it no longer smokes! I was afraid the rings or valve guides were toast, but apparently I was just dumping fuel into the intake. It finally runs like it's supposed to. Time and money well spent.
 
Well, today was a wrap up from the weekend. Finally had the time to finish the carpet install, came out OK. Also installed my new fog light switch and reinstalled the center console. Next up cleaning up a little surface rust on the bottom of the seats and painting them then installation. Also need to re-grease slide rails after I finish scraping off what use to be Lithium grease which is now a caulk like substance when the PO decided to mix petroleum grease with Lithium grease. This is a Bozo no-no, they are incompatible.
2C9B52A3-9F02-4858-8107-0EDC18A1DC0F.jpeg
 
Last edited:
Printed and installed straight needles in the instrument cluster:


Before

1635477676168.png


After

1635477703306.png
 
Printed and installed straight needles in the instrument cluster:


Before

View attachment 54321

After

View attachment 54322
Looks great. How did you pull the neddle, did you use a meddle puller. I also assume the face plate just unscrewed. Was it easy to reorentate the new needles?
 
Looks great. How did you pull the neddle, did you use a meddle puller. I also assume the face plate just unscrewed. Was it easy to reorentate the new needles?

Gently grab the black base of the needle and pull straight up. It just pulls off by hand. The faceplate just unscrews from the back. Be careful to lift the faceplate up, don't invert it and lift the instrument cluster up off the faceplate. The odometer zero knob will fall out and some of the self locating aluminum sleeves can also fall out. Not a big deal so long as they don't fall and roll under places you'll never find them again. The process to align the new needles is in the 3D print link.
 
Today worked on desmogging , stereo install , next clean up engine area ,
 

Attachments

  • 3F8F0C7F-28BA-4121-B57B-1F31D7A14E7B.jpeg
    3F8F0C7F-28BA-4121-B57B-1F31D7A14E7B.jpeg
    274.6 KB · Views: 91
  • 4F4BA1D5-5830-49EC-9E9B-C1FA3235ECB5.jpeg
    4F4BA1D5-5830-49EC-9E9B-C1FA3235ECB5.jpeg
    239 KB · Views: 99
  • 58B455D3-8542-4B35-B628-1932FCC82DA2.jpeg
    58B455D3-8542-4B35-B628-1932FCC82DA2.jpeg
    226.8 KB · Views: 92
  • 29406373-8868-4616-B209-159113BDEC79.jpeg
    29406373-8868-4616-B209-159113BDEC79.jpeg
    265.2 KB · Views: 86
Back
Top