darwoodious
Darin Nelson
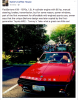
It's like your own little race track. Love it!

Ha! I thought the same thing!!! NASCAR? But then he threw in the off road part of the circuit!!! Oh yeah! Now we're going hybrid!! Nice!It's like your own little race track. Love it!
")
Finished the timing belt replacement, installed new dist cap and rotor. Grandson and I got the timing set. Everything worked out fine.
May need to replace the temp switch for radiator. Fan does not start or run at proper temp. Is there proper way to install bypass switch to control rad fan for back up?
It was a great day, especially working with Grandson.
Stoney
I will go out and try burping the baby right after dinner to see if that helps. Will keep you posed!One test for the temp fan switch is to short/jumper together the two contacts in the harness-side plug that connects to the switch pigtail, then place the ignition switch in run position. The fan should come on because the jumper wire is simulating the closing of the circuit by a properly working fan temp switch.
If it does, then rather than the switch having gone bad, it's more likely that you have some air accumulated in the rad---it seems to want to collect in that left side tank where the switch is installed. Too much air in that area, and the switch never gets much hot coolant flowing over it, and consequently does not "know" that the fan needs to be turned on. Once the air is bled out and the system topped off, reconnect the electrical plugs, start and run the car, and watch the temp gage and listen for the fan, it should come on when the temp needle is in the range of 190-200. If still not working, now you can focus on the switch itself, perhaps removing it and testing function in a pot of heated water with a multimeter.
If the fan does not come on with the above jumper test, then there is an electrical issue afoot---fuses, grounds, connections, etc should be checked.
Thanks to all for suggestionsOne test for the temp fan switch is to short/jumper together the two contacts in the harness-side plug that connects to the switch pigtail, then place the ignition switch in run position. The fan should come on because the jumper wire is simulating the closing of the circuit by a properly working fan temp switch.
If it does, then rather than the switch having gone bad, it's more likely that you have some air accumulated in the rad---it seems to want to collect in that left side tank where the switch is installed. Too much air in that area, and the switch never gets much hot coolant flowing over it, and consequently does not "know" that the fan needs to be turned on. Once the air is bled out and the system topped off, reconnect the electrical plugs, start and run the car, and watch the temp gage and listen for the fan, it should come on when the temp needle is in the range of 190-200. If still not working, now you can focus on the switch itself, perhaps removing it and testing function in a pot of heated water with a multimeter.
If the fan does not come on with the above jumper test, then there is an electrical issue afoot---fuses, grounds, connections, etc should be checked.
Replaced door hinge bolts with Allen head fitting rather than Phillips. Old ones were buggered up, looked crappy. Also replaced passenger door pin switch for dome light. Still working on the wiring for that, and replaced holder strap for driver side door. Lots of little things because I was stalling. Hoping gremlin appears to replace the accelerator cable. Not looking forward to that. From what I read, it is a lot like replacing clutch and brake master cylinders. Still reading to find out best way to tackle that.