What did you do to your X1/9 today ?

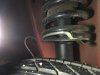
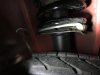
For a long time I have been Annoyed with the windshield wipers not going all the way to left on the drivers side. If I set the wipers up so they went all the way over then they set higher than I liked when not in use. If I put them lower then there was that rain spattered gap in front of me. A couple of weeks ago I took the arm off the wiper motor and move the pin out by a sixteenth of an inch. The wipers rested low to the bottom of the windshield like I want and go all the way across the way I want. Two days ago I got to test them in the rain. I had pretty much forgotten about my mod and was headed back home after my daily mail run when it dawned on me that the wipers were working as planned. If anyone tries this modification remember that 1/16 inch is enoughView attachment 4642

Great modification. I run 16" wiper blades and making a change like this would be a huge improvement. So how did you do it? Pressed out the pin, welded up the hole and re drilled or? Thanks
 
arm.jpg
arm2.jpg
I ground the button off the backside and pressed the shaft out. Then oblonged the hole by 1/16 inch. Made a crescent moon shaped piece of metal 1/16 inch thick and pressed the shaft back in with the sliver in place. I was too lazy to turn on the gas for the mig so after securing the arm and making sure the shaft was in straight and tight I zapped the backside with the stick welder ground the weld down a bit painted it and reinstalled. 1/16 works pretty good. I wouldn't go much more than another thirty second. Circles are interesting things. If you enlarge the radius by half you double the area. I think I remembered that right. At any rate it doesn't take much to change the arc.
 
Accelerator Cable replacement
Worked on replacing the accelerator cable. After getting it out found a couple broken strands of wire, may have been part of sticky accelerator but not the final problem. The pedal was seizing and caused it not to want to return to low rpm. After removing the assembly I worked it using PB blaster. This helped some but was still sticky. Cleaned with brake cleaner. Finally I drilled a hole into plastic using square end drill so as not to drill into shaft. Finished with a drill that a plastic straw from WD40 can would fit fairly snug. Then I sprayed White lithium grease into hole until it came out both ends of plastic attachment. See Pictures. Now it moves very free:):):)
20170903_001429.jpg 20170903_001010.jpg I made sure to drill hole so it will be in a location to be able relubricate with out removing the whole kit and kabudle again.
 
Last edited:
Minor activity. Replaced the front speakers above the dead pedal on the left and the similar spot on the right.

Removed a fair size mouses nest nestled up in the spaces there. Nice.

The home for the speakers was a rude, crude, torn punched in hole like I have never seen. But at least the door panels weren't cut.

Nice having four speakers as the old Infinity's stuck in there were quite toasty and the right speaker wire was eaten through. So many PO things on this car.
 
More in the line of "What I did with my X this summer".
At the end of last summer, I had installed a set of Vick's coilovers and dual DCNF Webers. I was in the middle of finding the proper tune for both items when I left for sunny FLA. When I returned this June, I found the right combination of ride height and carburetor tweeking that gave me the most enjoyable combination of road handling and throttle response.
The weather in New England this summer allowed me to put on about 1200 miles of smiles. I have to say that in the 25 years I have owned this car, this was the most pleasurable summer I have had out of many enjoyable ones.
I hope we all enjoyed our cars as much.
 
Accelerator cable replaced
It was a challenge doing it alone, but I made it. Used the engine hoist with a piece of heavy string tied to engine end of cable to pull it back far enough to get cotter pin in. Now all I have to do is put everything back together:)
 
Accelerator cable replaced
It was a challenge doing it alone, but I made it. Used the engine hoist with a piece of heavy string tied to engine end of cable to pull it back far enough to get cotter pin in. Now all I have to do is put everything back together:)

Engine hoist? For the accelerator cable? I want pics of this... :D
 
Engine hoist? For the accelerator cable? I want pics of this... :D
You wanted pictures, here they are. Kind of like a Rube Goldberg machine, but it really worked. Sometimes when working alone, any port in a storm. Kind of like pulling a tooth while tied to a door knob I suppose:):)
 

Attachments

  • 20170905_174426.jpg
    20170905_174426.jpg
    162.5 KB · Views: 149
  • 20170905_174436.jpg
    20170905_174436.jpg
    187.3 KB · Views: 144
  • 20170905_174357.jpg
    20170905_174357.jpg
    194.8 KB · Views: 151
You wanted pictures, here they are. Kind of like a Rube Goldberg machine, but it really worked. Sometimes when working alone, any port in a storm. Kind of like pulling a tooth while tied to a door knob I suppose:):)

I must say that I am not disappointed :p Nice job and extra points and kudos for a very creative way to use a tool for an unintended purpose. Thumbs up and food for future thought.

I am always finding myself in situations like this as I am almost always working by myself. Thanks for taking the time to post some pics.
Thank you, I will take that as an extreme compliment

Stoney
 
Somehow I never write these on the day I did them. More like last weekend.

-Fixed bad rust all around windshield and resealed it.
-Cut out rotted passenger floor pan. Welded in a new one.
-Fixed the cigar lighter circuit (which also fixed the door buzzer circuit and somehow the injector blower motor circuit - don't see how those are related)
-Fixed a dim driver's headlight by cleaning all the grounds in the headlight hole.
-Installed door catch straps
-Installed drivers door handle trim that was missing
-Replaced all the nasty door hinge bolts and lock washers.
-Fixed my fuel tank issue where I couldn't fill the tank - turns out the filler neck was almost completely blocked by a crystalized substance.
-Patched a hole in the fuel tank float.
-Adjusted the idle
-Installed Correct door lock tabs
-Welded in a patch for the rusted hole in the floor behind the passenger's seat
-Bolted in the passenger's seat with 4 bolts (it only had 2 previously)

Coming soon will be the driver's side floor pan and a full set of new struts.

EDIT:

-Fixed the snapped off high beam lever by plastic welding it back on.
(I found it under the passenger seat - saved me from having to buy a completely new stalk.)
 
Last edited:
Nice visit at MWB and Midwest-124 yesterday. Will be back soon, forgot to take photo of my gold X next to another gold 78 limited series parked there. Picked up new front sway bar kit, installed today. The X keeps getting nicer, enjoying it more and more each day. Then waxed for car show tomorrow. As finishing up I noticed a neat sun pattern on front end.
IMG_0052 1.jpg IMG_0055 1.jpg IMG_0046 1.jpg
 
Nice visit at MWB and Midwest-124 yesterday. Will be back soon, forgot to take photo of my gold X next to another gold 78 limited series parked there. Picked up new front sway bar kit, installed today. The X keeps getting nicer, enjoying it more and more each day. Then waxed for car show tomorrow. As finishing up I noticed a neat sun pattern on front end.
View attachment 4923 View attachment 4924 View attachment 4925

Really great looking car. Nice pics showing it off.
 
I had an annoying squeak coming from one of the rear shocks... I noticed that the spring was not sitting on the perch correctly. Jacked up the car, removed the wheel, rotated the spring without compressing it and squeak is gone...
 

Attachments

  • Before.JPG
    Before.JPG
    298.1 KB · Views: 160
  • After.JPG
    After.JPG
    210.8 KB · Views: 120
Removed the rubber air intake hose and replaced all of the clamps. I noticed that the Aux Air Valve metal tube was sticking up about an inch into the main rubber hose. That makes no sense to me, because it is obstructing and disrupting the airflow. My idle is now better... Fun times!
 
Damn-it you guys! I hate you!
Someone referenced his post in this section of the forum for me to see how he accomplished a particular repair. Being my first visit to "What did you do to your X today?", I now see there are a ton of good posts for me to go back through. Frankly all these years I thought this would be full of nothing but fluff like "I washed it". But now I'll have countless lost days enjoying all of this previously undiscovered great material! Why, why, why can't all of you just stop doing so much excellent work so I can get off my computer and do some work on my own car? Thought I was the only one with no life, but now i see there are MANY of us here.
Love you all, Jeff
 
Light day today......finish bleeding the brakes, waiting on conical washers to finish the clutch (line at the MC).....

Tonite after everyone's in bed.....refreshing the dash cluster.....little corroded at the grounds, so a light touch with some emery paper....

Our of curiosity....are the circuit boards and connectors interchangeable between CW and CCW tachs? I do have 2 other clusters, but they are CW tachs....
 
Back
Top