Lowtechprime
Retro Grouch
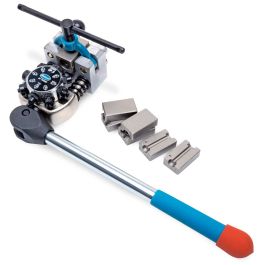
You need one of these for those "cheese steel" fittings... Just enough steel to rust, but not enough to provide any strength...


Careful here.... MWB lists them all that way but the listings for some also say '76 on and you'll need a different part number for '74-'75. That's the early double flare vs bubble flare thing. So if you have a '74 and you haven't replaced that junction block by the master, you will want to look again at the flare seats and also the FedHill tech note about common misthreadings.MWB lists them all the same although their nomenclature is different. sometimes ISO bubble flare, sometimes European bubble.

And here Midwest-Bayless confirms that the early brake failure switch block uses inverted flare rather than bubble flare.Careful here.... MWB lists them all that way but the listings for some also say '76 on and you'll need a different part number for '74-'75. That's the early double flare vs bubble flare thing. So if you have a '74 and you haven't replaced that junction block by the master, you will want to look again at the flare seats and also the FedHill tech note about common misthreadings.
") . But if there is a problem it would be either at the master port or the union block assuming that the short line has the same [either type] on each end. Per post#62 the OP probably needs a short line with a different type on each end. But this should have nothing to do with the existing switch union - not messing with it at all?
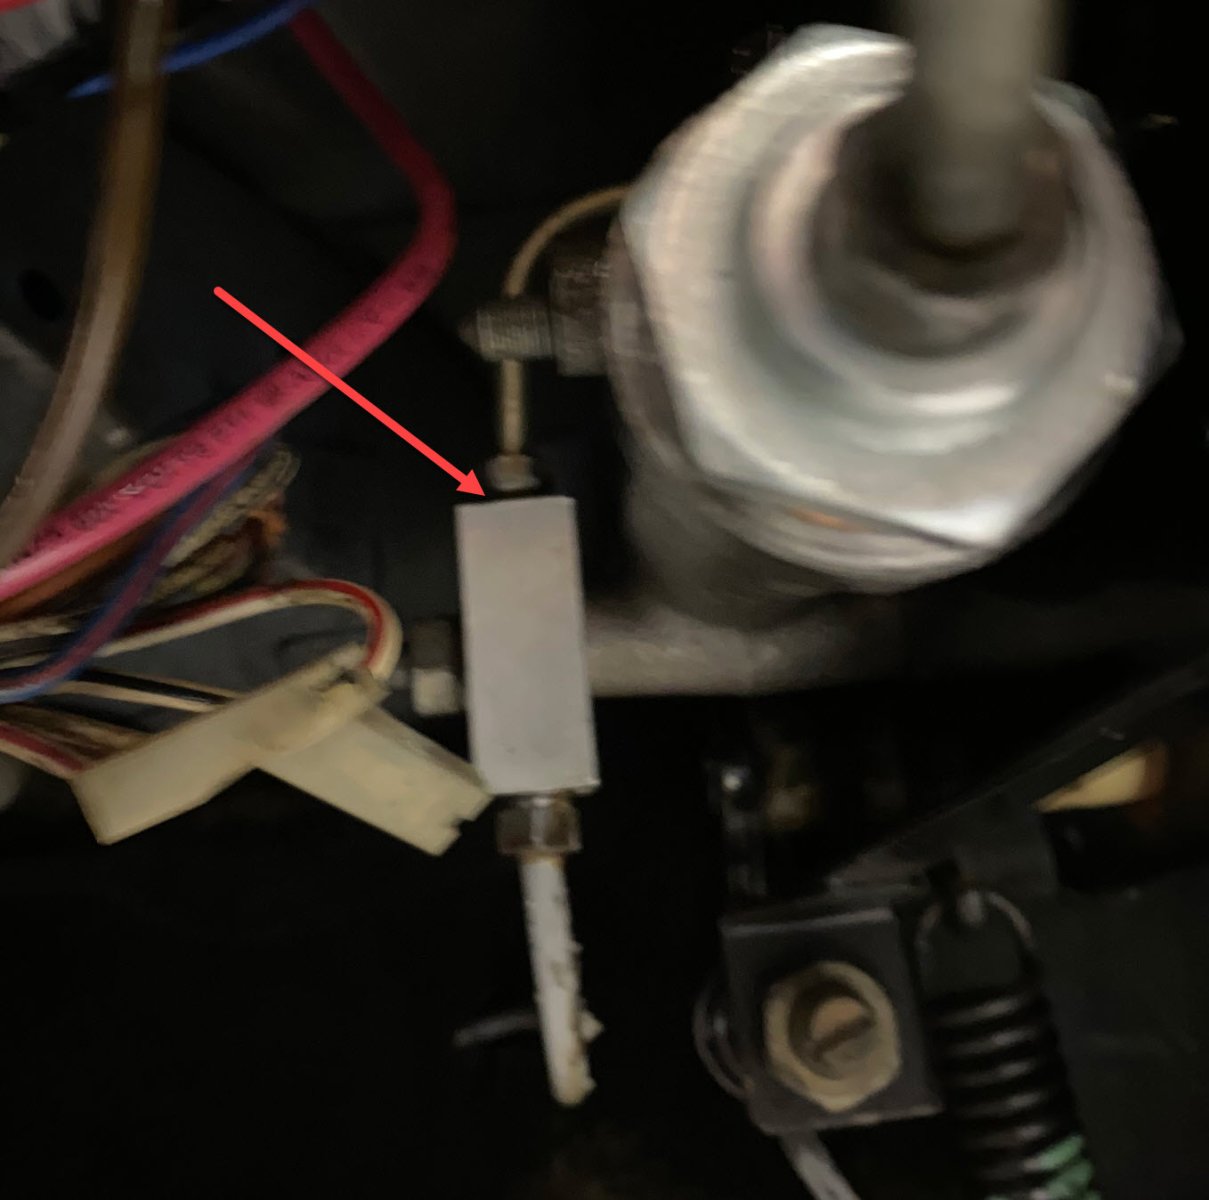
. But if there is a problem it would be either at the master port or the union block assuming that the short line has the same [either type] on each end. Per post#62 the OP probably needs a short line with a different type on each end. But this should have nothing to do with the existing switch union - not messing with it at all?Looking through this thread, you now have a master cylinder that take bubble flares (as they all did), a new (to you) junction block that takes bubble flares, but did you reuse your old '74 short brake line (from master cylinder to junction block) that has bubble flare at the master cylinder end, but double flare (inverted flare) at the junction block? If so, that would explain the leak you pointed to:So, I get all the parts to "upgrade" my '74 brake master with the new over the top brake line to the junction block and the new brake line to the left front wheel. hooked it all up begin beading and (of course) it starts leaking. From the top of that new/used junction block. I've already tried backing off and re tightening, no joy. I was suspicious of this fitting as the female part did not resemble all of the others in the system. I dread spending another day pulling the whole thing back out now that it's full of brake fluid. Any Ideas? Is there another available double female join that might take it's place?
View attachment 81039
On my '74 there was no junction block for the left front brake line, it went direct to the master. I purchased the new break line, junction block, and "long line", going from master to the junction block from MWB? I'm taking the junction block section apart today to double check this wasn't just me screwing up.Looking through this thread, you now have a master cylinder that take bubble flares (as they all did), a new (to you) junction block that takes bubble flares, but did you reuse your old '74 short brake line (from master cylinder to junction block) that has bubble flare at the master cylinder end, but double flare (inverted flare) at the junction block? If so, that would explain the leak you pointed to:
Yep, mine too. The lines to the rear and to the right front go to the junction block.On my '74 there was no junction block for the left front brake line, it went direct to the master.
Correct !! As some folks here seem to be confused about this....yes ....that was the correct solution. All of the parts you purchased should have had m10 x 1.25 threads and bubble flares. Assuming the parts you got were...and did not have damaged threads.....you should have been just fine !!On my '74 there was no junction block for the left front brake line, it went direct to the master. I purchased the new break line, junction block, and "long line", going from master to the junction block from MWB?
Sadly.....I suspect you did. As others have said...it is super easy to cross-thread these fittings !!! When you assembled that particular now-leaking junction.....did the fitting screw in straight - and easily by hand - until it bottomed ? Or did you have to crank it in with a wrench ?I'm taking the junction block section apart today to double check this wasn't just me screwing up.
 www.eastwood.com
 factorysupplyoutlet.com
Its not a great bit of design - no matter the sequence. Yes, I would install the line first, both ends finger tight and perfectly square, then fully tightened, and then tighten up the bolt. In terms of design, the issue is that the block does not have a definite position - it can rotate. Even after the line is fully installed and you tighten the bolt, the block will try to rotate and stress the line. If, as you say, the block bolt is tightened first, then the line will need a slight bend correction so the the fitting lines up perfectly. I hate "perfect" but unfortunately, this is one area where it is required!bolted the block to the assy first then tried to put in the cross over pipe.
Hmmm.......this is a bit odd. I was expecting to see evidence of cross-threading.....but not seeing anything....OK, I pulled the block out today and took pics below, all looked ok. Looking back I think the problem was I bolted the block to the assy first then tried to put in the cross over pipe. The bend being slightly off I was not able to get it perfectly straight. I reinstalled the crossover pipe, in the block now free from the bolt, hand threading it until it bottomed then did the same on the lower. Bolted the block loosely on the assy and gave them a final tighten, there was a slight leak at the bottom pipe but one more crank with the wrench stopped it. No leaks! Unfortunately it was just because there was by now, no fluid in the system. It started leaking again, at the top, when I started bleeding the system :-(
I'm guessing the first crooked tighten may have damaged something on the flare.
So now the whole thing has to come out which scares me as all the other connections don't leak, now.
I'm going to try a new over the top pipe, and block, (not too expensive) and try again. I may give the copper washer a try. Looks a bit fiddely for under dash work.
View attachment 81165
View attachment 81166
View attachment 81167
Normal, how this design functions. Slop between the tube nut to flare end is allowed to float-fit the seat. If there is no float, the flare tube end cannot conform to the seat position then seal. Notice the end of the tube nut flat out a bit due to the forces involved with pressing the tube's flare into the seat. The once sorta half spherical bubble flare has been mushed into the shape of the seat to form a "seal". This is why both Girling bubble flare and SAE 45 degree double flare (tiny sealing area) does not re-seal well once taken apart.Is the problem that the flare is not on straight?
I rotated and cropped your pic and then I drew a light red square on the image to check and to me it look like the flare is a few degrees off. You can see ifs closer tot he red line on the right than on the left.
View attachment 81171
Maybe its nothing, but looks odd to me. Was this a newly made up solid pipe?
I'm getting some new lines and will try again. I think I just got some bad luck and used parts that don't like each other.Is the problem that the flare is not on straight?
I rotated and cropped your pic and then I drew a light red square on the image to check and to me it look like the flare is a few degrees off. You can see ifs closer tot he red line on the right than on the left.
View attachment 81171
Maybe its nothing, but looks odd to me. Was this a newly made up solid pipe?
Not just new lines with new fittings, those joint blocks will be damaged from the previous attempt to assemble. They will need to be properly repaired or replaced.I'm getting some new lines and will try again. I think I just got some bad luck and used parts that don't like each other.