Instruments.....

ltheriau

Jet fuel for the X....?
I'd been looking to upgrade the "look" of my instrument cluster for some time and have recruited help from xWeb member "9151" a.k.a. Pottsy.

I sent him my gauge faceplates and he performed his magic.

Here are a few pics that I trust will show his fine work:

Here I have the Battery/Temp gauges apart. I pulled the little "nails" to remove the faceplate.

Uploaded with ImageShack.us

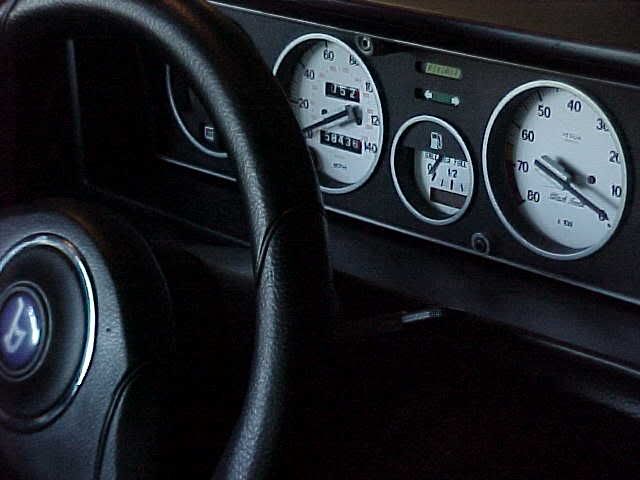
And now here are a few of the re-assembled gauges:

Uploaded with ImageShack.us

Uploaded with ImageShack.us

Uploaded with ImageShack.us

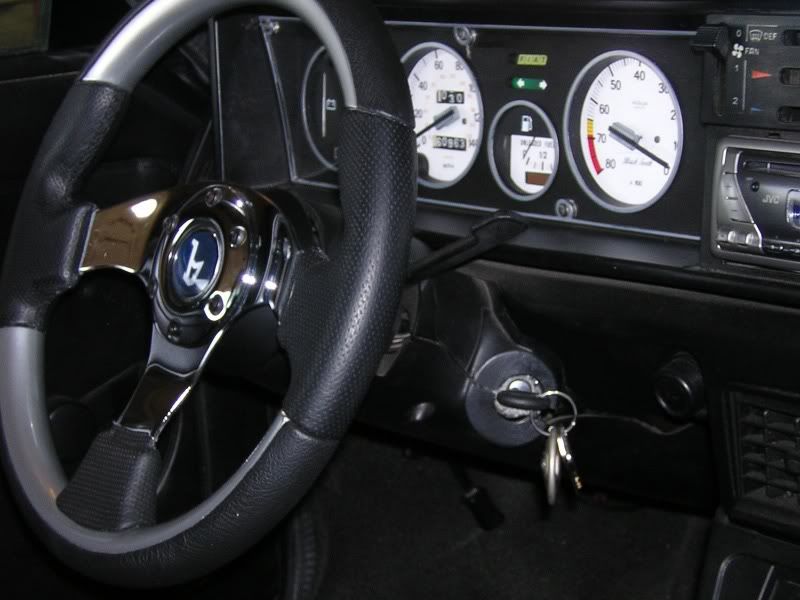
Note: The steering column has been removed to facilitate the Brake M/C repair.

I painted the needles with a yellow paint pen, but will be looking at something more luminescent for long term use.

Hope you like.....
 
Wow, those look downright upright...

LOVE to see new ideas with the Gauge clusters.

Hey Pottsy, you gonna share that artwork with me?? :grin:
 
Looks great. I did the same thing to my Opel GT's dash. It was a lot of work but it was the dead of winter.
 
Nice Work!

Do you have any non-flash daylight pics of the cluster? It's hard to tell how bright they are under normal lighting conditions due to the flash...
 
Pic....

Car is garaged right now with the steering column, pedal box and Brake M/C all removed for repair.

Give me a couple of days and I'll pull it out to take a pic.

Glad you like.....
 
Many thanks to Bob for his help ....

He sent through a number of scans for me to use as all mine were euro-spec (brit in particular).
I decided in the end I'd have to scan Lou's set as his was a particularly early example and different to all the others I had.

Once scanned into Serif DrawPlus 7 with a white background added for edge definition, I then scaled 1:1 - not as easy as it sounds because, although the scaler says 1:1, when printed they were around 3% too small, probably because of screen ratio differences. Anyhow, after farting around with the scales and having overcome printed edge expansion to allow for cutting edge accuracy, the blanks were ready for detail.

In order to provide the necessary edge sharpness and clarity (I'm charging $35 for a sheet and $70 if I fit them) for retail value, then the images have to be deconstructed down to each component image - some 180+ on the tacho - with each bar, full stop, correct typeface, part number, cut through for indication lights etc. This is what takes the time - around 3 day's worth.
Discussions and data exchange between Lou and me meant a while passed before my mock-ups were acceptable to Lou, (he chose the final design as he's my customer!). Once signed-off I printed onto polyester stock which, I hoped, would provide colour stability and resistance to temperature variation - given the USA/Canada's extremes of climate.
Unfortunately the new printing stock was great on the sheet but trying to make it adhere to the facings was a nightmare. It generated static as it was peeled off its backing and, with a particularly fierce adhesive backing, it stuck, stretched and distorted too badly for use.

Back to my original method in 2003. The use of high grade HP photo paper, good ink and film adhesive.

Hope you like the results!:D

Many thank too to Lou for his trust, patience and investment in my small business.

ps. when scanning there's no problem with the speedo or tacho as the only projection is the needle stop for the tacho. However, if sending me the other dials is necessary (there may be a need to scan them), then the edges of these folded tinplate instruments must be folded flat, or they can't be scanned due to the fixed focus of scanners at the platen surface.
 
Last edited:
Nice work, Lou...

Can't remember just where I've seen that before though...

dash.jpg


Oh... I remember now!

HA!

Hey... GE W5W bulbs work great at adding another 2 watts apiece over the 3 watters that were originally installed... I believe hey can still be had for about 2 or 3 bucks a pair at WalMart... and ya need 5 I think. Bob Brown can fill ya in on some LEDS if ya wanna go over the top... but the 5 watters and the white faces really are quite sufficient.

Again... great work! Brings our panels up into the 90's... HA!

OH... lastly... I printed mine out on an HP printer just using my wife's quality photo paper. After about 5 years now there is still no noticable fading and they still look fresh. The needles were replaced with plastic ZIP TIES, painted, cut to length and glued in place.

SteeringFixed.jpg
 
Mine or his, Hussein?

His looks SHARPER, mine is a bit less bold, I would say... and was a virtual scan also... then photoshopped by someone who is virtually dead to us now...

All a matter of personal taste...

There may be some others that have copies around... and then there is Pottsy also... a trustworthy soul with humor that knows no borders! HA!

I was referring to the pic you posted - I assumed it was also his work, not so, based on your response. You edited your post, right? I don't recall the 2nd pic the first time I looked...
 
Non-flash daylight pic....

I pulled the X out of the garage today and took a pic as requested.

Here's what it looks like.
Once I get everything re-assembled (see brake thread) I'll try taking a night time shot with lights on.
I'm using LED bulbs for backlighting.


Uploaded with ImageShack.us

I know I need to repair / replace the dash....that'll come later.
 
Yep to everything... I was looking for the...

... second picture but couldn't find it initially... so I used the older one.
 
Back
Top