kmead
Old enough to know better
A few days ago I was sitting down stairs watching the idiot box, which is in earshot of the pressure tank for our water system as we have a well.
I could hear the pump kick on, reach pressure, click off and then a sound of rushing water like someone was using water in the house. Only no one was using water. I went over to the tank and listened to what was going on, what was happening is water was pushing out of the water tank under 40 psi of pressure and back down the line to the pump.
Clearly the check valve in the pump had failed.
After doing some research it was either pull the pump and likely replace it or possibly install an inline check valve before the tank so the pressure in the tank can’t push the column of water back into the well. Gather the parts to do the latter. Also decide to take off the top of the well head to see how the pump system is configured.
There is a small electrical box as part of it to house the connection between the house and the wires proceeding down to the pump. Small box, 7 wires and three wire nuts.
First thing I find is there isn’t a dedicated ground in the wires from the house to the well casing, the ground wire is literally just trapped between the well head cover and the electrical box cover. The reality is it is barely a ground as the well head cover is clamped by three very rusty clamp bolts to an equally rusty well casing. A poor ground for sure as one could see the wires were somewhat green from moisture etc.
The next thing I found is whoever had connected the solid wires from the house to the stranded wire coming up from the pump had chosen not to twist the stranded around the solid wire or even to properly twist wire nuts onto the wires. One might say the wires were close but not intimate, as the wire nuts literally pulled off the wires with no effort at all. Sigh.
New wire nuts, properly wound the wires to mate them and stuffed everything back in (it seems the box is optimized for a ‘2 wire’ pump rather than the three wire pump in there now).
A few years ago I had felt stray electricity in our shower water so I added two ground rods 30’ apart, and bonded the incoming water line, incoming electrical conduit and gas line to them which resolved the sensation and we had no measurable electricity. Perhaps the poorly grounded wire was causing the problem.
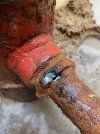
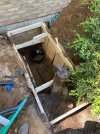
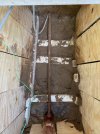
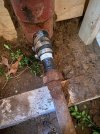
I did look down into the well and saw just a metal plate @5’ down with the wires to the pump going through it and a raised bump in the middle. It isn’t what I was expecting to see at all, there didn’t appear to be anyway to grab anything and lift out anything. There wasn’t one of those brass slip joints (pitiless adapter) which both hang the pump far below and transition the water line into the line into the house through the side of the well casing. This really has me scratching my head as to how one does replace the pump.
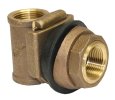
I will take a pic tomorrow of what I can see so if anyone has any suggestions I would love to hear what you have to say.
I could hear the pump kick on, reach pressure, click off and then a sound of rushing water like someone was using water in the house. Only no one was using water. I went over to the tank and listened to what was going on, what was happening is water was pushing out of the water tank under 40 psi of pressure and back down the line to the pump.
Clearly the check valve in the pump had failed.
After doing some research it was either pull the pump and likely replace it or possibly install an inline check valve before the tank so the pressure in the tank can’t push the column of water back into the well. Gather the parts to do the latter. Also decide to take off the top of the well head to see how the pump system is configured.
There is a small electrical box as part of it to house the connection between the house and the wires proceeding down to the pump. Small box, 7 wires and three wire nuts.
First thing I find is there isn’t a dedicated ground in the wires from the house to the well casing, the ground wire is literally just trapped between the well head cover and the electrical box cover. The reality is it is barely a ground as the well head cover is clamped by three very rusty clamp bolts to an equally rusty well casing. A poor ground for sure as one could see the wires were somewhat green from moisture etc.
The next thing I found is whoever had connected the solid wires from the house to the stranded wire coming up from the pump had chosen not to twist the stranded around the solid wire or even to properly twist wire nuts onto the wires. One might say the wires were close but not intimate, as the wire nuts literally pulled off the wires with no effort at all. Sigh.
New wire nuts, properly wound the wires to mate them and stuffed everything back in (it seems the box is optimized for a ‘2 wire’ pump rather than the three wire pump in there now).
A few years ago I had felt stray electricity in our shower water so I added two ground rods 30’ apart, and bonded the incoming water line, incoming electrical conduit and gas line to them which resolved the sensation and we had no measurable electricity. Perhaps the poorly grounded wire was causing the problem.
I did look down into the well and saw just a metal plate @5’ down with the wires to the pump going through it and a raised bump in the middle. It isn’t what I was expecting to see at all, there didn’t appear to be anyway to grab anything and lift out anything. There wasn’t one of those brass slip joints (pitiless adapter) which both hang the pump far below and transition the water line into the line into the house through the side of the well casing. This really has me scratching my head as to how one does replace the pump.

I will take a pic tomorrow of what I can see so if anyone has any suggestions I would love to hear what you have to say.

