5th gear "fubar" repair.

Rupunzell

Bernice Loui
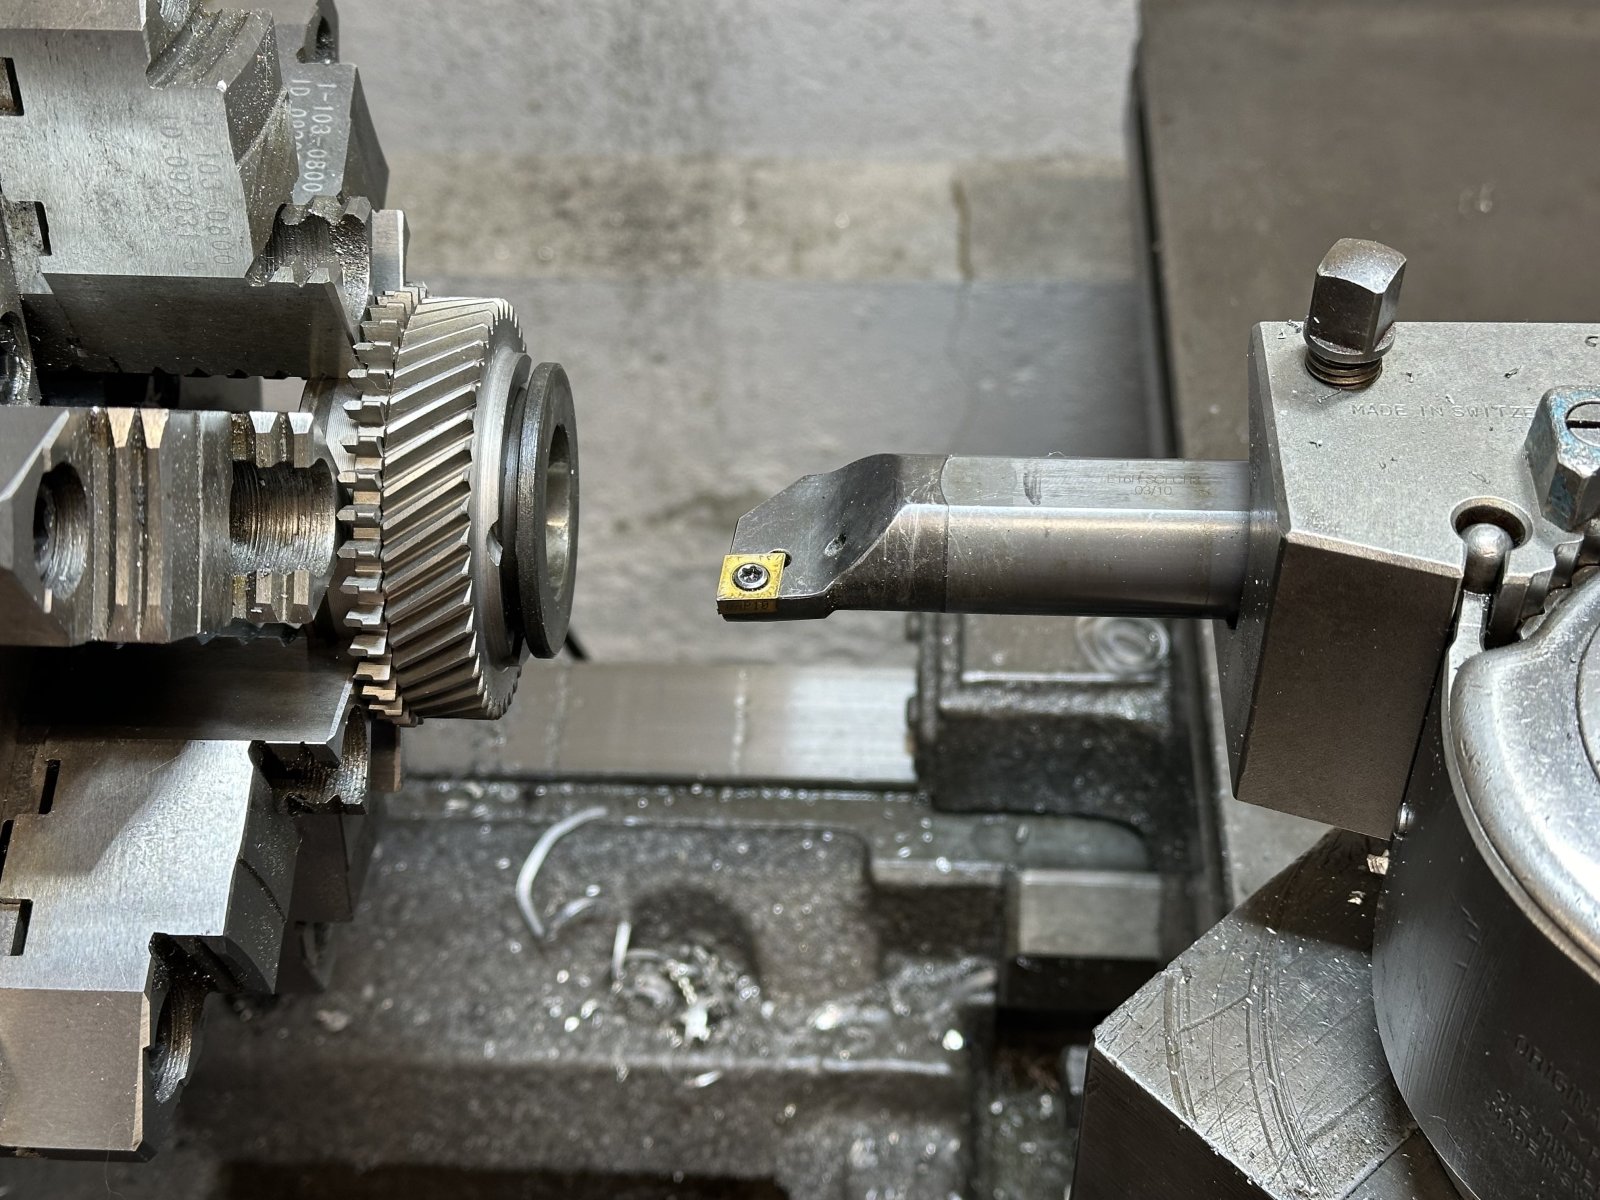
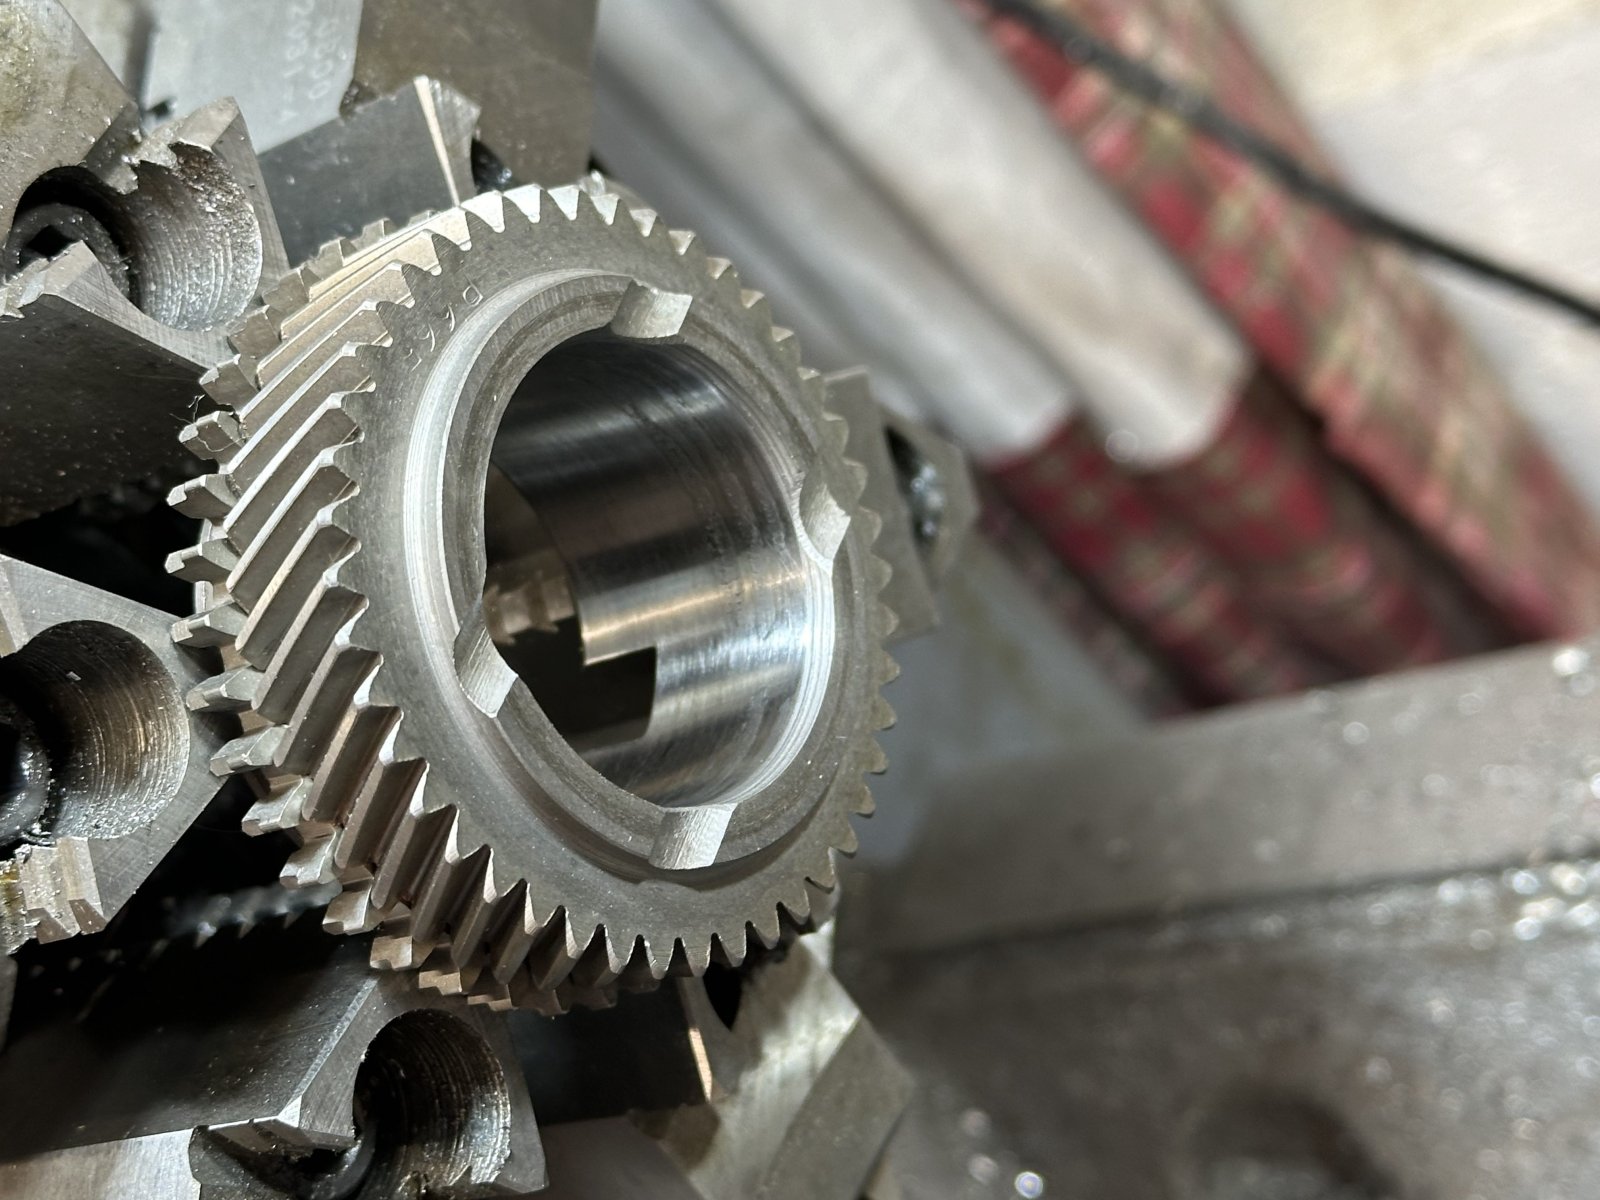
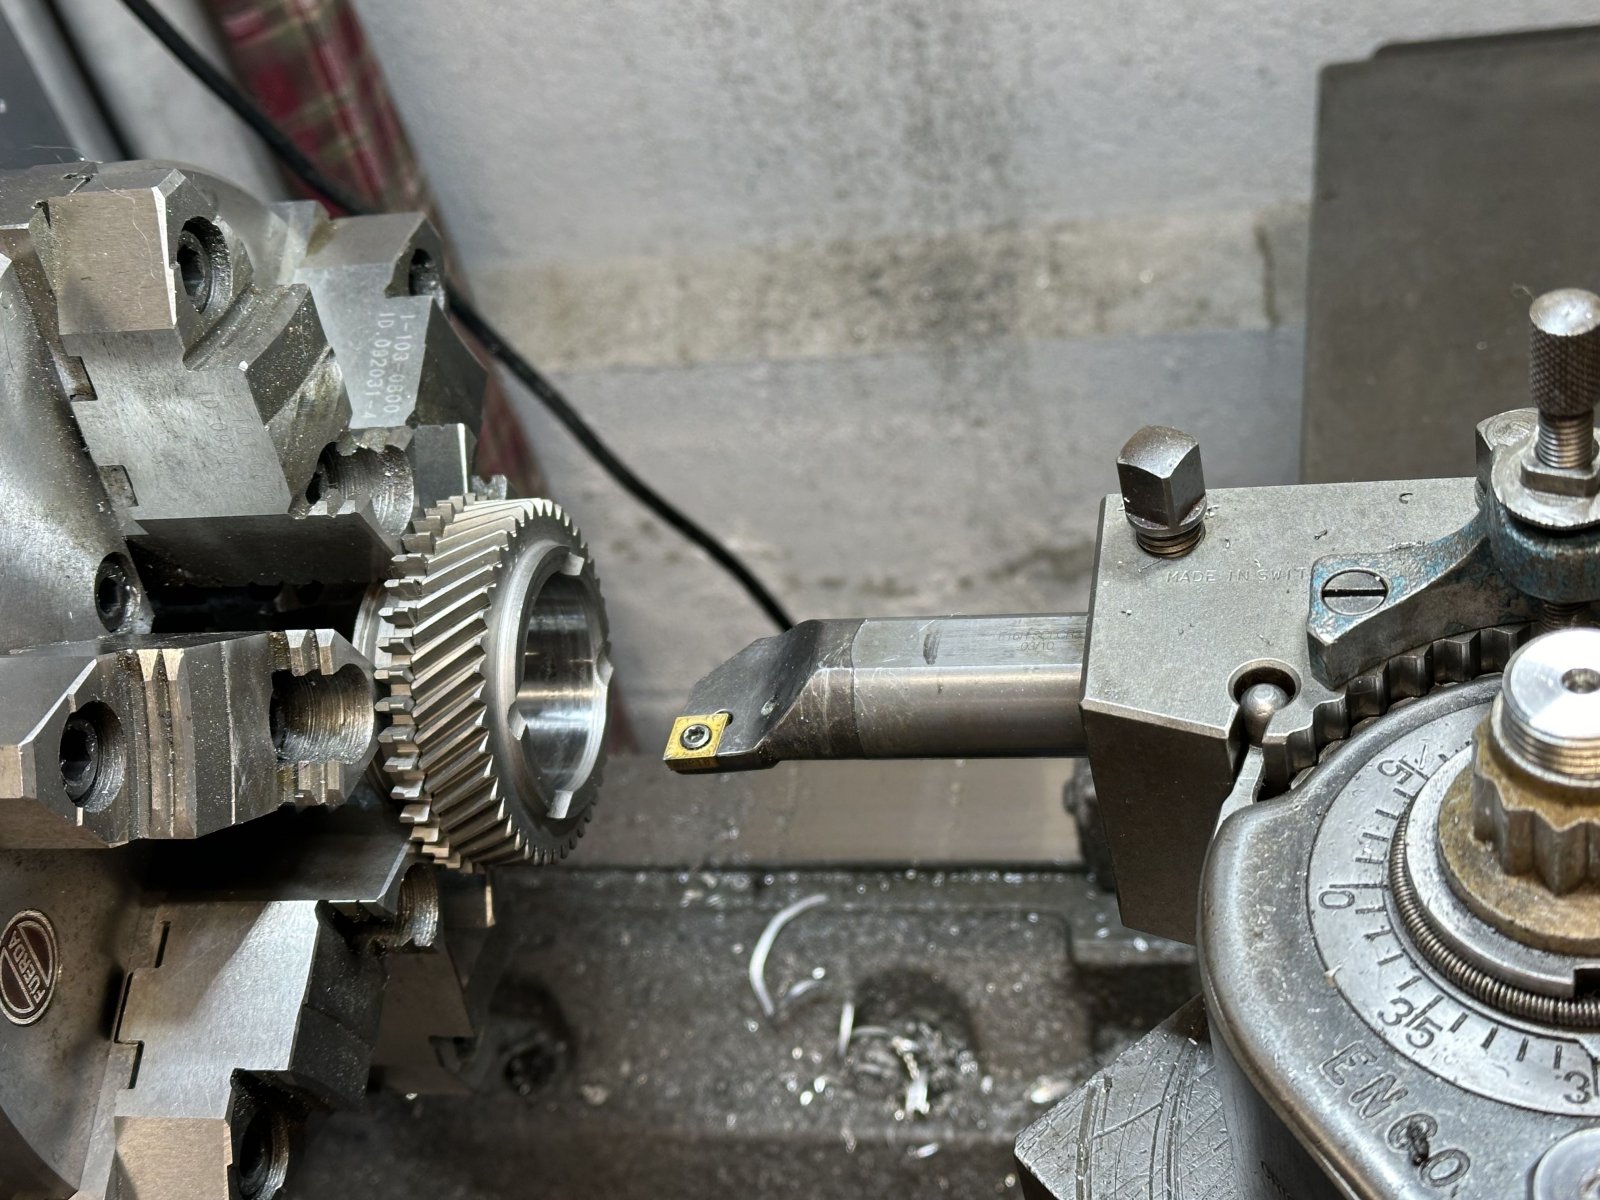
Received from an Xweb member, 5th gear with "Oooops" as delivered, ala lumpy internal bore that will never fit the sleeve bearing or have proper oil clearance.

Quick trip to the lathe... dial in the bore to no more than 0.0005" run out..
and about a lumpy 0.0025" later, done. Note, this gear has been heat treated to hard... Walter carbide insert on a solid carbide boring bar, easy peasy...

exxe 5th gear, clean up.jpg


Sleeve bearing test fit.

exxe 5th gear, bearing test.jpg


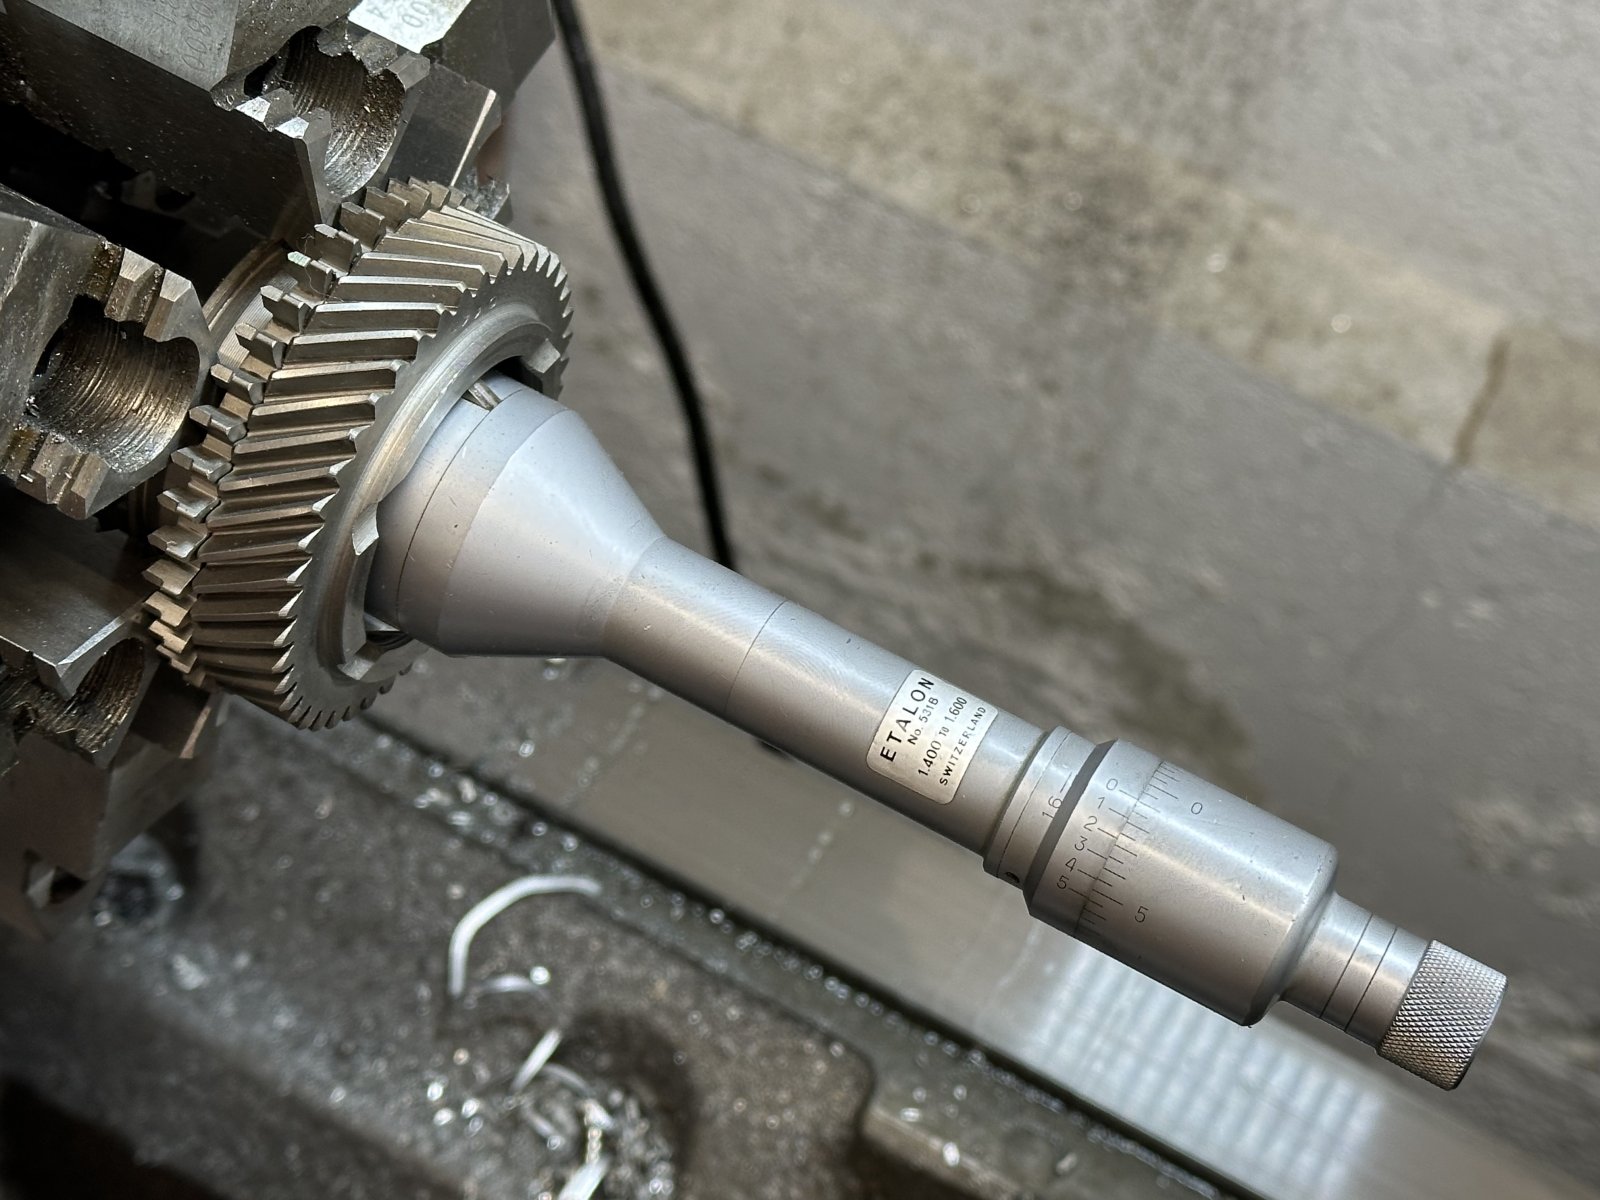
Bore measures 1.576" or 40.03mm, the separation between clean bore to cleaned up bore is not easy to detect.

exxe 5th gear, bore 1.576%22.jpg


Bore close up.. not ideal, should be ok.
exxe 5th gear, bore.jpg


Bernice
 
Last edited:
Nice 6 jaw. It's adjustable I'm guessing?
The 6 jaw happened to be on the Mori MS-850G from another project with thin wall tubing, which is about the only thing a 6 jaw chuck should be normally used for. Just wanted to get this did, into the 6 jaw it went knowing the cuts will be small.. Next up, put the 4 jaw back on the Mori or 3 jaw which is the most often used. Yes, 6 jaw, 3 jaw & 4 jaw by design are adjustable, only way for proper precision/accurate work on the lathe.

6 jaw chucks are fragile and will never clamp with all 6 jaws even around the work unless the work can deform from the clamp forces. This is why there is a much greater tendency for stuff to chatter and more using a 6 jaw on sold rounds..

Most versatile with the highest holding power is a 4 jaw allowed by a 3 jaw for most round work. 6 jaw chuck are mostly "lathe jewelry"..


Bernice
 
Last edited:
I love this type of stuff. I am one of those weirdo's who has a bunch of machinists setup as favorites on Youtube. I have not seen the bore dial indicator you use before. Can you tell us a bit more about it? most everyone seems to make due with either a typical dial indicator or a specific tool, such as one use for measuring the bore of a cylinder in an engine.

Thanks Bernice!
 
Nice work.

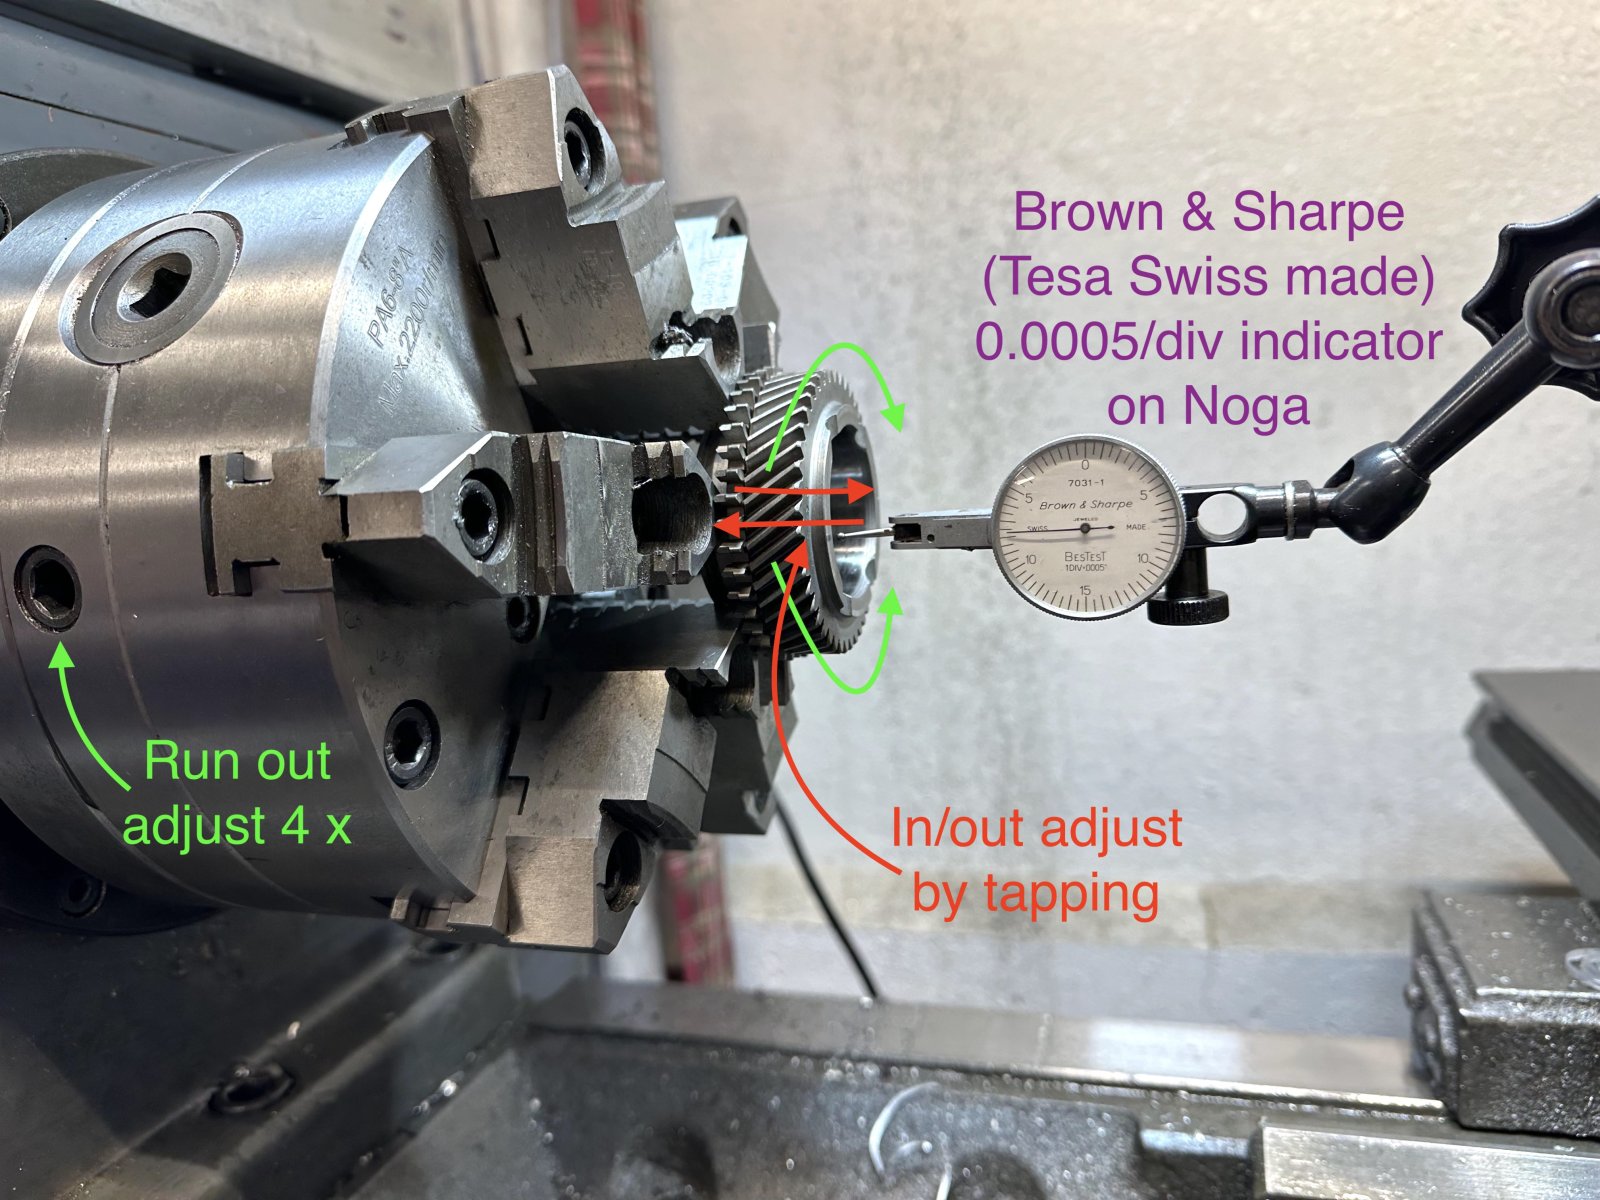
When you say 'dial in the bore to no more than .0005" run-out',
Is that just a matter of nudging the part a bit as the chuck is tightened down?
Or is there another way to get the thing chucked up straight?

Seems like getting that part true would be most of the battle.
 
I love this type of stuff. I am one of those weirdo's who has a bunch of machinists setup as favorites on Youtube. I have not seen the bore dial indicator you use before. Can you tell us a bit more about it? most everyone seems to make due with either a typical dial indicator or a specific tool, such as one use for measuring the bore of a cylinder in an engine.

Thanks Bernice!
5th gear in chuck, set up the 0.0005/div indicator with Noga on axis and level with the bore of the gear. Adjust the indicator point as needed, move the indicator point into the bore into the clean area, adjust the run out using he four screws on the chuck as needed, slide the indicator in/out to verify the bore is on axis with the lathe spindle/chuck and tap gently as needed to get this aligned. Once the indicator moves less than on division on the indicator for both run out and in/out.. double/triple check the set up is secure and nothing will/can move. This is a one time thing, one Ooops, part is wrecked.
5th gear lathe set up.jpg


Set up the boring bar with the tip of the insert just touching the clear area of the bore, back off the cross feed crank/dial about 0.003" then back up the boring bar into the lumpy area, spin the lathe spindle by hand to check if the point of the boring bar is touching any of the bore lumps, if just clear, back out the boring bar, add 0.001" to the crossed dial, spin up the lathe, take a pass.. Listen/watch for metal removal. If no action, add another 0.001" repeat until contact is made. After the first cut, back out the boring bar, make a measurement. Repeat (in-feed about 0.0005" per pass) until the bore measures the needed dimension. Easy to remove material, difficult to not gonna happen once the material has been removed.

As for indicators, kinda snooty with kind and brand of indicators. Indicators in the shop are Japan (MItutoyo, Peacock), German (Kafer), Swiss (Compaq, Tesa-Brown & Sharpe, Alina)..

Indicator set.jpg


2" Peacock indicator in the carriage stop (adjustable)
Peacock 2%22 on carrage stop.jpg


Best bore gauges made are Etalon (Swiss, measurement anvils are at 135-135-90 degrees allows for measuring out-a-round, only bore micrometers made this way) for manual, Mitutoyo (Japan) for electronic. Without proper measurement tools doing this kinda of stuff is a "lost" guest at best. The internal snap gauge then transfer to a micrometer method has too many sources of possible error, even with the most skilled operator.
etalon & Mitu bore gauges.jpg


As for the lathe, 4500 pounds of Mori Seiki MS-850 (one of Japans finest) -vs- some ounces of hardened steel..
Easily makes a cut that disappears (less than 0.0005") into the clean area of the bore. Then there is a world of cutting tools
and inserts. HSS turning tools are rarely used in this shop, it's always varied grades of carbide or cermet.


Bernice
 
Last edited:
I think a little quality time on a connecting rod hone would do wonders for that gear.
Hone not likely gonna work for this due to the lumps/bumps in the bore. Hone_ing works good to excellent on a bore that is concentric enough and bump/lump free. The stones/balls would roll over the lumps/bumps producing a non-round bore. This lathe method essentially "shaves" off the high spots to where they need to be.


Bernice
 
Was the internal bore lumpy due to manufacturing defect or did it cop some damage? The Oooops makes me think damage.
Will it need a sleeve to fit correctly now the ID of the bore has been increased?
 
Hone not likely gonna work for this due to the lumps/bumps in the bore. Hone_ing works good to excellent on a bore that is concentric enough and bump/lump free. The stones/balls would roll over the lumps/bumps producing a non-round bore. This lathe method essentially "shaves" off the high spots to where they need to be.


Bernice
I was thinking that honing after the lathe operation would yield a nice finish that would help hold oil.
 
Thank you Bernice! I really appreciate you taking the time to walk through the tooling you use. This is all great info.
 
That was mine.
Came from ebay Italy like that, so not worth trying to return.
Packaged in OG Fiat wrapping and box, still with cosmoline.
Obviously made after a long lunch…

Their tooling broke but “QC” decided to put it in a box anyway. :rolleyes:
IMG_7200.jpeg
 
I was thinking that honing after the lathe operation would yield a nice finish that would help hold oil.
"honing" was done post clean up via lathe using 320 grit silicon carbide cloth. This also means allowing about 0.0005" extra as any abrasive applied to the bore will remove more material...

Human hair runs about 0.001" or 0.025mm


Bernice
 
Wanted to follow up on this for the record.
Big thanks to Bernice for the help.

My Italian agent Alberto sent me another NOS 5th gear,
And it's been interesting to compare to the repaired one.

When the borked gear arrived, the smear area ID was too small.
Even a worn bush wouldn't fit.

Now, Bernice has sized the gear to match the other new one perfectly.
While i don't have very good measuring tools for things this small.
Feeling fits can tell you a LOT.
It's why machine shops have gauge pins, right?

Taking an NOS bush and fitting each gear, there is NO detectable difference in fit.
Interestingly, some damage marks are still visible.

Parts11.jpg


My urge would have been to polish or hone the ID of the damaged gear to looking good.
That would have been a mistake.
Bernice has shown wisdom in her restraint.

Thanks again Bernice.
 
Back
Top