Budget GP Build - Give me a plan, keep me on track

spiggs

True Classic
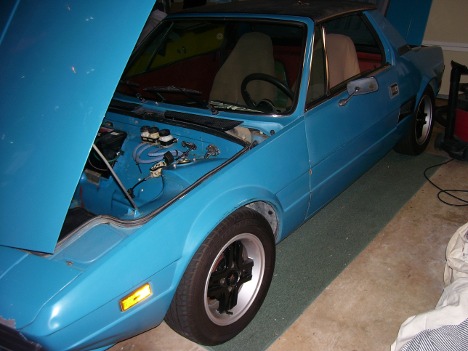
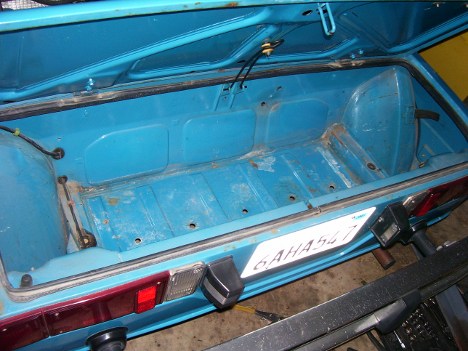
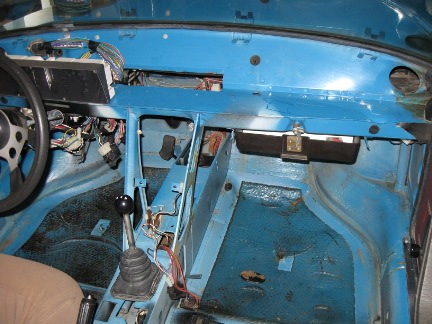
First some background. My car is a 1975 X1/9. I am going to use it as my autocross/fun car. I like stripped down no-nonsense project cars and looking through the regs the best fit seems to be GP. We also have a good group of GP cars of various prep levels locally, a "run what you brung" street tire class, and of course DP/XP so I would have options. The car will remain street registered and I am planning to drive to events but I don't expect a street car smooth ride. Eventually I'll flat tow but that is a ways off, probably when the kids are ready to participate.

I need help coming up with a plan. On my own I tend to lose focus and bounce around different ideas till projects die, so I am asking for help to keep me on track. Here is what I have so far.

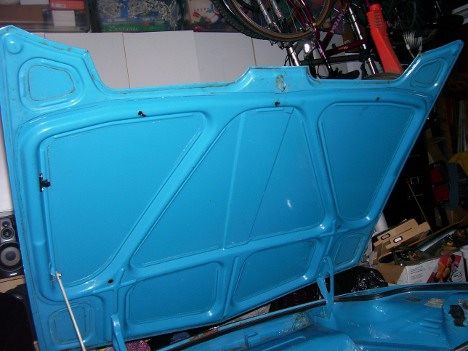
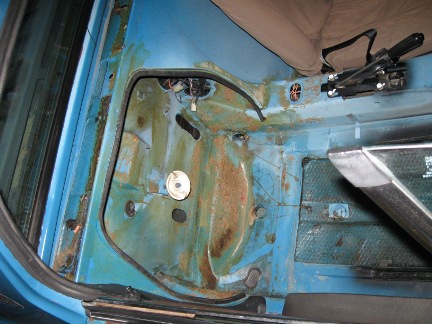
The aforementioned 1975 X1/9 Mediterranean Blue with a small bit of rust in the nose and doors but very solid structurally. Has some poor quality damage repair on the driver’s side door.

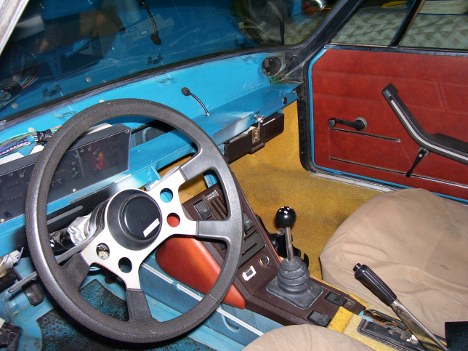
Drive train - Stock 1300cc engine and 4 speed transmission, engine runs OK transmission is shot. All new engine mounts, cam belt, tensioner bearing.

Suspension - Cut rear springs front and back. Marginal KYB struts with good strut top mounts. New radius arm bushings, new steering rack bushings. CD91 wheels with new Sumi HTR200 185/60/13 tires.

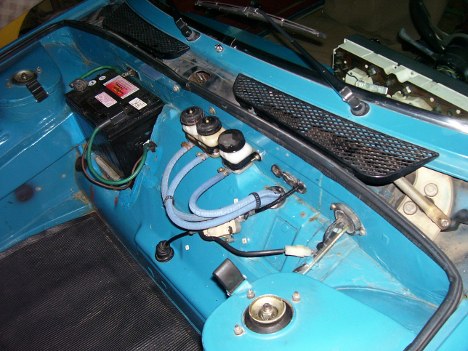
Brakes - New hoses and master cylinder, good used reservoirs relocated to bulkhead with new lines.

Other parts not on car - 1 white good used drivers side door, new front suspension arms, 4 speed trans reconditioned, New Bilstein sport strut inserts for VW Rabbit but will fit stock housings with minor fab, 1 pair each 300lb and 400lb Eibach 2.5" x 8"springs, PBS B3 camshaft, PBS DCOE intake, IAP header, 1 Kirkey economy seat, used 1300cc short block, used 1500cc FI longblock, used bare 1500cc head.

Budget - Very small but not non-existent. Wife is supportive, family remains first

Time - Sporadic but not non-existent

Tools - Good set of basic tools plus both a Mig and Oxy/Act welder, Smithy bench top lathe, Air compressor.


Priorities - Reliability, Budget, Speed

OK help me come up with a plan, maintenance/mod list and priorities, what should I keep, what should I sell, what should be on my shopping list. I will update this thread with photos and progress. Thanks for any help.

Vince
 
I have built this very car, twice.

The very first thing you should do is decide on drive or flat tow. I recommend the flat tow option. A towbar is cheap and solves lots of problems. The compromise to keep the car street legal and safe is a big one. Safety is a big one here as you have a family. Driving the car to/from the event is the most dangerous part of most autocrosses. And if you optimize lightening the car, while it is still safe for autocrossing, if someone runs a stoplight and t-bones you, its likely you won't survive without the door beams in place.

Once that decision is made, break the project down into the basic catagories:

1) chassis (encompasses the body, interior and ancilaries like fuel tank, radiator, wiring harness, driver controls, etc...)

2) drivetrain (engine/transmission)

3) suspension: control arms, bushings, springs, struts, mounts, brakes, etc...

Since everything bolts to the chassis, lets start there. Strip that baby of the interior, headlights/motors, glass, etc... and then put the necessary stuff back in. You can also skin the doors, hood and trunk deck and pin them in place. If you really want to go the full distance, cut the winshield off.

We can get to the rest as time permits.
 
Your point about safety is a good one. I will find a way to flat tow the car. However in California any vehicle whose wheels touch the ground of a public highway needs to be registered so even if I flat tow that requirement remains. Another factor is my local club runs regular night events so provisions for lighting will need to remain in some minimal fashion. I have begun stripping the car of unnecessary equipment and will continue to concentrate on that.
 
Starting to strip the weight out

bluex_lf.jpg


Here is my X1/9 ready for some weekend work

bluex_trunk.jpg


Started with the trunk. I was surprised how much the panels weighed. If you have not removed the fiberglass mat in the trunk do it. Mine was wet and my car lives under a cover and I don't use a hose to wash it. I can't imagine how long that water has been there.

bluex_nodash.jpg


Removed dash and heater.

bluex_res.jpg


This I did about a month ago when I changed the master cylinders.

bluex_hood.jpg


OK question here. When "skinning" the hood do I remove the whole structure under the panel or leave the perimeter? How many hood pins do I use and what type?
 
My 2 cents

Leave most of the substructure along with the front hinges. Some of the substructure is needed for safety. The two large post near the firewall slip into the substructure in the event of an accident. This keeps the hood from cutting your head off.

Cut a piece of aluminum for a new skin and use a 3M cement and rivets to attach the new skin to the subframe.

Remove the hinges and drill holes to lighten. Also remove the plastic stops attached to the hinges. I believe they are held on with two small screws.

I too removed my dash. Its very heavy. The glove box door alone weighs 5 pounds!

Make a rear deck lid from aluminum and attach it with 4 aluminum hood pins. Loosing weight on the rear half of the car is more important than loosing it in the front. This improves the weight distribution which helps the cars handling.

I have been removing weight from my car for 3 years. Its amazing how much you can remove once you start scrutinizing every part on the car. Just this last week I removed another 5 pounds and spotted several other things I could do in the future.

Good Luck!
 
Hey Vince... Before ya go any further...

A 1975 X1/9 in CA, as you well know, can be driven and registered and modified without the hassles of Smog Checks. Setting this car up primarily for the track and essentially removing it from CA highways with the exception of towing it to events seems like a real shame to me.

Have you considered finding a '76 or later model and stripping it down for track use? Since you have trans issues with this one... it'll require some work to be competitive also. Later models come pretty cheap too...

Just thought I'd toss that out for you to chew on...
 
The value of a 75 in CA

A 1975 X1/9 in CA, as you well know, can be driven and registered and modified without the hassles of Smog Checks. Setting this car up primarily for the track and essentially removing it from CA highways with the exception of towing it to events seems like a real shame to me.

Have you considered finding a '76 or later model and stripping it down for track use? Since you have trans issues with this one... it'll require some work to be competitive also. Later models come pretty cheap too...

Just thought I'd toss that out for you to chew on...

Well I did think about that but I tell you what, I think to keep this one around my plan isn't bad.

Lets say I don't keep it, what will happen to the car? No one is going to restore a clapped out 1975 to bone stock condition, and if they do being a 75-78 doesn't much matter.

Mild performance? I bet the 80-87 FI cars are better candidates with a Mad Matt engine package, or swap in a legal late model engine(Fiat or non-Fiat) into a 76-79.

All out street performance? Well are you going to cut the fenders off for some fiberglass kit then swap in a full bore SOHC, DOHC, or ? Where will that car be in 10-20 years? What if the rules in our great state change and 1975 is no longer exempt? Besides if you read the rules 1975 means no smog testing but it is still illegal to remove the smog equipment. Best hope is sell it to someone in another state where it doesn't much matter if it is a 75 or later because the smog rules are so lax. If not it just sits.

So I keep the car, give it some race history in a way that has very little chance it will ever be wrecked, take it for the occasional blast to the local donut store, gas station, and car show 1/2 mile away and insure it stays around for many years. Who knows maybe some day return it to limited street duty as a vintage Italian race car and do vintage rallies and hillclimbs, what is a better use than that?
 
HA... and chew on you did...

Have fun with your car... and I'm glad you at least considered my suggestion.

As for "legal" engine swaps into late models that are legally registered and smogged... I know of none on the road here in CA. If there are, I'd really be interested in what engines/drivetrains were used and what "legal" hassles were involved to get them approved and keep them on the road.

That info would be invaluable for all of us on this site and with this STATE of affairs we live in here. (pun intended)
 
Well I did think about that but I tell you what, I think to keep this one around my plan isn't bad.

Lets say I don't keep it, what will happen to the car? No one is going to restore a clapped out 1975 to bone stock condition, and if they do being a 75-78 doesn't much matter.

Mild performance? I bet the 80-87 FI cars are better candidates with a Mad Matt engine package, or swap in a legal late model engine(Fiat or non-Fiat) into a 76-79.

All out street performance? Well are you going to cut the fenders off for some fiberglass kit then swap in a full bore SOHC, DOHC, or ? Where will that car be in 10-20 years? What if the rules in our great state change and 1975 is no longer exempt? Besides if you read the rules 1975 means no smog testing but it is still illegal to remove the smog equipment. Best hope is sell it to someone in another state where it doesn't much matter if it is a 75 or later because the smog rules are so lax. If not it just sits.

So I keep the car, give it some race history in a way that has very little chance it will ever be wrecked, take it for the occasional blast to the local donut store, gas station, and car show 1/2 mile away and insure it stays around for many years. Who knows maybe some day return it to limited street duty as a vintage Italian race car and do vintage rallies and hillclimbs, what is a better use than that?


Thank you! I was catching some flak to for my 1974 project, so I offered to sell it to anyone that wanted to save it. Everyone seems interested in the parts I am pulling off and putting on ebay so I think all will be forgiven, at least my Stock X will live on keeping other X's on the road while I turn it into something crazy.
 
A little progress and some questions

Worked on stripping the interior today. Removed the rest of the carpet, vinyl trim, windshield wipers, some unneeded wiring etc...

bluex_ingut1.jpg


bluex_intgut2.jpg


So I have a few questions.

What is the best way to remove all the residual glue? I know the tar stuff is a pain and I'll tackle that with a scraper and wire brush but getting rid of the glue would really cleanup the interior.

How about all the little metal brackets etc? I would want to remove those just so the car is more pleasant to work on.

Along those lines what can I use to cover the metal seems? Some light plastic piping maybe?

Should I remove the rear window or just replace it with plastic. If it matters I plan to keep the front window.

Next I have 12 hood pins on order to do the trunk, hood and engine cover. Gotta say its kind of fun stripping the car, looks so purposeful.

Vince
 
Were in CA are you?

You need to visit Alex in San Diego. He has my old DP car which he is going to race in GP.

This will give you lots of ideas on weight, etc.

It will also give you some idea on Engines as well.

Good luck

Eric Armstrong
 
Just chatted with him

He pops back and forth quite a bit nowdays.

Must be rough, huh? ;)

Eric
 
Answers

"How about all the little metal brackets etc? "

Use a dremel tool with a cutoff wheel to cut the brackets. Then clean them up with a 2" sanding disc.

"What can I use to cover the metal seems? Some light plastic piping maybe?"

Black piping can be purchased from Pegasus Racing Supply. You can get it to slip over three different thicknesses of sheetmetal.

"Should I remove the rear window or just replace it with plastic? If it matters I plan to keep the front window."

I replaced mine with lexan and lost 5 pounds. Use 1/8" thick and you can loose 7 or 8 pounds. You probably need to search the rules to see if you and leave it out.

Leave the front window intact if you are not planning on putting in a roll cage. The SCCA has a specific rule concerning Targa Topped cars. No roll cage is needed if the winshield is left in its stock configuration. If you chop it off....you must have a roll cage.

Have Fun!
 
Thanks for the info and pointing out the specific rule for Targa style cars. Looks like I'll need to run a rear window to meet the "closed" car criteria since it only specifies that the side windows can be removed.


"How about all the little metal brackets etc? "

Use a dremel tool with a cutoff wheel to cut the brackets. Then clean them up with a 2" sanding disc.

"What can I use to cover the metal seems? Some light plastic piping maybe?"

Black piping can be purchased from Pegasus Racing Supply. You can get it to slip over three different thicknesses of sheetmetal.

"Should I remove the rear window or just replace it with plastic? If it matters I plan to keep the front window."

I replaced mine with lexan and lost 5 pounds. Use 1/8" thick and you can loose 7 or 8 pounds. You probably need to search the rules to see if you and leave it out.

Leave the front window intact if you are not planning on putting in a roll cage. The SCCA has a specific rule concerning Targa Topped cars. No roll cage is needed if the winshield is left in its stock configuration. If you chop it off....you must have a roll cage.

Have Fun!
 
Had a little time today so I worked on skinning the engine cover.

eng_cvr_btm.jpg

eng_cvr_top.jpg


It was a lot more work than I expected. The hardest part being prying apart the seams where the factory glued the panels together. I think for the next one I will purchase some putty knifes and sharpen them to get between the panels. Got a few dents in it from trying to pry it apart but nothing a little hammer and dolly work can't take care of. The panel is real floppy now but no big deal for the cover. I do have concerns about doing this to the hood. I think it would need some structure, maybe a sheet of foam core bonded to the bottom would do?


I also made these to cover the holes left by the rear top hook panels

top_hook_plates.jpg


Feel a bit guilty adding weight back to the car but I want it to look quality and uncovered holes just don't look quality to me.

Vince
 
Seat mounting question regarding the SCCA prod rules

I have completed gutting the interior and would like to mount the seat next. If I just sit on the floor the top of my head makes contact with the targa bar so I would like to get the seat lower. My first thought was to cut out the floor where the seat mounts and put in a new section as low as possible. However in reading through the ruleset the only part that addresses the passenger compartment floor states

17.2 BODYWORK AND STRUCTURE
"E. The floor in the driver/passenger compartment may be modified
for installation of subframe connectors, exhaust components, and
for driveshaft clearance. When modified, the driver/passenger
compartment must remain separate from any exhaust and
driveshaft components. The modified area must be steel or
aluminum and no more than a 4 in. clearance is allowed be-
tween modified floor area and exhaust, or modified floor area
and driveshaft components."

It does not address lowering the floor for seat mounting considerations so since it doesn't say I can then I can't. Is this correct?
 
The way I read this,

no you cannot modify the floor solely for the purpose of lowering the seat.

However.

You have to work within these rules to accomplish your goal. Install some "subframe connectors", two on each side, lower than the floor, and remove the floor in this area to make access. If the two "subframe connectors" also happen to provide a good seat mount, well, so be it. The primary purpose of those rails was to connect the subframe. After the surgery was done, the only place left to mount the seat was on the subframe connectors.

I did a similar thing when building my car for ITC back in the 90s. There was a rule that prohibited tying the front strut towers. But I was running a fuel cell, and the only good place to run a mount bar was between the strut towers. The tech inspectors never questioned it.

Pete
 
It does not address lowering the floor for seat mounting considerations so since it doesn't say I can then I can't. Is this correct?

In prepared, they are very afraid of people modifying the floor. So the floor is strictly controlled. Therefore you cannot cut the floor except for the specified purposes.

I had a similar problem with my DSP car. I did a couple of different things to get lower in the car.

1) cut the seat rails out. Drill the spot welds and remove them. This lowers the seat more than half an inch and allows much more flexibility in mounting and positioning.

2) Shop for seats that provide for a lower seating position. What type of seat do you have? The upholstered fiberglass seats or upholstered steel frame seats (Corbeau) simply don't work. I used an aluminum Ultrashield, 20 degree layback. Even with this seat, I still sat too high. The solution was to actually cut a section out of the bottom of the seat so that the car's floor became the seat bottom (at the apex of the seat back and the seat bottom).

The seat was then bolted to the floor using brackets I fabricated and attached to the sides of the seat. This worked exceptionally well. You can see in the photo below how low I sit and I am 6'3" tall.

dsp_stevehoelscher01tour_1.gif


stevehoelscher2000tour.gif


Note here that significantly shorter drivers sit higher in the car.

dsp_markseelbinder01tour_1.gif


dsp_brianreeves01tour_1.gif
 
In prepared, they are very afraid of people modifying the floor. So the floor is strictly controlled. Therefore you cannot cut the floor except for the specified purposes.

I had a similar problem with my DSP car. I did a couple of different things to get lower in the car.

1) cut the seat rails out. Drill the spot welds and remove them. This lowers the seat more than half an inch and allows much more flexibility in mounting and positioning.

Seat rails are out, along with all other unnecessary brackets and coating from the interior.

2) Shop for seats that provide for a lower seating position. What type of seat do you have? The upholstered fiberglass seats or upholstered steel frame seats (Corbeau) simply don't work. I used an aluminum Ultrashield, 20 degree layback. Even with this seat, I still sat too high. The solution was to actually cut a section out of the bottom of the seat so that the car's floor became the seat bottom (at the apex of the seat back and the seat bottom).

I have a Kirkey 20 degree layback economy http://www.kirkeyracing.com/index.php?link=browse&code=Series09 My concern with cutting out the bottom and sitting on the floor is that my butt becomes the crumple zone for any floor impacts. If I did something like this could I build a structure underneath to provide some buffer and still be within the rules?

The seat was then bolted to the floor using brackets I fabricated and attached to the sides of the seat. This worked exceptionally well. You can see in the photo below how low I sit and I am 6'3" tall.

We are the same height, curious what is you inseam? I have relatively short legs with my 32" inseam so I tend to be more headroom challenged. Of course at 210lbs I could probably drop another inch if I lost a few pounds....
 
Back
Top