Rupunzell
Bernice Loui
Headlight bulb holes got flanged to increase the strength and rigidity of the sheetmetal with the hole.
Made a flanging die out of aluminum as this is a use twice item once done. Die was made to fit and work with
the hydraulic hole punch.

Flanging die applied to hole.

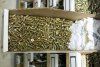
Zinc Phosphate primer after deburr.

On to making and installing a patch bracket for the slot where the rusty area in
the battery area dissolved the sheet metal.

Patch bracket made of 0.80mm thick 304 stainless steel. Bend is needed to fit the shape of the sheet metal in that area. This required a compound cut-bend. Note the cut area to a hole and silver soldered strap to reinforce where the top cut was made to strengthen the part.

Those who have worked on aircraft air frames would recognize these tools.

Holes drilled, de-burred, cleaned up.

Bracket installed with seam sealer. Screws and prevailing torque nuts applied.
No welding, all holes, fab edges deburred, more zinc phosphate primer.

The back side.

What this area looked like at the beginning of this fix.

Just about ready for paint in this area. Once that is done, brackets goes in for a test
fit then on to the rear bumper.
Bernice
Made a flanging die out of aluminum as this is a use twice item once done. Die was made to fit and work with
the hydraulic hole punch.
Flanging die applied to hole.
Zinc Phosphate primer after deburr.
On to making and installing a patch bracket for the slot where the rusty area in
the battery area dissolved the sheet metal.
Patch bracket made of 0.80mm thick 304 stainless steel. Bend is needed to fit the shape of the sheet metal in that area. This required a compound cut-bend. Note the cut area to a hole and silver soldered strap to reinforce where the top cut was made to strengthen the part.
Those who have worked on aircraft air frames would recognize these tools.
Holes drilled, de-burred, cleaned up.
Bracket installed with seam sealer. Screws and prevailing torque nuts applied.
No welding, all holes, fab edges deburred, more zinc phosphate primer.
The back side.
What this area looked like at the beginning of this fix.
Just about ready for paint in this area. Once that is done, brackets goes in for a test
fit then on to the rear bumper.
Bernice