79X19
True Classic
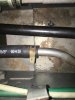
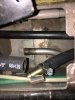
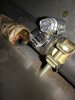
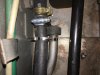
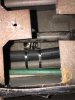
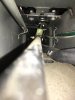
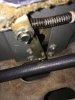
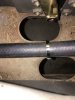
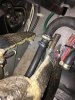
By now many of you have already seen my thread about replacing the coolant pipes on my '81 FI car. I've elected to go with the B&W 304SS replacements including the external heater tube. My question is about the internal heater tube that runs in the interior center tunnel from about the emergency brake handle to just past the accelerator pedal. I have replaced the heater hose from the engine to the connection point at the e brake but I am concerned about the condition of this 3-4' interior pipe. The outside looks good and the end that's connected to the heater box looks solid. The end of the pipe by the e brake was corroded at the 6 o'clock position but not bad. How have others dealt with this pipe? Its welded in place so replacement is all but impossible. I was thinking of bypassing the tube altogether and used brass hose menders to complete the connection to the heater box. If I dont have to address it I really dont want to and leave it alone. I've replaced every other pipe and hose other than this one and Id hate to have an interior leak after a complete interior resto. Thoughts?