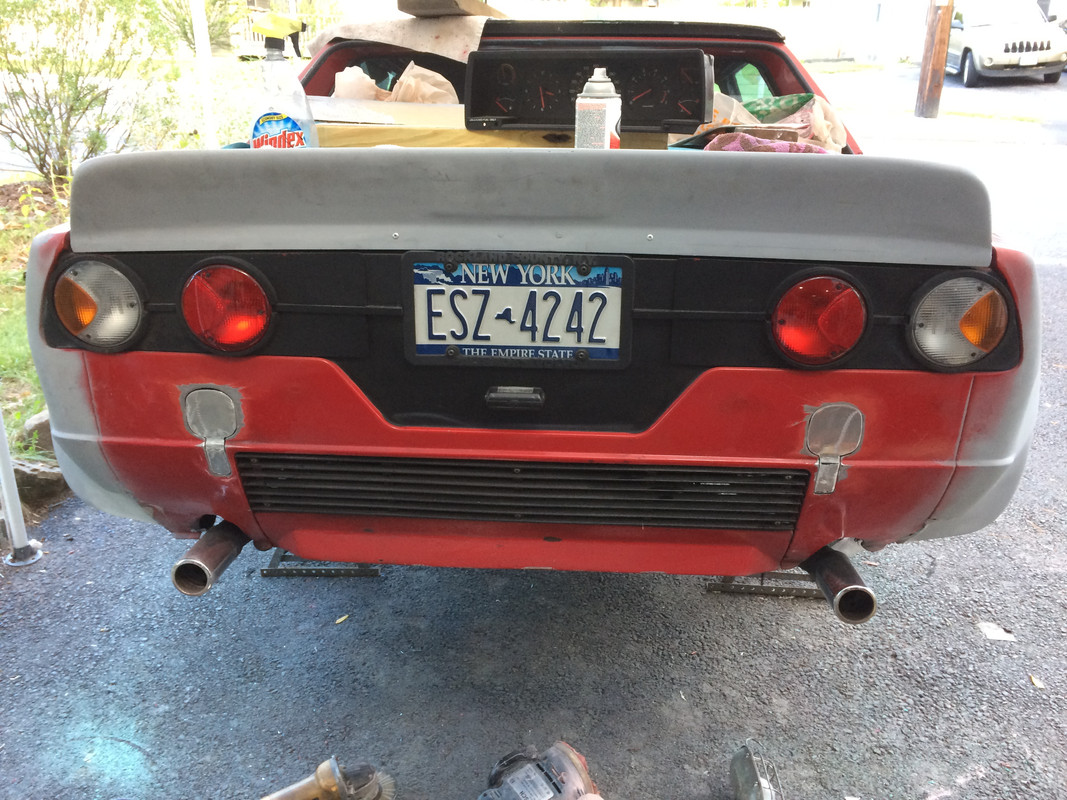
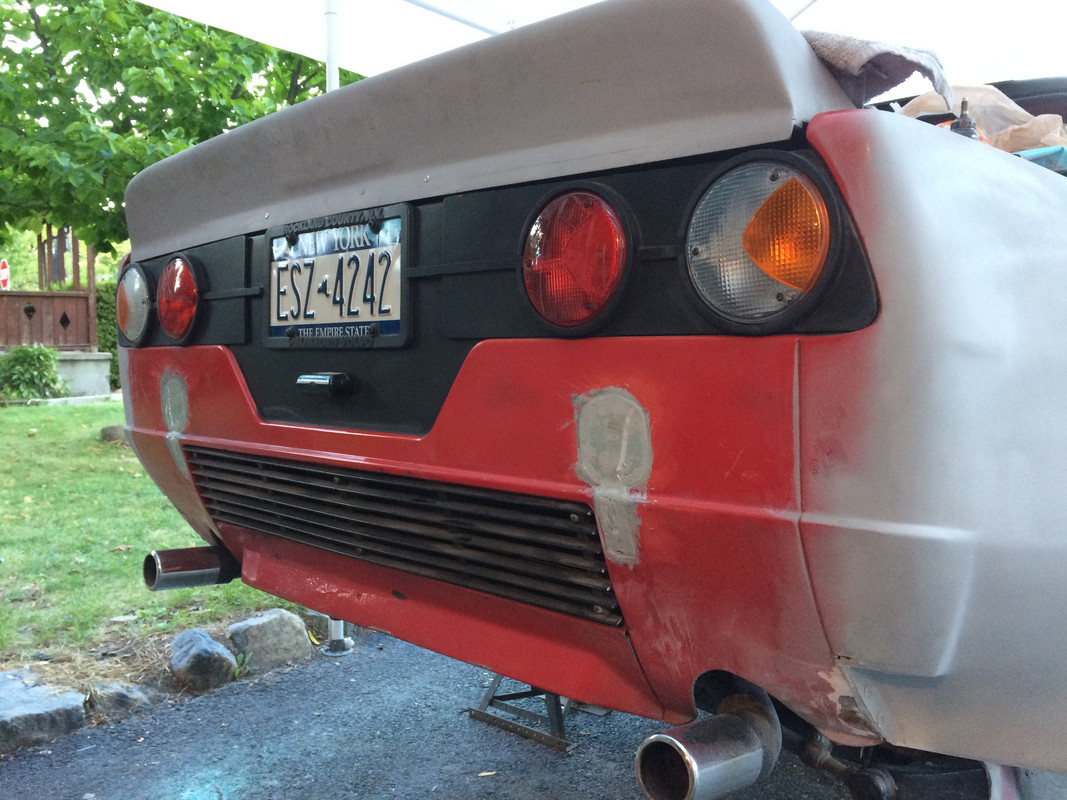
Rear Bumper tube support End Removal

The regular Dremel cut off wheels suck. The Lock cutting wheels cut really fast for Dremels.
There are two types of regular cutting wheels; thin smaller ones, and "reinforced" thick larger ones. I have both of those and while the reinforced ones do not break as easily, they really do not cut that well. I haven't tried the "lock" type. Those were new to me the last time I looked. I wonder what makes them that much different?
 
There are two types of regular cutting wheels; thin smaller ones, and "reinforced" thick larger ones. I have both of those and while the reinforced ones do not break as easily, they really do not cut that well. I haven't tried the "lock" type. Those were new to me the last time I looked. I wonder what makes them that much different?

I am not sure but way back the same style were sold as lock cutters. For cutting pad locks. The EZ-lock seem to be the same size and same material.
 
Actually "EZ-Lock" is what I thought you were talking about. I never saw the "lock cutting" ones.

I'll have to look into the EZ-Lock wheels. As I recall you need to buy the mandrel separate, and the wheels were even more expensive than the regular "reinforced" ones - so not cheap. But if they work I guess it's worth it.

In recent years a type of circular saw blade has become popular for cutting all types of metals, including stainless. They refer to them as "cold saws" and do not require a coolant flow. It would be great if they could make miniature ones like that for these rotary tools.
 
More ugly progress. First you need the proper environment, meaning tools all over the place. Don't forget extension cords and air hose to trip over.

IMG_1443[2].JPG


Some nice ugly but functional welds.

IMG_1444[1].JPG


Then quality time with the grinding wheel and then some primer

IMG_1445[1].JPG


Next episode will be Bondo time. Lest anyone think otherwise, I'm not very good with bodywork, or welding. I do the best I can to get 15 foot results.
 
More ugly progress. First you need the proper environment, meaning tools all over the place. Don't forget extension cords and air hose to trip over.

View attachment 30025

Some nice ugly but functional welds.

View attachment 30026

Then quality time with the grinding wheel and then some primer

View attachment 30027

Next episode will be Bondo time. Lest anyone think otherwise, I'm not very good with bodywork, or welding. I do the best I can to get 15 foot results.
Unless you're willing to finish stitching it and complete a seam weld ( ups the chance of distortion though) you're good to go Carl. Just seal it from the other side if possible to keep your fillers as free from moisture as possible and you'll be fine. Good job. Throw in a couple more air grinders and a DA sander and it looks like my floor
 
I agree with Cliff, if you can get some seam sealer on it from the back then really no need to fool around with a complete seam weld. Even some spray on panel protection undercoating will work. The metal on these bodies is difficult to weld - much more so than most vehicles for some reason. So it may be a good case of less is more, otherwise you end up chasing bad welds and do more damage than good.

Slightly off topic here, but not really. I know everyone condemns the use of body fillers. But two things; first it has come a LONG way from the stuff that everyone is talking about, and second every body shop uses it for every repair - including the top shops. In fact high end customizers cover the complete vehicle in a coat of it in order to get everything perfectly flat and level. It is hilarious to watch those programs where they are doing a quarter million dollar show car build and in one scene they are ridiculing the previous body repairs for using body filler, but in the next scene they are slathering it on the whole car. I guess a third item is I've worked on vehicles that had repairs with (too) heavy body filler applied many years ago and until you stripped it out you could not tell it was there. No signs if shrinkage, cracking, unevenness, rust, pulling away, etc; my point is if applied correctly it works excellent. Especially for a very minor job like what you are doing.

And my floor always looks worse than that.
 
I still swear by the body solder. May give one of the new metal on metal fillers that seem to be great.
 
I still swear by the body solder.
I agree, solder (the modern version of lead) is the preferred method.
However it is also more difficult to master and therefore runs a risk of making a big mess if not done properly. But that last part is also true of regular body fillers. As you say, the plastic fillers with a strengthening material like metal particles or glassfiber bits in it are more durable on a open seam. The good thing in this case is this is not structural at all. We're not talking about repairing a rusted chassis panel with a patch. This is purely a cosmetic cover over a factory opening. So all that is needed is to keep the cover in place.

Don't get me wrong, I'm not advocating any shortcuts. But that's my point, using body filler correctly is not a shortcut. I've done the metal work to the point of needing no filler. And not only is it very difficult to get right, but also very easy to screw everything up in the process by overworking the metal. If I had the exceptional metalworking skills that someone like Cliff has it would be different. But lets be honest, very few of us are that talented despite extensive training and years of practicing. It is truly an artform to master it.

By the way, I'd do the body filler first and then the seam sealer.
 
Some great options for you Carl. Having done a little lead work in the past it can be somewhat tricky and requires a few extras that unless you plan to do more might sit in a drawer and never see use again? However, judging from what I've seen so far in your entries I'm sure you'd make small work of it and be a pro in no time. Haven't used it in several years but I'm sure the new systems are better than the older stuff, which I'm sad to say that I never once wore any safety equipment. But quoting your previous entry "I'm not very good with bodywork, or welding. I do the best I can to get 15 foot results" and the fact that you're not looking for Barrett Jackson show car results it'll be much less work using simple fillers. You can use small home made blocks and hide that opening like it was never there like a pro.
 
Thanks guys. Yes, the point I was making was if I can do this, anyone can. My rear quarter panel where the exhaust pipe exits was in terrible shape with tons of rust through and a good bash from sometime. Of all the parts cars I have had access to that panel was always worse than mine. Currently it's a LOT of that Bondo/fiberglass stuff you can buy. So you can see my standard is not too high!
 
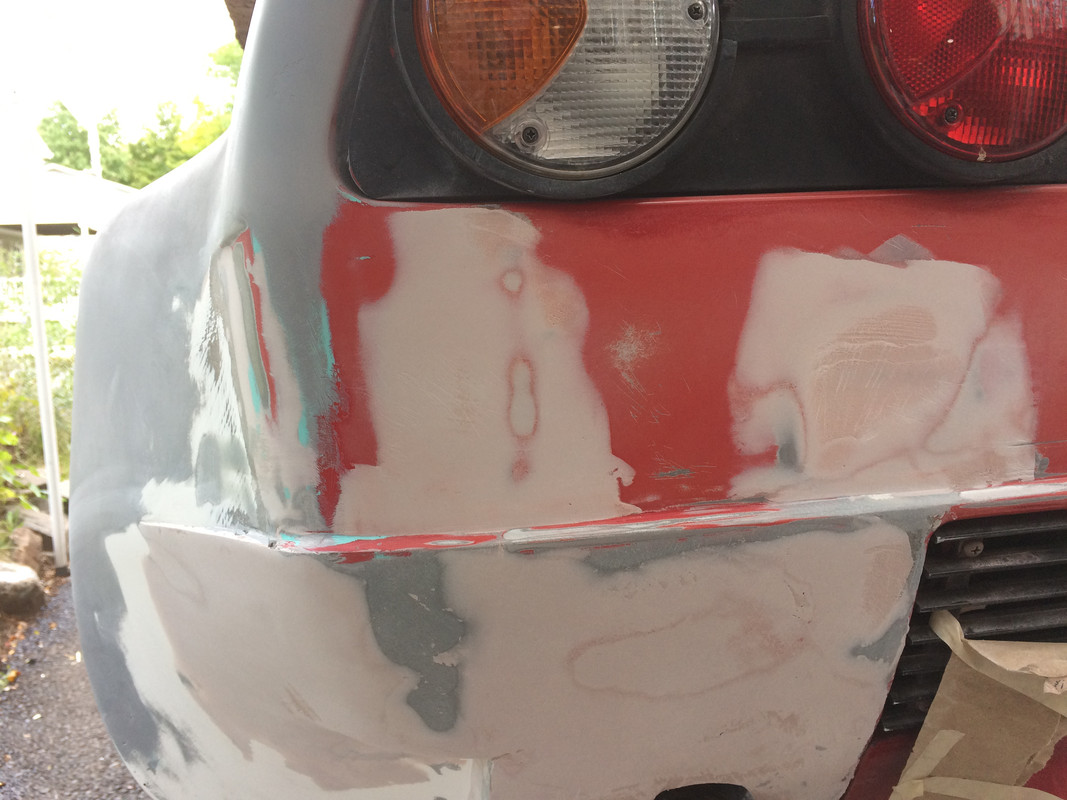
OK, more progress. After three Bondo attacks, I got it where I wanted it.

IMG_1446[1].JPG


Then my perfect match Rustoleum red.

IMG_1448[1].JPG


I'll work on the removable panel that goes over the tube ends next.
 
There are two types of regular cutting wheels; thin smaller ones, and "reinforced" thick larger ones. I have both of those and while the reinforced ones do not break as easily, they really do not cut that well. I haven't tried the "lock" type. Those were new to me the last time I looked. I wonder what makes them that much different?
The reinforced cutting wheels that I bought from "Biltema" are really good. I don't remember the exact price but a set of 10 cost me like 3 or 4 USD. I've tried lock types as well but only for grinding. They ARE expensive, and do not perform better than the cheaper ones. But very convenient when switching wheels.
 
Finish plates pop riveted in.

IMG_1449[1].JPG


I'll paint the rivet heads to match. That is a third brake light I added down there. It's an add on rear fog light I have had for decades. Being in an unusual location it's more apt to catch your eye. When it stops raining and I can take a nice outdoor pic, I'll take a full rear view pic.
 
The reinforced cutting wheels that I bought from "Biltema" are really good. I don't remember the exact price but a set of 10 cost me like 3 or 4 USD.
That's a great price. The only ones I've seen around here are the Dremel brand and they are much more expensive, and don't seem to work well on heavier metal like this. I've not heard of "Biltema", I'm guessing it is a Swedish brand?
 
I've not heard of "Biltema", I'm guessing it is a Swedish brand?
Yes Biltema (Car Theme) is a big Swedish low price chain in Automotive, Marine, Construction... Their products vary in quality but I've found most of their power tools really good but a little bit heavy and clumpsy. I previously had Bosch and Black & Decker "Dremels" but they broke or burnt. The Biltema Dremel is definitely tougher but a little bit heavy.
 
I used Rustoleum Sunrise Red with my original paintwork - matched very well. Did the whole SerpentAuto Spoiler with it.

I cut them back with a saws-all, and made aluminum inserts

Dallara-Rear00008.jpg


Epoxy to bond them

Dallara-Rear00009.jpg


no panel distortion this way, then just a little filler to blend it

Dallara-Rear-Fender00045a.jpg


Dallara-Paint00109.jpg


Never, ever want to do that again, or any of the other work required for the Dallara kit - I think I have PTSD from all that bodywork, the sight of bondo & filler kinda gives me the shudders :D
And that serpent spoiler still has sunrise red! Albeit a couple more coats. Insane how well is matches


Odie
 
Back
Top