ng_randolph

Bjorn H
Shortly after I got my X1/9 I added power door locks and keyless entry. At the time I also put in wiring for remote trunk release for a potential future upgrade. Well, the future is now; I completed the trunk release install in August.

Several people here have added remote trunk release, and one of the difficulties encountered is the force required to open the latch. There is a fairly strong coil spring external to the latch, presumably there to make sure the lever in the door jamb retracts properly. @drsnemann measured the force needed to be 15.4 lbf, or just under 70N. People have dealt with this in different ways; Removing the external spring (@lookforjoe), using a stronger actuator, or adding leverage . I chose the latter.

To get an idea of what is required, I put a camera in the trunk and recorded while opening the trunk. The minimum movement needed at the butt end of the lever is just about 5 mm. I wanted to use a MES door lock actuator, as I have found these to be very reliable. I measured the actuator travel to be 23 mm, and the vendor claims it to be "capable of dead lifting over 8 pounds!), or about 35N. So I set out to increase the leverage about 3x, reducing the required force to around 23 N and giving just over of 7 mm of travel. There is a bit of wiggle room on the travel; when attaching the manual trunk release cable one can (should) put in a bit of preload. This reduces the travel needed, and helps the door jamb lever retract.

The trunk latch is riveted together, and I ground off the rivet heads to open the unit. I made a CAD-drawing of the existing latch lever, then extended it about 50 mm. SendCutSend (my new best friend) laser cut one from 1/8" 304 stainless steel for not much money.

Levers.jpg


Rather than riveting the latch back together, I drilled up the rivet holes in the rear facing half and installed press-in spacers.

Press-in_spacer.png


DSCN2907.jpg


On the forward facing half I drilled up the holes and installed M3.5 PEM-nuts (M3.5 to fit the 3.6 mm ID of the spacers)

Press-in-nut.png


DSCN2909.jpg


After a thorough cleaning I greased up the moving parts and assembled the latch with truss head screws and thread locker. SendCutSend does not do coining, so I used an M2.5 pan head screw for the end stop. 3M DP420 epoxy in lieu of thread locker on this. As it happens, the actuator limits the travel and I don't actually hit this stop screw.

P1000966.jpg


P1000967.jpg
 
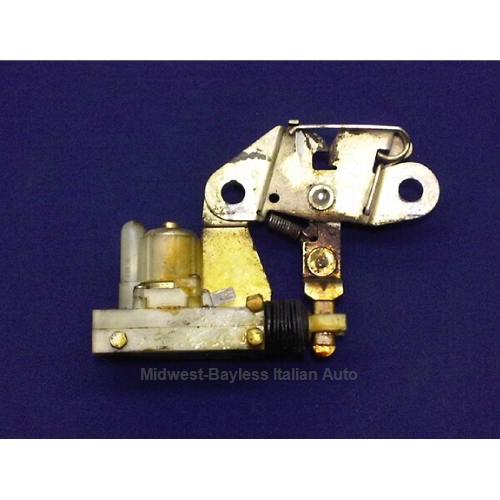
Somewhere in my stash I have the decklid actuator for a 2000 spider, which was acquired with the intention of effecting power runk-lid. Gotta dig that out!

Looking at the pix on MWB, it looks like the factory setup for the spider power decklid release also did what you did, they lengthened the "pendulum" arm to provide a place for the solenoid to push and no doubt to add a measure of leverage.
watermark.axd
 
Well done and nicely documented.
Shortly after I got my X1/9 I added power door locks and keyless entry. At the time I also put in wiring for remote trunk release for a potential future upgrade. Well, the future is now; I completed the trunk release install in August.
 
Somewhere in my stash I have the decklid actuator for a 2000 spider, which was acquired with the intention of effecting power runk-lid. Gotta dig that out!

Looking at the pix on MWB, it looks like the factory setup for the spider power decklid release also did what you did, they lengthened the "pendulum" arm to provide a place for the solenoid to push and no doubt to add a measure of leverage.
watermark.axd
The 124 has a bit of a ‘popper’ with that leaf spring across the top of the lock.
 
I like your choice of extending the lever arm rather than the other options. ;) [More on that below]

"SendCutSend" attends a couple of the trade shows I go to. I've spoken with the principles and I like what they offer. So far I haven't had the need to actually try them yet though.

I wanted to make a related mod to the frunk release. But instead of using a remote actuator I wanted to reroute the pull cable from under the dash to the factory release box in the door jam. I could do that because this X does not have a factory engine cover and related latch mechanism. That has been replaced with a open mesh grill that is completely removable. So with no engine cover release needed there's a empty space in the factory release lever box (at the door). Naturally it requires a longer cable to reach the door jam, which increases the resistance. I looked into lightening the spring on the latch mechanism to help, but I could not find a good alternative. I even tested/compared the springs on the frunk, engine, and rear trunk latches to see if any of them was lighter than the others. But I found no noticeable difference. In the end I extended the location of the cable attachment point lower down on the latch lever a little and that seems to be enough to allow a decent action from the stock release box. However if I find I'm still not satisfied once final assembly gets done I will copy what you did and replace the latch lever with a longer one. Thanks for posting.
 
Shortly after I got my X1/9 I added power door locks and keyless entry. At the time I also put in wiring for remote trunk release for a potential future upgrade. Well, the future is now; I completed the trunk release install in August.

Several people here have added remote trunk release, and one of the difficulties encountered is the force required to open the latch. There is a fairly strong coil spring external to the latch, presumably there to make sure the lever in the door jamb retracts properly. @drsnemann measured the force needed to be 15.4 lbf, or just under 70N. People have dealt with this in different ways; Removing the external spring (@lookforjoe), using a stronger actuator, or adding leverage . I chose the latter.

To get an idea of what is required, I put a camera in the trunk and recorded while opening the trunk. The minimum movement needed at the butt end of the lever is just about 5 mm. I wanted to use a MES door lock actuator, as I have found these to be very reliable. I measured the actuator travel to be 23 mm, and the vendor claims it to be "capable of dead lifting over 8 pounds!), or about 35N. So I set out to increase the leverage about 3x, reducing the required force to around 23 N and giving just over of 7 mm of travel. There is a bit of wiggle room on the travel; when attaching the manual trunk release cable one can (should) put in a bit of preload. This reduces the travel needed, and helps the door jamb lever retract.

The trunk latch is riveted together, and I ground off the rivet heads to open the unit. I made a CAD-drawing of the existing latch lever, then extended it about 50 mm. SendCutSend (my new best friend) laser cut one from 1/8" 304 stainless steel for not much money.

View attachment 78617


Rather than riveting the latch back together, I drilled up the rivet holes in the rear facing half and installed press-in spacers.

View attachment 78618


View attachment 78620

On the forward facing half I drilled up the holes and installed M3.5 PEM-nuts (M3.5 to fit the 3.6 mm ID of the spacers)

View attachment 78619


View attachment 78621

After a thorough cleaning I greased up the moving parts and assembled the latch with truss head screws and thread locker. SendCutSend does not do coining, so I used an M2.5 pan head screw for the end stop. 3M DP420 epoxy in lieu of thread locker on this. As it happens, the actuator limits the travel and I don't actually hit this stop screw.

View attachment 78623

View attachment 78622
Wow great job well done.
 
Shortly after I got my X1/9 I added power door locks and keyless entry. At the time I also put in wiring for remote trunk release for a potential future upgrade. Well, the future is now; I completed the trunk release install in August.

Several people here have added remote trunk release, and one of the difficulties encountered is the force required to open the latch. There is a fairly strong coil spring external to the latch, presumably there to make sure the lever in the door jamb retracts properly. @drsnemann measured the force needed to be 15.4 lbf, or just under 70N. People have dealt with this in different ways; Removing the external spring (@lookforjoe), using a stronger actuator, or adding leverage . I chose the latter.

To get an idea of what is required, I put a camera in the trunk and recorded while opening the trunk. The minimum movement needed at the butt end of the lever is just about 5 mm. I wanted to use a MES door lock actuator, as I have found these to be very reliable. I measured the actuator travel to be 23 mm, and the vendor claims it to be "capable of dead lifting over 8 pounds!), or about 35N. So I set out to increase the leverage about 3x, reducing the required force to around 23 N and giving just over of 7 mm of travel. There is a bit of wiggle room on the travel; when attaching the manual trunk release cable one can (should) put in a bit of preload. This reduces the travel needed, and helps the door jamb lever retract.

The trunk latch is riveted together, and I ground off the rivet heads to open the unit. I made a CAD-drawing of the existing latch lever, then extended it about 50 mm. SendCutSend (my new best friend) laser cut one from 1/8" 304 stainless steel for not much money.

View attachment 78617


Rather than riveting the latch back together, I drilled up the rivet holes in the rear facing half and installed press-in spacers.

View attachment 78618


View attachment 78620

On the forward facing half I drilled up the holes and installed M3.5 PEM-nuts (M3.5 to fit the 3.6 mm ID of the spacers)

View attachment 78619


View attachment 78621

After a thorough cleaning I greased up the moving parts and assembled the latch with truss head screws and thread locker. SendCutSend does not do coining, so I used an M2.5 pan head screw for the end stop. 3M DP420 epoxy in lieu of thread locker on this. As it happens, the actuator limits the travel and I don't actually hit this stop screw.

View attachment 78623

View attachment 78622
Is this primarily so as to open the trunk without having to open the driver's door? Or just for fun :)
 
To mount the actuator, I drew up a sheet metal bracket and had it cut, bent and plated at SendCutSend.

Actuator_Assy.JPG


This fits to the left of the trunk latch, and is shaped to not interfere with the ground tab (for the tail lights) spot welded next to the left tail light.

20231109_195957.jpg


What is not clear from the photo is that there are 3mm spacers between the bracket and the car body in order to clear the jog along the edge of the car sheet metal.

When the actuator pulls on the latch lever, the lever will again push on the wires for the manual trunk release as well as the emergency release. To prevent the manual release cable from getting dislodged by this, the manual release cable is now attached with several split rings. The actuator is attached with a chain, though this is less critical; if operating the manual release would push on the actuator, no harm would be done. The emergency release has enough give that no lost motion accommodation was made.

20231109_200807.jpg


Earlier I tested the emergency trunk release (look for a cable terminated in a rubber ring next to the coolant reservoir in the engine bay). It worked, but it felt like something was about to break when using it. From the factory the cable is only protected where it goes under the trunk mat. The cable is also dragged over a sheet metal edge where it does a 90° at the rear of the trunk. To make this a bit better, I now run the emergency release cable through a 4 mm Shimano gear change sheath from the trunk / engine bay firewall all the way to a few inches from the trunk latch. This, combined with a doubling of the mechanical advantage at the latch, made the emergency release work quite well.

20230814_123457.jpg


The translucent tube on trunk floor is the original cable sleeve.

20231109_200726.jpg


And this is what it looks like in operation.
 
Last edited:
Rather than riveting the latch back together, I drilled up the rivet holes in the rear facing half and installed press-in spacers.
On the forward facing half I drilled up the holes and installed M3.5 PEM-nuts (M3.5 to fit the 3.6 mm ID of the spacer

After a thorough cleaning I greased up the moving parts and assembled the latch with truss head screws and thread locker. SendCutSend does not do coining, so I used an M2.5 pan head screw for the end stop. 3M DP420 epoxy in lieu of thread locker on this. As it happens, the actuator limits the travel and I don't actually hit this stop screw.
@ng_randolph - did you locate a chart that indicates the appropriate drill size for any given press in (M3, M4, etc.)? I bought a range from Aliexpress, but of course there is no back up or supporting info for usage.

TIA
 
Back
Top