What did you do to your X1/9 today ?

This is a first for me , my X19 will be delivered next month but that just gives me time to get started on the project 👍🏻

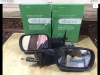
Ordered my side mirrors today and now to find both sides glass inserts with holes.
14x6 Rims on the way also, straight to the shop for prep and powder coating
 

Attachments

  • 1802A626-9168-4911-B391-4AEAA7579EC5.jpeg
    1802A626-9168-4911-B391-4AEAA7579EC5.jpeg
    229 KB · Views: 112
  • 21421A28-20AC-4545-9975-5C69540A1EB0.png
    21421A28-20AC-4545-9975-5C69540A1EB0.png
    2.3 MB · Views: 111
Pulled the seats this weekend to find original paint and NO RUST. 😀 The seat frames were a little flakey, though.
Too bad the carpet by the pedals are worn through as the rest is very nice.

X , 1 6 21, no rust floorboards.jpg
 
Pole barn starts today! Yay!. But the best part is when the workers are trying to guess what is under the cover. I have had one person shockingly be right. Well kinda. " if it werent for the wing, i would say it was an old fiat" i gave him 100% credit
20201231_102719.jpg


Odie
 

Attachments

  • 20130110_112113.jpg
    20130110_112113.jpg
    356.4 KB · Views: 89
Pole barn starts today! Yay!. But the best part is when the workers are trying to guess what is under the cover. I have had one person shockingly be right. Well kinda. " if it werent for the wing, i would say it was an old fiat" i gave him 100% creditView attachment 41534

Odie
Odie, I think that was his polite way of saying a old Fiat shouldn't have a huge wing on it. :p Kidding.
 
Engine bay photos
Finally getting things mounted, connected, & hooked up. Funny how so many things fit in there when the other stuff wasn't in there and then when you go to put everything in you run out of room quickly and even end up needing to modify or adjust stuff to get it all in.
Still need to run a couple of heater hoses and alternator belt and install the distributor access panel....and whatever else I have overlooked, but it's getting closer.
I am sure that it will never look this good again, hence the photos.
Still a way to go.....
EngineBay,01.jpg
EngineBay,02.jpg
EngineBay,03.jpg
 
Engine bay photos
Finally getting things mounted, connected, & hooked up. Funny how so many things fit in there when the other stuff wasn't in there and then when you go to put everything in you run out of room quickly and even end up needing to modify or adjust stuff to get it all in.
Still need to run a couple of heater hoses and alternator belt and install the distributor access panel....and whatever else I have overlooked, but it's getting closer.
I am sure that it will never look this good again, hence the photos.
Still a way to go.....
View attachment 41593View attachment 41594View attachment 41595
Nice job, looks very clean.
What did you use for the suspension strut top mount covers?
 
Thank you.
We used 3" stainless butt weld end caps from McMaster. We drilled & tapped 3 holes around the base for set screws to hold them in place and had a friend chamfer the inside edge so it would fit over the strut tower better. We also marked the set screw locations on the body and drilled a "cone" for the set screw to grab. Then the buffing to improve the look. Chrome acorn nuts looked a bit better than the factory nuts on the tops of the struts. I don't think that you could do this on an earlier car (not sure how early) as the sheet metal around the top strut mounts isn't high enough for the set screws to grab.
 
That’s a lotta shiny stuff

Engine bay photos
Finally getting things mounted, connected, & hooked up. Funny how so many things fit in there when the other stuff wasn't in there and then when you go to put everything in you run out of room quickly and even end up needing to modify or adjust stuff to get it all in.
Still need to run a couple of heater hoses and alternator belt and install the distributor access panel....and whatever else I have overlooked, but it's getting closer.
I am sure that it will never look this good again, hence the photos.
Still a way to go.....
View attachment 41593View attachment 41594View attachment 41595
 
Fixed INOP reverse lamps. X1/9 is an early model owned now for over five years, the back up lights never worked. When I pulled the drivetrain (1500 + original 4 speed) last summer to swap in the new 1500 build + newly built 5 speed, observed the wiring to the reverse switch was disconnected and tucked up against the firewall. Last year I had also upgraded the exterior lamps to LEDs from Superbright, so it was time to get the backup lights working. Good for signaling intention to other motorists and important if you are in pitch black conditions trying back up (made me recall a dark and stormy holiday night in my beater Alfa Berlina with no backup lights - not good).

First identified the root cause. Put the car in reverse and applied an ohmeter to the switch, which remained open. Removed switch from transaxle. Jumpered the lead from the switch, ignition on, lamp circuit works. So it has to be the switch as the issue.

When I initially installed the Steve Hoelscher built 5 speed, I placed in what I now know to be a gear engagement switch in the reverse switch location, which is on the front of the transaxle. Upon removal of that yesterday, that switch was obviously much shorter than the correct reverse switch I had in stock for a few years that sat unistalled.

I checked the MWB site which documents the difference between the gear engagement switch (short) and the reverse switch (long). Further, there are two styles of reverse switch differing in their connectors. Got lucky on this one: mine had the early style connector. Applied teflon tape to the switch, screwed it in with 22mm socket. Success, now I have functional bright LED reverse lamps.
 
Last edited:
I couldn't resist buying a set of 13x7" steel rims today as condition was good and price was ok 1500 SEK (178 USD). I would like to have 205/60 tires in the rear, and 185/60 in the front, but my current 5.5" rims don't allow much wider tires than 185/60. I am planning to have them powder coated in "Alitalia Yellow". -Or should I stick to silver metallic?
IMG_20210127_184358.jpg

Testfit to check offset/clearance: ET is about 23-25mm and the rim is very close to touch brake caliper, but fits. Seems like 185/60 in the front will not be a problem -Will even stretch a little bit. 205/60 will be perfect at the rear.
Does anybody know from what kind of Fiat these rims originally comes from?
 
Go for the gusto! Yellow all the way!

I couldn't resist buying a set of 13x7" steel rims today as condition was good and price was ok 1500 SEK (178 USD). I would like to have 205/60 tires in the rear, and 185/60 in the front, but my current 5.5" rims don't allow much wider tires than 185/60. I am planning to have them powder coated in "Alitalia Yellow". -Or should I stick to silver metallic?
View attachment 41894
Testfit to check offset/clearance: ET is about 23-25mm and the rim is very close to touch brake caliper, but fits. Seems like 185/60 in the front will not be a problem -Will even stretch a little bit. 205/60 will be perfect at the rear.
Does anybody know from what kind of Fiat these rims originally comes from?
 
Back
Top