
Pete Whitstone
True Classic
Hey all,
Last weekend I completed my Scirocco radiator conversion on my 87 X. I wanted to drive it a bit before posting about it, so I could detail not only the install, but also the effects, positive or negative. I'll save you the wait and tell you now that I am greatly pleased.
I sourced the radiator from Rock Auto, a Spectra unit, Spectra part CU98, Rock Auto part 433938, for an 87 Scirocco 16v. Cost was $76 plus shipping. I also got the funky radiator hose documented in racerx's conversion, the E71075 hose which fits the Plymouth Sundance and others.
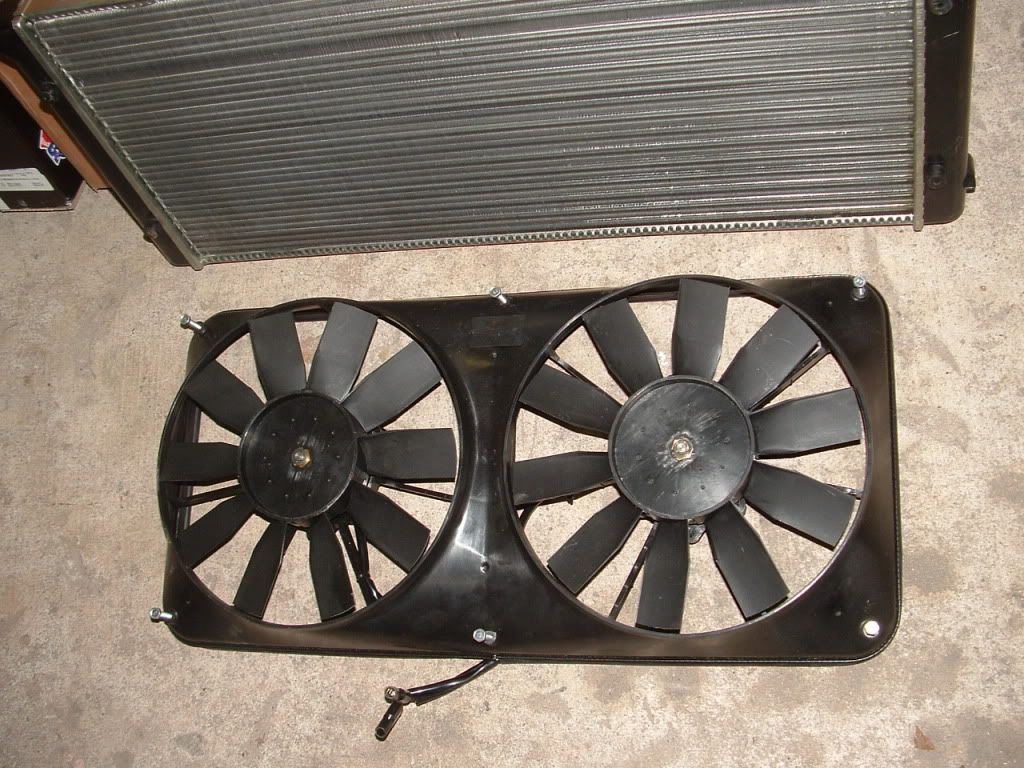
Then I went to Summit for a fan package, I found what I was looking for in a Flexalite 340, Summit part FLX-340, for $320. This comes with a variable thermostat so you can set what temperature the fans come on. I also ordered a Moroso bleeder kit whle I was there, part MOR-63765.
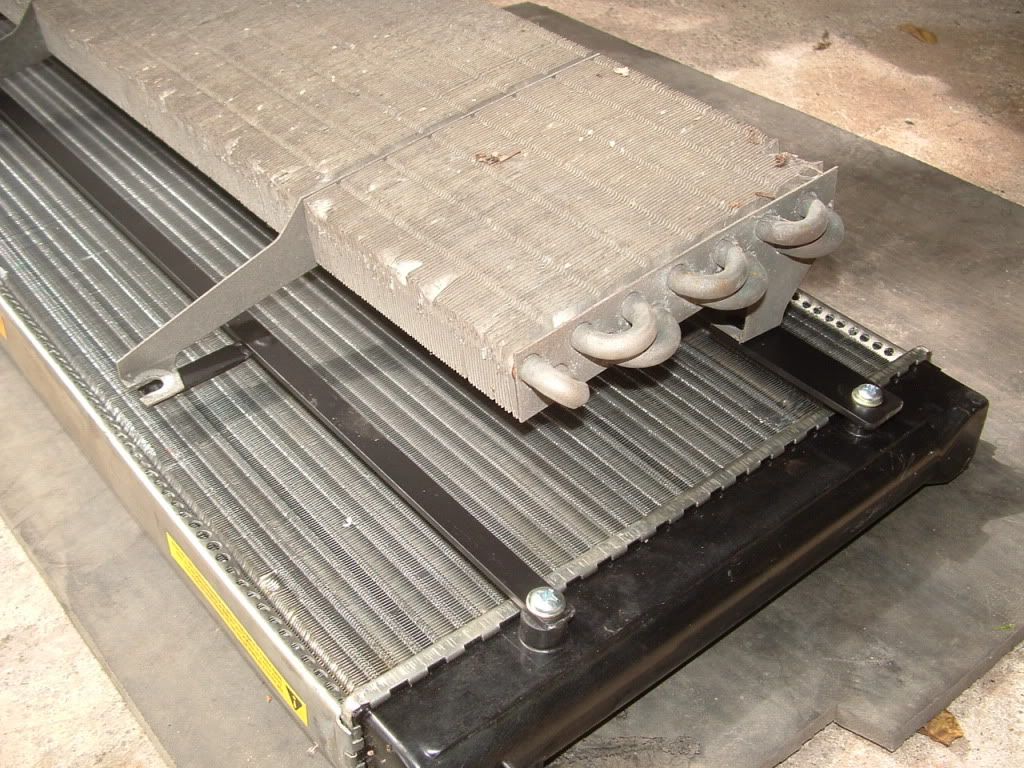
Here is a shot of the radiator and fans:
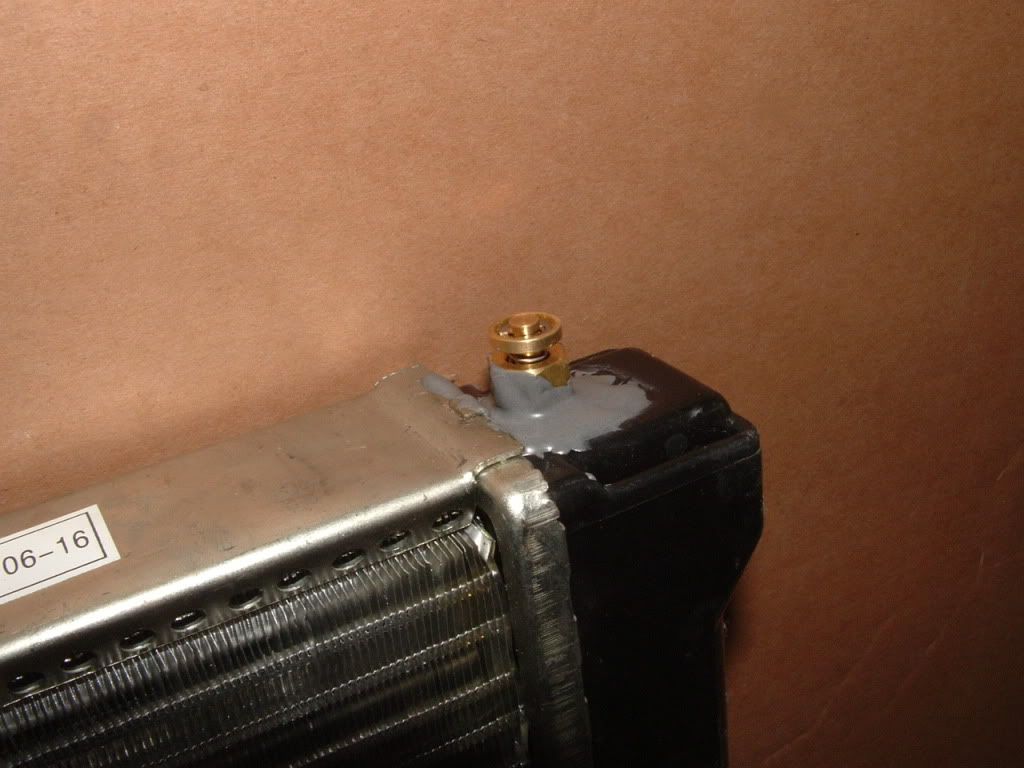
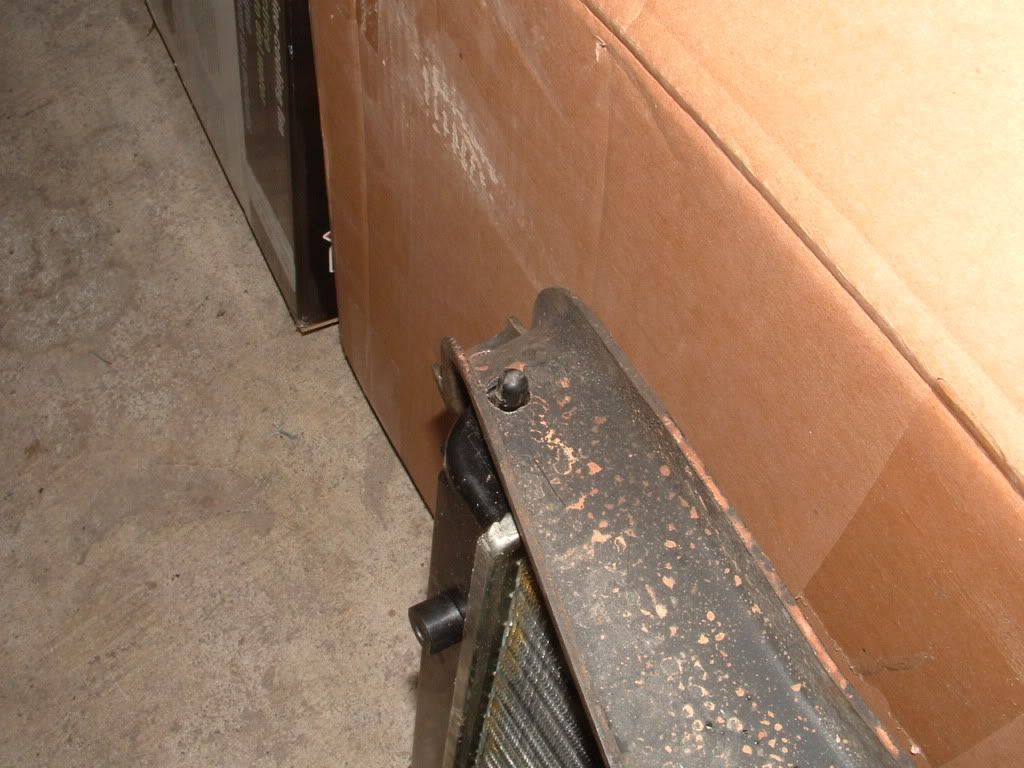
The side of the radiator has a bleed nipple that points towards the headlight pod, but it has to be cut off to make the radiator fit. It left a small hole which I filled with a screw and some sealant.
I also tapped a hole in the top for the bleed nipple and installed it. The plastic it was tapped into was pretty thin, so for peace of mind I also added some JB Weld.
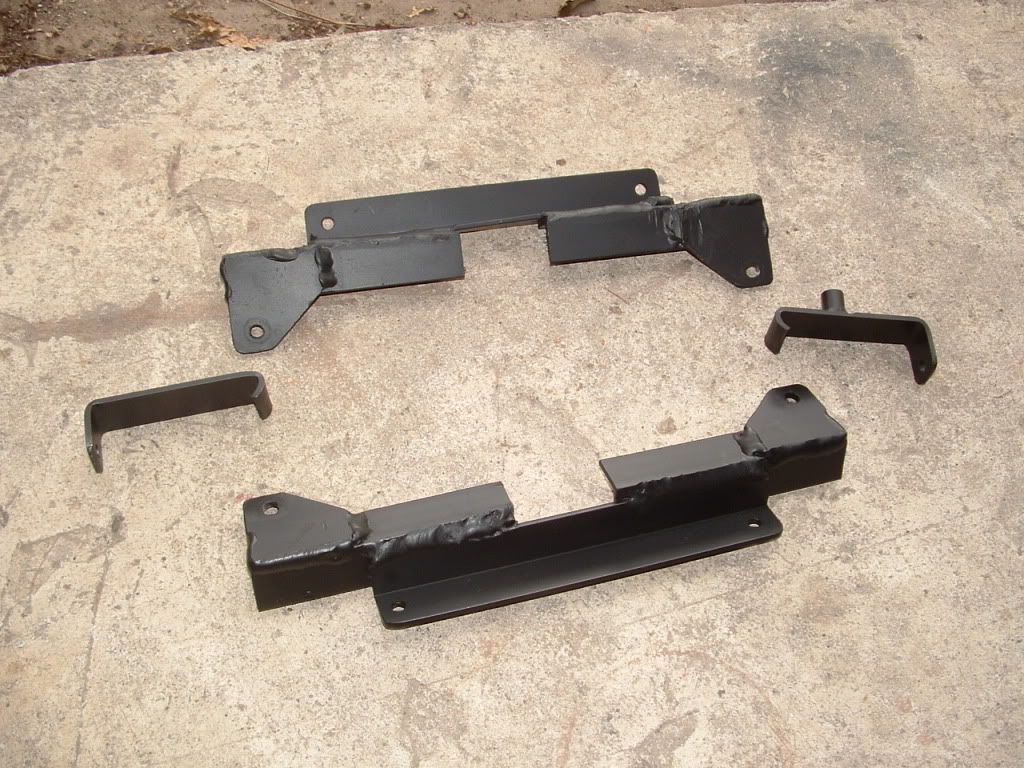
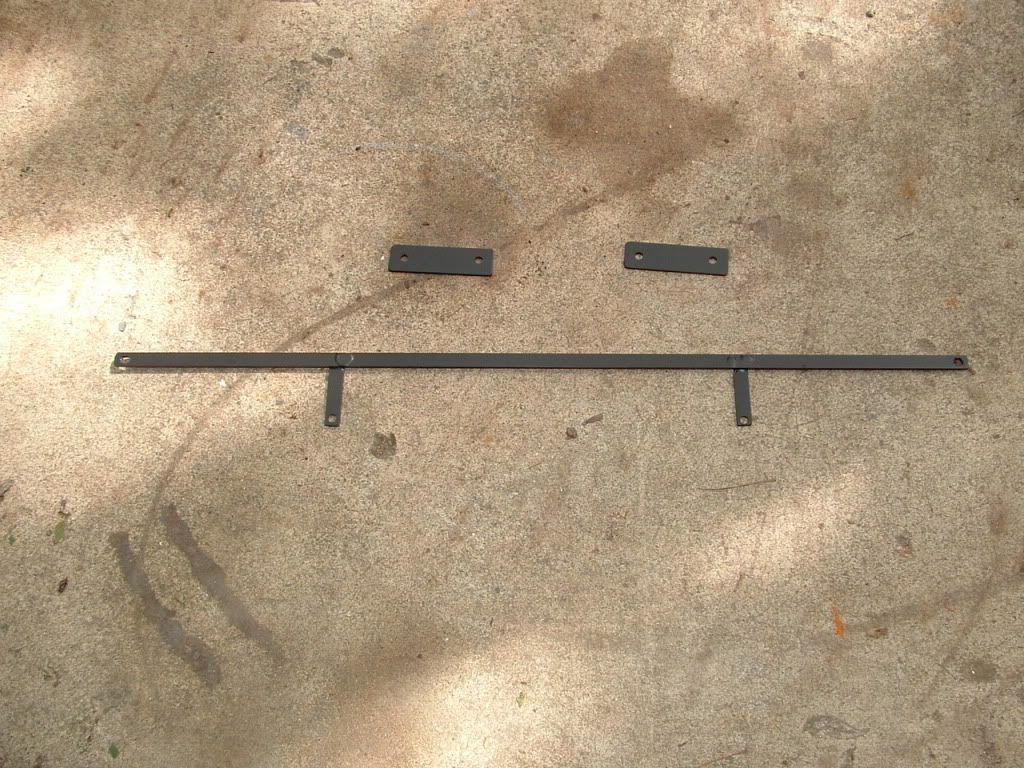
Then I set about building some bracketry that attached the fan package to the radiator. It's mostly 1/8" aluminum angle and flat, and I painted it flat black.
And here it is all put together.
I also built some bracketry for the front, to mount the AC condenser.
And with everything mocked up and ready to install.
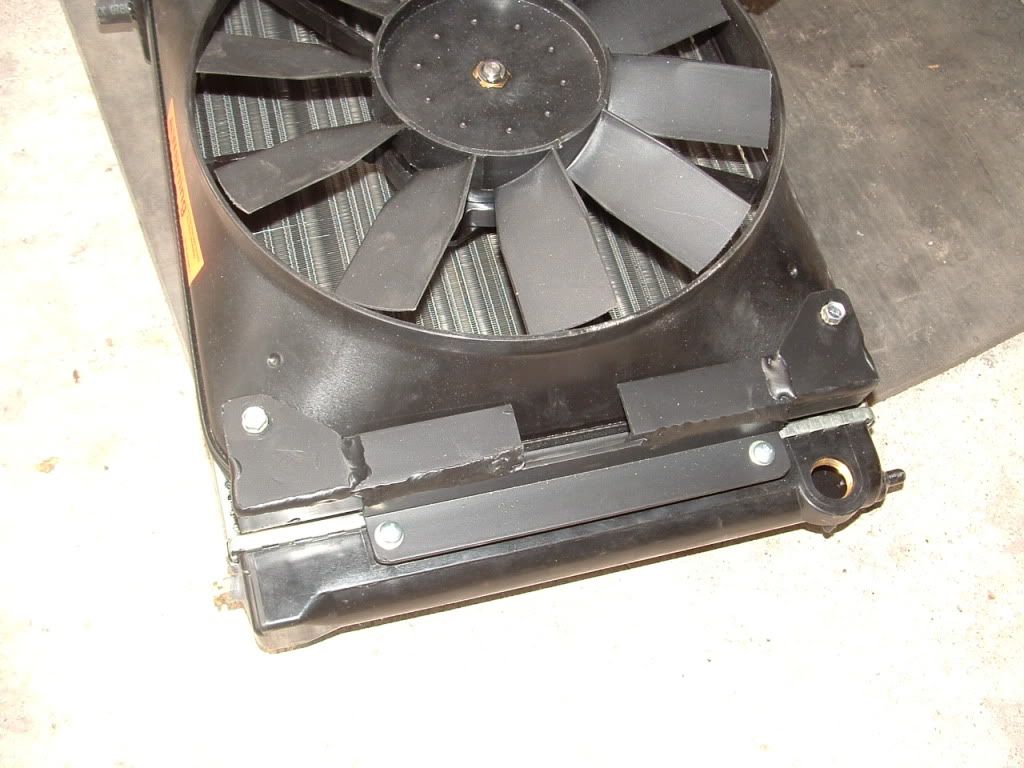
All the bracketry attaches to the 4 little nubs on the front and back of the radiator with some thick sheet metal screws. They are self-tapping into the plastic.
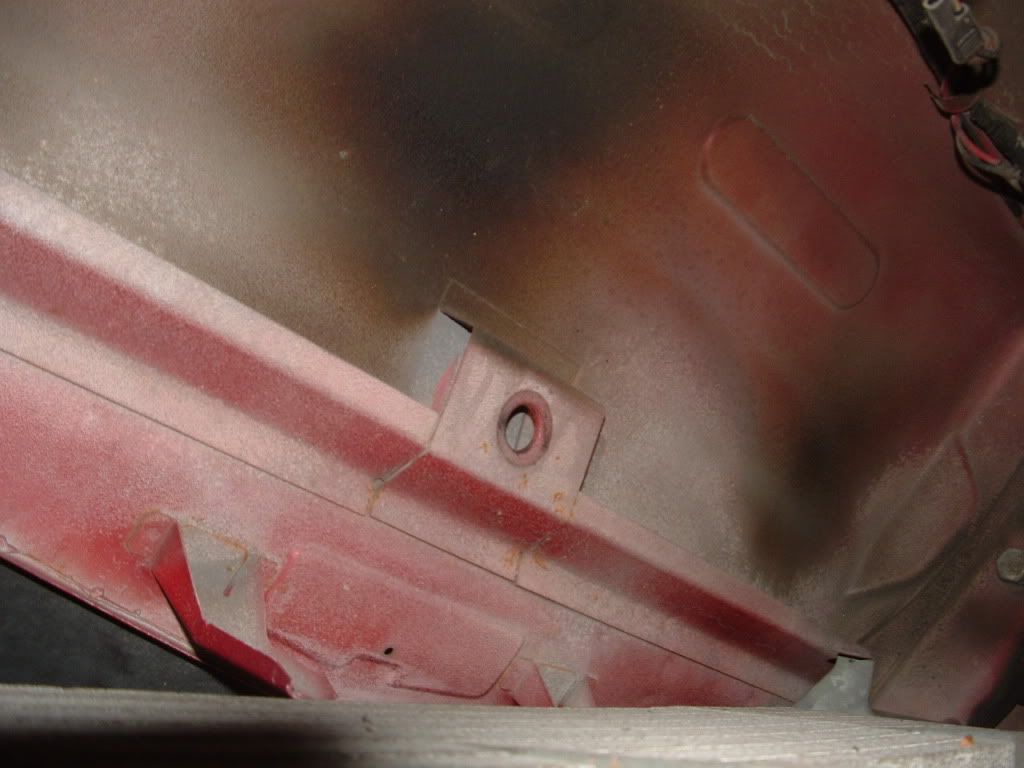
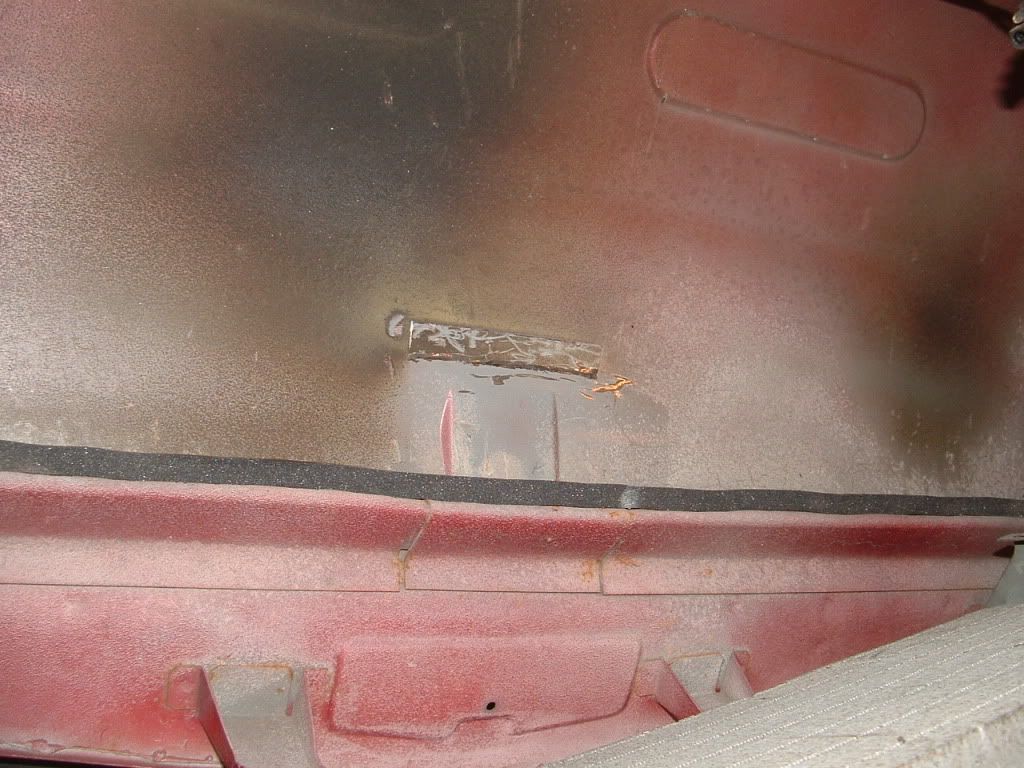
Next, the vehicle would need some modifications for the new unit. There is a receiver hole at the top of the radiator tub that has to be cut out.
I also hammered the sheet metal edge that's in there up and back, so there was no sharp edges to poke the radiator.
Then I applied some door weatherstripping so the radiator had a bit of a cushion to lean against.
When racerx did his install, he did not completely cut out the stock receiver hole like I did. He left a ledge at the back that would hold the radiator forward - see this thread: http://xwebforums.com/forum/index.php?threads/7202/
In retrospect, his was the better plan. I used a more stock arrangement, in that I had a nub at the top of my radiator-to-fan bracket, which fit into a hole cut in the top of the tub.
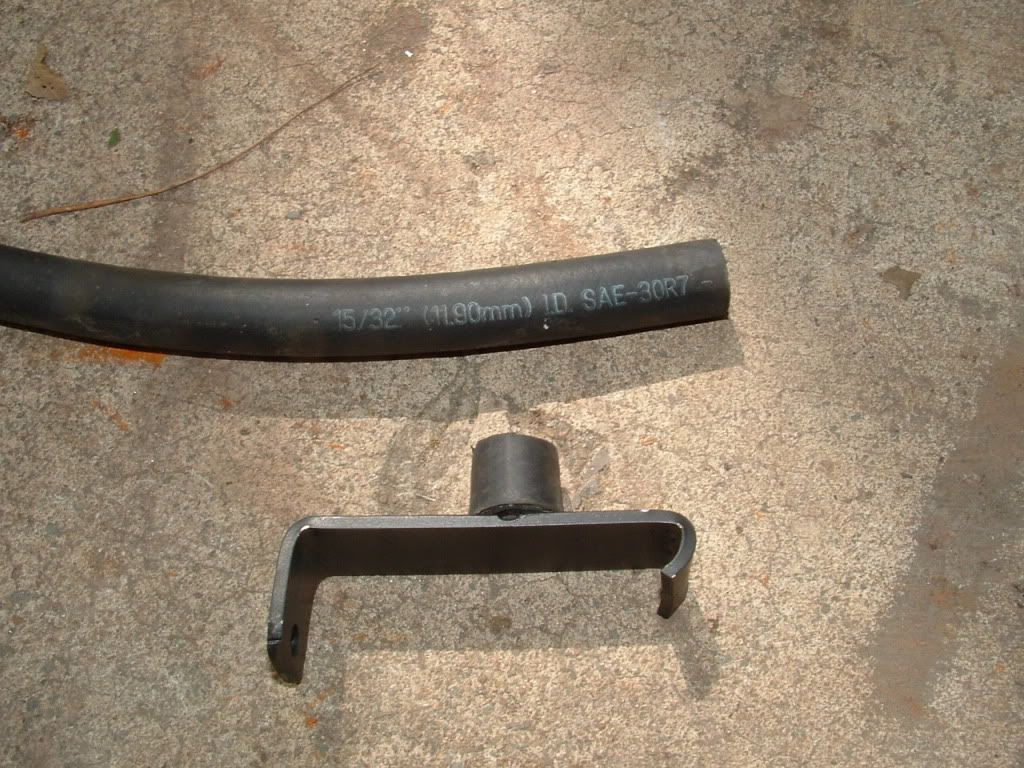
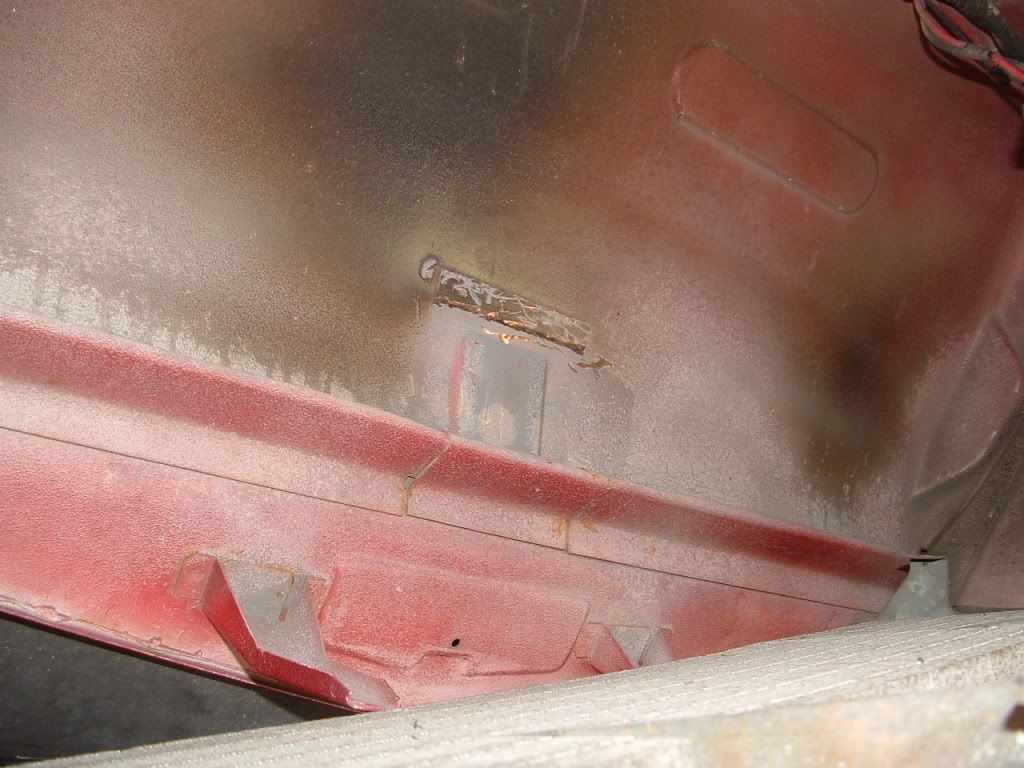
I cut a small section of fuel hose to go over the nub and stop unwanted rubbing and noise. Here is the hole the nub and hose would fit into.

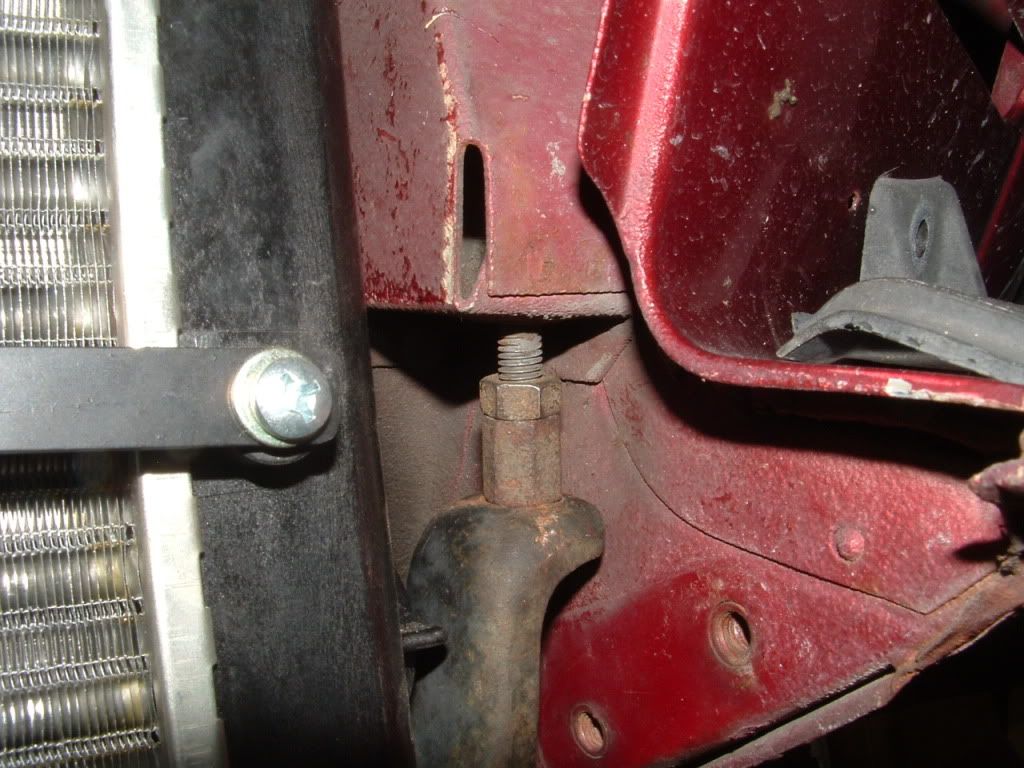
So now I was all set to install the top end of the radiator, but the unit is held in place by the bottom. Drilling some holes in the stock bracket allowed the VW radiator nubs to be used for retainment (the radiator is upside down in this shot).
Since the VW radiator is a couple inches taller than the stock unit, the bottom bracket has to sit lower. This was accomplished with some extensions, held in place with jam nuts, as seen here.
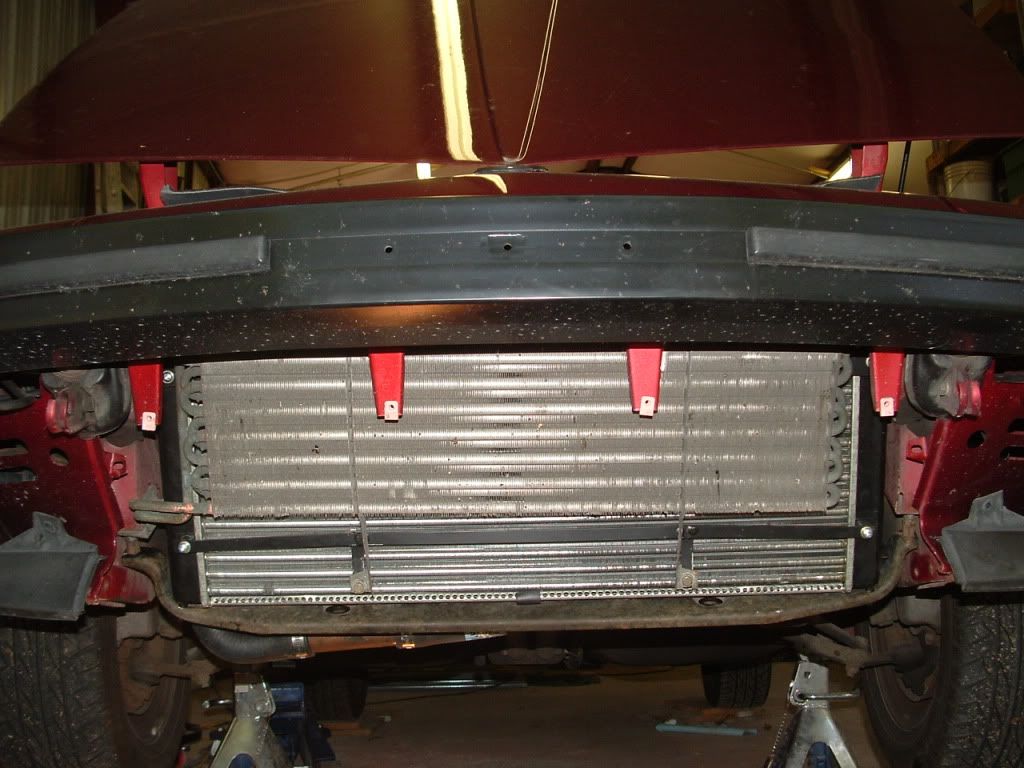
And here is the whole thing in place.
I just had the AC system charged, so I had to keep the condenser in place the whole time. It would have been a lot easier to do the conversion when the system was discharged and then charge it afterwards, since it would allow the removal of the condenser.
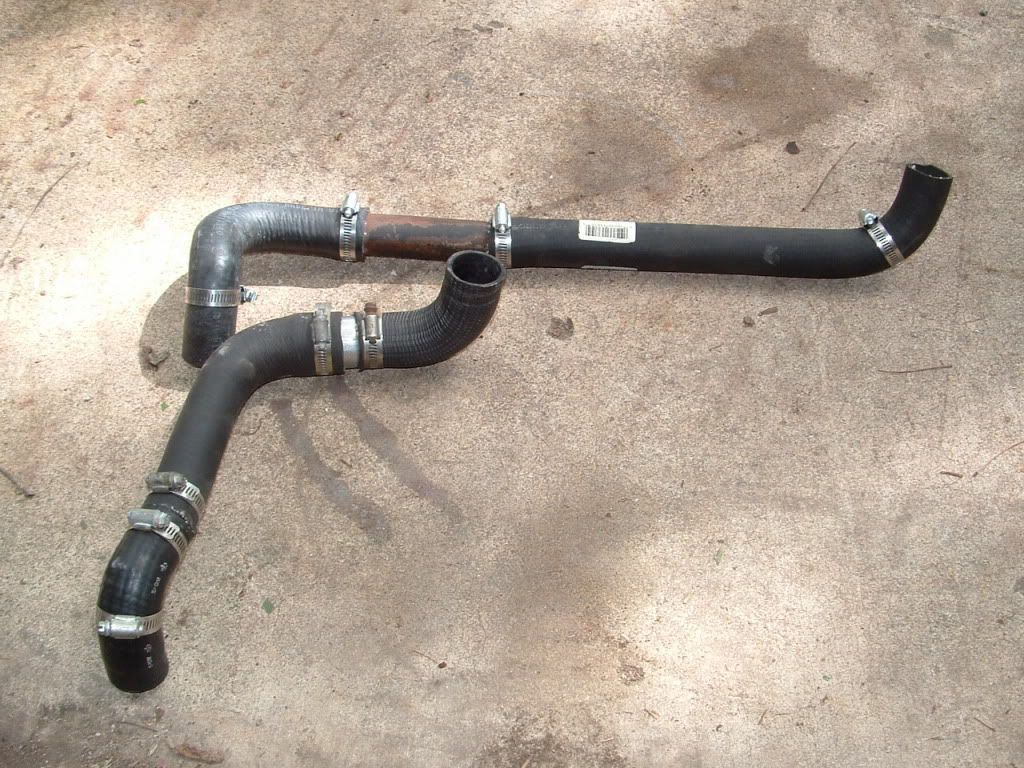
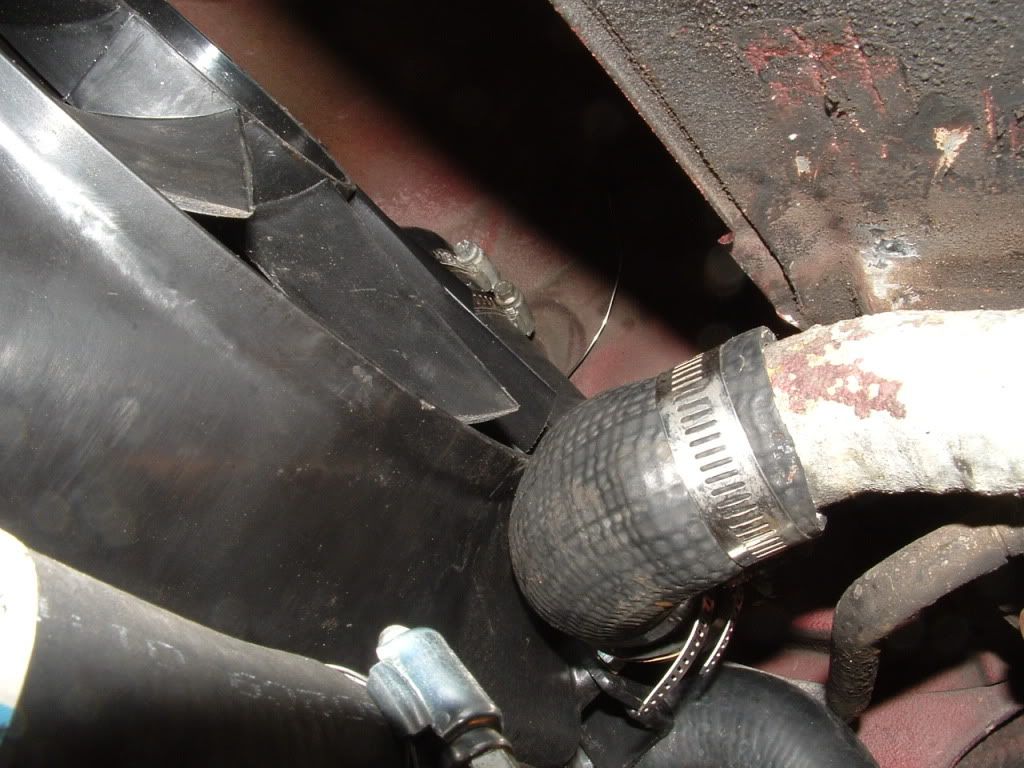
With the radiator and fans in place, I turned my attention to the hoses. They were composed of 3 different hoses plus an adapter. One hose was the aforementioned Sundance hose, with a section cut out. The next was a hose I got from NAPA that I was told was a Pinto application, visible in the top left of the pic below. The third hose was one of the stock hoses that was removed from the car. The adapter was an O'Reilly Auto Parts adapter that I think is intended for exhaust systems, and mates a 1-3/8" hose with a 1-1/4" hose. It's in the upper part of the lower hose in this image (upper and lower being relative to the image, not the actual installed hose position). I also used a chunk of water pipe from a DOHC engine to link the two hose ends in both hoses. The result was kind of Frankensteinian but it works.
With everything installed, the tubes on the car that carry water were pointing pretty much straight at the bottom edge of both fans.
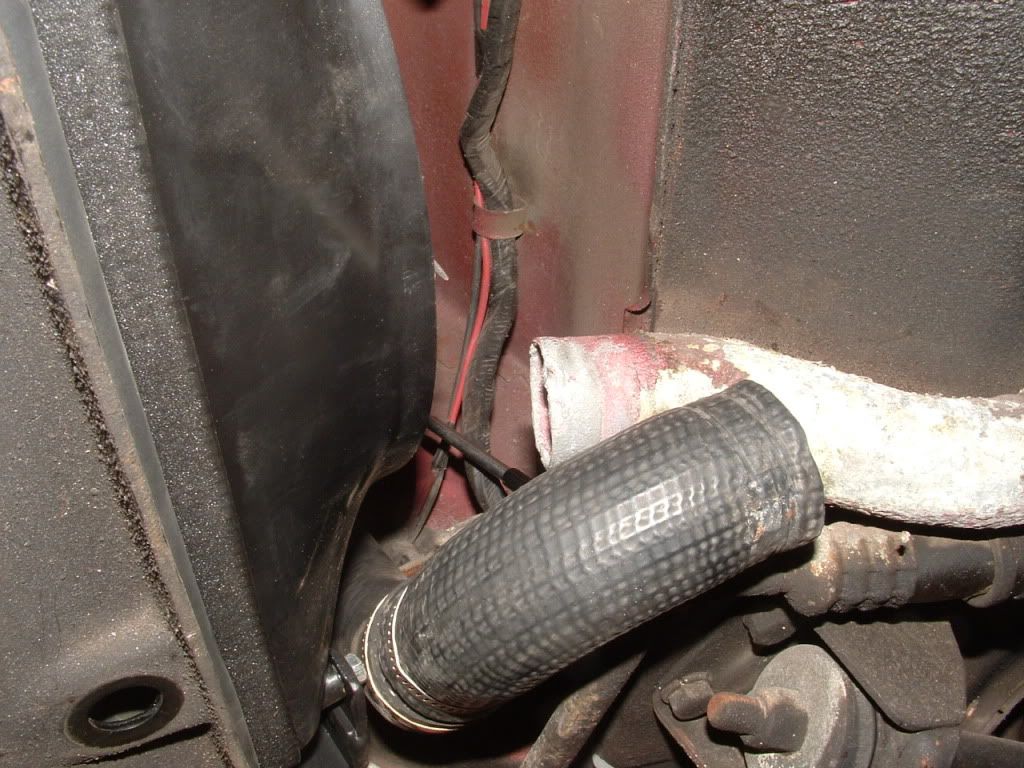
My caveman solution to this was to bend the pipes down away from the car about an inch. This was not as easy as I thought it was going to be, those tubes are stouter than they look. But this obtained the clearance that was needed.
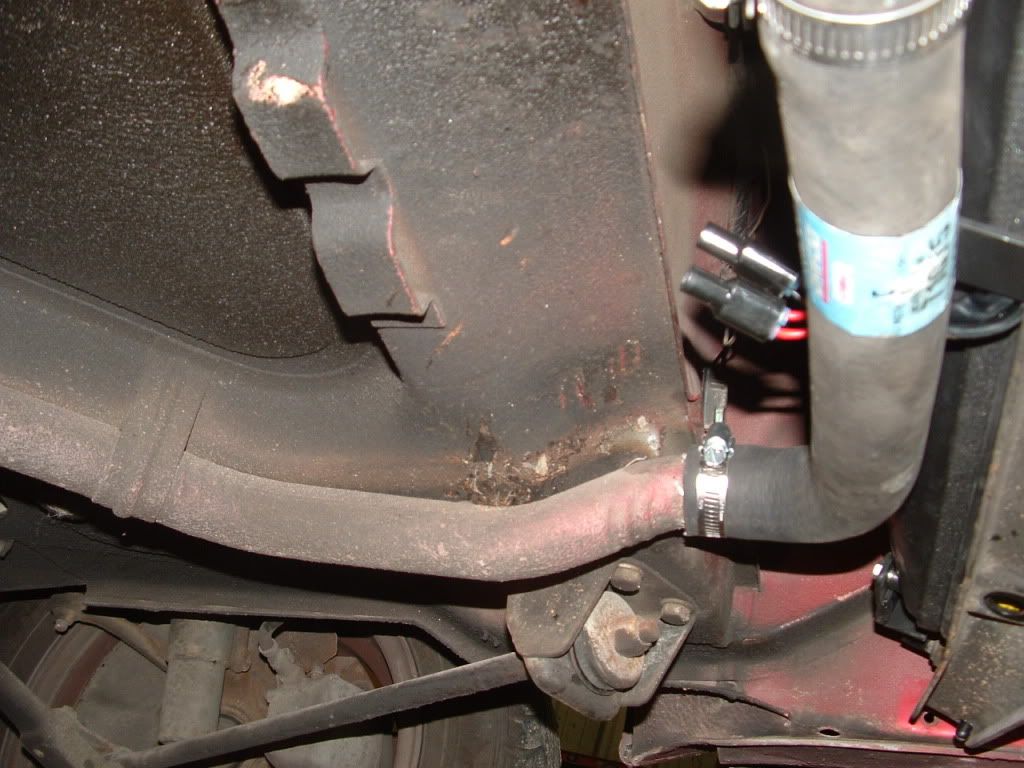
Since both pipes are on the right side of the car, it gets pretty tight over there, but everything fits, barely.
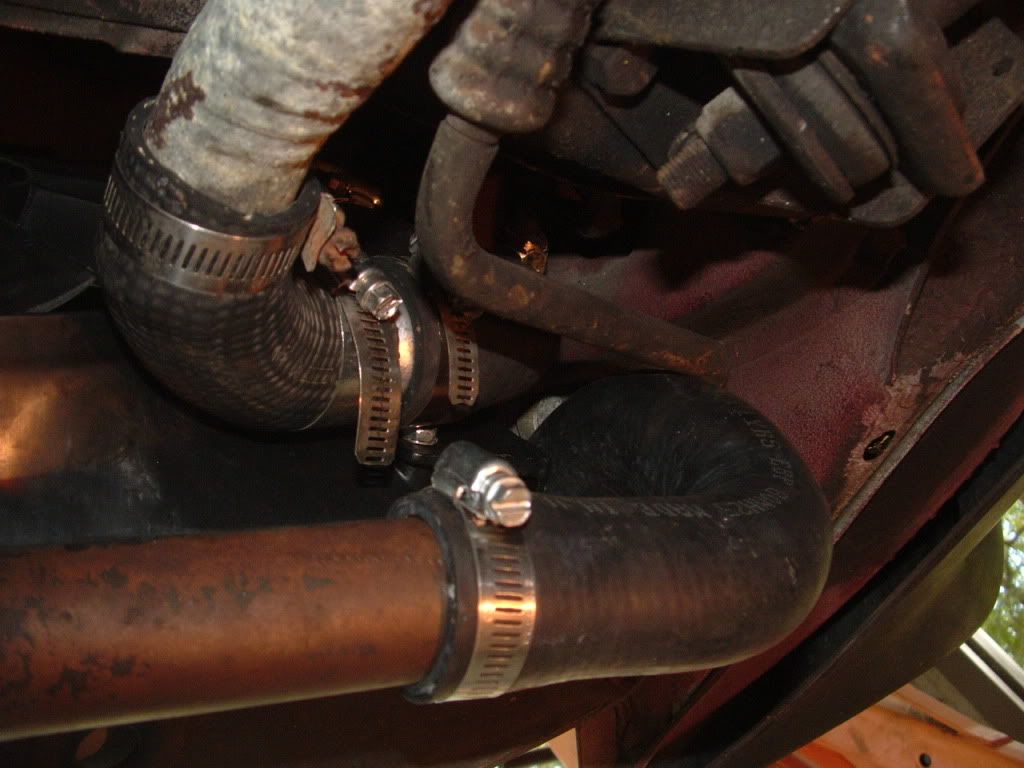
I wish the AC hoses weren't so close to the radiator hoses, but oh well.
Finally I could crawl out from under the car and get to work on the topside. The only thing to do up there was to install and wire up the thermostatic control. I mounted this on the right fender near the VIN tag.
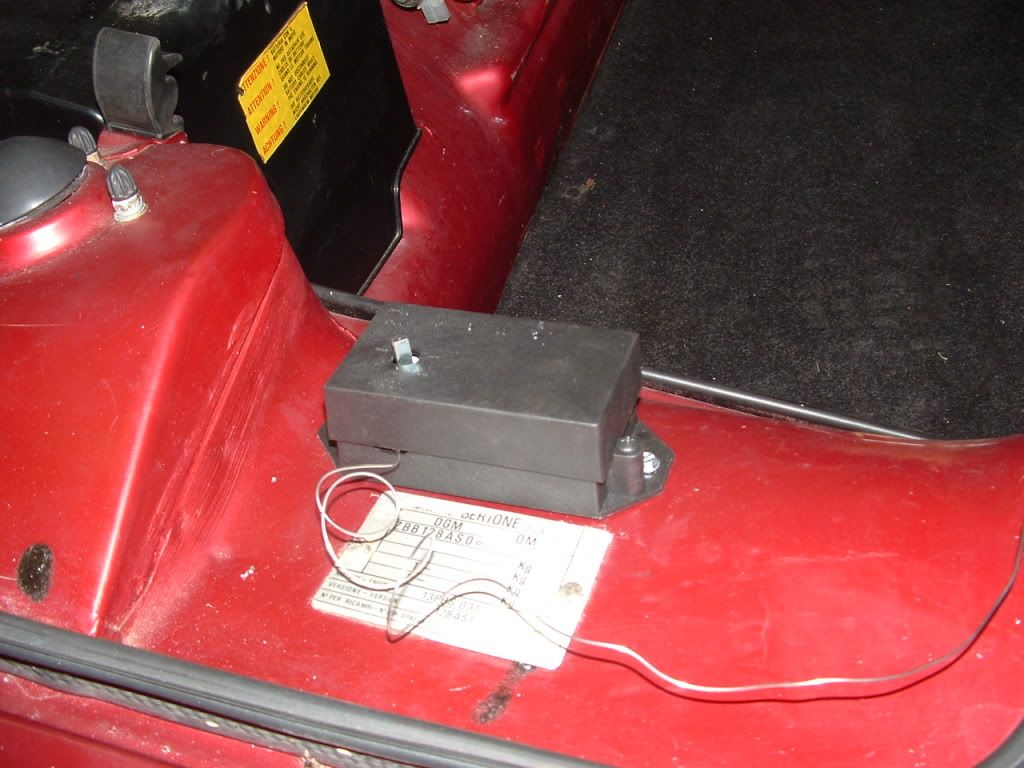
It has a probe that goes down into the radiator fins, so I had to drill a small hole in the radiator tub to get it down there. There is a second small hole for the fan power wires to pass through. The fans are powered directly from the battery. I bundled the wires in some of that clamshell wire stuff.

As it turns out, that thermostatic unit was bad from the factory so I am awaiting its replacement from Summit. In the meantime, since the stock thermostatic switch was installed in the radiator (it fits perfectly), I am using it to trigger the fans.
So the bottom line. After a week of driving around in the Texas heat, I couldn't be more pleased. The ability of this radiator to shed heat is simply awesome. Prior to the install, the gauge read 200 all the time during cruising, but would climb to as high as 235-240 during extended idling such as in a traffic jam. And then for the rest of the ride it would not cool down much.
With the new radiator, 180 is the norm, and it might climb to 220 during extended idling. The fans cycle on and keep the temps in check, and once you get moving again, it returns to 180.
I also raised my idle to about 1100 with the AC off. This helps keep the water moving, and keep the car from "shuddering" when then AC is on.
I understand there are some on the list who don't care for this mod, but to those who are ok with it, I highly recommend it. I never thought I would drive an X where I didn't have to watch the gauge like a hawk.
K20 conversion, here I come (Matt, what's your schedule look like?") )
)
Pete
Last weekend I completed my Scirocco radiator conversion on my 87 X. I wanted to drive it a bit before posting about it, so I could detail not only the install, but also the effects, positive or negative. I'll save you the wait and tell you now that I am greatly pleased.
I sourced the radiator from Rock Auto, a Spectra unit, Spectra part CU98, Rock Auto part 433938, for an 87 Scirocco 16v. Cost was $76 plus shipping. I also got the funky radiator hose documented in racerx's conversion, the E71075 hose which fits the Plymouth Sundance and others.
Then I went to Summit for a fan package, I found what I was looking for in a Flexalite 340, Summit part FLX-340, for $320. This comes with a variable thermostat so you can set what temperature the fans come on. I also ordered a Moroso bleeder kit whle I was there, part MOR-63765.
Here is a shot of the radiator and fans:
The side of the radiator has a bleed nipple that points towards the headlight pod, but it has to be cut off to make the radiator fit. It left a small hole which I filled with a screw and some sealant.
I also tapped a hole in the top for the bleed nipple and installed it. The plastic it was tapped into was pretty thin, so for peace of mind I also added some JB Weld.
Then I set about building some bracketry that attached the fan package to the radiator. It's mostly 1/8" aluminum angle and flat, and I painted it flat black.
And here it is all put together.
I also built some bracketry for the front, to mount the AC condenser.
And with everything mocked up and ready to install.
All the bracketry attaches to the 4 little nubs on the front and back of the radiator with some thick sheet metal screws. They are self-tapping into the plastic.
Next, the vehicle would need some modifications for the new unit. There is a receiver hole at the top of the radiator tub that has to be cut out.
I also hammered the sheet metal edge that's in there up and back, so there was no sharp edges to poke the radiator.
Then I applied some door weatherstripping so the radiator had a bit of a cushion to lean against.
When racerx did his install, he did not completely cut out the stock receiver hole like I did. He left a ledge at the back that would hold the radiator forward - see this thread: http://xwebforums.com/forum/index.php?threads/7202/
In retrospect, his was the better plan. I used a more stock arrangement, in that I had a nub at the top of my radiator-to-fan bracket, which fit into a hole cut in the top of the tub.
I cut a small section of fuel hose to go over the nub and stop unwanted rubbing and noise. Here is the hole the nub and hose would fit into.
So now I was all set to install the top end of the radiator, but the unit is held in place by the bottom. Drilling some holes in the stock bracket allowed the VW radiator nubs to be used for retainment (the radiator is upside down in this shot).
Since the VW radiator is a couple inches taller than the stock unit, the bottom bracket has to sit lower. This was accomplished with some extensions, held in place with jam nuts, as seen here.
And here is the whole thing in place.
I just had the AC system charged, so I had to keep the condenser in place the whole time. It would have been a lot easier to do the conversion when the system was discharged and then charge it afterwards, since it would allow the removal of the condenser.
With the radiator and fans in place, I turned my attention to the hoses. They were composed of 3 different hoses plus an adapter. One hose was the aforementioned Sundance hose, with a section cut out. The next was a hose I got from NAPA that I was told was a Pinto application, visible in the top left of the pic below. The third hose was one of the stock hoses that was removed from the car. The adapter was an O'Reilly Auto Parts adapter that I think is intended for exhaust systems, and mates a 1-3/8" hose with a 1-1/4" hose. It's in the upper part of the lower hose in this image (upper and lower being relative to the image, not the actual installed hose position). I also used a chunk of water pipe from a DOHC engine to link the two hose ends in both hoses. The result was kind of Frankensteinian but it works.
With everything installed, the tubes on the car that carry water were pointing pretty much straight at the bottom edge of both fans.
My caveman solution to this was to bend the pipes down away from the car about an inch. This was not as easy as I thought it was going to be, those tubes are stouter than they look. But this obtained the clearance that was needed.
Since both pipes are on the right side of the car, it gets pretty tight over there, but everything fits, barely.
I wish the AC hoses weren't so close to the radiator hoses, but oh well.
Finally I could crawl out from under the car and get to work on the topside. The only thing to do up there was to install and wire up the thermostatic control. I mounted this on the right fender near the VIN tag.
It has a probe that goes down into the radiator fins, so I had to drill a small hole in the radiator tub to get it down there. There is a second small hole for the fan power wires to pass through. The fans are powered directly from the battery. I bundled the wires in some of that clamshell wire stuff.
As it turns out, that thermostatic unit was bad from the factory so I am awaiting its replacement from Summit. In the meantime, since the stock thermostatic switch was installed in the radiator (it fits perfectly), I am using it to trigger the fans.
So the bottom line. After a week of driving around in the Texas heat, I couldn't be more pleased. The ability of this radiator to shed heat is simply awesome. Prior to the install, the gauge read 200 all the time during cruising, but would climb to as high as 235-240 during extended idling such as in a traffic jam. And then for the rest of the ride it would not cool down much.
With the new radiator, 180 is the norm, and it might climb to 220 during extended idling. The fans cycle on and keep the temps in check, and once you get moving again, it returns to 180.
I also raised my idle to about 1100 with the AC off. This helps keep the water moving, and keep the car from "shuddering" when then AC is on.
I understand there are some on the list who don't care for this mod, but to those who are ok with it, I highly recommend it. I never thought I would drive an X where I didn't have to watch the gauge like a hawk.
K20 conversion, here I come (Matt, what's your schedule look like?
)Pete
Last edited by a moderator: