Dallara & K24: Recovering From OffRoad Experience

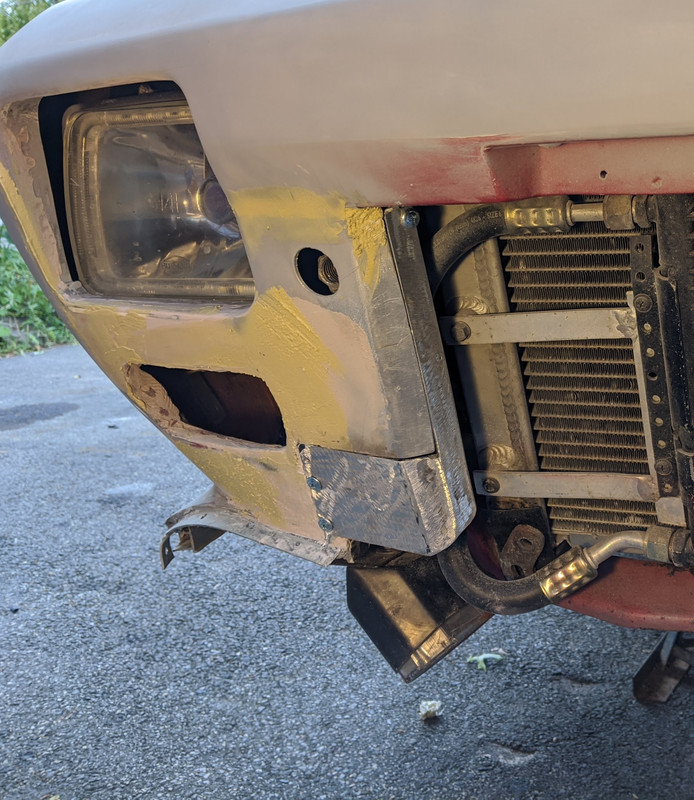
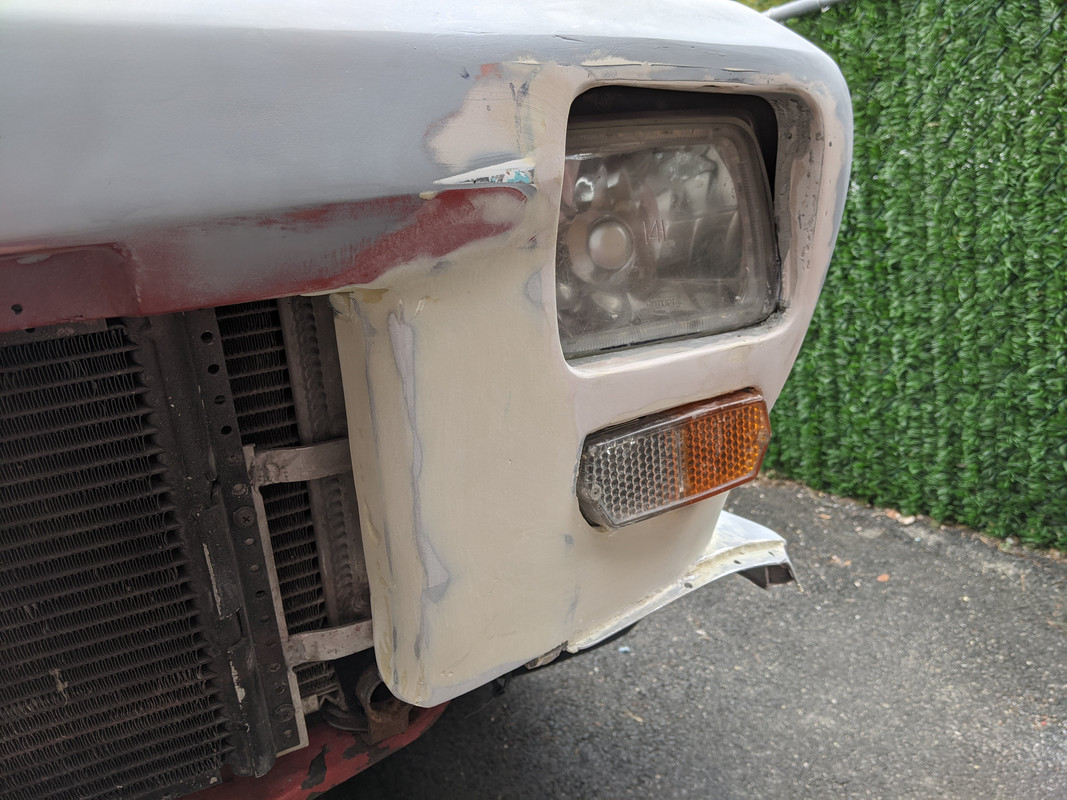
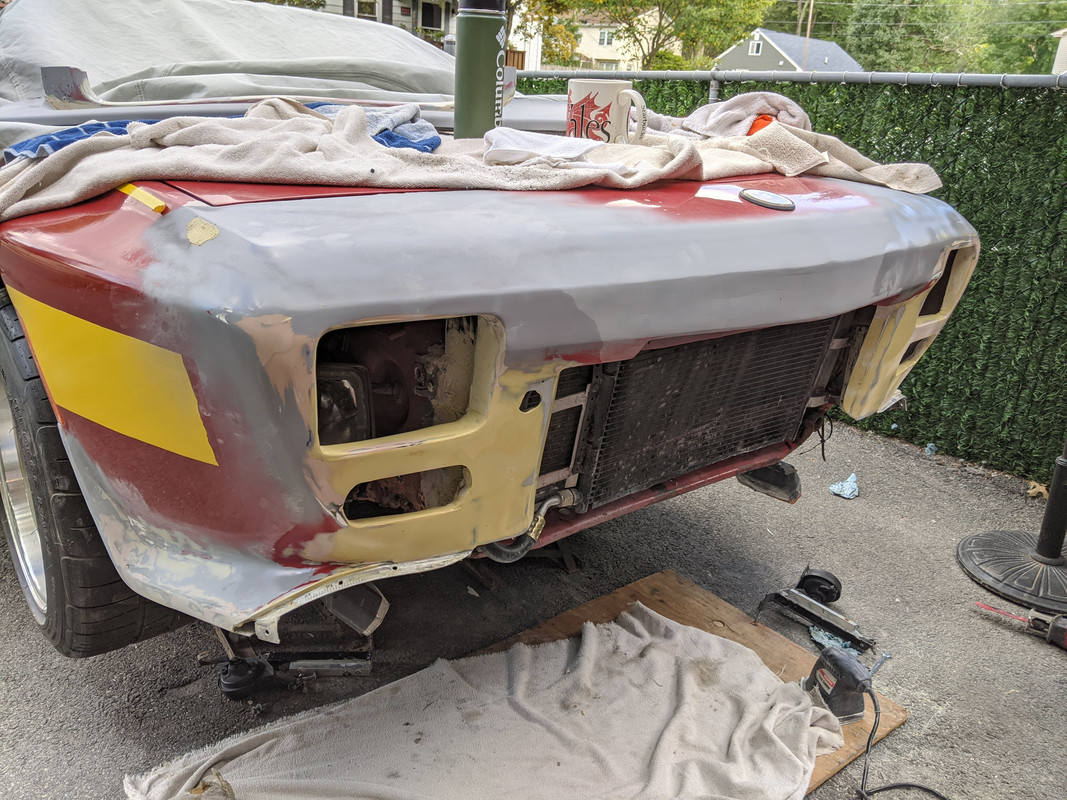
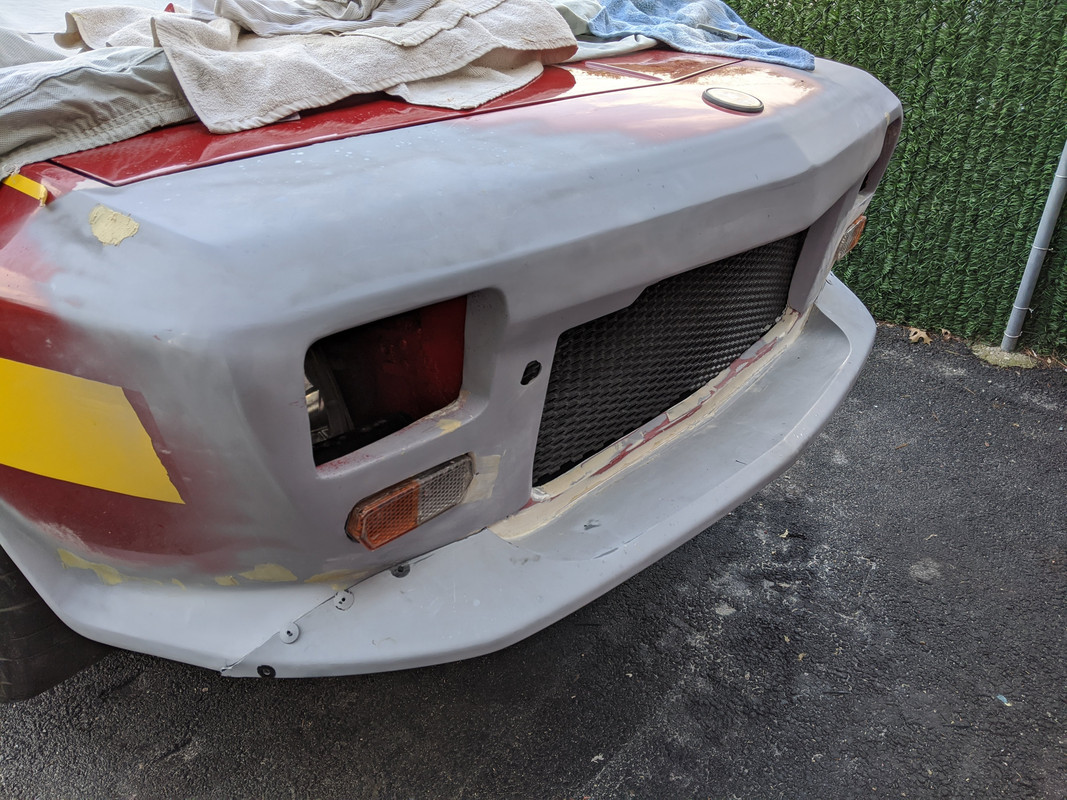
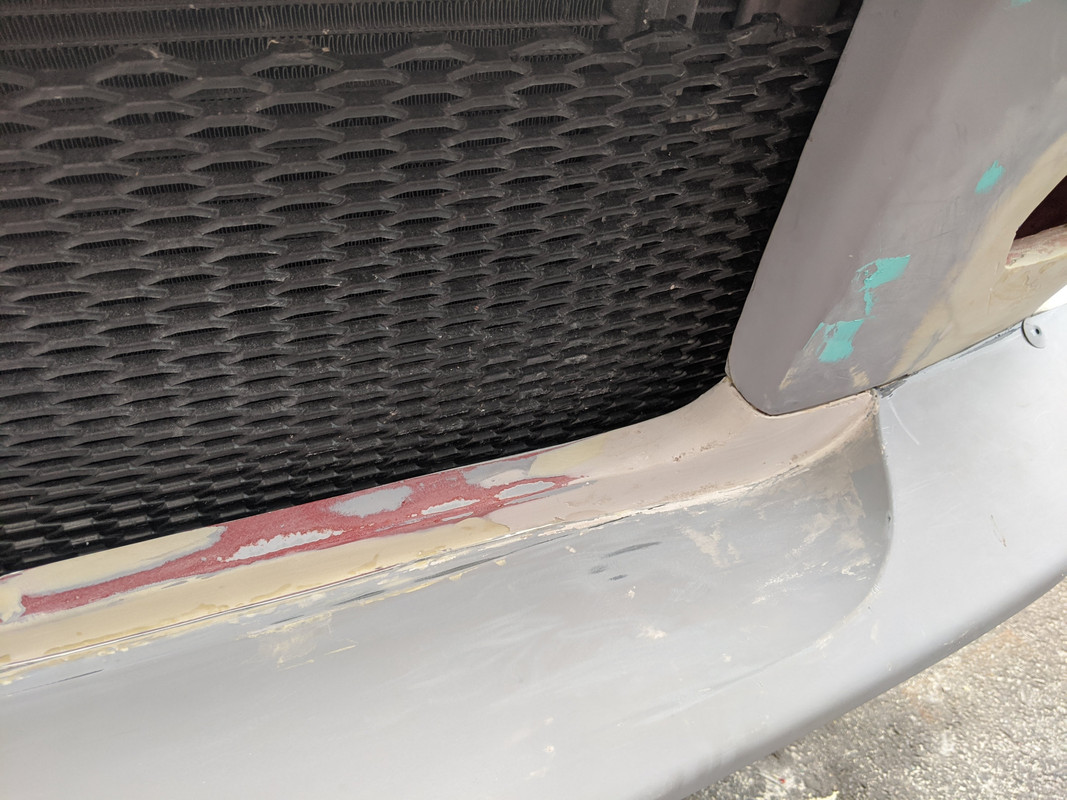
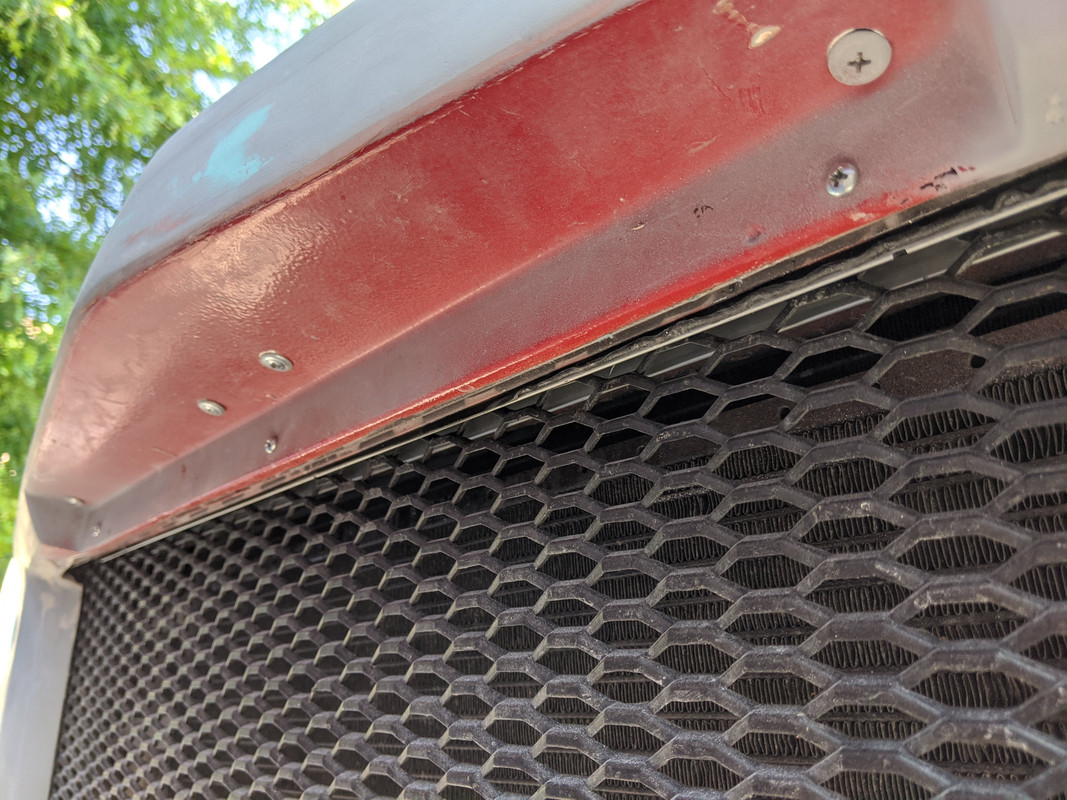
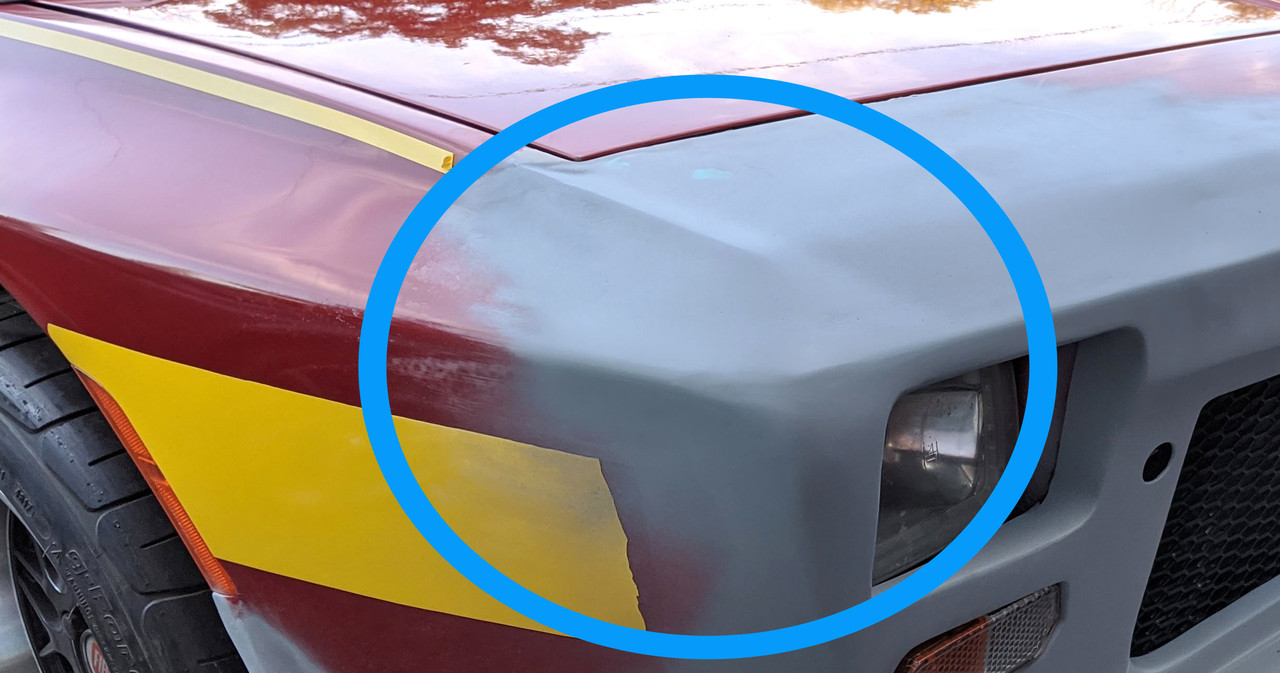
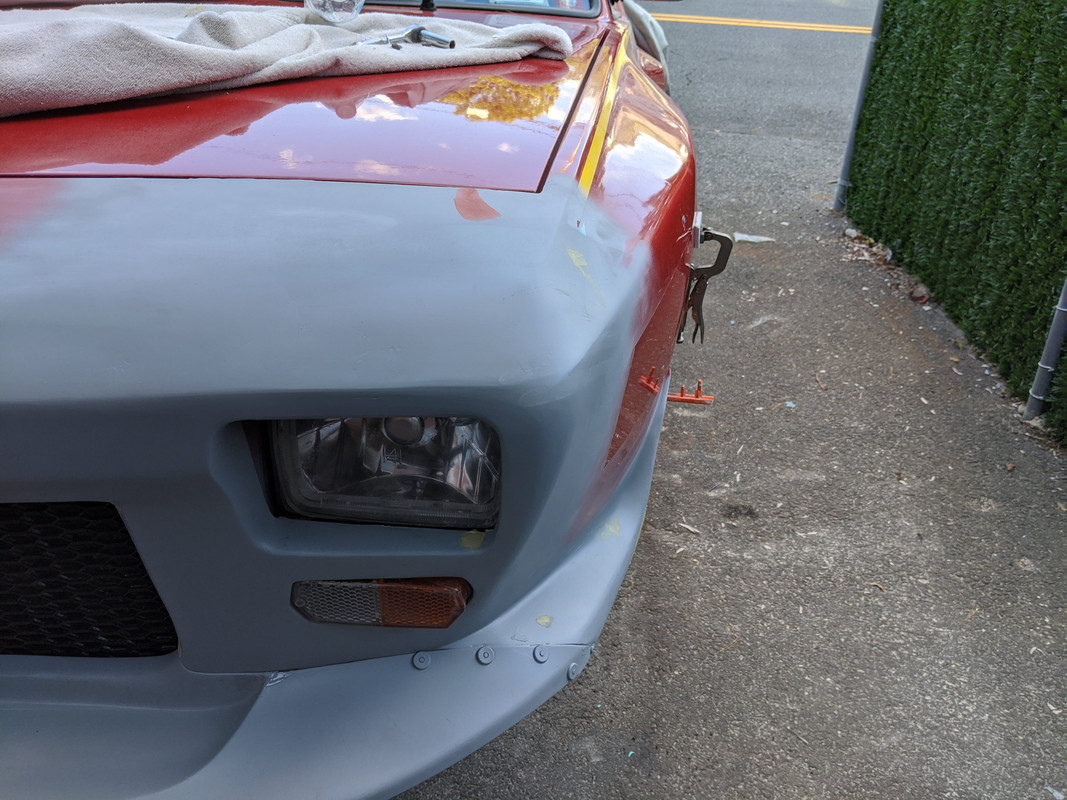
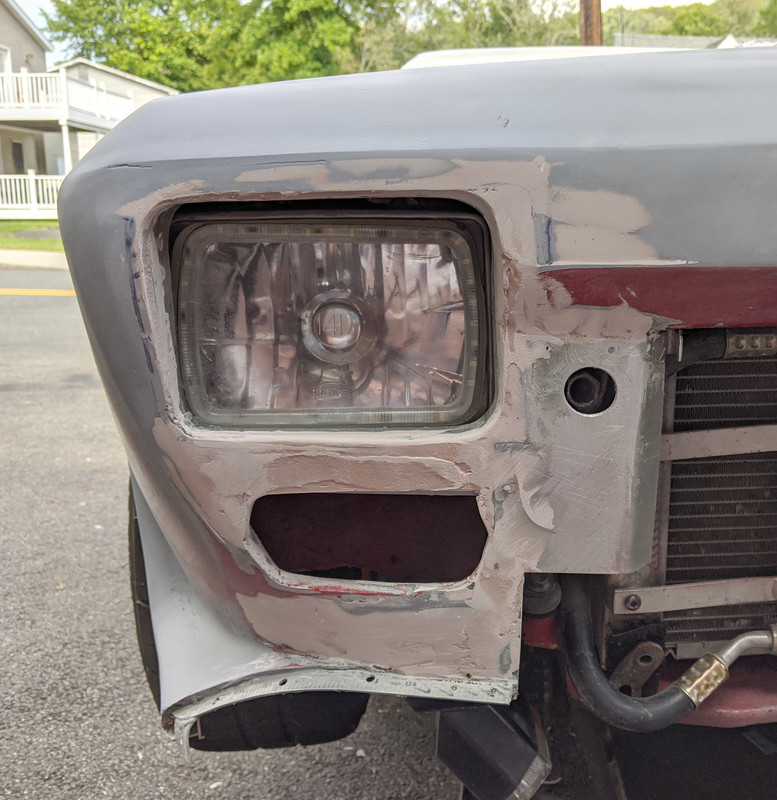
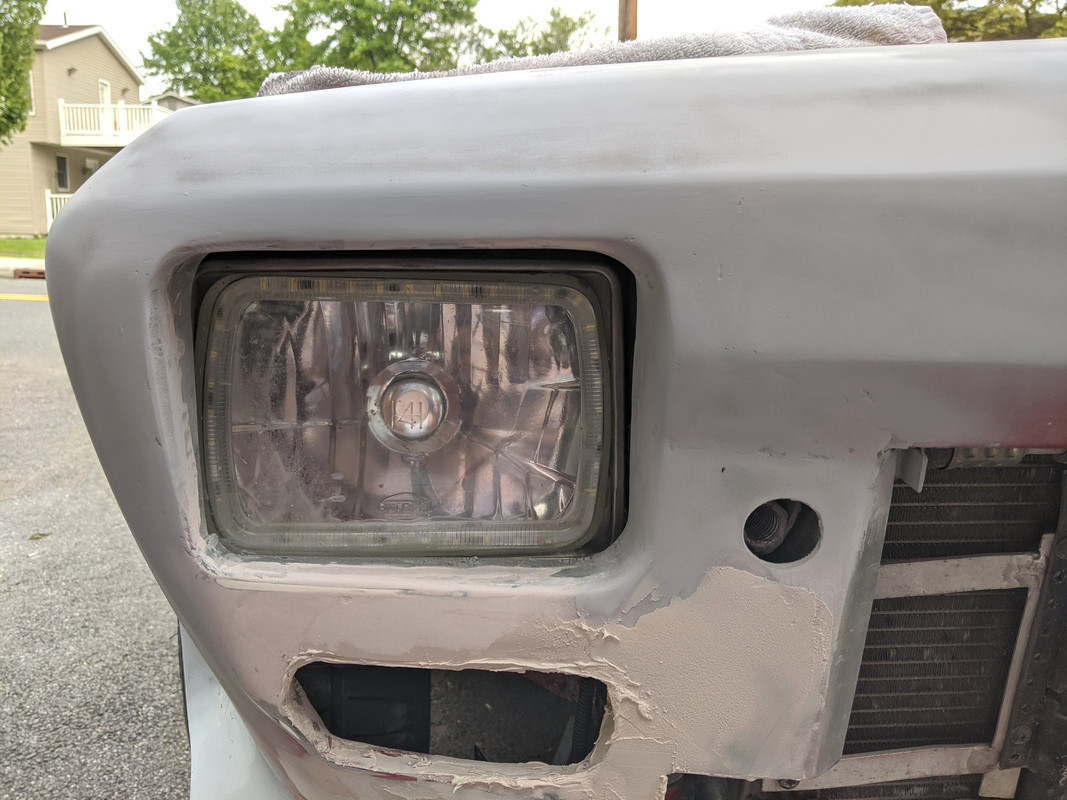
Today I added some fibre-reinforced bondo in the larger voids - around the surround & under the marker light

IMG-20200828-140054.jpg


IMG-20200828-140100.jpg


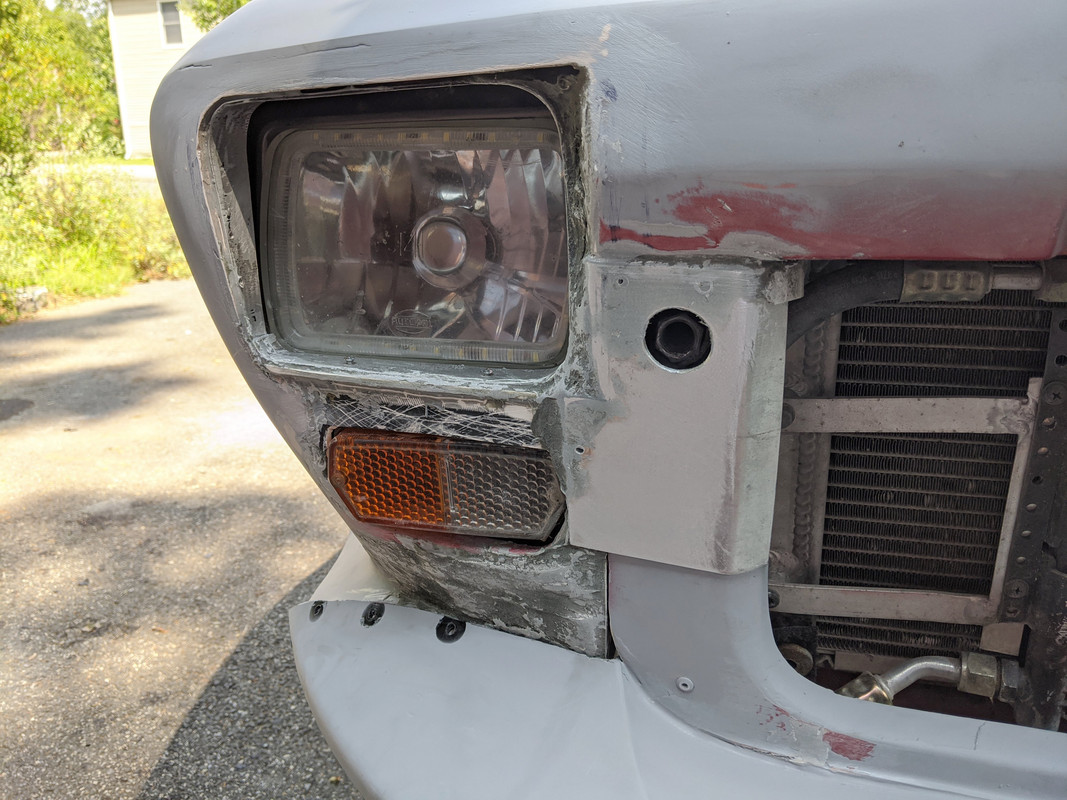
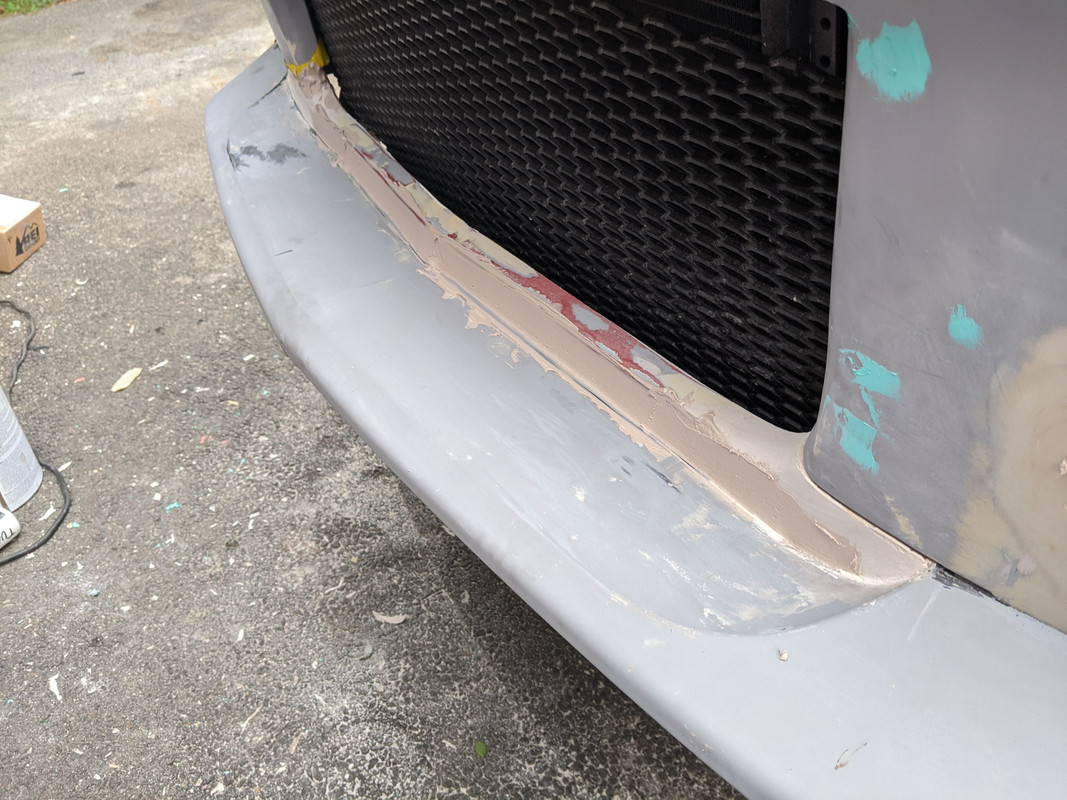
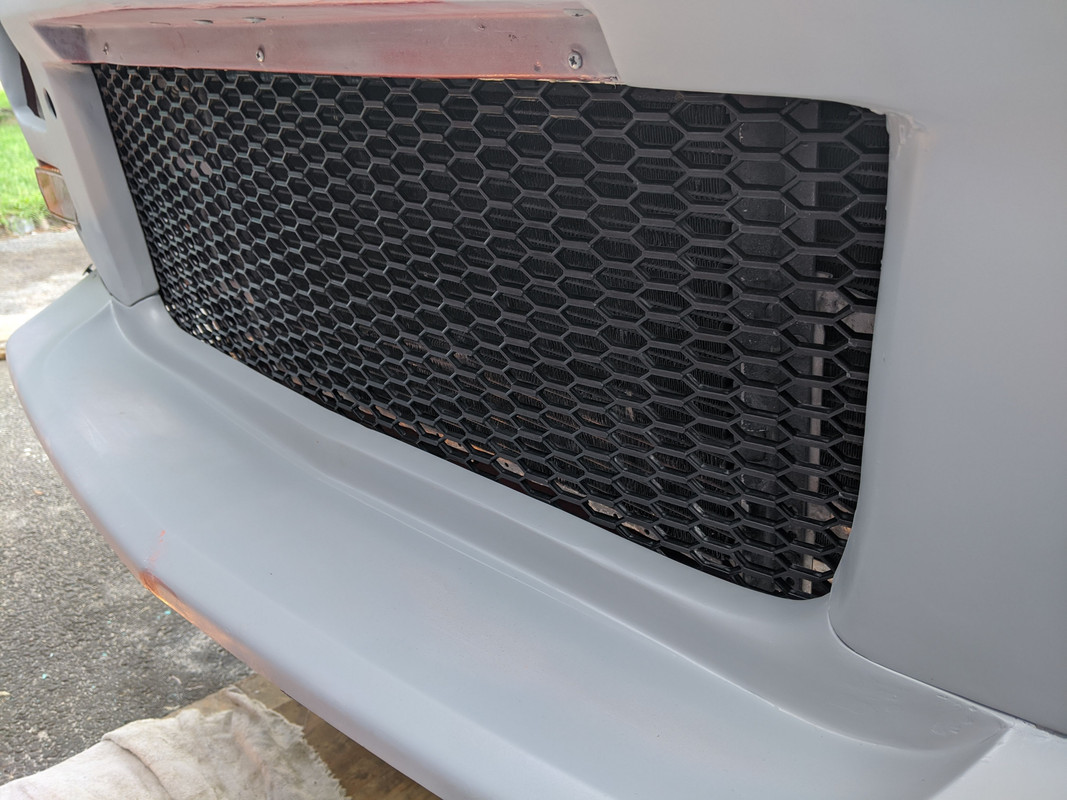
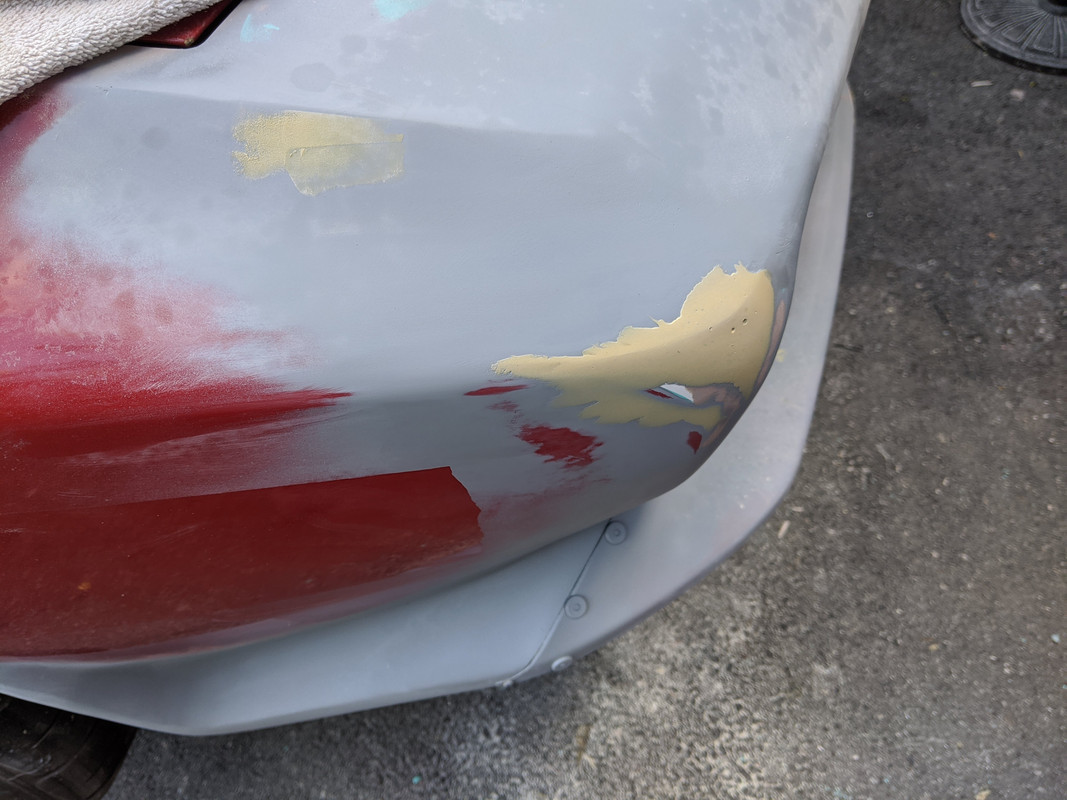
couple layers of regular bondo/sand later. Center rib needs more filler to level across the span

IMG-20200828-152411.jpg


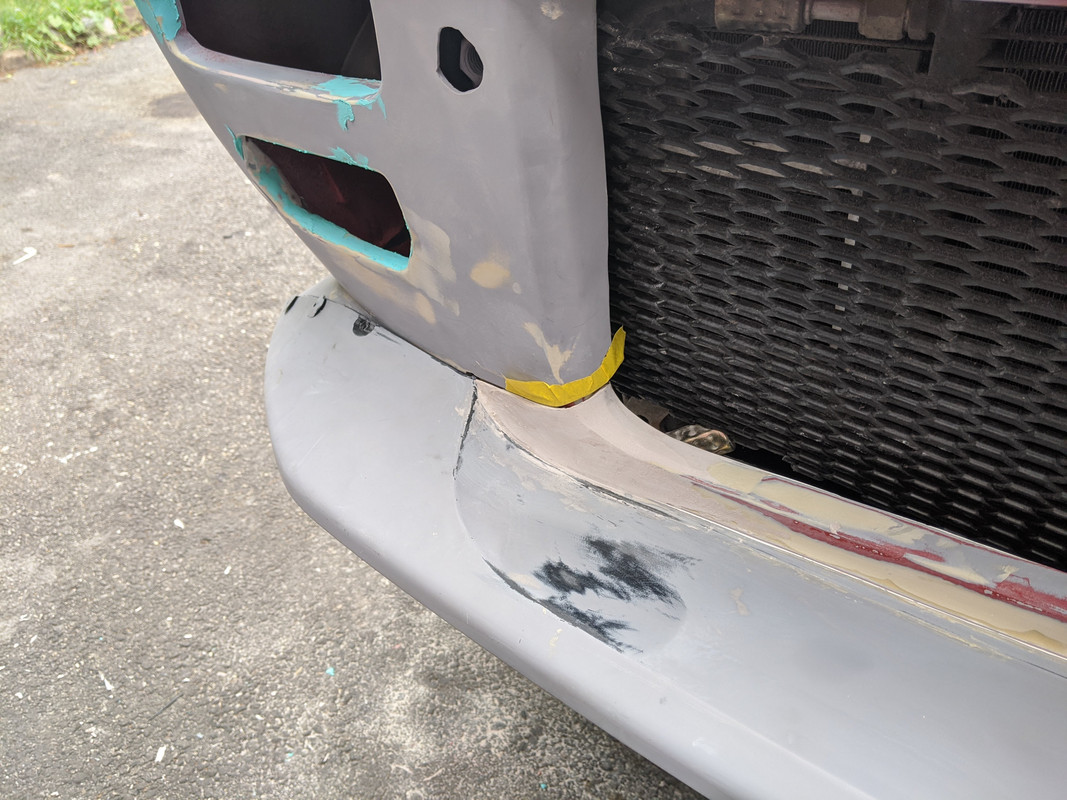
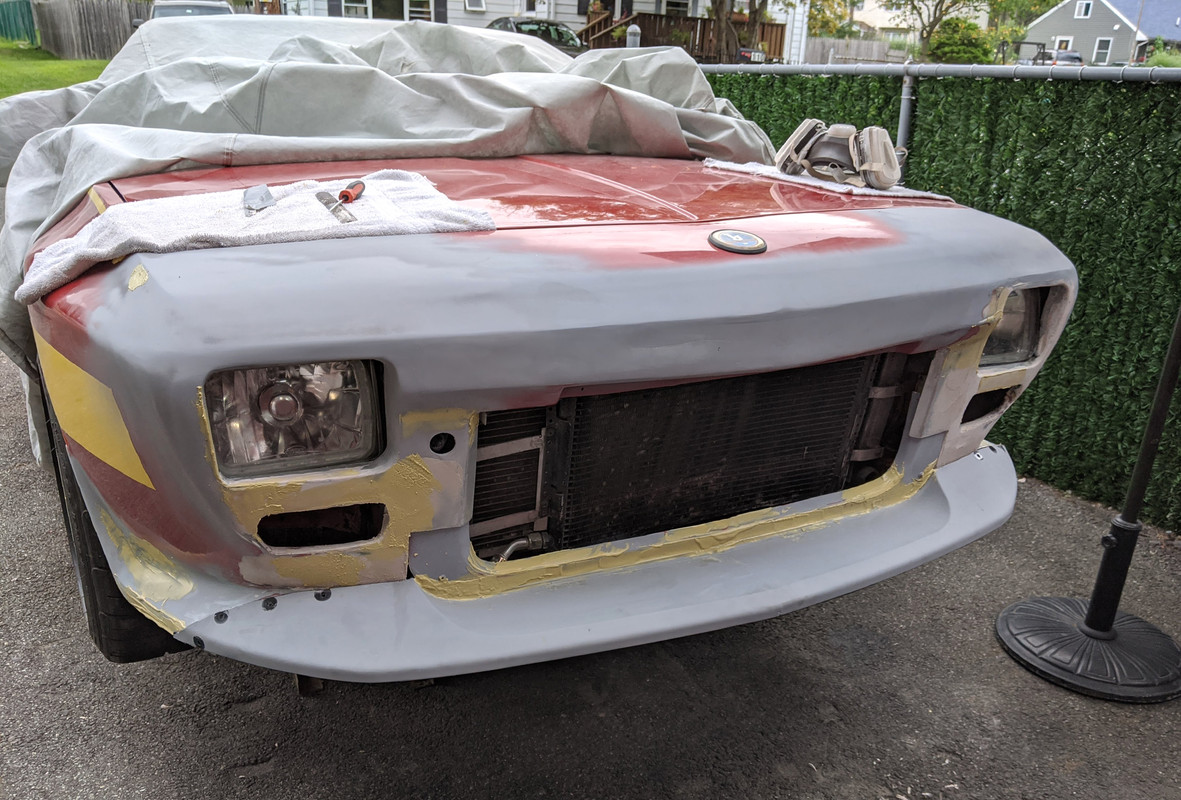
Still have to add more, and fix the wonky directional aperture

IMG-20200828-161550.jpg


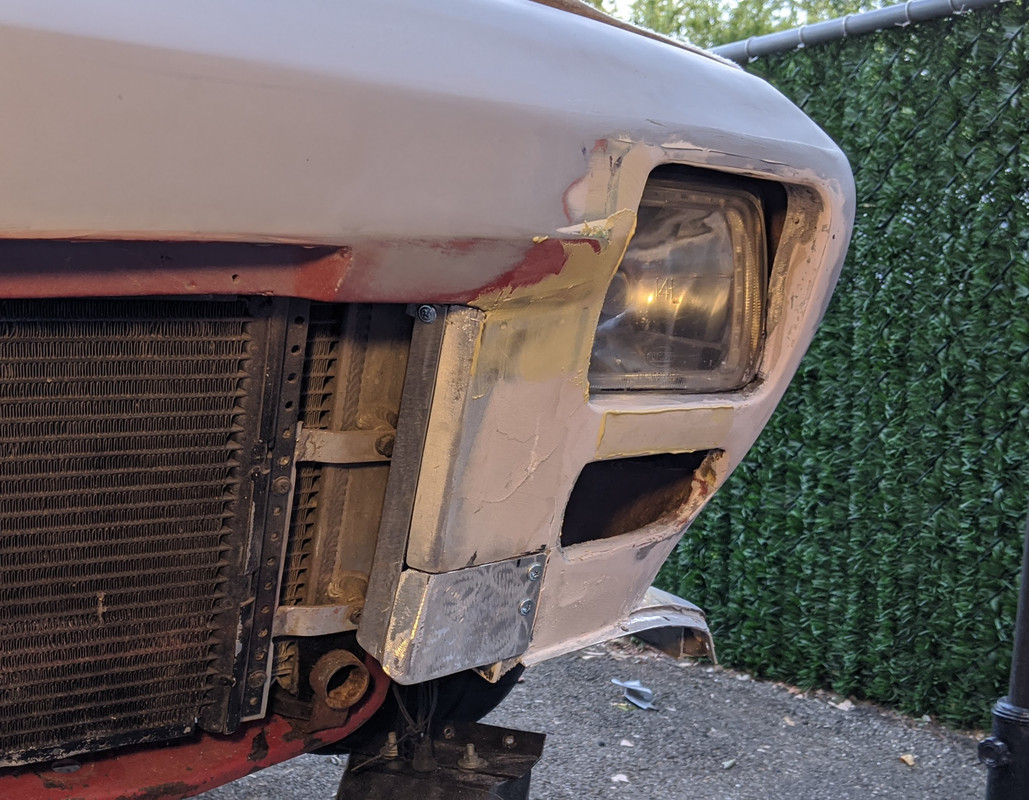
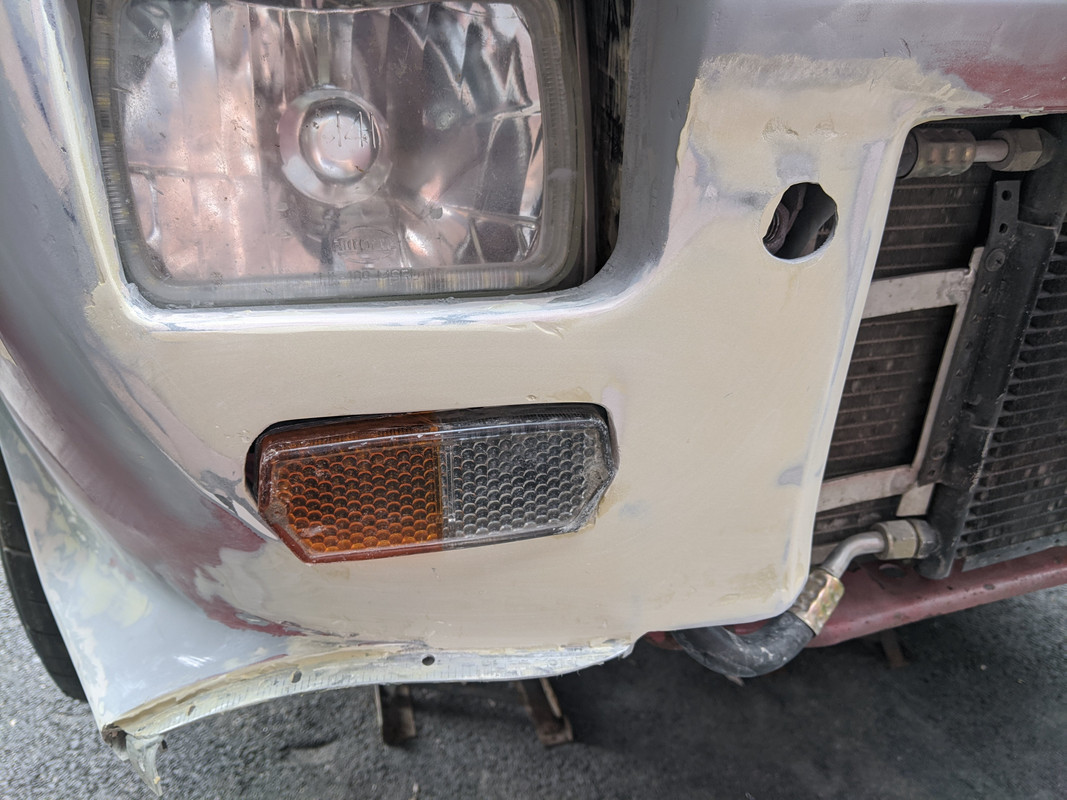
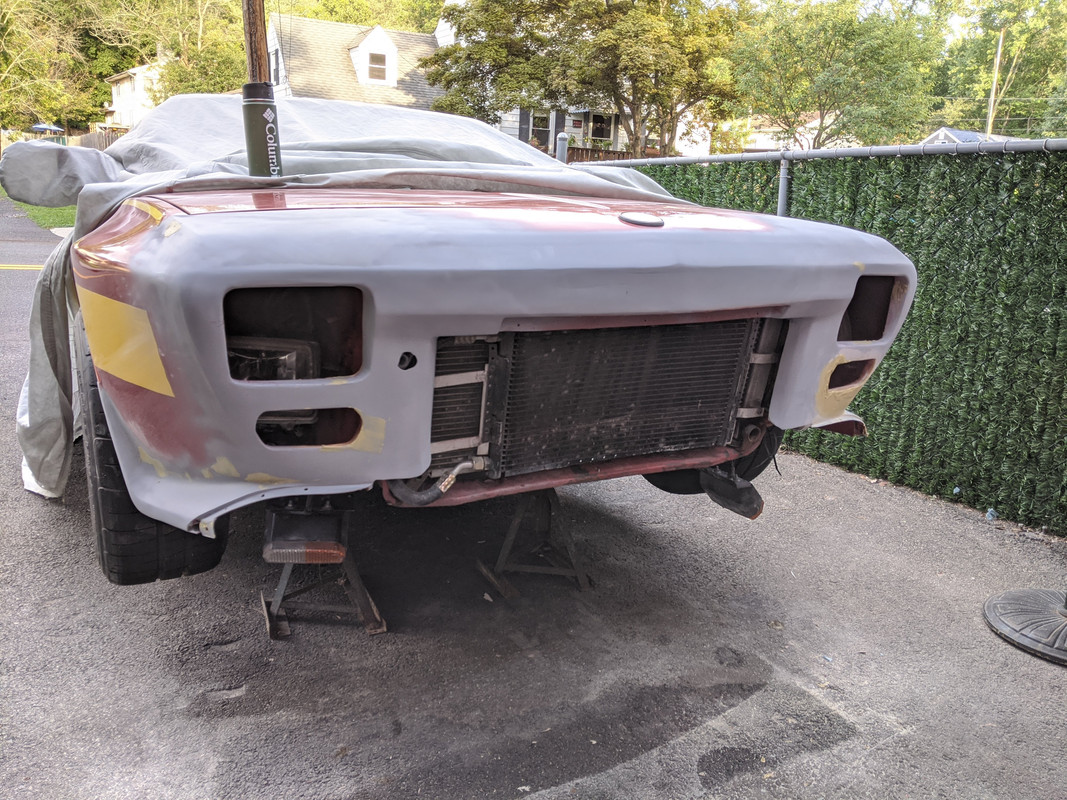
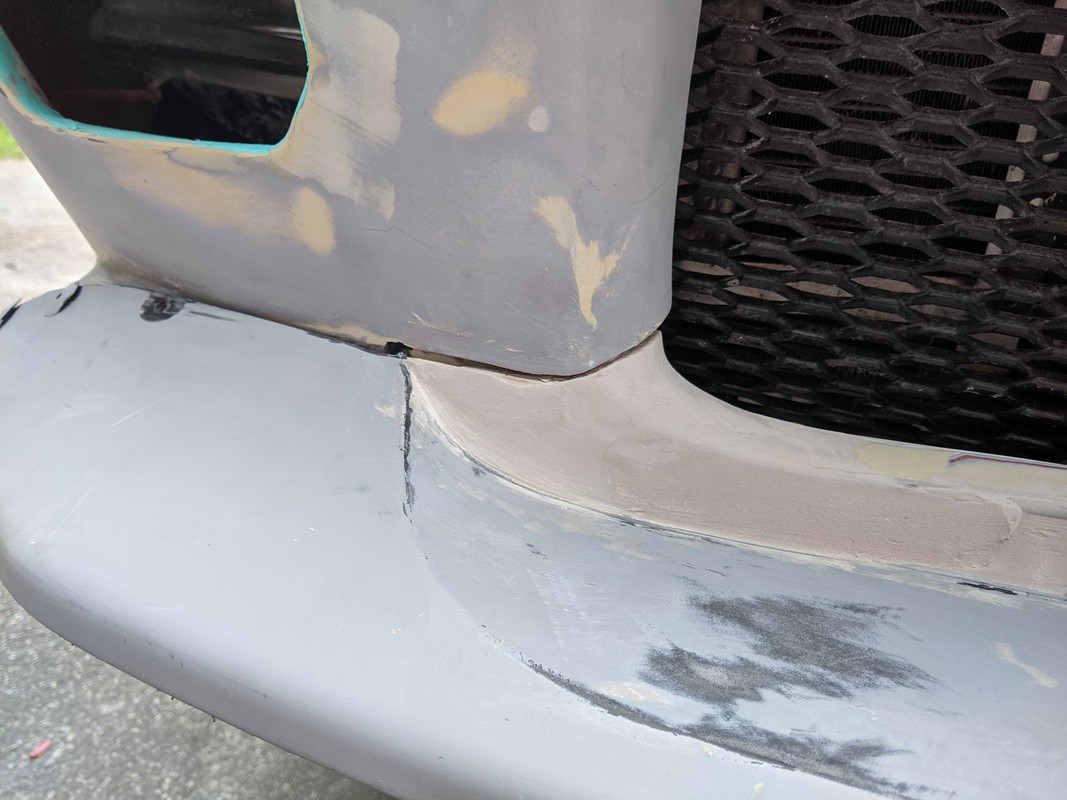
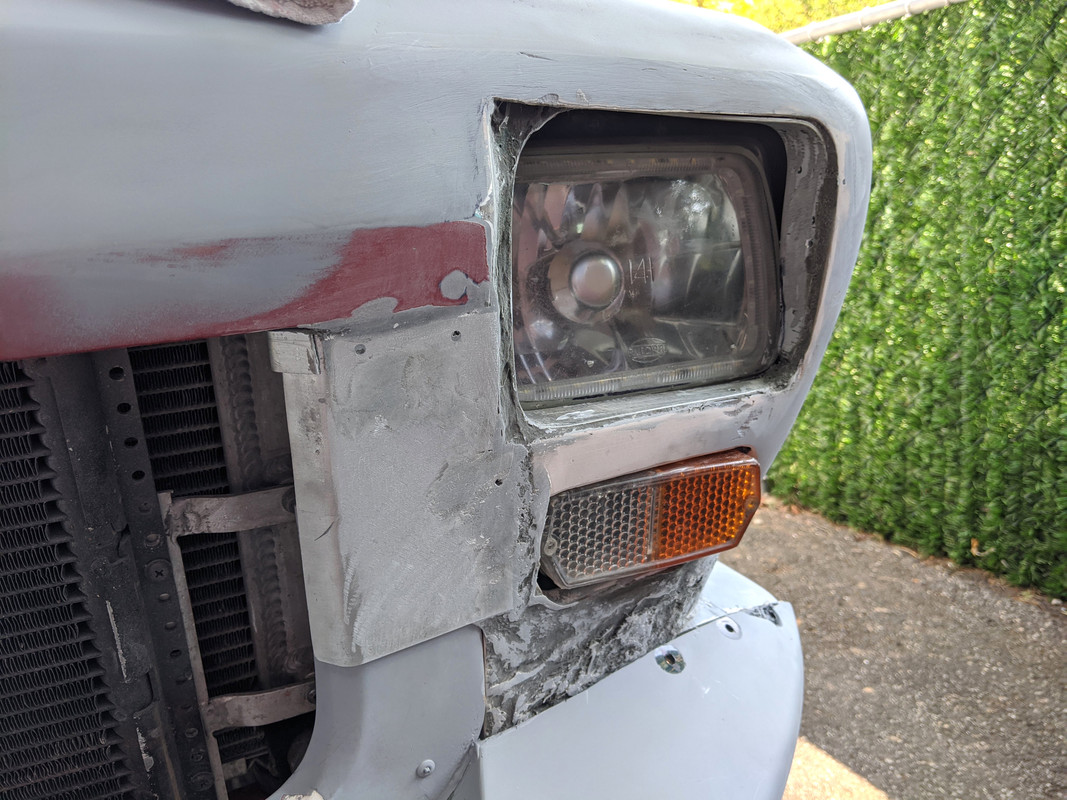
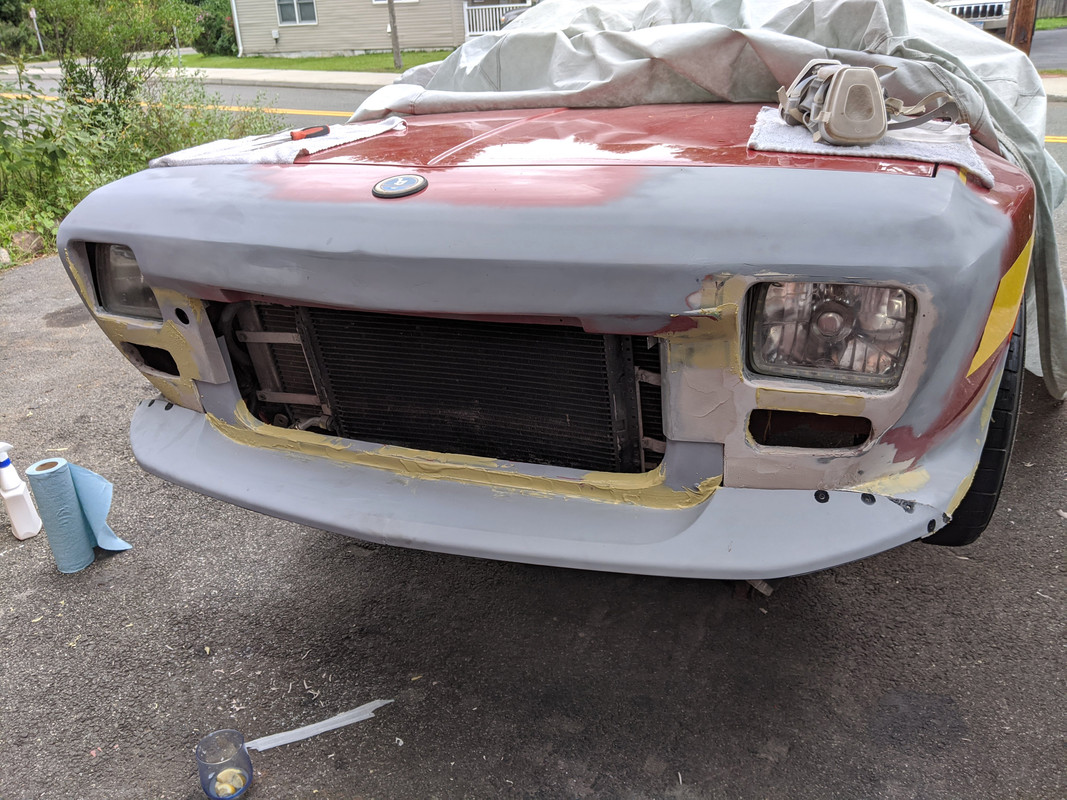
Left looks pretty good overall

IMG-20200828-161534.jpg


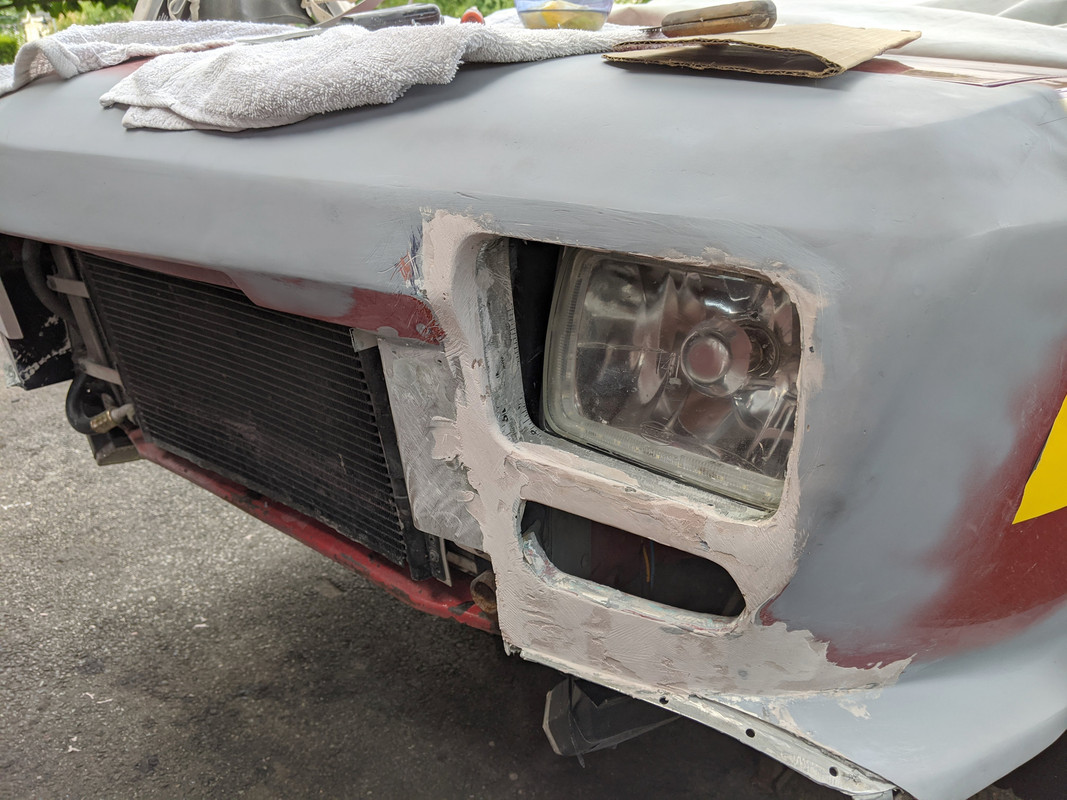
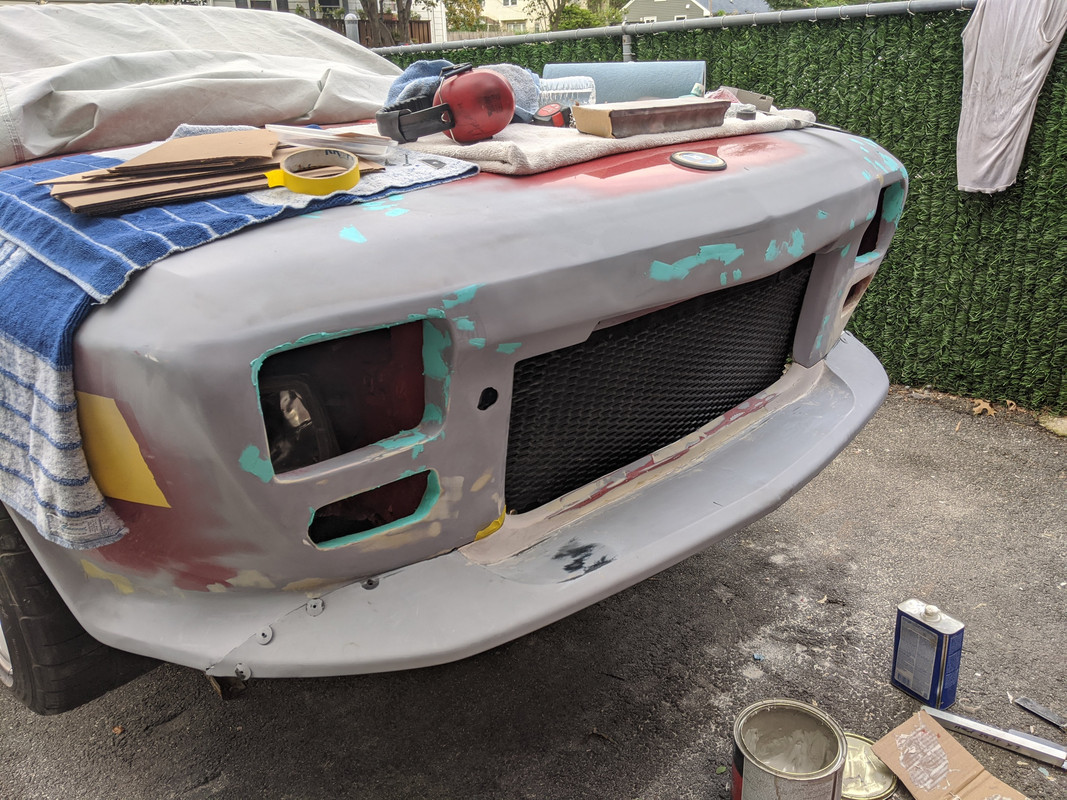
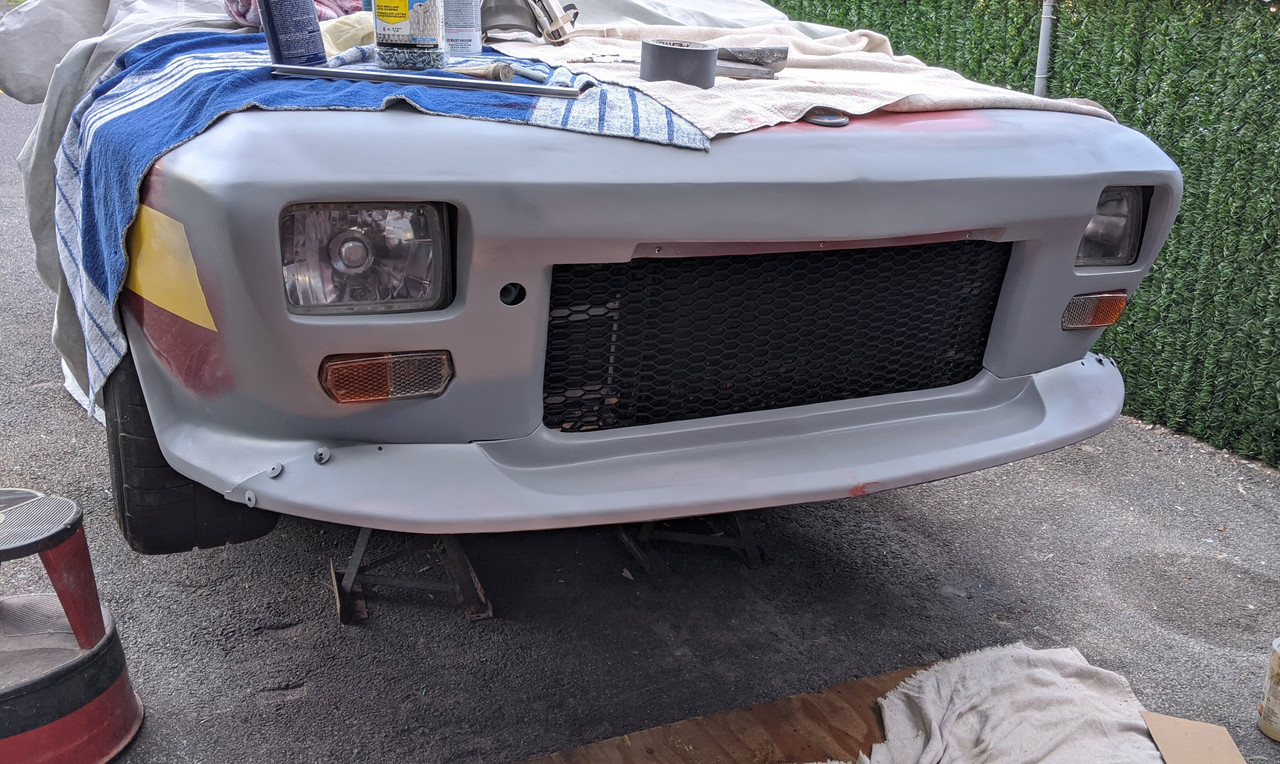
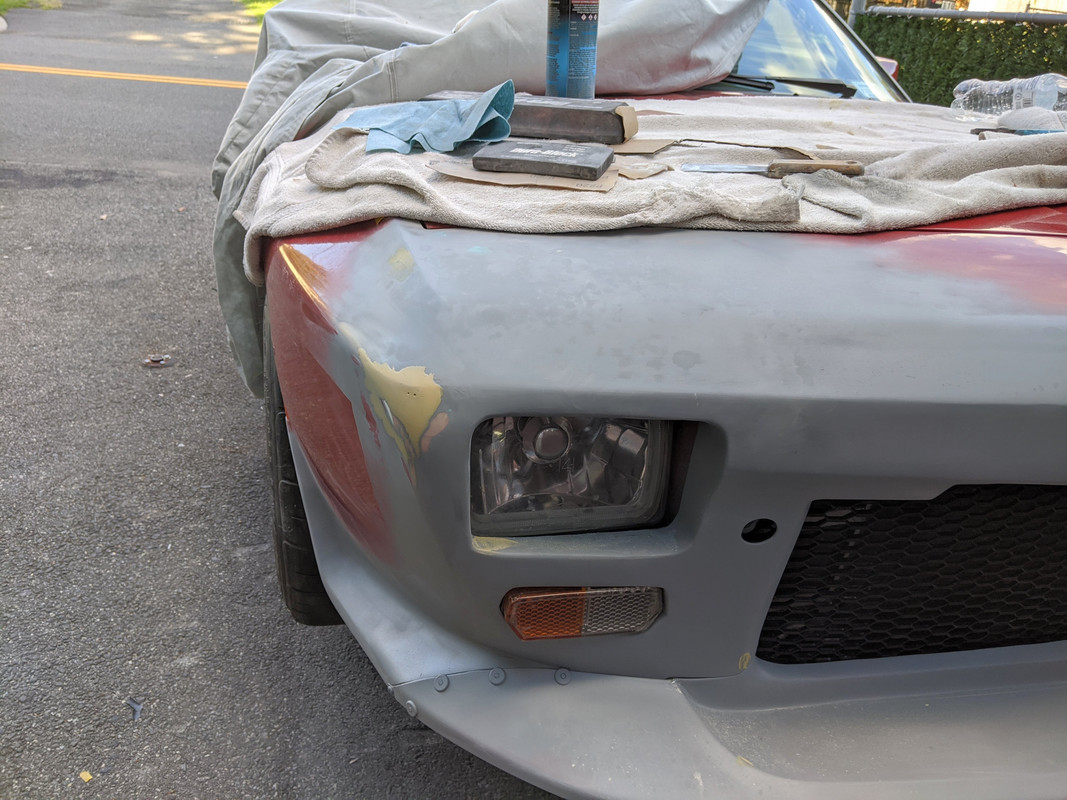
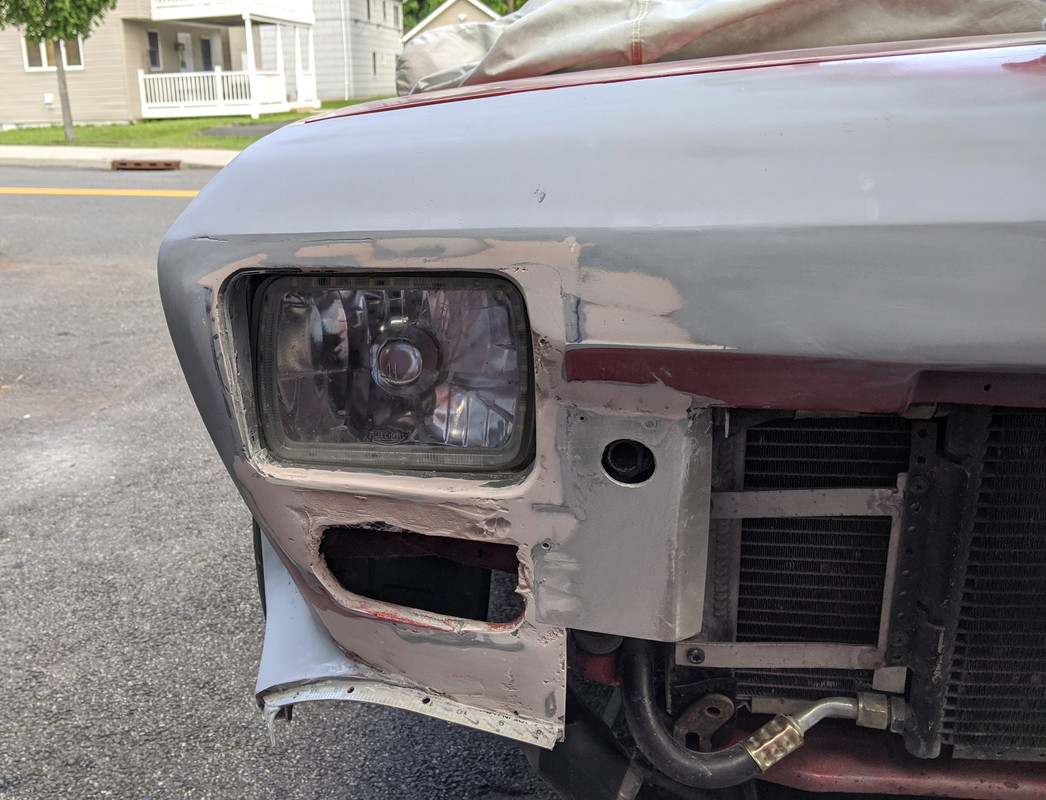
little primer on the right to check flow into center & top. Gonna need much clean up & detail later. Left side needs more work

IMG-20200828-173623.jpg


IMG-20200828-173641.jpg


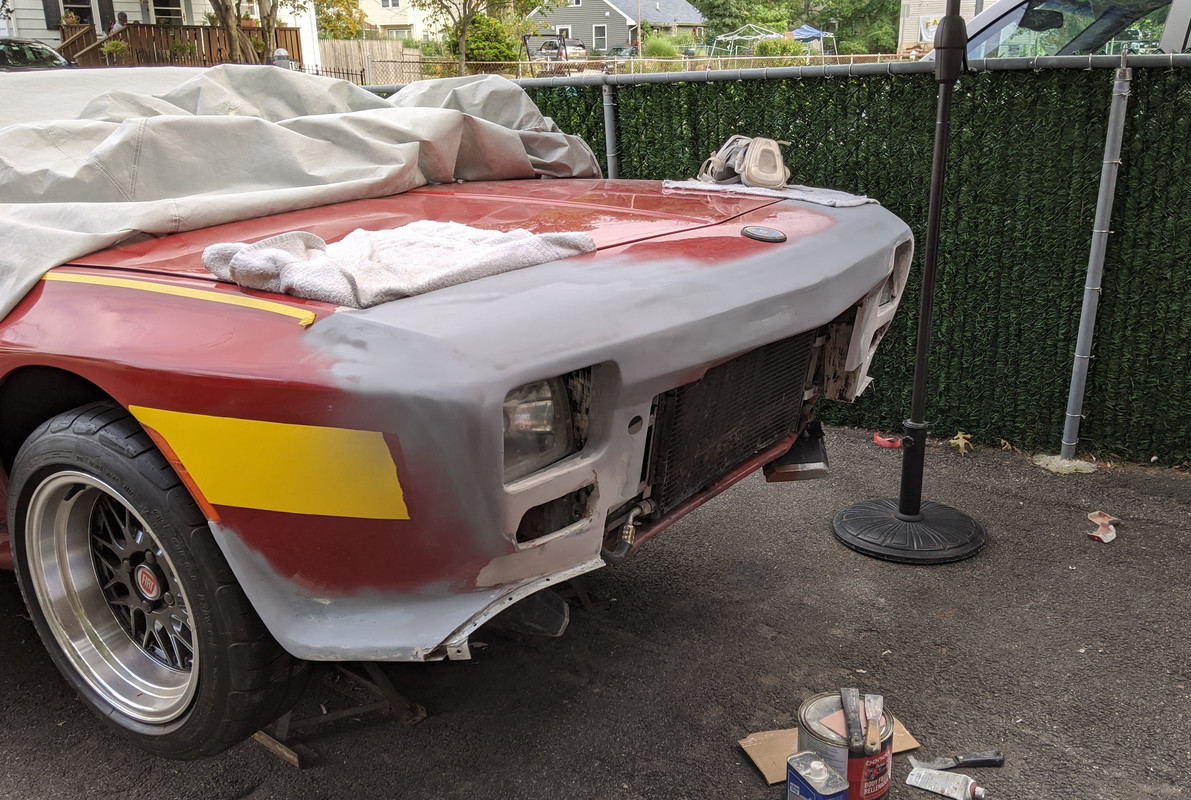
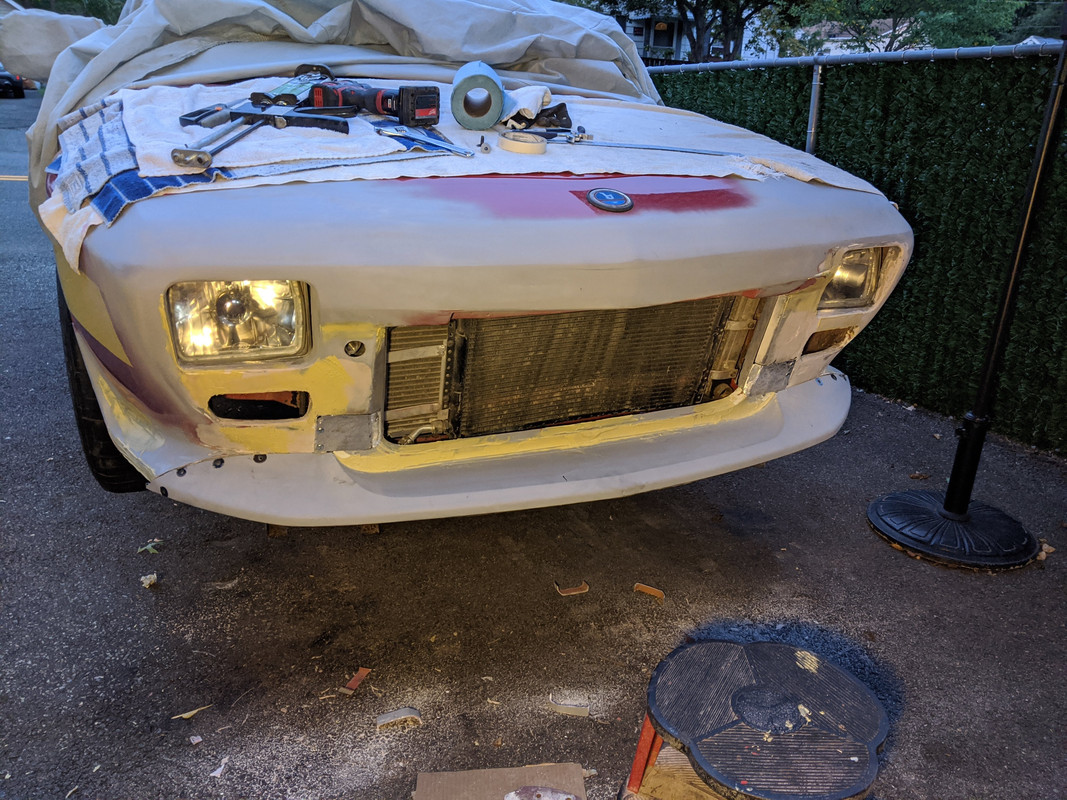
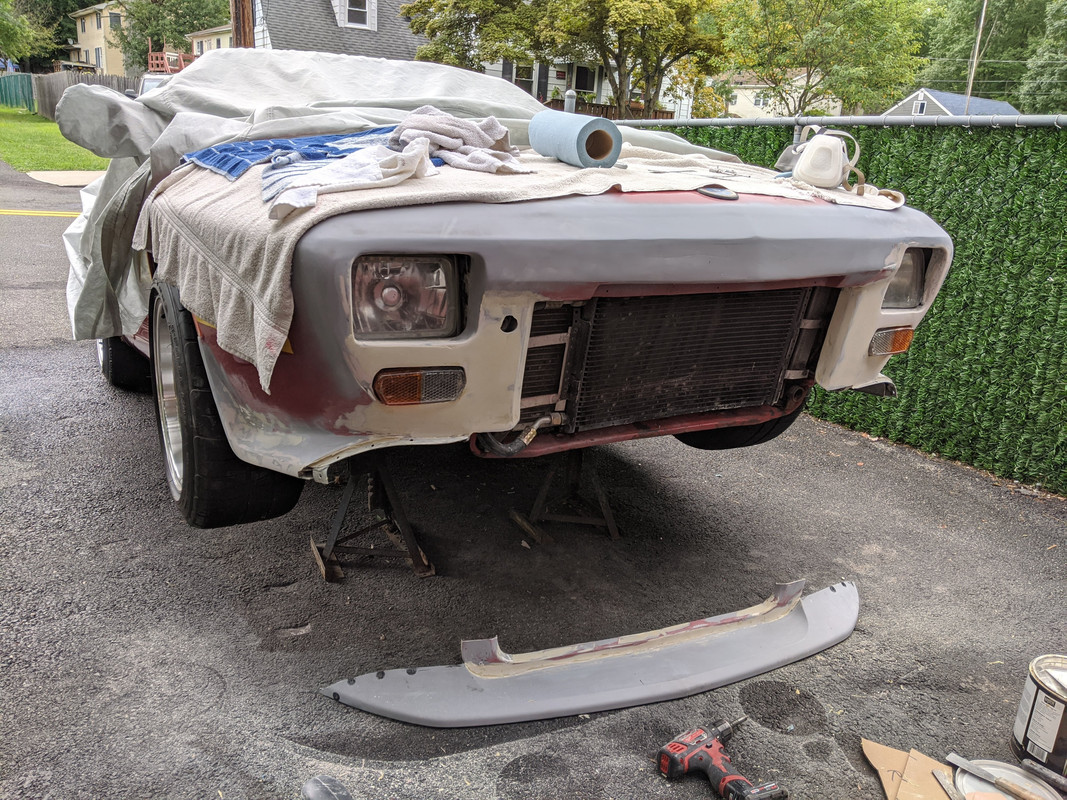
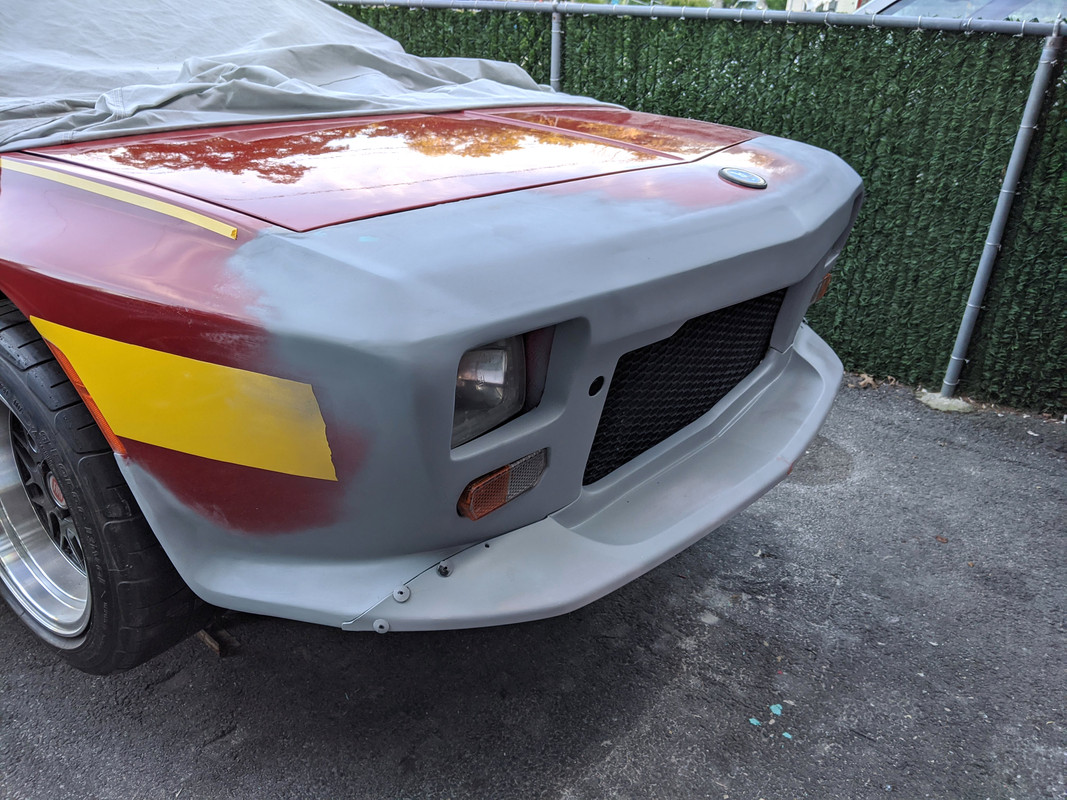
Feeling OK about the way it's coming along!

IMG-20200828-175055.jpg


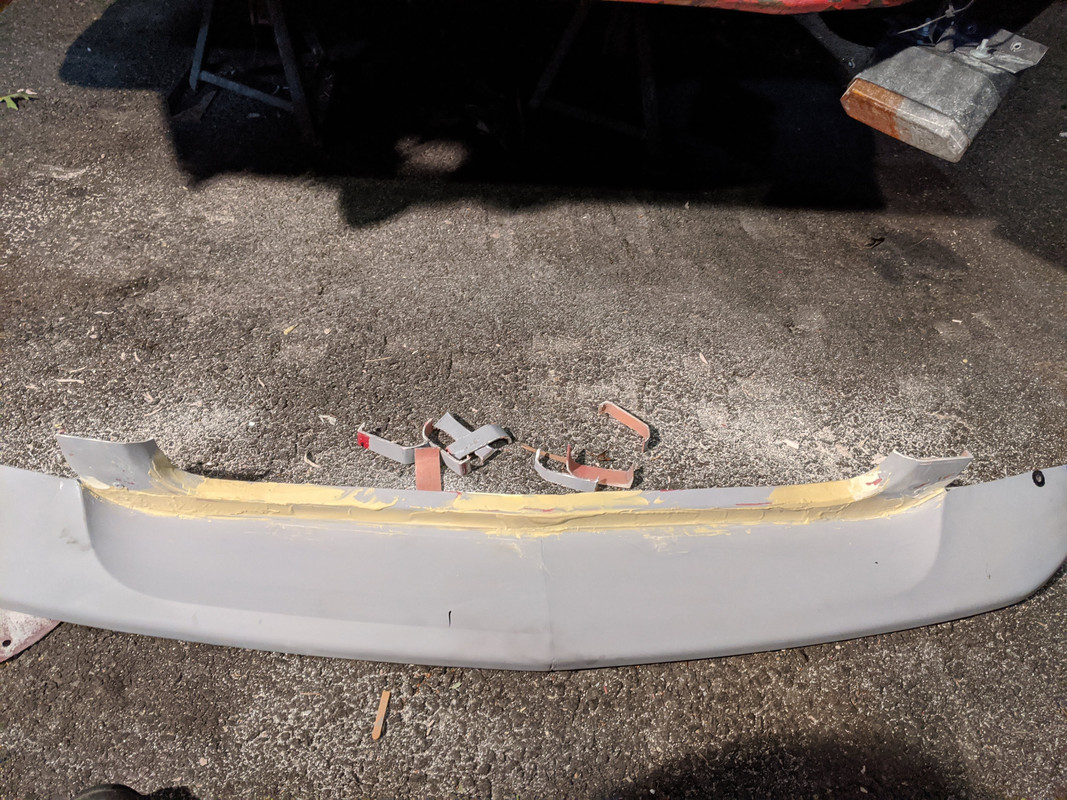
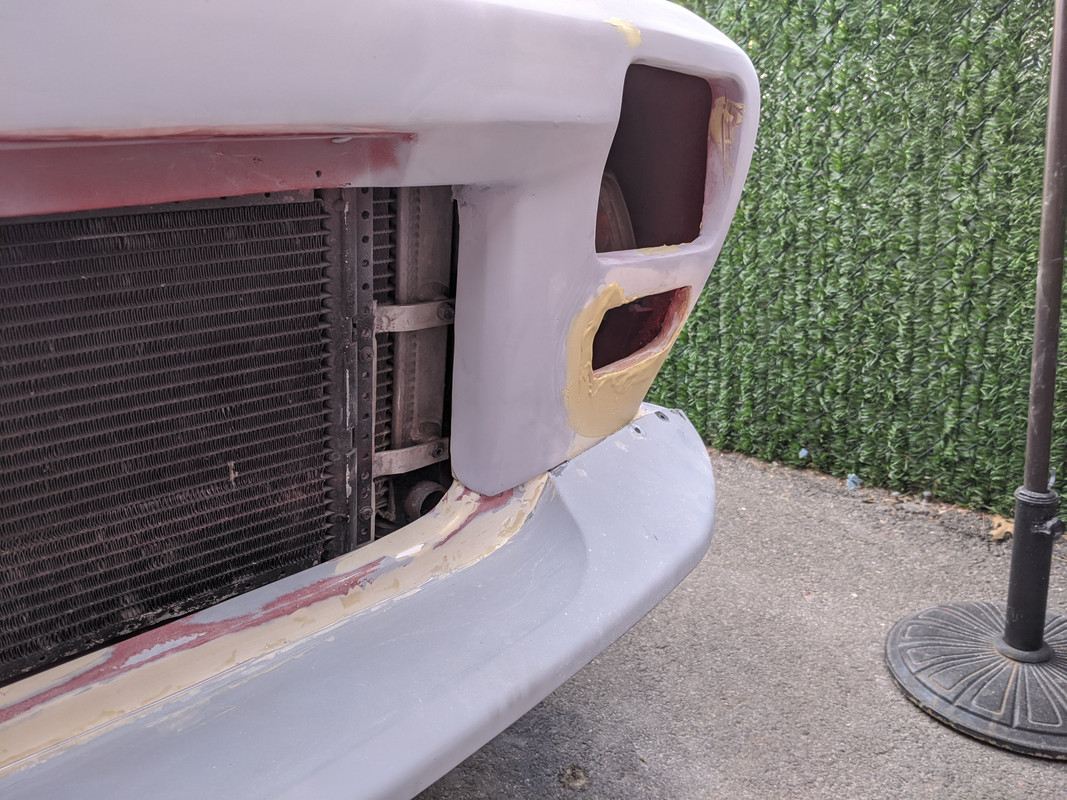
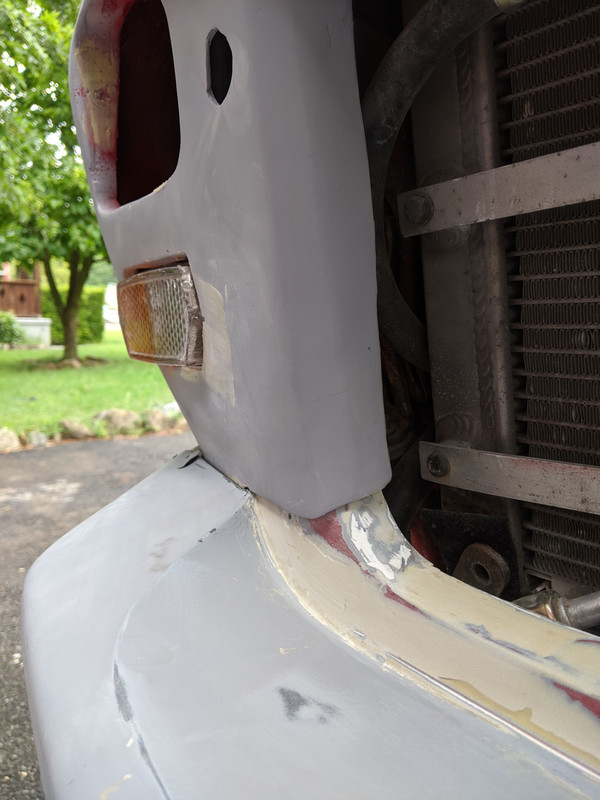
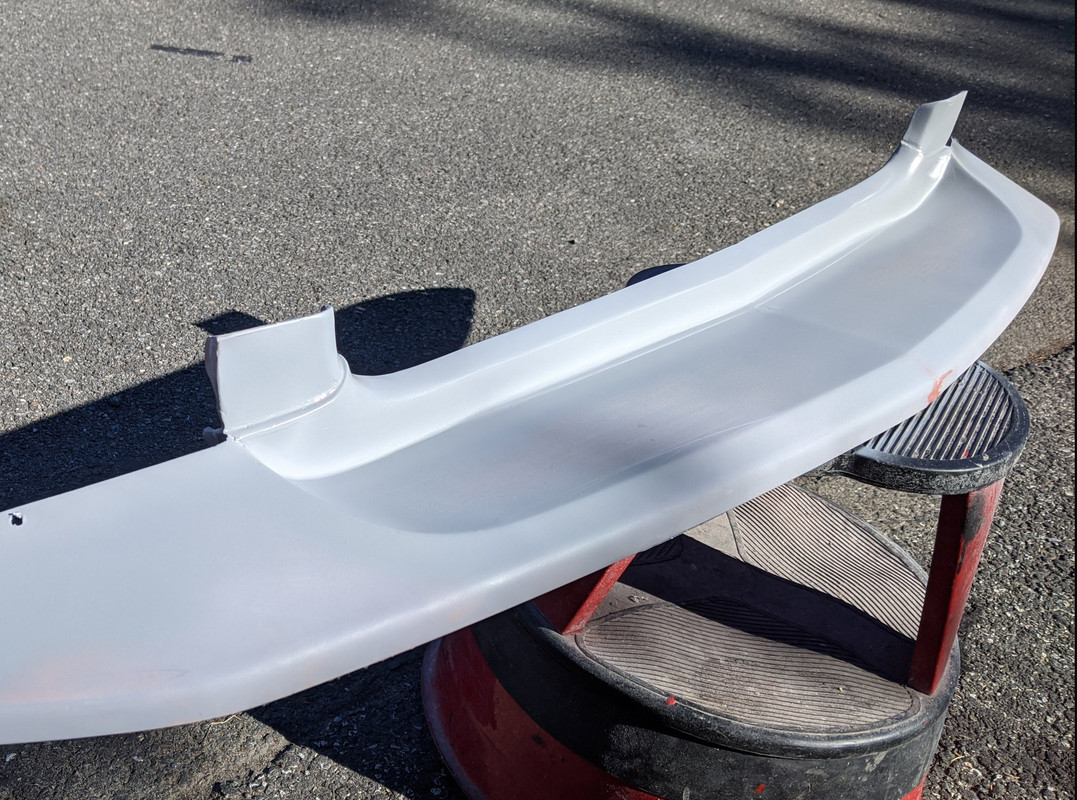
Spoiler & uprights will go in like this. Have to add some sort of attachment method for the uprights under the fixed sections.

IMG-20200828-183559.jpg


IMG-20200828-183619.jpg


IMG-20200828-183625.jpg


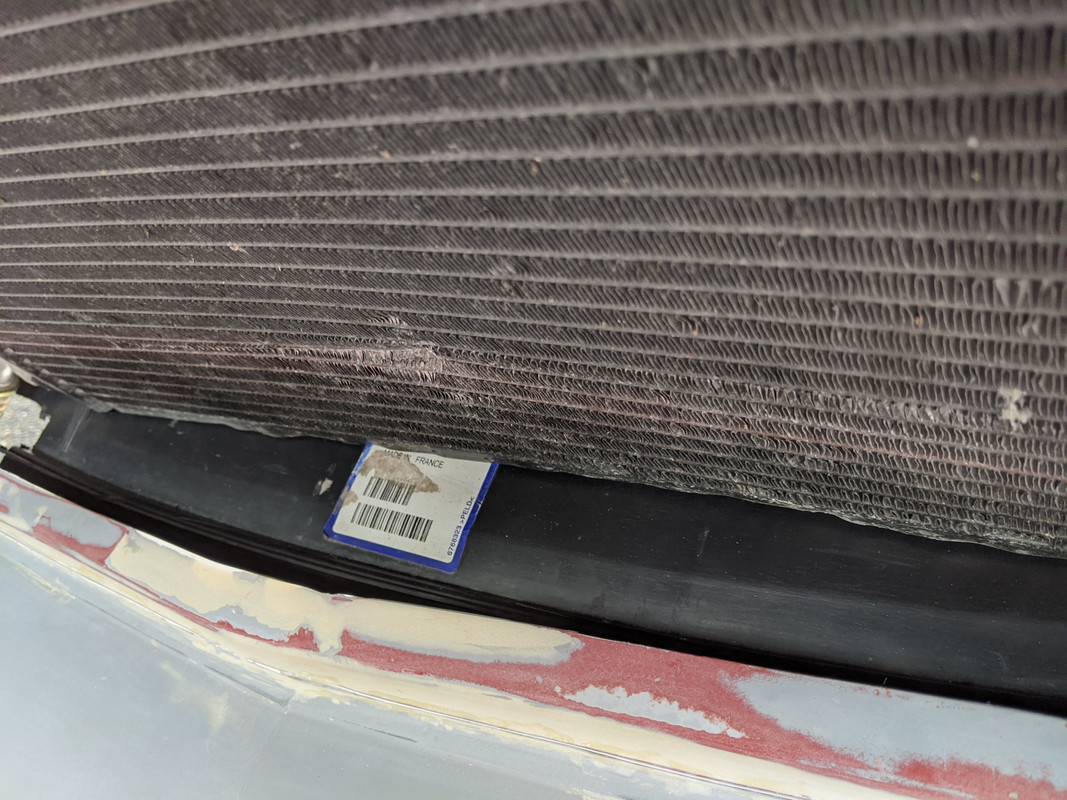
also have to figure out how to resolve this, since it has no continuation in the fixed section
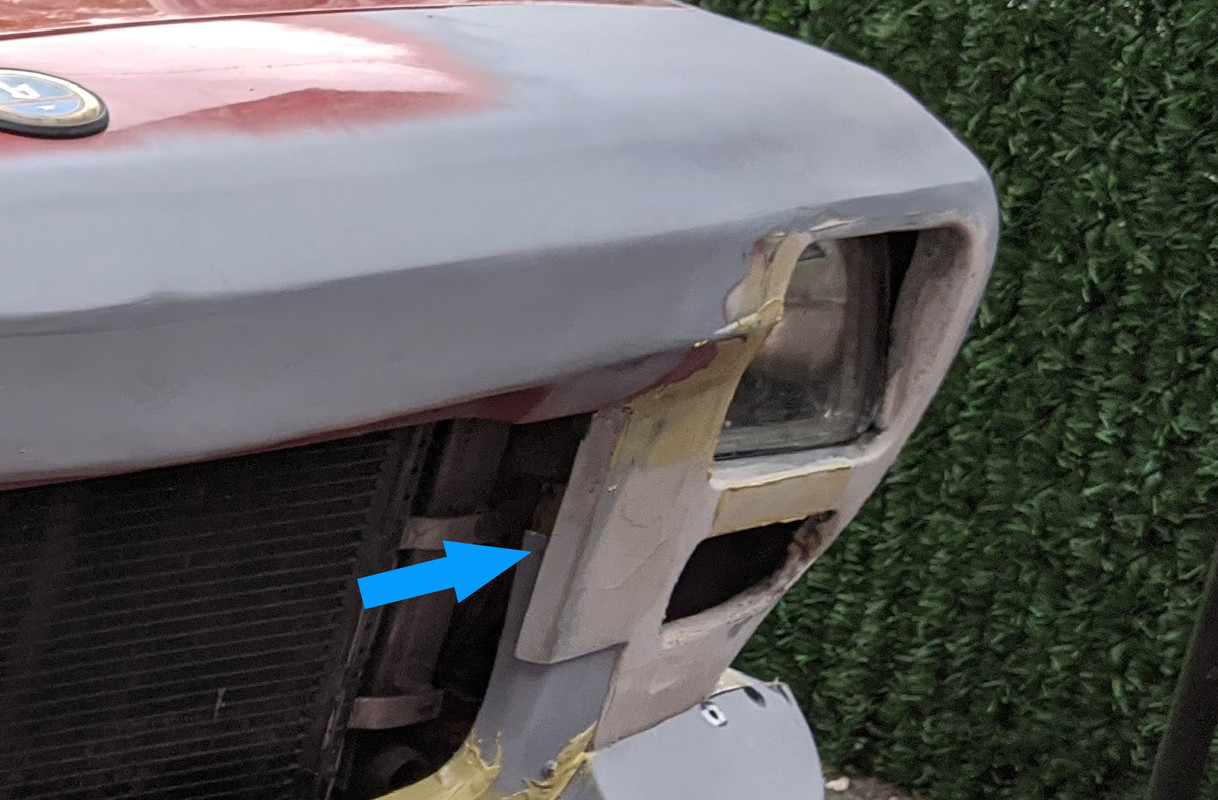
IMG-20200828-183625crop.jpg
 
Last edited:
Given how this is coming together, I would add the further return to the upper part and trim the spoiler section so it butts the fixed part of the front in a good clean cut line. If I had my choice it would be at the transition of the arc of the radiator opening on the spoiler so it aligns to the top of the spoiler to each side. If it needs to be an overlap joint then trim back the edges of the vertical on the spoiler part coming up and add an overlap on the backside.

How I would like to see it. However, opinions are like a—holes, everyone has one...
6EE1BB11-E1B5-4FFC-83BF-CB3D3C545CEB.png
4493C47C-C94C-4F3D-B0E6-F87A89C70B78.png
06124930-55B9-4EB5-BE61-311A142EFDBE.png
 
It would also be nice if the lower opening for the turn signal would follow the lines off the headlight opening so your eye falls down the headlight opening to the line of the opening for the turn signal. You would likely also have to make your own lens...
 
Given how this is coming together, I would add the further return to the upper part and trim the spoiler section so it butts the fixed part of the front in a good clean cut line. If I had my choice it would be at the transition of the arc of the radiator opening on the spoiler so it aligns to the top of the spoiler to each side. If it needs to be an overlap joint then trim back the edges of the vertical on the spoiler part coming up and add an overlap on the backside.
View attachment 35864View attachment 35865

Nice work, Karl. Thank you for taking the time to consider it. That looks much cleaner. Getting it to meet the arc for the grille opening will be a little bit of a PITA. I'll figure out how I can make that so :D 
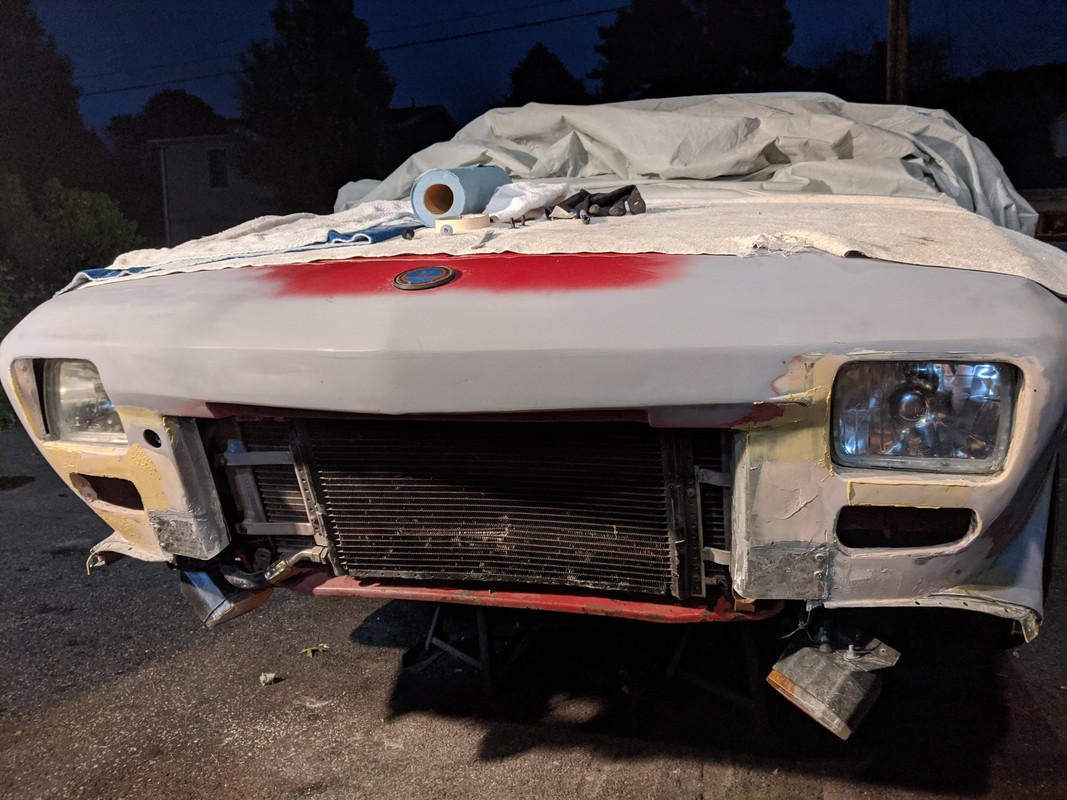
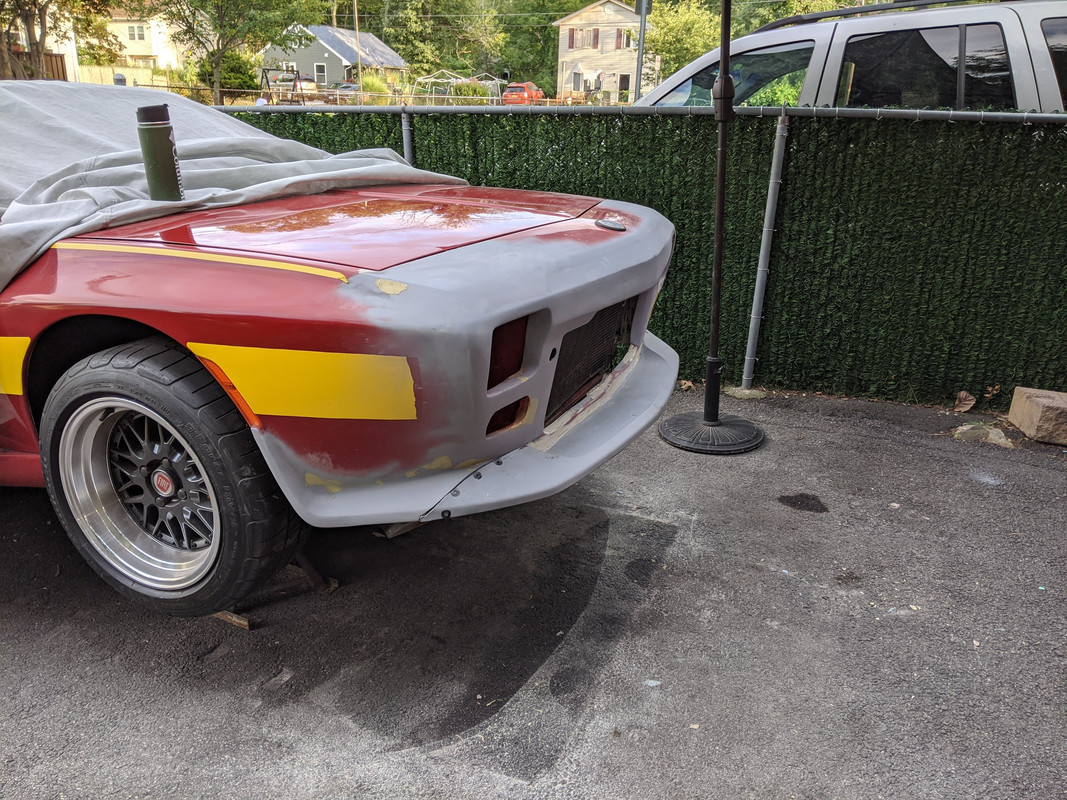
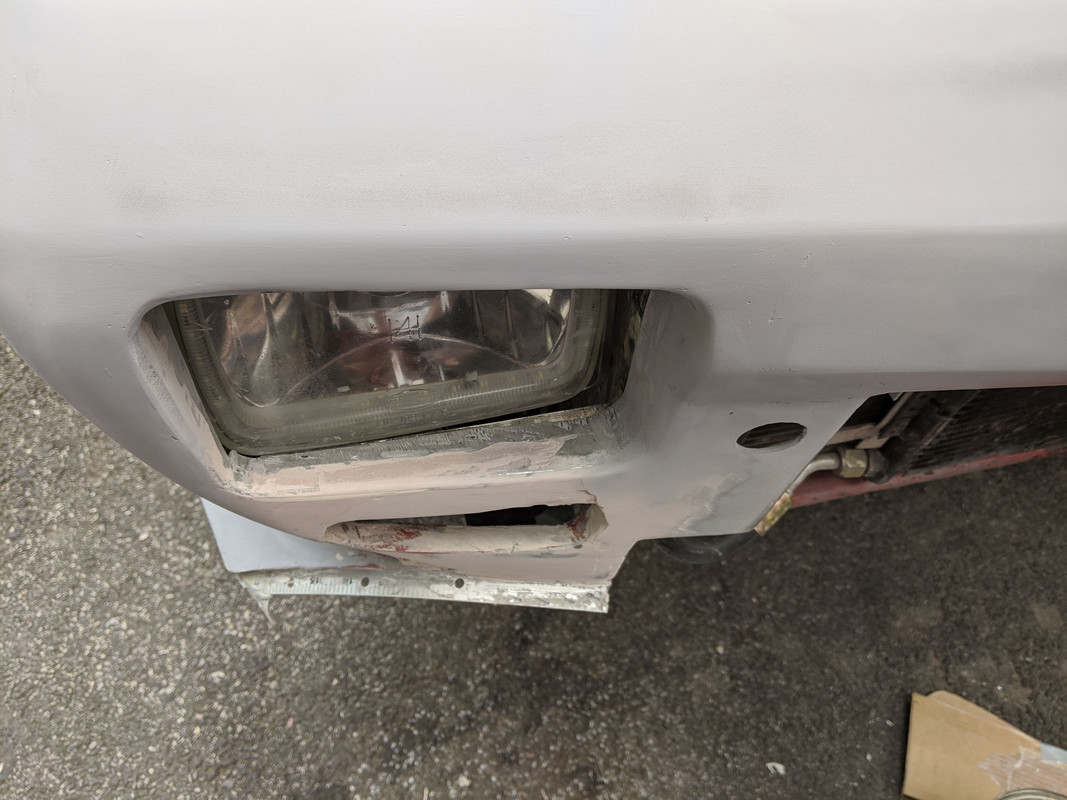
The markers are staying as is, though. I'm committed to keeping the old Fiat tractor light units 🤪
 
Back on the nose today, after some work on the house in the morning.

I fabricated the filler sections to approximate Karl's suggested layout. The details around the spoiler/vertical overlap had to change. Cut back the existing panel to provide about an inch overlap for bonding the new piece flush with existing.

IMG-20200831-185827.jpg


IMG-20200831-185832.jpg


difficult to tuck the spoiler into place as is - the inner corners interfere with pivoting the uprights under whilst overlapping the outer ridges

IMG-20200831-193745.jpg


sections bonded so I can move on to filler work tomorrow

IMG-20200831-200430.jpg


spoiler uprights cut down to 2" to get it to tuck under. Still may need to angle the inner corners uphill to ease the fitment.

IMG-20200831-200519.jpg
 
Last edited:
In regards to the fit up of the spoiler being difficult we have a saying in design because we have lots of people who opt for making some particular thing easy:

Easy once, ugly everyday.

Looking good, yes flaring the transition metal or fiberglass of the overlap will make the lower spoiler an easier fit and be a better overall look.

Looks to be pretty fair dinkum to me. Thumbs up.
 
Got a good amount of work done on the front today. Fill, sand, repeat multiple times :)

U-Pol gold for the skim coats - much finer than 3M Bondo

IMG-20200901-123530.jpg


Also checking the marker/directional apertures. They needed several add/substract stages to get a better outline

IMG-20200901-123545.jpg


IMG-20200901-123540.jpg


then after that, some U-Pol inside the headlamp opening surfaces

IMG-20200901-164317.jpg


IMG-20200901-164326.jpg


then some filler primer to check overall lay of the land

IMG-20200901-181034.jpg


found I needed to build up the left tuck under the marker - it sat back too far

IMG-20200901-181043.jpg


Spoiler overlap - I need to build up the seams on the body side of the outlying junctions - I have to even out the gap along the rivet area

IMG-20200901-181115.jpg


IMG-20200901-181144.jpg


IMG-20200901-181151.jpg
 
Had a couple hours after work, and the rain stopped, so I futzed with the spoiler/fender connection, and an air guide. My grille attachment has to change now, with the new inner verticals the grille won't align with the upper channel I built into the nose section

IMG-20200902-181342.jpg


I may build up the spoiler side of the upright to taper it out to the overlap. There has to be a gap to allow for pivoting the spoiler in place.

Also some details to refine in the top of the support, I see.

IMG-20200902-174417.jpg


IMG-20200902-174422.jpg


chopped up a Volvo splash shield to make an air guide

IMG-20200902-174033.jpg


Aluminum brace is needed to keep the spoiler from flexing downward

IMG-20200902-174443.jpg
 
Last edited:
Looking good. Lots of work.

Could you wrap the front signal lenses with something @1/8” thick and then cover it with plastic sheeting. Then place the light precisely where you want it and then apply the bondo to that edge/surface to make a more consistent, sharp edged opening?
 
Looking good. Lots of work.

Could you wrap the front signal lenses with something @1/8” thick and then cover it with plastic sheeting. Then place the light precisely where you want it and then apply the bondo to that edge/surface to make a more consistent, sharp edged opening?

I could.... I was just going to clean up the lines on what's there, and round out the aperture edges as with the headlamp openings. I wasn't planning on any sharp/crisp-edged openings since everything else is softer-edged.
 
Worked on the spoiler after work today - easing the transition from it to the fixed upright. Couple layers of bondo into it, some spot putty work also

IMG-20200903-174941.jpg


IMG-20200903-174854.jpg


had to add more here
IMG-20200903-174858.jpg


IMG-20200903-182917.jpg


Then I had to even out the center strip to eliminate an extra step that occurred when I bonded the Greenwood panel to the Volvo cover

IMG-20200903-180145.jpg


Still more detailing to do. Now that the main form is done, I need to remove the spoiler & refine, cut back & refine the mating ridge, and the center line. This part of the work I dislike intensely, it never ends. Fill, sand, fill, sand, putty, sand, prime, sand, putty, over and over :(
 
Last edited:
Joe, sorry to see so much damage. All repairable with time. X 1/9's are very stable in handling corrections/over-corrections,( in the dry anyway).
My restoration was from an engine fuel fire at traffic lights
Just as demanding and time consuming a restoration. All good X 1/9 fun in Covid home confinement time.
 
Worked on the spoiler after work today - easing the transition from it to the fixed upright. Couple layers of bondo into it, some spot putty work also

IMG-20200903-174941.jpg


IMG-20200903-174854.jpg


had to add more here
IMG-20200903-174858.jpg


IMG-20200903-182917.jpg


Then I had to even out the center strip to eliminate an extra step that occurred when I bonded the Greenwood panel to the Volvo cover

IMG-20200903-180145.jpg


Still more detailing to do. Now that the main form is done, I need to remove the spoiler & refine, cut back & refine the mating ridge, and the center line. This part of the work I dislike intensely, it never ends. Fill, sand, fill, sand, putty, sand, prime, sand, putty, over and over :(

The result will be worth it. It is coming together very nicely indeed.
 
Worked on wrapping up the main nose work & the spoiler connection.

Aluminum track to make the grille attachment

IMG-20200904-133036.jpg


IMG-20200904-134904.jpg


several layers of putty, sand, putty & prime later

IMG-20200904-162856.jpg


IMG-20200904-162904.jpg


Looks pretty good overall

IMG-20200904-182921.jpg


have to address the rivet attachment to the fender skirts, and that's the worst of it done

IMG-20200904-184838.jpg


IMG-20200904-182902.jpg


IMG-20200904-184832.jpg
 
Last edited:
Got the spoiler wrapped up for now. Need to find alternative 9mm hole rivets - the ones I put in are too bulky. I noticed in the last set of pics I had somehow shaved off some of the fender ridge line into the nose - looks all kinds of wonky

IMG-20200904-184832.jpg


IMG-20200905-171957.jpg


IMG-20200905-172014.jpg


closer to the left now, I think I can move on

IMG-20200905-172020.jpg
 
Last edited:
With the very custom nice looking spoiler you have here it sure would be prudent if you were to make a mold of it.

We all know what can happen to a front spoiler!
 
With the very custom nice looking spoiler you have here it sure would be prudent if you were to make a mold of it.

We all know what can happen to a front spoiler!

Thank you. I've been thinking about that on & off - actually the thought the whole nose. I recall discussing mold-making in another thread somewhere, however I think my eyes glazed over when I saw how involved it is, building/integrating the back supports, etc. Then, I go off into just how far do I go? A full clip back to the center of the wheel arch? I'd definitely have to include the entire top panel since I have no pop-ups, or maybe stop at the nose tip? - I've just exhausted myself thinking about it again 🤪
 
Thank you. I've been thinking about that on & off - actually the thought the whole nose. I recall discussing mold-making in another thread somewhere, however I think my eyes glazed over when I saw how involved it is, building/integrating the back supports, etc. Then, I go off into just how far do I go? A full clip back to the center of the wheel arch? I'd definitely have to include the entire top panel since I have no pop-ups, or maybe stop at the nose tip? - I've just exhausted myself thinking about it again 🤪
For a part that size a mold that is just made of casting plaster (hydro all) and “horse hair” (a type of straw) or burlap to reinforce the mold would be more than adequate, I used to have a large master seat mold that I made off a master to be able to create splashes and then cut the desired sections out of it.

You don’t have any undercuts so it would be pretty easy to make in an afternoon. They are just a bit heavy and clunky to keep around.

The parts wouldn’t be perfect coming off it but would require much less work than remaking what you have created there.

This is the guy (from TurboBricks) I had passing conversation with - building a Volvo Amazon with mostly carbon fibre panels - in this vid he is working on an intake plenum, but it delineates the mold building process. Sounds like it would be easier than that though, from what you are describing. I'll have to look up the casting plaster & "horse hair"... Does it still need the gel coat he describes around the 16min mark?

 
Back
Top