
You are using an out of date browser. It may not display this or other websites correctly.
You should upgrade or use an alternative browser.
You should upgrade or use an alternative browser.
What did you do to your X1/9 today ?
- Thread starter Eastep
- Start date
tvmaster
True Classic
I imagine a cigarette lighter with a wider profile could be found if a return to originality was needed?I ran into that. I'll probably just run a small hole saw through it. The metal piece pops off on the back, or at least mine does. I don't think the cigarette lighter will ever go back.
If the metal piece pops off, does that also encompass the rheostat and ashtray opening as well?
Last edited:
tvmaster
True Classic
Lol. And the exxe adds another tool to the box. I think the hole size should be 1.13”, so the bit needs to be slightly wider?
Schmenge
Canada West Coast
Just to throw it out there, make sure when you check the cam belt alignment that the distributor cam is in the right spot. I once had a customer that had a very soft knocking at certain rpm, turns out the distributor camshaft was not aligned properly which will sometimes allow # 2 piston rod to hit the fuel pump lobe. I did have one engine that came in that had totally grenaded due to the customer replacing his own cam belt and getting it completely out of alignment. The piston rod hit the lobe and stopped for a nano second, which threw everything out of timing, then the piston impacted the exhaust valve which snapped off, turned upside down and then went through the head after which the piston and rod exited through the side of the block, pretty messy!Today I bought a new project, a 1974 Fiat 128 Sport Coupé. Overall not very very rotten, but noticed some bondo on doors and panels so I am prepared for welding. The engine is running well, but knocking a little bit between idle-3500 rpm. Above 3500 rpm the noise disappears completely. I couldn't locate exactly where the knock came from, but an engine teardown will probably tell. Drove it from Skåne, south of Sweden back home, 350 km (217 mi), but didn't go faster than 60 mph due to the engine knock that worried me. I will certainly put a 5 speed in this car to reduce engine speed (4500 rpm @ 60 mi/h !!!). Maybe I even put my spare 1.5l in it...
The plan is to fully restore it with some modifications.
View attachment 54932
twincam69
True Classic
Here are pics of the overriders. I also used some 3M rubber strip for the area on the bumper that usually has black tape.I'm also using a single rail of the '75 bumper, but not as nicely finished like with your overriders. I'd love some pics. Thx
Bjorn Nilson
True Classic
The distributor isn't on the camshaft on my engine (1300). Do you mean the auxiliary shaft? Timing and fire order seem to be ok but I haven't checked cambelt and alignment yet.Just to throw it out there, make sure when you check the cam belt alignment that the distributor cam is in the right spot.
jimmyx
True Classic
This is not like a hole saw. They only come in a few sizes. The “teeth” do the work like a hand file only faster.Lol. And the exxe adds another tool to the box. I think the hole size should be 1.13”, so the bit needs to be slightly wider?
tvmaster
True Classic
Do you have to sand the metal smooth after, or do these leave a cut-free finish?This is not like a hole saw. They only come in a few sizes. The “teeth” do the work like a hand file only faster.
jimmyx
True Classic
No sanding required.Do you have to sand the metal smooth after, or do these leave a cut-free finish?
Buy yourself a step bit, they cut very clean holes.I TRIED to replace the ciggy lighter with this more useful voltmeter/USB charger. Who knew cigarette lighters were 3.3mm narrower back then. Opening is 25.5mm, new unit is 28.8mm.
I‘ve been searching online all day for one which fits, but they all seem to be juuuuuust a little too wide.
I really don‘t want to butcher the original center console, but if I decide to, what tools would be needed to bore out the hole 3.3mm? It’s the metal in behind the console I’m not sure how to cut…ideas?
Or, if anyone has a unit sourced which actually fits the 25.5mm (1”) hole, please post.
View attachment 55377 View attachment 55378 View attachment 55379
kmead
Old enough to know better
A hole saw would be ideal if you can get the right diameter. With what you are stating the hole is just over 1.125”
To do this, first run the hole saw through a piece of wood stock. Then clamp the piece of wood stock centered over the existing hole in the console. This ‘hole’ in the wood piece will be your drill guide to ensure the bit won’t wander and ruin your nice console.
What is the over lap ring width on the new USB voltmeter? A slightly larger hole will do just fine in most cases due to the overlap, if so a 1.1875” OD hole saw would provide more than enough room (@30mm).
Last edited:
ng_randolph
Bjorn H
I believe he is referring to the fuel pump lobe on he aux shaft. On the Fiat DOHC engines this lobe can hit a connecting rod if the aux shaft is not timed right. I don't believe this is a problem on the SOHC engines.The distributor isn't on the camshaft on my engine (1300). Do you mean the auxiliary shaft? Timing and fire order seem to be ok but I haven't checked cambelt and alignment yet.
Last edited:
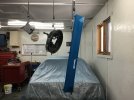
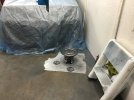
HI today painted some small pieces, little tight in garage with winter toys , snow falling today.
Attachments
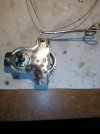
Wasn't too hard after all. The tricky part was finding a clamp to hold the cables while installing. I was thinking paperclips, or wire ties, or large staple of some kind. Here is what I came up with - artery forceps. Crimped and soldered a small ferrule on the open end of the cable. Now just to mount and check for correct length..I'm with Karl, I'd just replace the entire assembly instead of attempting to replace just the cable. These are a nightmare to rewrap the cable onto them. And as he said there are lots of other parts that will be worn. The fact someone else has attempted prior repairs tells me it has pre-existing problems. I believe the ones from Ladas is a direct fit for very little money.
Attachments
Last edited:
Agnelli
True Classic
Did a quickie front caliper service, wanted to check wear on my Porterfield pads, and free up the sliding blocks, which were super oxidized. Wire brushed / 180 grit to refresh, then applied Moly grease left over from CV joint service. We'll see if this resolves a tendency to pull one way under hard braking. I've already refreshed front and rear suspension with all new bushing + aligned it, so we'll see if free running calipers solves it.
Schmenge
Canada West Coast
Sorry, my bad, at first glance I thought it was a 124 coupe with the twin cam.The distributor isn't on the camshaft on my engine (1300). Do you mean the auxiliary shaft? Timing and fire order seem to be ok but I haven't checked cambelt and alignment yet.
kmead
Old enough to know better
Very cool. Not sure about the pink shift.Getting to the home stretch. Starting to do finish markings, some neat stuff I had made. Reflective vinyl markings (ala Mopar 1960/70's).
View attachment 55417View attachment 55418View attachment 55420
One niggle. It would be nice if the trailing leg of the X matched the angle of the vent opening (parallel to) and perhaps the right leg extending down to the radius of the vent opening.
In any case very nicely done. Cool materials.
tigeravg
True Classic
Copy all. And thanks for the input, Karl.Very cool. Not sure about the pink shift.
One niggle. It would be nice if the trailing leg of the X matched the angle of the vent opening (parallel to) and perhaps the right leg extending down to the radius of the vent opening.
In any case very nicely done. Cool materials.
The reflective color is a bright silver, it's the LED camera flash that makes it flop pink. In the second pic, you'll see the "natural" metallic hue it seems to the naked eye. As for the angle, yup. I thought the same thing immediately upon application. I was of a mind to increase that angle to match the front edge of the vent opening. That would also cause the top of the "X" to match the targa sail at the trailing edge of the window opening. Win-win.
The gal who makes all my markings and stencils can make the changes in about 30 seconds. When I was her neighbor for 20+ years, I parked in front of her shop with calipers and measuring tapes to make immediate corrections after a prototype pop. Now I live 500 miles away. Same with my pal, the upholsterer. A first world problem for sure.
tvmaster
True Classic
What about this step bit? I can remove the metal plate and keep it original, but would these bits tear up the console plastic, or make a nice, expanded hole?A hole saw would be ideal if you can get the right diameter. With what you are stating the hole is just over 1.125”
To do this, first run the hole saw through a piece of wood stock. Then clamp the piece of wood stock centered over the existing hole in the console. This ‘hole’ in the wood piece will be your drill guide to ensure the bit won’t wander and ruin your nice console.
What is the over lap ring width on the new USB voltmeter? A slightly larger hole will do just fine in most cases due to the overlap, if so a 1.1875” OD hole saw would provide more than enough room (@30mm).

Titanium-Coated High-Speed Steel Step Bit Set, 2-Piece
Amazing deals on this Titanium-Coated Hss Step Bit, 2Pc at Harbor Freight. Quality tools & low prices.
 www.harborfreight.com