A/C Guide posted here some time ago.

DuaneEstill

Banned User
Someone posted an excellent detailed guide for the proper rebuild of the A/C, may have been the old Xweb. Was wondering if anyone knew where that was/is, as I'm getting to that phase now. It's not the difficult to get the 'old' stuff down here. The balmy, sticky, Southern summers that I've haven't missed for 44 years is officially here.
 
A/C rebuild.

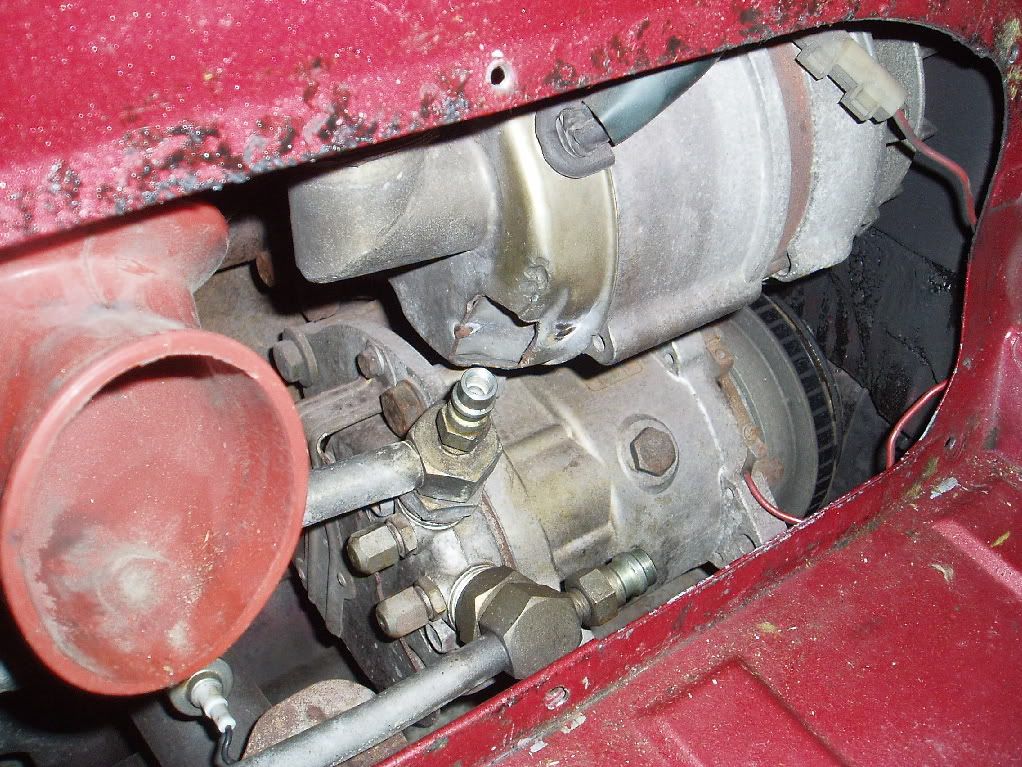
Duane, I have redone the A/C on my 87 and it works very well. I installed a new shaft seal on the compressor about 2 weeks ago. The compressor is a Sanden 508, the counter guy at Car Quest looke up the compressor then what vehicle used the compressor, then looked up a jeep that used it and found the seal part number. The seal was $29 had it the next day. Some guy say they purchased a tool to install it, but If you are careful you don't need it to change the seal and remove the old one.

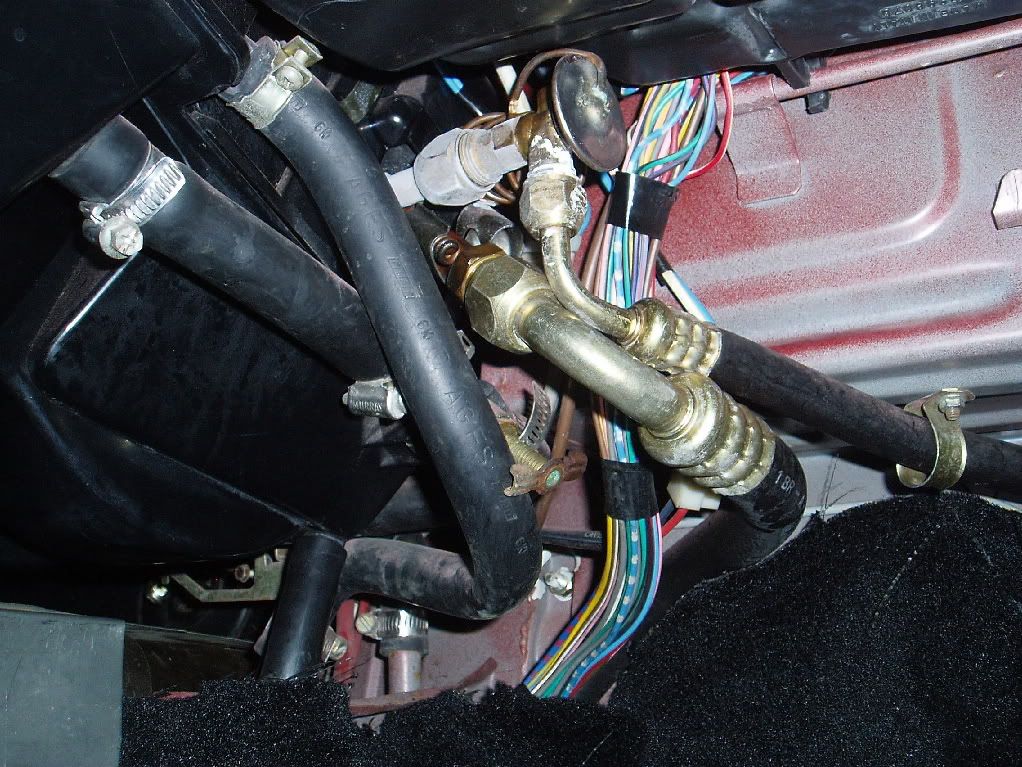
I have also changed all the O ring seals I purchased a bag from Car quest and installed the 134a ports. When I did the recharge I first used a can of Dura Cool and topped up with 134a. When you install the 134a ports the Alternator end cover will have to modified, see pictures.

Adapters-1.jpg


ExpansionValve-1.jpg


If the Expansion valve is working correctly and the system is charged you should get frost like this. The X does not use a frost sensor, but a heat and pressure sensor on the high side line at the air dryer to assume there is frost on the evaporator. Goofy yes, but if you need more explaination just ask.
Pressureswitch.jpg
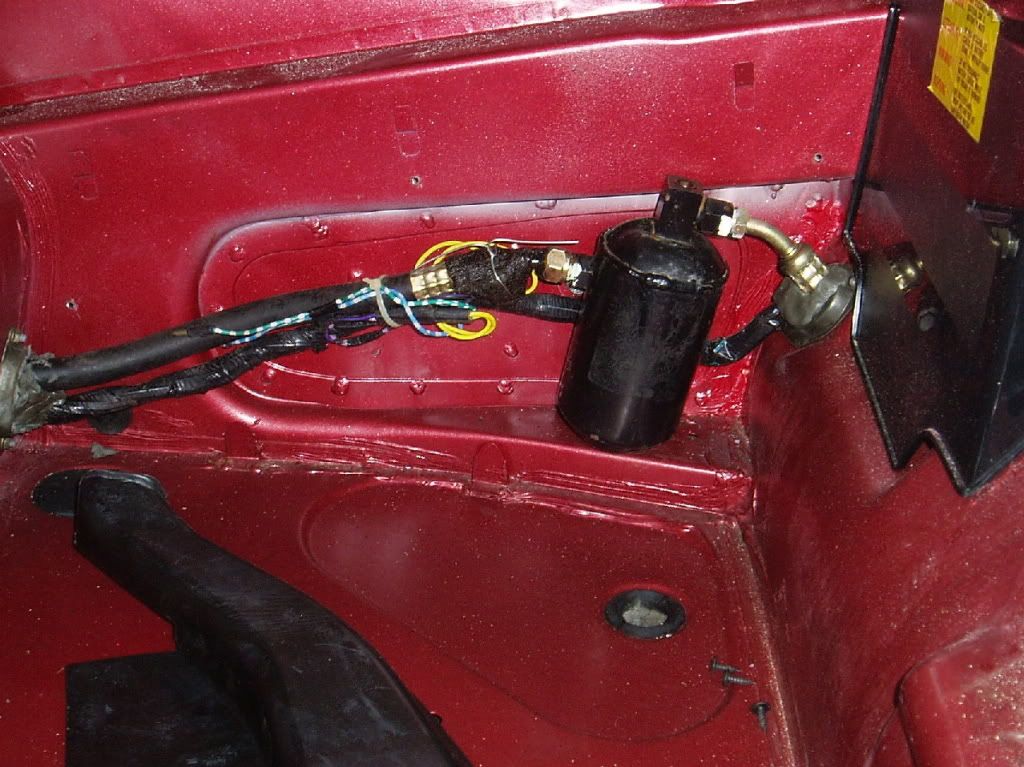
Make sure these switches are secured against the pressure lines in the front trunk.


This where I bought the expansion valve for $20.
Nostalgic Air Parts [info*nostalgicairparts.com]

Pressures-1.jpg


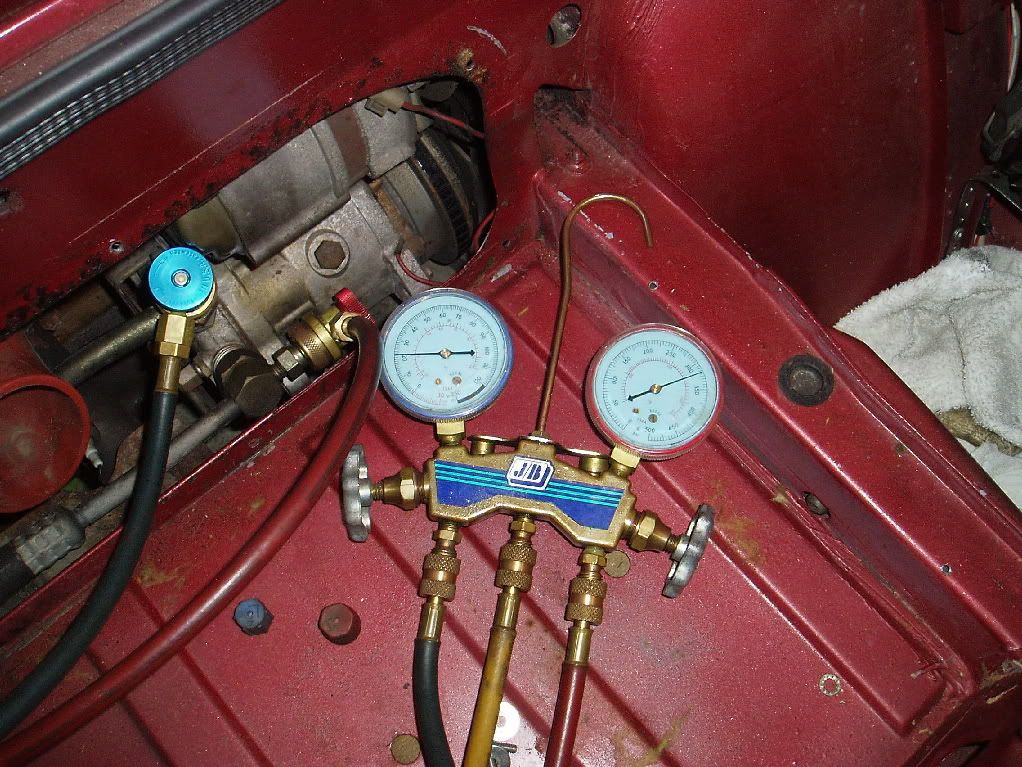
This how the ports connect, low side about 20 PSI, High side just over 300PSI.

Orings.jpg


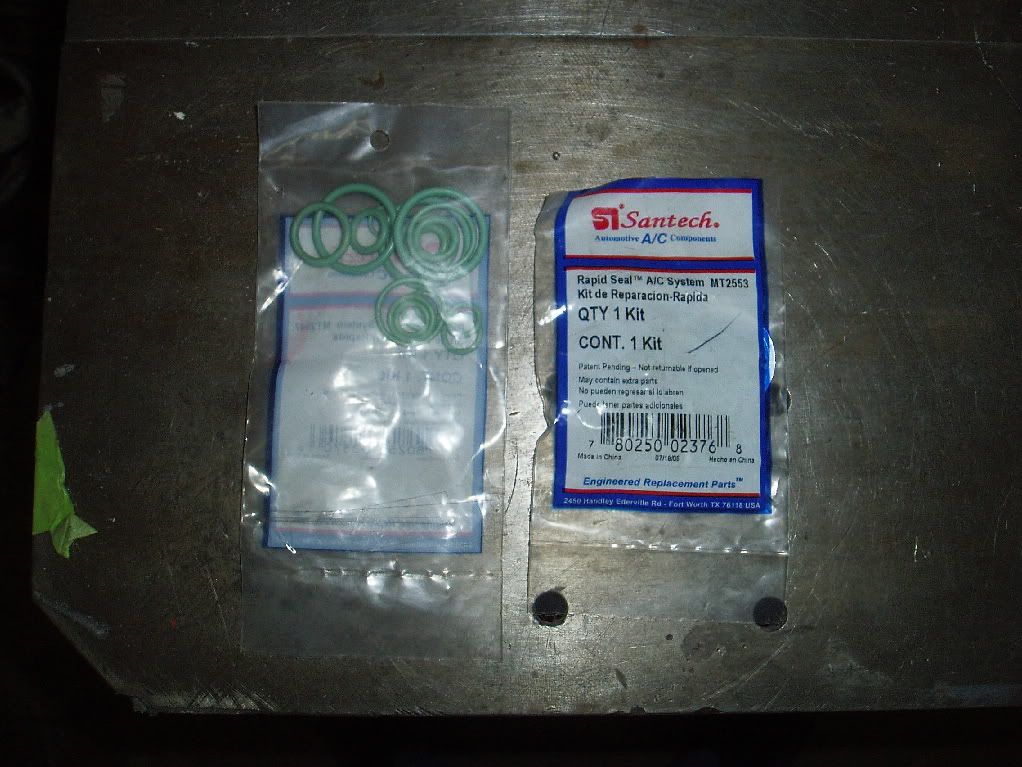
Seals from Car Quest, no vehicle type just a bag of them, more than enough to do an X.


If you have any Questions just email me.


TonyK.

Grimsby Ontario Canada.
 
Nice pics & explanation of the system.

Don't you think just over 300 high side is a little too high?

I added a 7" 500CFM fan on my condensor for exactly that reason - I'm used to seeing around 250 high side on most setups.
 
According to the manual.

The high side pressure switch opens at 340 to 360 PSI, Even then it is within operating limits. The pressure bleeds down and the compressor will cut in again.

The pressure of 300 psi+ is with the engine rpm at 2500. I find with these pressures the A/C works very well on humid days.

TonyK.

Grimsby Ontario Canada.
 
OK - I was seeing 325psi at idle. My new fan kicks on pretty soon after AC is operating - so even though I haven't rechecked pressures, I have to assume it's doing it's job. AC certainly is crispy cool :grin:
 
Nice write up...

Curious, did you have new "barrier" type hoses made up, or did you use the existing hoses that came with the car?..
 
Hey Tony... will just about any 508 compressor work...

I believe Rudy purchased an aftermarket "kit" he was gonna install and found his NEW Sanden compressor bolted right up and aligned perfectly.

If so... I believe a NEW compressor can be had for less than 150 bucks... which might be a better alternative to those who have more money, than time, tools or knowledge.

Your thoughts?
 
It's a dream.

I've never had AC on any of the 8 Fiats I've owned. Only had A/C actually installed on the current 79 X. The Pinin' Spider had the funky A/C ripped out before it went into the previous owner's collection.

It's almost weird to actually imagine being A/C cool driving in an X, but I'm on it. Is there a place where this new implant has been documented? Well worth it considering the South, I'd say. Can you use 134 with the newly implanted units?
 
Air Conditioner information

Hi Duane:eek:mg:
I recently purchased a used original X19 air conditioning unit from an 88 Bertone that I plan to instal in my X. I found the information on the Greek X19 Club site very useful:
x19gr.50webs.com/
 
Duane... Rudy never installed the entire system...

... and sold the car to a "gentleman" in Vegas...

So there is no documented install of an aftermarket system that I know of... and all are 134A systems, AFAIK.

I installed such a system that was supposedly a bolt-in for my '69 Vette... and much of it was... but it was the undocumented issues that I hadta customize that really slowed me down. What was great though... was the system sealed up nicely and everything worked the first time and cools fantastically.

With this ONE installation behind me, I felt confident that customizing a system, and possibly installing the entire evaporator unit in the front trunk, might even be a better alternative... and then just ducting into the cockpit. We even discussed the condenser being installed in the rear or even in a "Dallara-styled" wing...

HA... Lots of brain-storming being done here but we never got the opportunity to apply some of the ideas...

YOU could be the FIRST!
 
Additional information.

I did not use or change to barrier type hoses on this car, On my son's RX7 I had hoses made up or rather purchased the hose and ends and had a Hydralic shop crip them for me. That car has not had a recharge in 4 years. The Sanden 508 should be the same no matter what car it came from. At the time I didn't think of purchasing or costing a new compressor, I just figured changing the $29 seal to be the solution. Either way a compressor must come out and go back in. Changing the seal isn't tough, you just have to be carful.

TonyK.

Grimsby Ontario Canada.
 
Did you replace the air dryer?

Did you replace the air dryer or just flush and refill with R134a oil (can't think of the name of the oil right now)? The retrofit book I bought said that it should be replaced with a drier that is compatable with the R134a gas, but finding that for an X should be fun! LOL

Thanks,
 
Did you replace the air dryer or just flush and refill with R134a oil (can't think of the name of the oil right now)? The retrofit book I bought said that it should be replaced with a drier that is compatable with the R134a gas, but finding that for an X should be fun! LOL

Thanks,

Ideally, perhaps, but you can simply add the conversion valves to the high/low side compressor fittings & add refrigerant oil, recharge (after evac of any R12 & drawdown to check for system integrity).
 
Talked to my mechanic about this yesterday...

Ideally, perhaps, but you can simply add the conversion valves to the high/low side compressor fittings & add refrigerant oil, recharge (after evac of any R12 & drawdown to check for system integrity).

He says pretty much the same thing, evac the system of R12, add 2oz of the R134 compatible oil, change the fittings and charge up. He says the success of this breaks down like this:

50% works great
30% works ok
Remaining 20% works mediocre or doesn't work

He says R134 systems are much more sensitive to having the right amount of refrigerant in them than R12 systems.

We're going to give it a try next week, so we'll see.

Pete
 
Just a point here.

I did not change the oil or dryer, but removed the dryer and left in my welding electrode oven for a week to force out mositure. If you read my first reply I clearly state that I use 1 can of Dura Cool then top up with 134a to about 325 PSI at 2500 rpm. The Dura Cool makes a big difference in how the system works. The expansion valve must frost for the system to work correctly. If it doesn't then you are back to square one, a system that does not work. You can charge the whole system with Dura Cool after pulling a vacuum for 45 minutes or so depending on, how long it has been apart and how humid it is where you live. This refrigerant requires a lower pressure to liquify than 134a. This puts less strain on the compressor and less stress on all pressure components.

I did add about 2 oz of Retro oil made by Castrol that is compattable with both R12 and 134a systems. For this reason I did not flush out the lines of the existing system.

TonyK.

Grimsby Ontario Canada.
 
Thanks... my thoughts exactly...

If I had the skills and tools and experience I probably would attempt a rebuild or reseal myself. Thank God the compressors are reasonable though! HA!
 
Along the lines of what TK said...

... but using a totally different methodology...

When I installed an aftermarket system on my Vette (Hot Rod Air) I took it to a shop recommended by a few friends...

They attached two hoses to the high and low side of the system to a big box machine and pushed a button. Then the took a break and had a coke and some chips.

Some light and buzzer went off about 30 minutes later and they asked me to start the car and test the system. Worked perfect!

I dunno what the machine is called, but it first evacuated the system, tested for leaks, (insured it held pressure), then charged it. All in one operation.

Cost was 100 bucks.
 
Last edited:
I rented the tools from Autozone for FREE!

Well, it's a tool rental. So, I'll get my $320 back when I return them. I just recharged my truck (after replacing the condensor and dryer) for $30 (condensor and dryer were much more expensive) and pulled a vacuum on the X last night after flushing and new O-rings and it's holding. :) So far so good!
 
There ya go... and BTW...

How much Freon does a typical X and your truck use and what does it cost?

And tell us more... A vacuum pump, guage set, anything else... leak detecter???
 
retrofit info

The vacuum pump rents/buy it for around $200. (get it back when returned)
The manifold gauge set rents/buy it for around $100. (get it back when returned)
Cans of R134a are between $8 - $15 per 12oz can (X used about 4-5 cans)(truck used 3)
Oil is about $15 a can (need 1)
new O-rings are about $12 for a universal set
Flush was about $16 per can (used 3)
PITA factor = priceless

Gotta get the new cam timed up and the engine back in the car (and the trans fixed) to see if it will actually work. I've owned the car since the early 90's and have never atempted to get it working, but always wanted to. I'll post results (and pics) went I'm done.
 
Back
Top