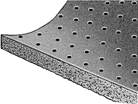
Firewall insulation

Hi Randy,

I'll be fitting this template to Mac-X for "proofing" sometime this weekend.
I'd do it earlier but there's not enough time at night time. (too dark!)
Should be 1 more release or if we're lucky this will be good enough.

It's close. Just want it as perfect as we can make it.

Thanks for your comments. -Bob
 
Hey Bob,
I have a complete original one that I removed from an '85 X1/9.
It is complete, and in one peice! Let me know if you want a few photos of it. I think its on here some where now I come to think of it.
Guy
 
Thanks Randy, but

It's already been done HERE:
We're at the fine tuning stage already.
I'll have a fit / finish report this weekend and we'll finalize the drawing then.

Thanks though.
 
When we do the final tweaks I can output a final jpg, high res PDF, EPS, and auto cad files. I will up the line weight on the more basic files for the Archive.

Thanks guys

Karl
 
Paging Karl, final tweeks on insulation

OK, here it is.

I printed out the template (I only had 11 x 17 at my disposal) and put it together at the measured size and fitted it into Mac-X.

Overall, we were pretty close. The thing we didn't account for was the 3D element of the install.
The firewall area is not flat, especially around the gas tank area.

So I placed it in the best position which lined up pretty well as you can see:

templatefitsm.jpg


For some reason, it's a little short to the right hand side, but the heater hose hole is in a perfect spot. (see lower right of Ign. access hole)

Left side was good all around but I've decided to move the hinge cutout a little over to the right and shorten the access hole to the gas tank hookup. I'd much rather it be a little too small than a little too big.

Right-Top hinge access cutout was quite a bit off. The screw lugs end up at what should be center but are to the right of the template.
I've reduced the Ign. access hole size to 90 percent of original size. I want to be sure the cover goes over without bare spots. Also, the cover gently bends the insulation inwards anyway, as it should.

Bottom-center hole is reduced in width by 30 percent. (too wide)

Right-most oval hole moved to the right about 1 inch but kept at the same vertical position and angle.

Overall width is increased on the right-hand side by 1.3 inches.

Below is the modifications needed. All changes are edited using a pixel editor so no changes to your dimensional notes were made.

Let me know if there are any questions regarding the overall template. This will be as accurate as it gets to the original.

THANK YOU KARL!

Firewall Insulation 2b draw:
fwinsulation2b.jpg
 
Last edited:
Henks looks and fits good

Good enough for several pro judges
it just seems to me guys like Henk and Matt and Chris O put a lot of their own money at risk to get us what we need to make our X's perfect. I appreciate them for doin it and support them.
Just my 2 cents.
 
This is not a competition

And certainly not one to interfere with any of their business.
This is to obtain information not published or documented by anyone and to improve upon the X1/9.
If any of the 3 vendors want to take advantage of that, they're more than welcome.

Case and point: Mark Plaia's pivots.

:)
 
Indeed I would be more than happy for them (Matt, Chris Obert, Henk or others) to use the files, by making them available for free they are in the public domain.

This is more something for DIY folks. I am sure the vendor for the originals can still produce the original product.
 
Great! This is it...

Consider this the finished product. (Karl, please read my PM first, tx,)

For those with later model X's, the center cutout (top center, sort-of) can be widened (double width to the right) to accommodate the wider hood latch spring.
For everyone else with the earlier models, this will work out perfectly as it is, sans the large square Ign. access hole cutout if you don't have one.

This becomes (by all intent) the firewall pattern for all X1/9's.

Karl, if you can post the biggest photo (jpg) you can (I think 2 megs?) along with the CAD file, that would be great.

Many thanks for your help on this. One for the archives.

Regards, Bob
 
Great File

Bob,
Thanks for all the work generating this drawing. Another great piece of information for the archives. :thumbsup:
Randy
 
This was a colaborative effort

Karl was / is the sketch artist. I'm taking photos and doing measurements.

There's 1 more update to the drawing... the "release" version. :thumbsup:
 
X1/9 Firewall Insulation Template

After quite a few back and forth photographs, sketches, printouts, markups and redo's, Bob Brown and I have created a set of properly scaled drawings of the firewall insulation.

We used the now cleaned and completely stripped Mac X to create the template. I will have Bob post the most up to date version applied to the firewall along with some tips for secondary cuts needed depending on the year X you have.

The short answer per Bob for installation is:
For the early models, the center (top) center slot will remain verbatim but the larger circle in the center and the Ign. access hole will NOT be cut.

For the late models, the top center slot with be double width (rightward from it's present position) and the Ign access and larger circle in the center will be cut. Those are the primary differences.
There are also two slits needed to go over/around the bracket on the right.

These files are placed in the public domain, you are welcome to use them, potentially for commercial gain if you wish. We make no claims as to the safety, commercial viability or any other use of this template. We are not responsible for any problems you may have in printing, cutting or otherwise using this template. Use at your own risk.

The link to a .ZIP file contains the following files:

.EPS (Expanded Post Script) which many sign cutting companies use to cut 2D and 3D letters. One can also use this on a large format printer to create a single piece of paper printout, you will need a plotter that has a 24" platen width and a piece of paper at least 60" long. Adobe Illustrator and many other programs can open and manipulate this file type.

.DXF (an Autocad file type) which can be used to laser or water jet cut a part complete from a sheet of material. One can also use this on a large format printer to create a single piece of paper printout, you will need a plotter that has a 24" platen width and a piece of paper at least 60" long. This file can also be manipulated in a variety of CAD programs to customize the part to your car if you need to. There are a variety of free programs which can open this file type.

.JPG (an image file) which you can print out in segments to paste together the template and trim out by hand. This will take the most work on your part but will of course be the least expensive.

.SKP (a Sketchup format for the free 3D program from Google) I used this to create the other files from. If you need to make adjustments to the template this would be a very easy way to customize it to meet your needs.

Bob has spent quite a lot of time honing this template for us. Your car a may be a bit different so you may find some minor issues with this template. If you do, please feel free to contact me and I will be happy to make an adjustment to assist you if needed. Please verify that you have printed it out at the correct size first before contacting me.

Without further ado, the files attached below.

Template Small JPG.jpg


An image of the second to last test fit, the two red arrows show the last two tweaks we made to fit the part:

X%20firewall%203B.jpg


I have deleted the previous files from my drop box and edited the previous posts references to them.

Good luck and a huge thanks to Bob Brown who applied his patience and skills to create this template. This was a nice partnership of two guys working together a thousand miles apart using email 👍
 

Attachments

  • Ins Files.zip
    581.2 KB · Views: 30
Last edited:
Large jpg with notes

Many thanks to Karl for helping put this together.
Without his efforts, this would not have looked anywhere near as good and would have taken a LOT longer to do. Thank you Karl!

I'm including a HUGE jpg image link as addendum to Karls post.
This image has the noted differences between the old X model insulation and the newer models. Noted differences are in RED.

For those "do-it-yourselfers", you can create a cutout pattern by D/L this image, CROP the width to meet the outside edges of the pattern only, then scale it to print at exactly 49.46 inches wide. (I rotated the image by 90 Deg. and printed it to 49.46 inches long :) )
This will likely be what I end up using for Mac-X.

An X-Web visual sample is shown below but the BIG D/L is HERE. Enjoy!

xinsulation3cm2.jpg
 
Last edited:
I saw some material

on one of those Hot Rod TV type shows over the weekend that looked very similar to the original material in the X, even down to the waffleboard pattern on the aluminized side. It was from the LMC people, who specialize in pickup truck restos.

I can't swear to it, but I think it was this stuff:

http://www.lmctruck.com/icatalog/fa/full.aspx?Page=62

Product # 48-2590, about halfway down the page.

Pete
 
It's late and my eyes are tired, but Product # 48-2590 looks to me like that cheap insulation that looks like carpet padding or drier lint with aluminumized sheeting on one side. JC Whitney used to sell it...
 
Back
Top