racerx
Autoxer
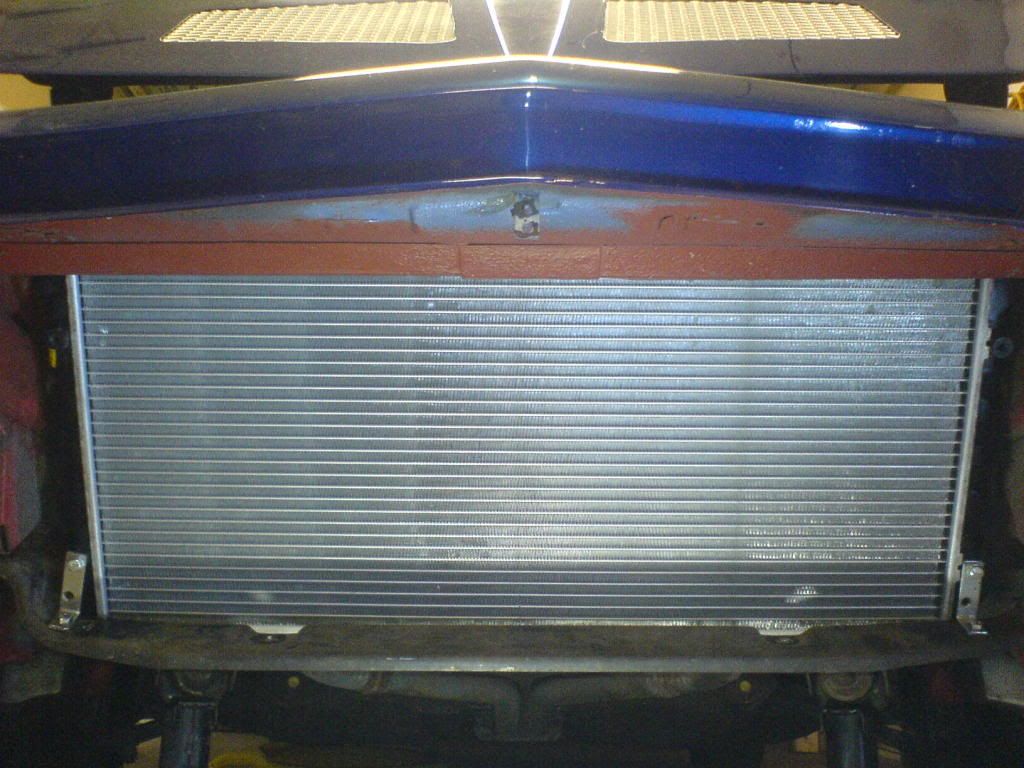
Hi everybody this is my version on the Volkswagen Scirocco Radiator replacement for the factory Fiat unit .When I first saw the discussion thread on it I thought wow that is so cool but when I noticed that it hung 2 inches lower than the factory radiator Oh that’s no good no disrespect to anyone I autox and sometimes safety pylons are hit on the front and I don’t want to the radiator to get damaged so I thought to myself there’s got to be a better way so I went ahead and ordered a Scirocco radiator there are two different sizes you need to get the one with the 26.62 in. x 12.62 in. x 1.25 in. core size and a 30 in x 12.75 in over all dimensions
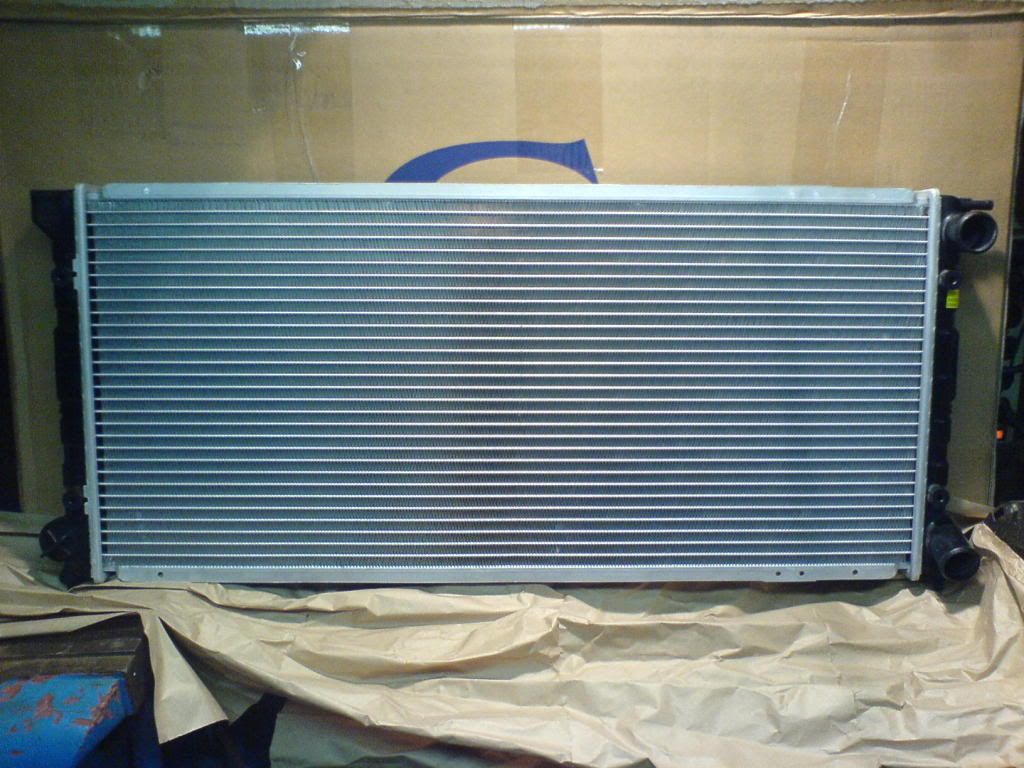
When looking for one try 87 Volkswagen Scirocco Radiator. I got mine from hear $69.03 I skipped the bidding and called the toll free number got it in 3 days.
Before you do anything put cardboard on the front and back of the radiator core to protect it wail mocking up you will be taking it in and out several times.
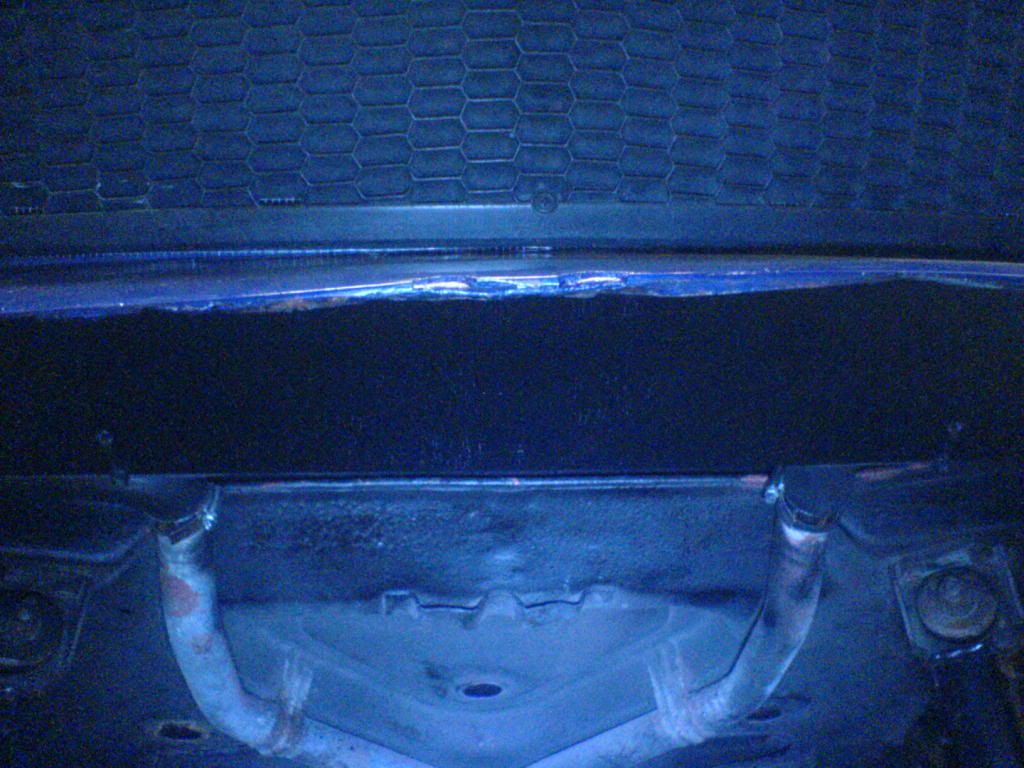
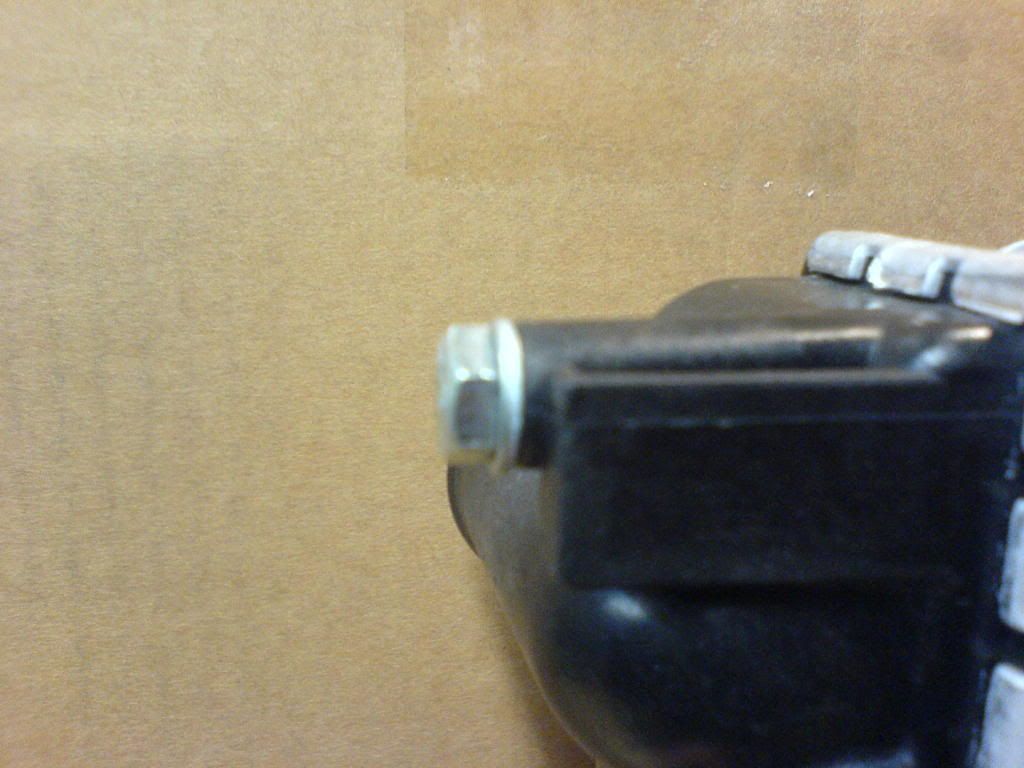
Let’s get started on the install. The first thing I noticed after taking the old radiator out I looked up at the upper radiator mount and saw a bracket with a hole in it
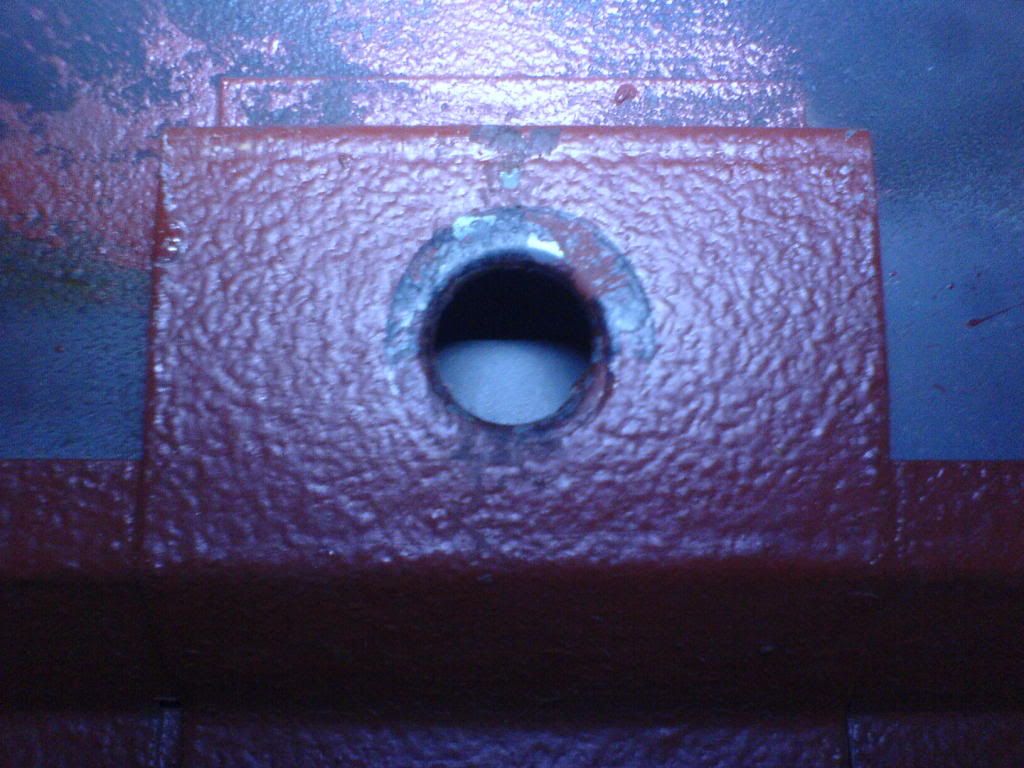 the factory radiator has a nub on it and goes in that hole my friends 77 doesn’t have that bracket (on 77 and older you’ll have to make a bracket) so I cut the bracket in half and bent the metal up to make a holder for the radiator
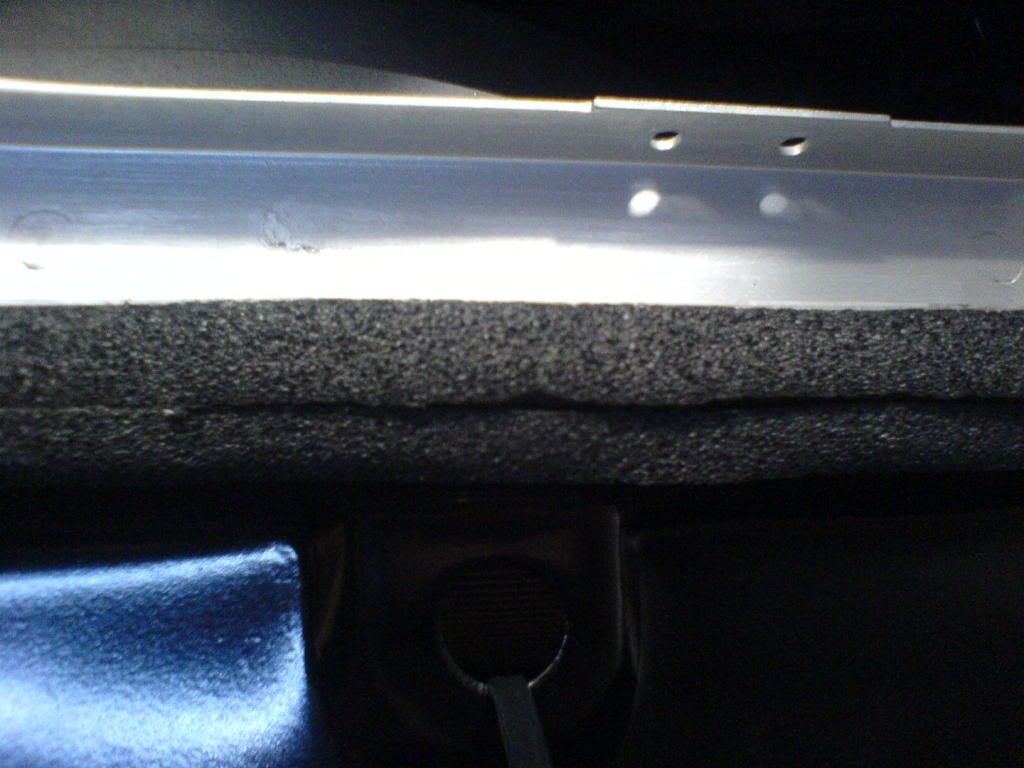
and that brought the radiator an inch and a half farther up get some rubberized home window flashing use it to pad and protect the radiator .

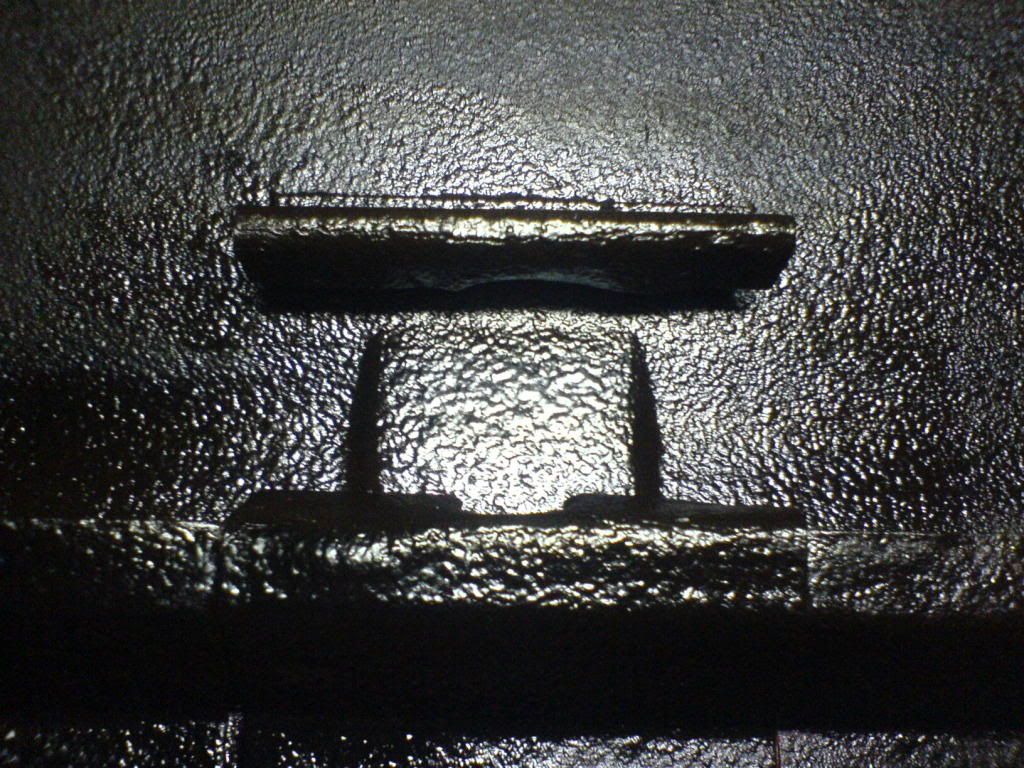
Now for the lower mount first take the factory lower mount and put it on backwards have 2 small metal L brackets ready put the radiator up behind the factory radiator bracket you may want a third hand (friend, wife) to hold the radiator while mocking up the L brackets you will notes on the front of the new radiator unused mounting nubs
You will need to make threads in these mounting nubs I used a 6mm x 1.00 Tap. line up the L brackets with those and make marks to drill new holes on the factory lower bracket drill the hole and bolt the new L bracket to the factory bracket if done right the radiator will be mounted very solid.
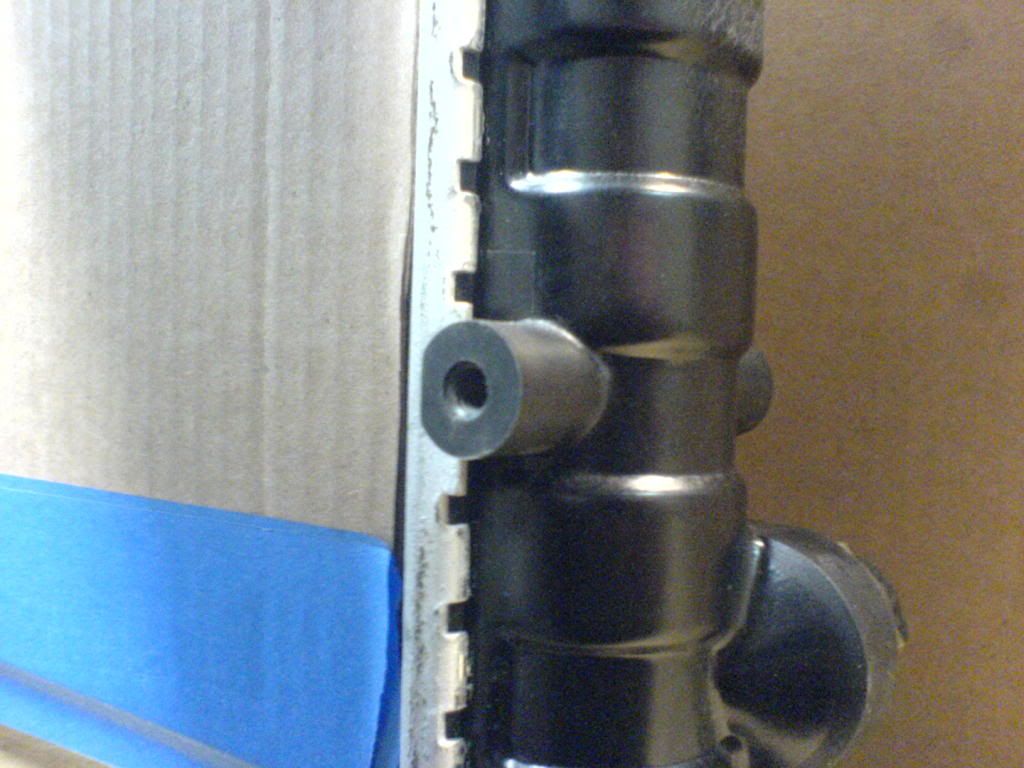
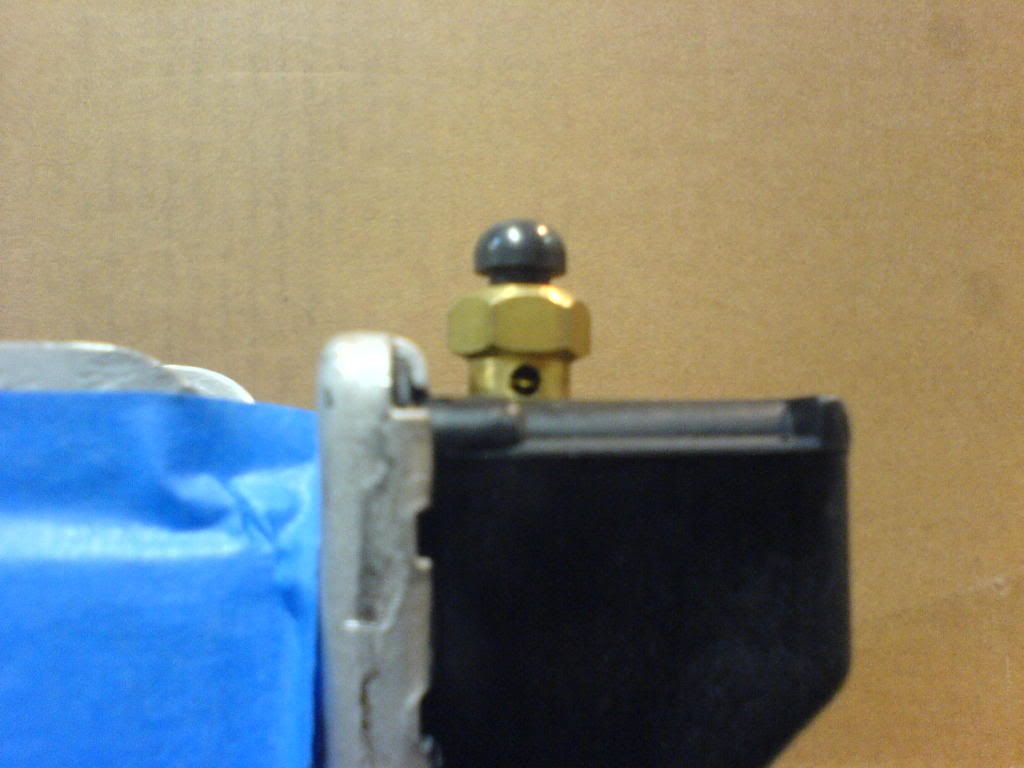
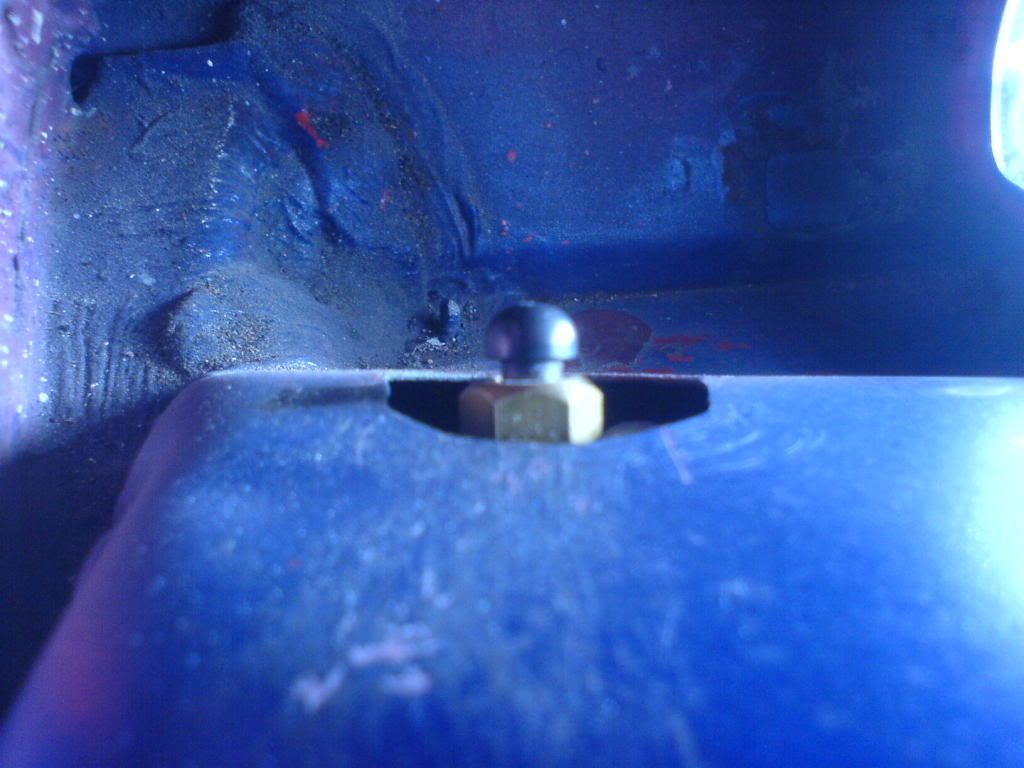
Now for the bleed valve I didn’t like the factory V Dub go threw the head light pod deal so I cut it off drilled and taped it with a 6mm x1.00 and put a bolt in it
Put some sealant on it I used Permatex 14A .I purchased a bleed valve from jags part number #555-51108
$12.99 I put this valve in what is the same place as the Fiat factory bleed valve you will have to drill with a 21/64 drill bit and tap with a 1/8 NTP pipe tap again put some sealant on the threads not to much you don’t want to cover the small holes on the bleed valve don’t over tighten any bolts on the plastic tank its just plastic it can break if this is done right it will line up with factory bleed hole.
The one that you reach to from inside the front trunk. You may have to open up
this hole a little.
Now for the coolant hoses the factory has the right side coolant tub the one under the car go to the upper right side of the radiator as hot coolant the coolant exits on the lower left of the radiator cooled down and goes to the left coolant tube the problem is the VW rad has the upper hot in and lower cool down on the same side so I took the Fiat factory right hose and discarded it than I took the Fiat factory left and reused it on the right hooking it up from the right tub to the lower VW rad lower in than I made a new radiator hose that will go from the left side tub to the upper VW rad I bout part # E71075 from Advance auto for $8.99 It has funny squiggle in the middle of it and the ends are pointing the wrong way but that’s OK because your going to cut out the funny squiggle only 2 inches of it and put a 1.25 inch coupler also known as a mender and reposin also known as reclock the ends of the hose to match the left side Fiat tub to upper VW rad this new hose you made has a small end and a big end put the small end on the Vdub’s radiator upper put the big end to the Fiat left side tub
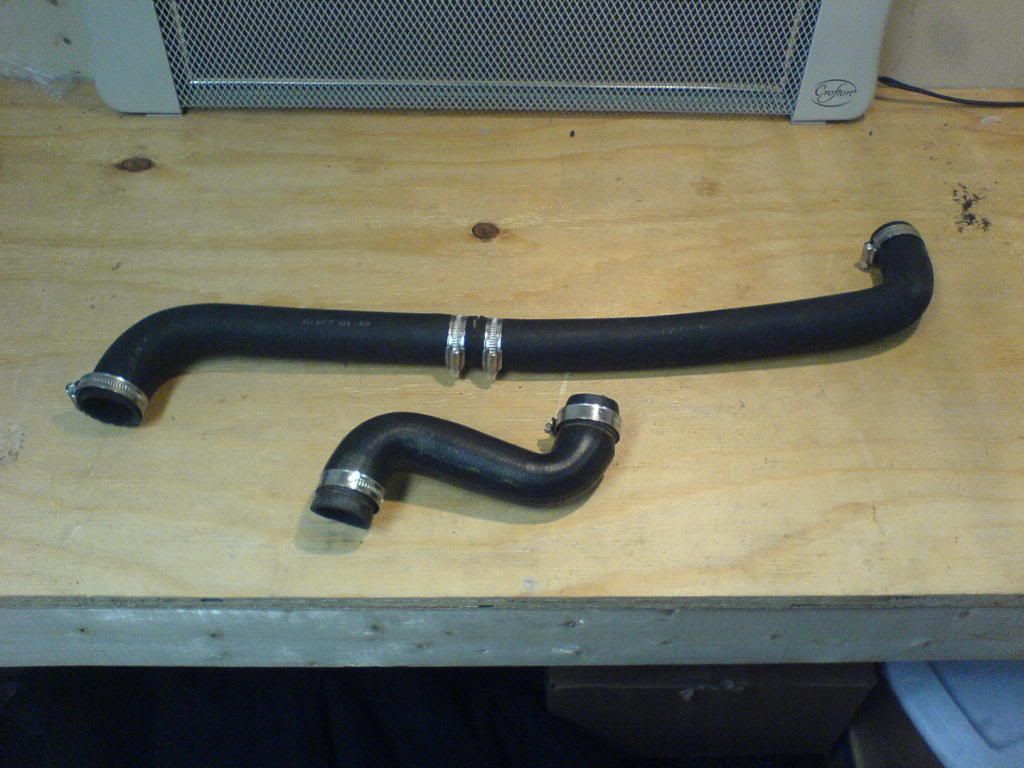
now the coolant flow into the radiator is hot to the lower so to fix that go to the back at the thermostat housing switch the hoses around the now upper hose is stretched so take it out of the car cut it and get a 1.50 inch x 5 inch mender put it on so it has three inches of the mender showing

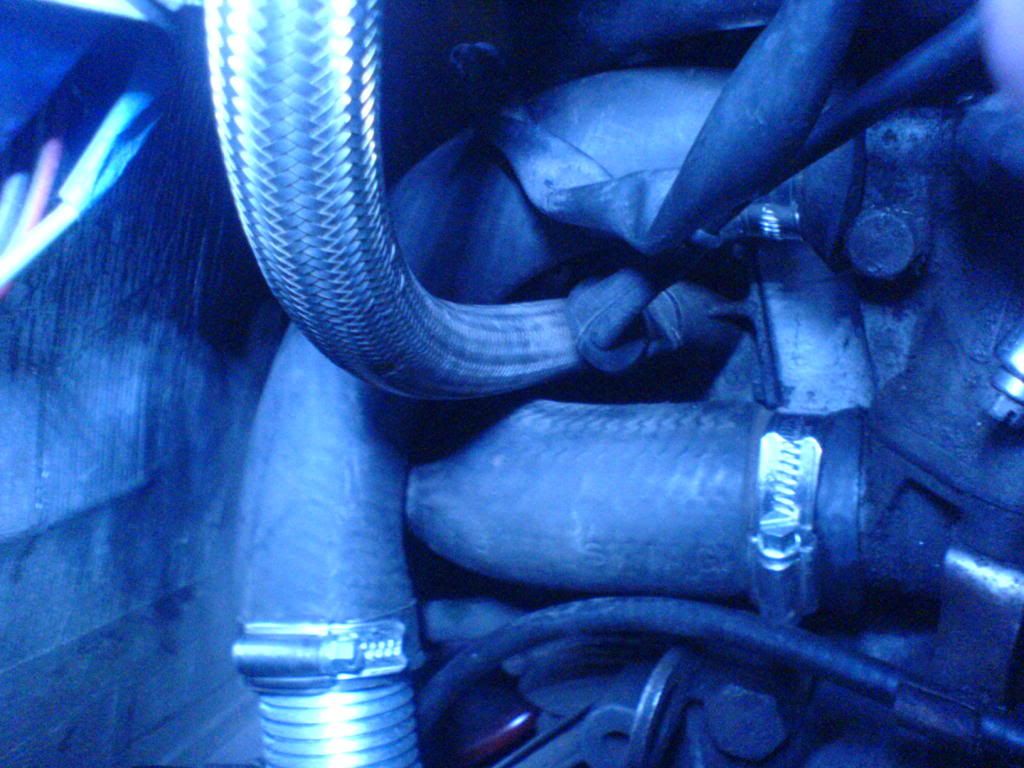
Clamp it and put it back in the car it will fit perfect. I got my menders from a place that custom fabricates hydraulic hoses they are made of metal I did not want to use plastic because it can brake they cost $8-10 bucks each.
The Fiat factory fan temp sender fits in the VW rad with no trouble at all.
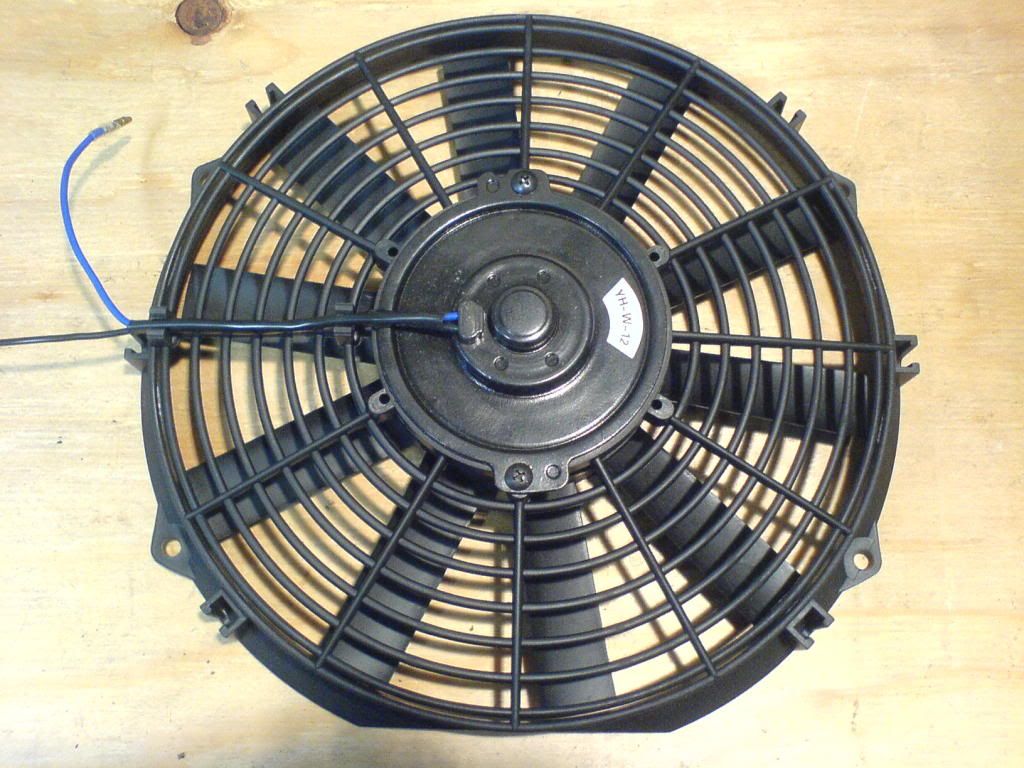
Now for a cooling fan it makes no sense to use the Fiat factory one there heavy and the Efficiency is bad I’m guessing about 600-800 cfm a new plastic 12” cooling fan is 1500-1800 cfm and can be purchased on ebay for 25-45 dollars for now I’m going to hook it up to the Fiat factory wiring the new fan only draws 12amps the Fiat factory fan draws 16 amps so I don’t think it will be a problem.

Now fill the system bake up with coolant I drained all of the old coolant out of everything including the engine block and heater core because I’ve been using standard coolant I’m going to fill with coolant made for aluminum engines / radiators the coolant is from Volkswagen .1 VW gal coolant 2 of redline water wetter the rest tap water.
Just so you know NOS Fiat x1/9 radiators are now impossible to get and even if you can get one be prepared to pay big money so unless you just have to have a stock unit. Well you can get a used one maybe it’s good maybe it not or you can have a radiator shop clean yours out but that can cost $150-300 or more so for the $160-200 (depend on quality of clamps and coupler you buy) the Vdub rad is cheaper, lighter (15lb lighter) and more efficient.
Parts list
1. 87 Volkswagen Scirocco Radiator $69.00
1. new radiator hose part # E71075 from Advance auto for $8.99
1. 1.25 mender $8.00
1. 1.50 mender $8.00
1. 12 inch fan $28.00
2. L brackets $3.00
1. bleed valve from Jags 12.99
the rest depends on what hardware ( nut and bolts )and hose clamps you my already own
When looking for one try 87 Volkswagen Scirocco Radiator. I got mine from hear $69.03 I skipped the bidding and called the toll free number got it in 3 days.
Before you do anything put cardboard on the front and back of the radiator core to protect it wail mocking up you will be taking it in and out several times.
Let’s get started on the install. The first thing I noticed after taking the old radiator out I looked up at the upper radiator mount and saw a bracket with a hole in it
and that brought the radiator an inch and a half farther up get some rubberized home window flashing use it to pad and protect the radiator .
Now for the lower mount first take the factory lower mount and put it on backwards have 2 small metal L brackets ready put the radiator up behind the factory radiator bracket you may want a third hand (friend, wife) to hold the radiator while mocking up the L brackets you will notes on the front of the new radiator unused mounting nubs
You will need to make threads in these mounting nubs I used a 6mm x 1.00 Tap. line up the L brackets with those and make marks to drill new holes on the factory lower bracket drill the hole and bolt the new L bracket to the factory bracket if done right the radiator will be mounted very solid.
Now for the bleed valve I didn’t like the factory V Dub go threw the head light pod deal so I cut it off drilled and taped it with a 6mm x1.00 and put a bolt in it
Put some sealant on it I used Permatex 14A .I purchased a bleed valve from jags part number #555-51108
$12.99 I put this valve in what is the same place as the Fiat factory bleed valve you will have to drill with a 21/64 drill bit and tap with a 1/8 NTP pipe tap again put some sealant on the threads not to much you don’t want to cover the small holes on the bleed valve don’t over tighten any bolts on the plastic tank its just plastic it can break if this is done right it will line up with factory bleed hole.
The one that you reach to from inside the front trunk. You may have to open up
this hole a little.
Now for the coolant hoses the factory has the right side coolant tub the one under the car go to the upper right side of the radiator as hot coolant the coolant exits on the lower left of the radiator cooled down and goes to the left coolant tube the problem is the VW rad has the upper hot in and lower cool down on the same side so I took the Fiat factory right hose and discarded it than I took the Fiat factory left and reused it on the right hooking it up from the right tub to the lower VW rad lower in than I made a new radiator hose that will go from the left side tub to the upper VW rad I bout part # E71075 from Advance auto for $8.99 It has funny squiggle in the middle of it and the ends are pointing the wrong way but that’s OK because your going to cut out the funny squiggle only 2 inches of it and put a 1.25 inch coupler also known as a mender and reposin also known as reclock the ends of the hose to match the left side Fiat tub to upper VW rad this new hose you made has a small end and a big end put the small end on the Vdub’s radiator upper put the big end to the Fiat left side tub
now the coolant flow into the radiator is hot to the lower so to fix that go to the back at the thermostat housing switch the hoses around the now upper hose is stretched so take it out of the car cut it and get a 1.50 inch x 5 inch mender put it on so it has three inches of the mender showing
Clamp it and put it back in the car it will fit perfect. I got my menders from a place that custom fabricates hydraulic hoses they are made of metal I did not want to use plastic because it can brake they cost $8-10 bucks each.
The Fiat factory fan temp sender fits in the VW rad with no trouble at all.
Now for a cooling fan it makes no sense to use the Fiat factory one there heavy and the Efficiency is bad I’m guessing about 600-800 cfm a new plastic 12” cooling fan is 1500-1800 cfm and can be purchased on ebay for 25-45 dollars for now I’m going to hook it up to the Fiat factory wiring the new fan only draws 12amps the Fiat factory fan draws 16 amps so I don’t think it will be a problem.
Now fill the system bake up with coolant I drained all of the old coolant out of everything including the engine block and heater core because I’ve been using standard coolant I’m going to fill with coolant made for aluminum engines / radiators the coolant is from Volkswagen .1 VW gal coolant 2 of redline water wetter the rest tap water.
Just so you know NOS Fiat x1/9 radiators are now impossible to get and even if you can get one be prepared to pay big money so unless you just have to have a stock unit. Well you can get a used one maybe it’s good maybe it not or you can have a radiator shop clean yours out but that can cost $150-300 or more so for the $160-200 (depend on quality of clamps and coupler you buy) the Vdub rad is cheaper, lighter (15lb lighter) and more efficient.
Parts list
1. 87 Volkswagen Scirocco Radiator $69.00
1. new radiator hose part # E71075 from Advance auto for $8.99
1. 1.25 mender $8.00
1. 1.50 mender $8.00
1. 12 inch fan $28.00
2. L brackets $3.00
1. bleed valve from Jags 12.99
the rest depends on what hardware ( nut and bolts )and hose clamps you my already own
Last edited:
")