PAINT XPERTS! How do I best strip paint from plastic, rubber, & stainless steel trim?

Anthony G

True Classic
1) The PO painted the black plastic scoops a glossy black.

If I can, I want to strip it off and return them to their factory flat (or semi-gloss) black without wrecking them.

What's best to use? (If I have to, I'll just source some new scoops, but I figured it couldn't hurt to try and save them - and I might learn something in the process.)

2) The PO also got some red overspray on some black rubber trim pieces (rubber around markers, rubber at rear window) during a cheap paint job.

What's best to use to remove paint from black rubber trim without wrecking it (if possible)?

3) And lastly (oh glorious PO), the PO painted ALL the stainless steel trim (windshield bezel, horizontal door window rails, horizontal targa trim) flat (or semi-gloss) black, which wouldn't necessarily be bad, except that he did a crappy job of prepping (roughing/priming) the surface, so it's wearing off.

How do I best strip the black paint off the stainless pieces without wrecking them?

4) The car is a solid red 86. I'm about to have it completely repainted at the shop (probably to the original PPG 886 or similar primary, rosso corsa, etc) after some body repairs. I have stripped all of the trim myself to save money. The shop owner has been great. He's let me come there to strip/prep it while they're doing the body repairs.

I'm considering repainting all the stainless trim flat (or semi-gloss) black again, to get that slightly more modern red/black motif, which I like. (It's an 86, so the rear window bezel, the outer door handles, and the vertical side window strips are already black anyway. I would just have to re-do the horizontal door trim, the windshield bezel, and horizontal the targa trim.)

If I DO choose to go all black trim instead of keeping the newly uncovered factory stainless, how do I PROPERLY sand/prep the stainless to prepare it for a good permanent black paint job that will stick? And what primer (if any) and black paint should I use on it? Feel free to be very specific (step by step) down to the details on this one. Anyone who has done this successfully, I'd really like to hear exactly how, so I can do it right.

Thank you paint X-perts!

Look forward to hearing from you!

And I REALLY look forward to FINALLY sharing my face-lifted 86 with you all. Hopefully not much longer now..
 
(I accidentally posted this first in 'discussion'.)

Moving it here for properness and posterity.

Got two good responses there so far, as follows (see next two replies):
 
Anthony who?

Black-Tooth
Tony Natoli

Join Date: Jan 2008
Location: Santa Clarita California

------------------------------

I have ONE word for you...

DUPLICOLOR

Use TRIM BLACK on all hard surfaces for a factory like SATIN black finish and use their VINYL & FABRIC spray for all fabric, vinyl and flexible rubber areas.

For the side scoops and the like... lightly sand the old color and then spray with Trim Black. For the SS parts... use a bucket and LACQUER THINNER... soak and then brush & wipe away old paint.

To repaint SS trim... rough up with 3M Scotchbrite pads and FIRST decide if you like the FLAT GRAINED look of Aluminum and if not, paint with Trim Black for a factory look.
__________________
My best,


Tony
"Black-Tooth and me since 1983"
 
For the rubber.

TonyK
True Classic

Join Date: Oct 2008
Location: Grimsby Ont Canada

------------------------------------

Use Tal Strip, paint stripper. It will soften the paint and clean the rubber back to it's black colour. You can use it on metal trim and some plastics to remove the old paint.

TonyK.

Grimsby Ontario Canada.
 
What is this, some kinda Tony party?!

What a Fiat cliché! :D

Thank you for the excellent info, Two Tony's.

Love, Third Tony
 
Stainless steel, I would use fine steel wool.

Rubber, New razor blade and scrape it off. I spent hours doing this to the rubber on the Otas. It generally flakes right off.
 
Try the easy stuff first

Apologies if this had been mentioned but first try "goof off" and/or 3M paint buffing compound on the plastic and rubber. There is also a paint remover product at Hobby Shops for plastic models designed to keep from destroying the plastic - for botched paint jobs. I would soak the stainless parts in lacquer thinner. Just keep it immersed or keep going over it with a brush with thinner until it washes away. If it is a urethane paint than the Talstrip is probably the best stuff. Good luck.
 
Never tried it myself,

But I know that for plastic models, brake fluid is recommended to remove paint without damaging the plastic. Just make sure that you have the kind of brake fluid that warns against contact with painted surfaces.
 
I love your color choices!!

I am doing the very same scheme on my X. It too is an 86. I got it with the red and black, but it all needs to be redone. I have wondered about powdercoating the windshield and rear trim. So if anyone has opinions on that please add them. As for paint removal, I LOVE using the Goof Off as mentioned above and Eastman's Pre paint prep spray. I really love Goof Off on rubber items. It seams to not only get the paint off but also seem to refurbish to, or at least get things really cleaned up (paint, dirt, oxidation, wax, etc.) When you get done put pics up for sure!! And thanks to all who have added to this post since I have had many the same questions! Good luck with your painting!
 
Thank you guys for all the great tips!

If anyone comes along and has more insight to add, please feel free.

Very educational/helpful.

I think I will start with Goof Off or the hobby shop stuff first for the delicate soft rubber parts, and lacquer thinner for the hard plastic and stainless, before moving on to stronger paint strippers. Couldn't hurt to err on the side of gentler first, right?

Will split this into two steps -- will focus on getting things stripped and cleaned off first, then will see what I'm left with before resurfacing/repainting.

Thanks again! :worship:
 
Oven cleaner

I have heard that hobbyists use oven cleaner to strip paint from styrene plastic models. Styrene is (as plastics go) pretty delicate stuff; so it should definitely be safe on the side scoops and rubber. If it was rattlecan paint, lacquer thinner will work like a charm on the rubber, but of course don't use that on the plastic.
Overspray from painting the car should be 2K (paint + hardener) paint and neither the lacquer thinner nor the oven cleaner is going to do a lot -but it might be enough.
If it's thick enough on the rubber you can crack it off little by little. If it's thin enough the lacquer thinner might be sufficient.

For the SS trim: if you want the black out look, get rid of it, where you can.

During my repaint, I replaced my windshield gasket with one that doesn't have the trim; so that's blacked out. The panels on the A pillars, I just removed. I could always put them back, but I'm not sure why they were there; I've driven in the rain since and haven't missed them.
The rest of the SS trim I covered with blackout tape.
These were also made in black from the factory, if you can get them; but the blackout tape worked fine, it looks great.

The blackout tape is quite stretchy, so it does a good job around curves and stuff.

For the targa bar trim I was able to get a set of the factory black pieces.

It's often difficult to keep a weather-exposed painted satin black finish in good condition. 2K finishes are more durable, but on small items (like wiper arms) sometimes the convenience of rattlecan paint makes it easy enough to just keep refinishing it.

I've been pretty happy with Eastwood's Chassis Black.
 
Thanks Wyverndude! Helpful clarifications and good alternative suggestions.

The paint overspray on the side marker rubber is pretty thin, so maybe some oven cleaner will do the trick. I like the idea of using hobbyist stuff that is used on delicate plastic models as a jumping off point.

The scoops have a pretty thick layer of cheap looking black glossy paint on them. So there will be more to remove there.

I've read mixed things about using lacquer thinner on the hard plastic. Some, like you, say NO, and other say yes, but don't leave it on too long, and clean the part thoroughly with soap and water after the paint is removed.

It hadn't occurred to me to get rid of the trim in spots. Interesting suggestion, particularly considering your observation that trim paint doesn't hold up particularly well over time.

Certainly would be a cleaner, more elegant, perhaps more permanent solution to find whatever trim pieces I could in factory black. Didn't even know the targa trim pieces came in black. 87 perhaps?

I'm curious to know what the X looks like without the windshield trim, and the A pillar panels. Got any pics? :)

My body shop guy is a little hesitant to pull the windshield for fear of cracking it (he thinks the old ones are vulnerable and it certainly may be hard to find another one), but I'm considering pulling it for the paint job.

All that would be left then is the door window (horizontal) stainless trim. so you like black out tape for that, huh? I imagine myself struggling with it and not getting it to lay right/look good, but you give the impression of a great result. Hmm..
 
Weight savings of removing A-panel trim pieces..

6 oz ?

WooHOOOOO!!!

FINALLY, the defining edge thats gonna make my stock 86 go 0-60 in under 6 seconds.

:excited:

BONUS: removing windshield trim; 1lb?; = 0-60, 5.5 seconds for sure.
 
laquer thinner "the automotive stuff" on the stainless stuff as well as rubber parts.

carefull if the rubber is dryrot the thinner will eat into it.. Dont use thinner on the plastic parts, it will eat them up. the vents were probly effected by dryrot. a coat of krylon will stick like glue..
a semigloss will look very much like the original surface.. I also see them in good shape cheap on ebay quite often.

I usually take the stainless stuff off the car so I can use a very wet rag of laquer on them without worrying about getting any on the paintwork. scrape your windows while your at it , there is likely oversparay all over the glass as well.

the longer the paint has been on there the longer it will take to remove it.. take your time.
 
The 'removing paint from RUBBER' list.

Between suggestion here and searching the web, here's what I've got.

MIND YOU, THIS IS NOT A GUARANTEED LIST! SOME OF THESE ARE ANECDOTAL AT BEST. TRY AT YOUR OWN RISK!! AND RESEARCH BEFORE DIVING IN!!

It's quite a list:

Brake fluid
Oven cleaner
Bumper stripper
Goof Off
Go Gone
Mr Clean Magic Eraser
3M Remover
3M buffing compound
Motsenbocker's Lift Off
Hobby shop plastic model paint remover
WD-40
Fast orange
GoJo

DO NOT USE:

Vaseline (or petroleum based substances) (will rot the rubber)

I also get the impression that lacquer thinner and paint stripper are too harsh to start with, especially on delicate aging rubber. Try the above first. Again we're talking RUBBER for this list, not plastic or stainless.

Corrections? Additions?
 
The 'removing paint from STAINLESS STEEL' list.

Fortunately a Google search of "removing paint from stainless steel" will provide a wealth of info, since people commonly want to clean and remove stains from their stainless steel household appliances, sinks, etc.

Pretty much any solvent (without chlorides!) will remove paint from stainless without damaging it. DON'T GET THIS STUFF ON YOU GOOD CAR PAINT!! Obviously, it's better if the trim is off the car when you do it. And make sure the trim is 100% clear of solvent before putting it back!

Some choices (all should be followed by a thorough rinse):

MEK (Methyl Ethyl Ketone)
Mineral Spirits
Lacquer thinner
Turpentine (seems to be the most common suggestion for household use)
Paint Stripper (Tal Strip, for one) (this is a stronger option, may not be necessary)

Here's a great link:

http://www.metalresources.net/index.php?option=com_content&view=article&id=132&Itemid=101

Corrections? Additions?
 
The 'removing paint from PLASTIC' list.

Consensus is, generally you want to start with something mild and gradually move to something harsher as needed, so as not to damage the surface of the plastic.

Listed more or less mild to harsh:

Vegetable oil
Soap and water
Rubbing alcohol
Pinesol Orange
Linseed Oil
Simple Green
Scale Master (plastic model paint remover)
Chameleon (plastic model paint remover)
Bumper stipper
Goof Off
Goo Gone
Brake Fluid
Paint thinner (careful, can remove color/affect surface)
Lacquer thinner (careful, probably WILL remove color/affect surface)

DO NOT USE metal paint strippers. Probably too harsh.

Still working on this one.. To be edited..

Corrections? Additions?
 
Blackout pics per request

Mine is a 1981, it was all bright trim from the factory.

Here's two shots of the windshield rubber (aftermarket) and showing the targa drip rail, wing window rail, and window scraper trim, as covered with the blackout tape. This also shows the A-pillar without the "drip rail/gutter" thing.
pict0001de.jpg


pict0008qq.jpg


Your paint guy only has to worry about cracking the windshield if he's trying to save the windshield gasket. If you're going to be replacing the gasket anyway, you can just cut it. Then run a wire around it, and it should be pretty easy to get it out.
I would recommend taking the windshield out, if you're thinking about it. Most X1/9's I've seen have rust around the windshield frame. Even if you don't see any. Those who know more about it than me may know whether they got that resolved by 1986 when yours was built.
If you can get a new windshield, it sure is nice!
 
Thank you for the pics, Wyverndude!

Trim work looks very clean.

Car looks great. (Nice customized mirrors too!) You should post pics of the whole care for all to enjoy, if you haven't already. (Maybe in the 'Official Member Car Picture Thread' in discussions?)

So the Targa drip rail you were able to find in factory black? Do you happen to remember the source?

And no rain leaks without the A-pillar drip rail, huh? Wonder if it would hold up in a heavy downpour..

The vertical wing window rail on mine is already black (86). Is yours factory black too (replaced on your 81), or is that black-out tape?

And finally, the black-out tape on the horizontal window scraper rail looks amazingly smooth and neat. Good job! That looks like an increasingly attractive option..

Btw.. thanks for giving me a vocabulary/names for these things. Haha. I finally have a sense of how to reference them.

You're probably right about leaning towards taking the windshield out if I'm repainting the whole car. Though it's a rust free CA 86, I know if there is any corrosion, that's likely to be a vulnerable spot. I will look into either ordering a new gasket for the original windshield trim rail (if available), or ordering an aftermarket gasket like yours. Again, if you remember any info about your source, please let me know.

My car is a red 86 (I think paint code 886, but the sticker has been removed). I want to either redo it as close to the original code as I can get (may be slightly toward orange), or another very primary red (Rosso Corsa perhaps) so it will in fact end up looking much like yours, with the simple, slightly modernized red with all black trim scheme. What color code did you end up going with for yours? And it a 2 or 3 stage job?

Thanks for the great info!
 
Now we're in my wheelhouse! Most of us Model Guys use EASY-OFF oven cleaner, when we botch a paint job. :sleep:It has to be the Yellow Can, "stinky" stuff. The Blue can, "Less Fumes" version, doesn't work as well. I've taken off a Top coat, back down to the primer, using a toothbrush in the detail areas, washed it off with DAWN dishwashing detergent and had contest winning results. For the most part, I used standard Rattle Can Auto Primers before I Airbrushed on the final color coats,using everything from Testor's Model Paints to Lacquer Fingernail Polish, just to get the colors "right". The Easy Off worked on everything, without disturbing the primer underneath.
Here's a model I built of my 74 "X", after I added the "Lone Ranger" mask and stripes.
X19b.jpg


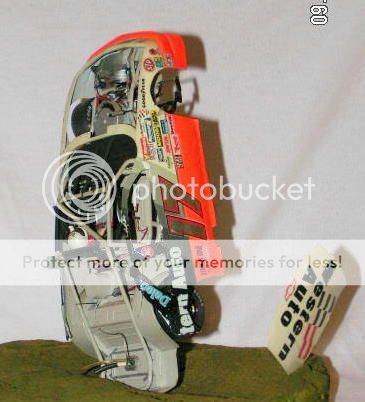
Some of us "Champion" model builders may spend MONTHS on one model. I've got a B-17 Bomber I "started" 20 years ago that isn't finished yet and I spent 18 months, "Wrecking" this NASCAR Lumina," just right. It won more Hobby Contest than DW won races, in the real car.:wink2::)
17DWWhirlwind00.jpg

17DWWhirlwind.jpg


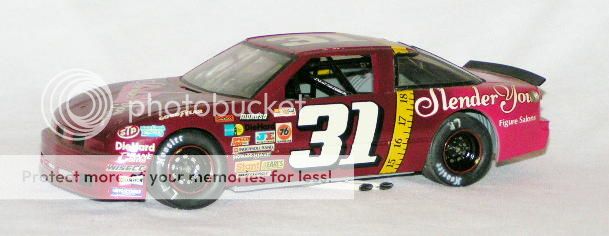
Here's the Fingernail Polish NASCAR
SlenderYou1.jpg
 
Back
Top