
You are using an out of date browser. It may not display this or other websites correctly.
You should upgrade or use an alternative browser.
You should upgrade or use an alternative browser.
Philippine X1/9
- Thread starter deocon1
- Start date
- Status
- Not open for further replies.
sorry Papa Tony
I know moving things is a tender topic at times but it seemed worth doing as this thread is a classic in the making and it is undeniably goin 'workshop' quick. I, just personally, was thinking this topic could quite easily become a Philippine X custom body build chronicle (its well on its way already) and people would want to reference it in the future workshop archive re: body
Maybe I'm just too "archive headed" these days from time spent sorting archives and ripping archives and etc archives, who knows... just sayin its easier to simply plant it here today than to end up wanting to relocate it en masse later anyway, like 1.0...)
(not wishing to sidetrack the thread") )
)
I know moving things is a tender topic at times but it seemed worth doing as this thread is a classic in the making and it is undeniably goin 'workshop' quick. I, just personally, was thinking this topic could quite easily become a Philippine X custom body build chronicle (its well on its way already) and people would want to reference it in the future workshop archive re: body
Maybe I'm just too "archive headed" these days from time spent sorting archives and ripping archives and etc archives, who knows... just sayin its easier to simply plant it here today than to end up wanting to relocate it en masse later anyway, like 1.0...)
(not wishing to sidetrack the thread
)Black-Tooth
Tony Natoli
Reminds me of the "Sorry Charlie" commercial...
OK... I'll wait until after April 20th and on MY birthday the following day... I'll ask to meet with the remaining Moderators and we'll restructure this place so much it'll be UNRECOGNIZABLE!
HAHAHA!
OK... I'll wait until after April 20th and on MY birthday the following day... I'll ask to meet with the remaining Moderators and we'll restructure this place so much it'll be UNRECOGNIZABLE!
HAHAHA!
well
By then I'll have an umbrella drink in my hand so you guys can all crunch heads together and do whatever comes naturally with it at that point.. I'm just trying to mess up and confuse you as much as I can manage before I have to turn in my keys! (as youd say,) HA!
By then I'll have an umbrella drink in my hand so you guys can all crunch heads together and do whatever comes naturally with it at that point.. I'm just trying to mess up and confuse you as much as I can manage before I have to turn in my keys! (as youd say,) HA!
Hi Walter,
I did the spacer myself. 3 inches offset. But I guess that much space is detrimental to my son's safety. So it stayed there only to aid positioning the rims the way I want it. Later on, I will fabricate my own suspension with "adjustable coil-over shocks" and wishbone members to eliminate the need for spacers.
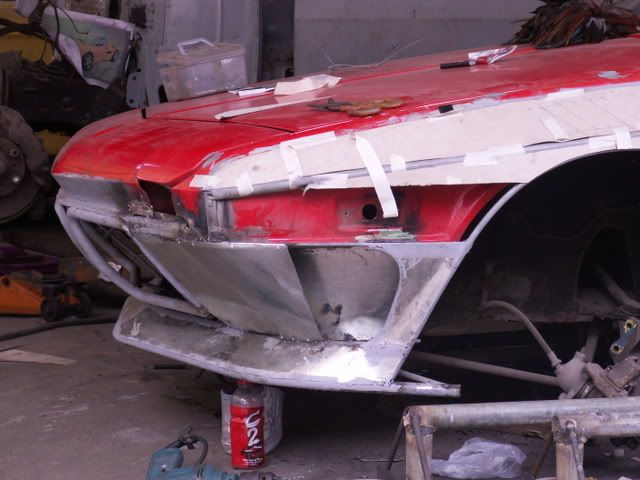
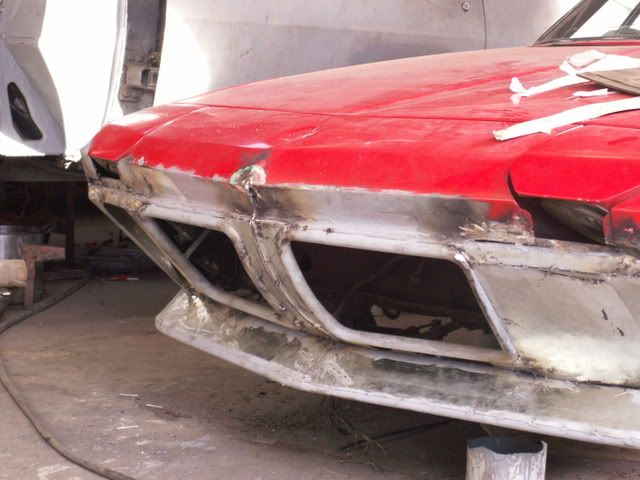
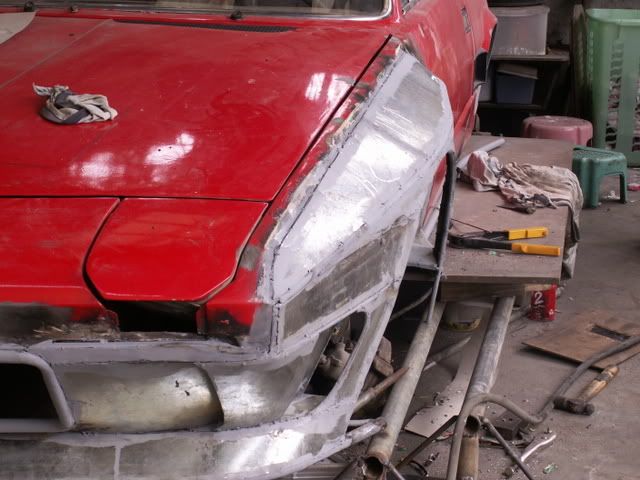
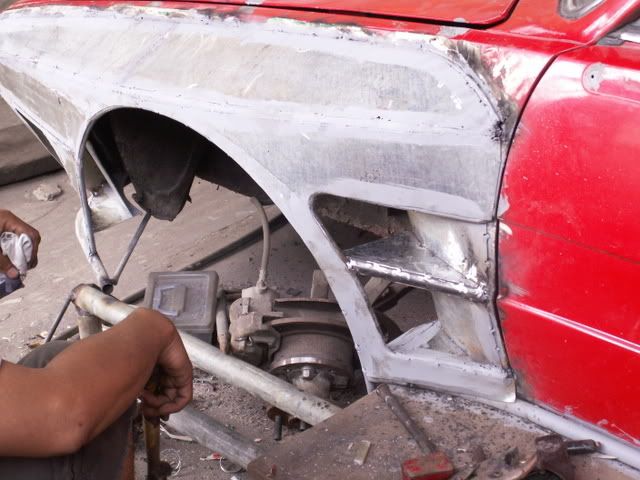
After mocking-up the fender, the valence ans the spoiler, it was time to do it in metal sheets.
Tack welding the spoiler to be fully-welded later.
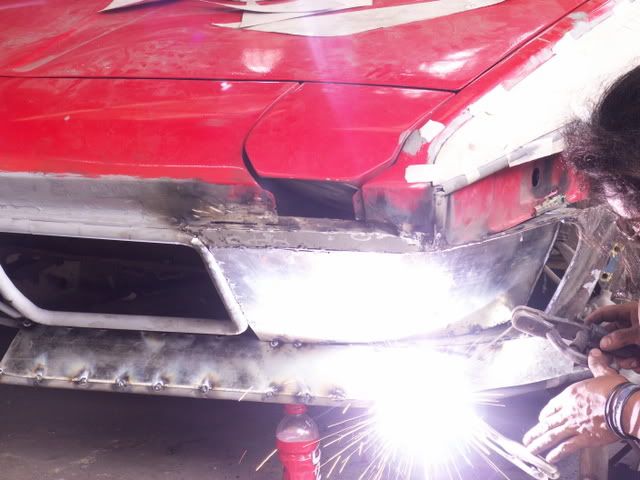
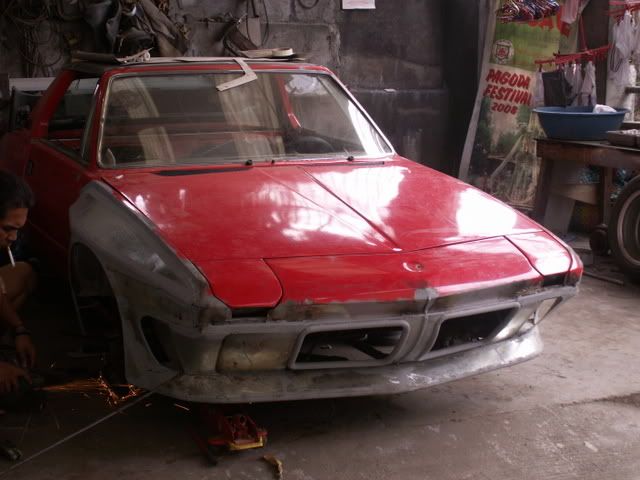
I changed the design of the front valence to make it more agressive.
I did the spacer myself. 3 inches offset. But I guess that much space is detrimental to my son's safety. So it stayed there only to aid positioning the rims the way I want it. Later on, I will fabricate my own suspension with "adjustable coil-over shocks" and wishbone members to eliminate the need for spacers.
After mocking-up the fender, the valence ans the spoiler, it was time to do it in metal sheets.
Tack welding the spoiler to be fully-welded later.
I changed the design of the front valence to make it more agressive.
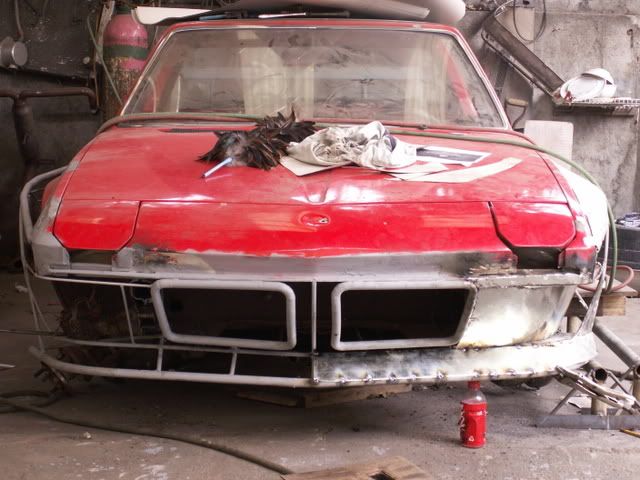
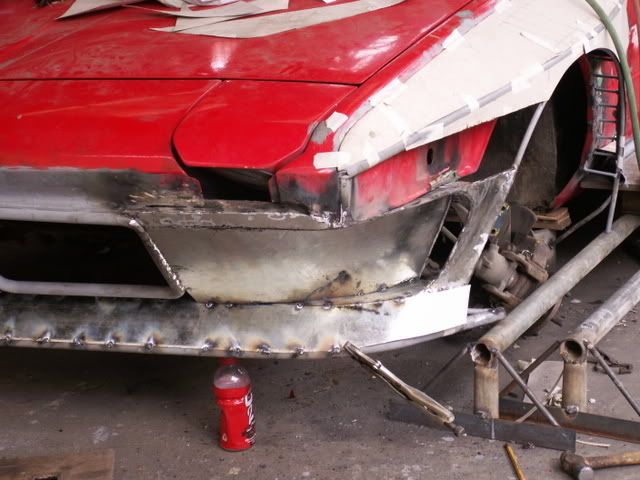
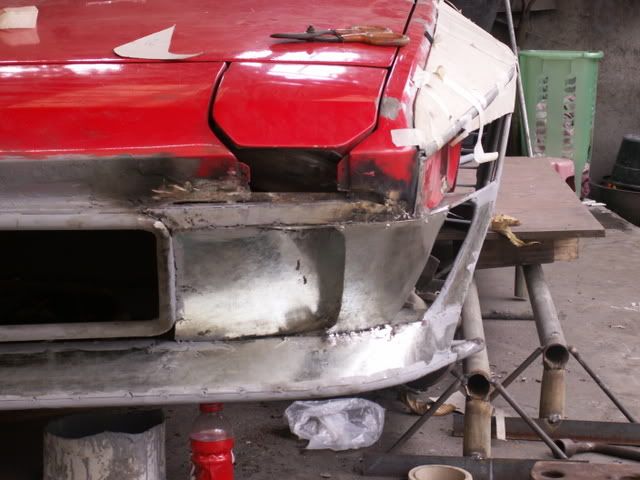
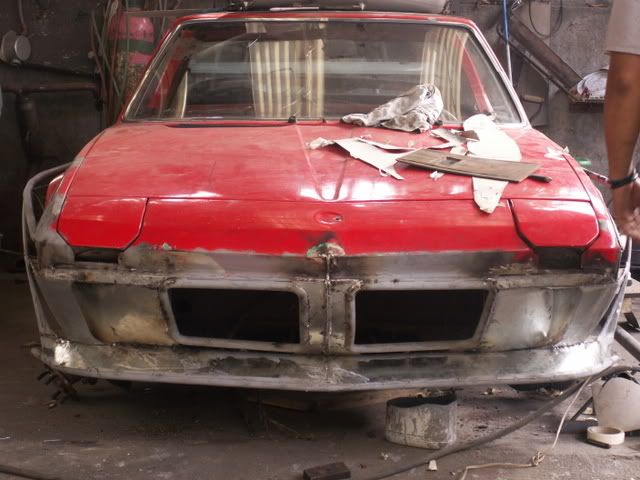
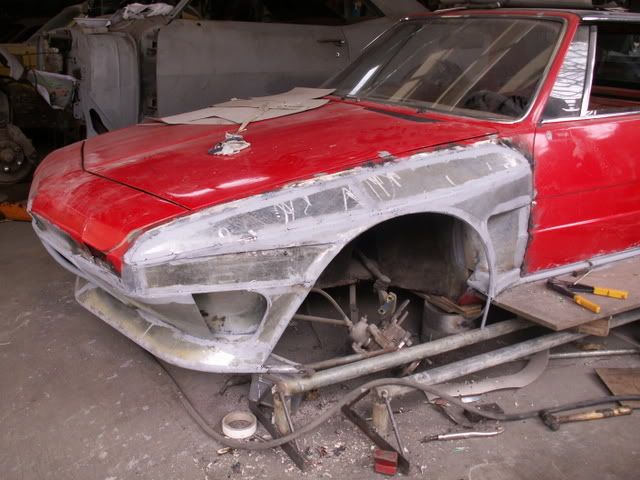
Last February 16, my helper did not come to work. So, I had a chance to review the design. I cannot get over the look of the bumper.
It looks like a building with a heavy overhang.
So, to improve the looks, I added an air diffuser that connects the bumper to the upper part of the spoiler.
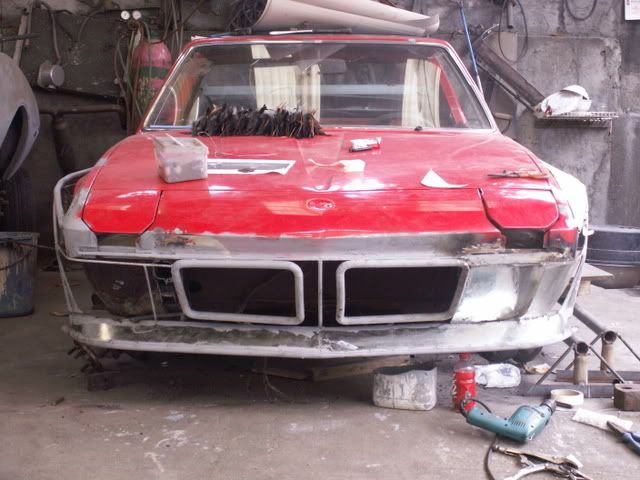
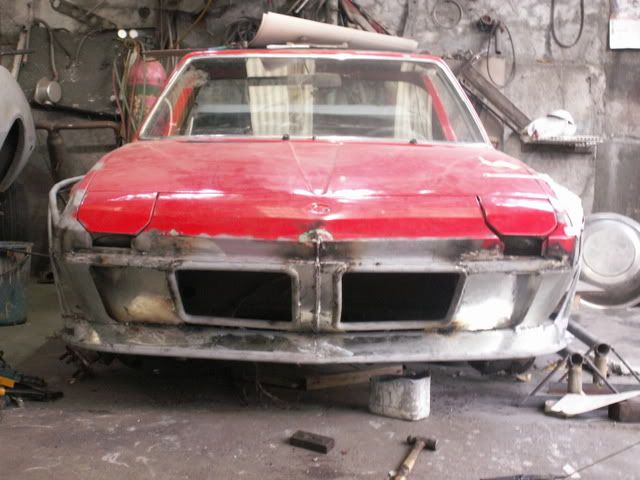
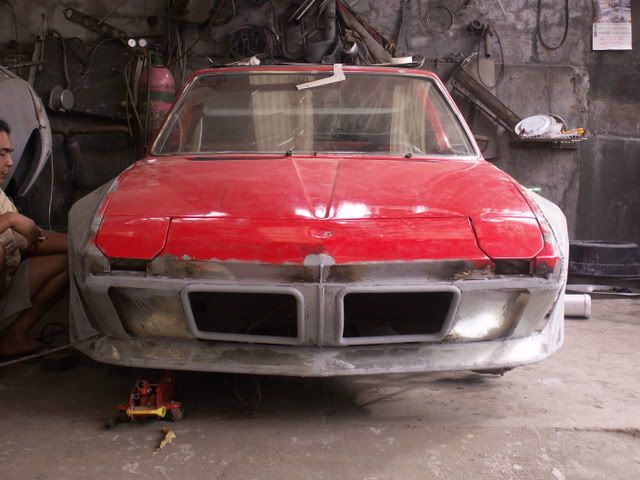
From the side.
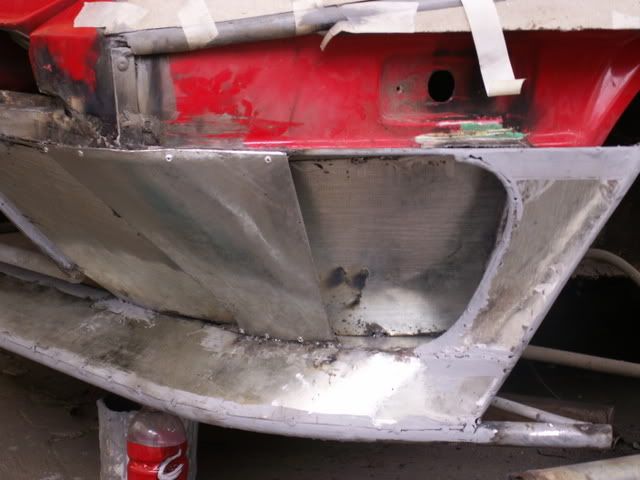
Seen from the front.
And while at it. I finished the rest of the spoiler.
It looks like a building with a heavy overhang.
So, to improve the looks, I added an air diffuser that connects the bumper to the upper part of the spoiler.
From the side.
Seen from the front.
And while at it. I finished the rest of the spoiler.
I'm so impressed I'm not sure what to say...
Except that I'm pretty damned impressed. The gumption expressed in this project is, well, inspiring.:thumbsup:
Except that I'm pretty damned impressed. The gumption expressed in this project is, well, inspiring.:thumbsup:
X1/9Cruiser
True Classic
this is a great thread...
Seeing a project take shape like this with photos is great! I can't wait to see the finished product. Keep up the good work!!!
Seeing a project take shape like this with photos is great! I can't wait to see the finished product. Keep up the good work!!!
wannabfast
Thai with a 78 in MN
wonderful work! altho with the front grille like that people might confuse that with a bmw...:nana:
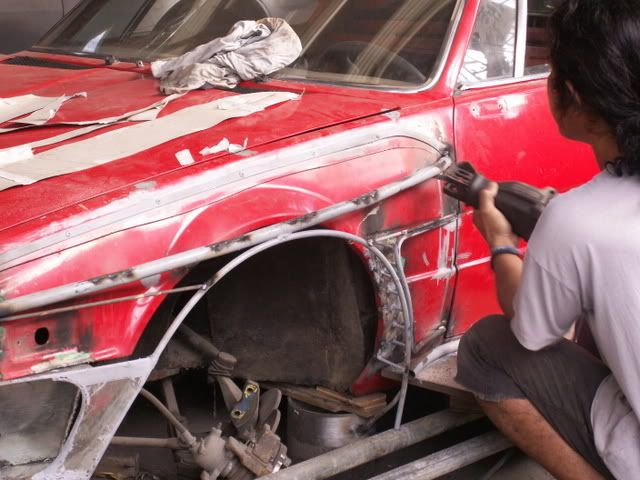
I did some drawings to have an idea of what I am going to do.
I plan on a very "lazy fastback" treatment to the rear.
And to complement the air vents of the front fender, I plan on installing air intakes just ahead of the rear wheel well. The air intake will house the fuel injection intake and on the other side, the a/c condenser, thus making them functional.
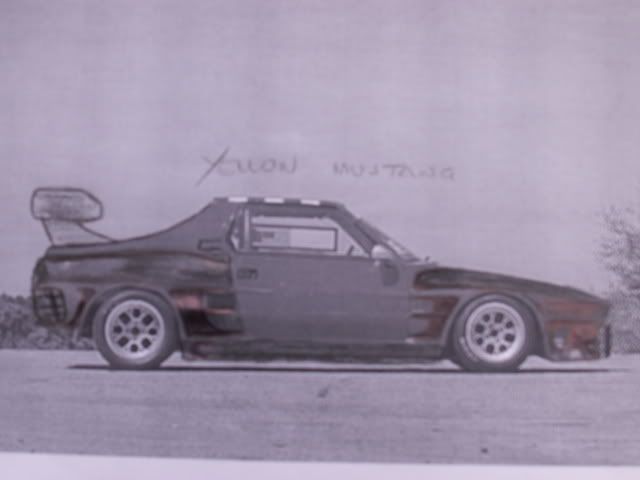
I will also redesign the rear to complement the front end. That will come later.
I plan on a very "lazy fastback" treatment to the rear.
And to complement the air vents of the front fender, I plan on installing air intakes just ahead of the rear wheel well. The air intake will house the fuel injection intake and on the other side, the a/c condenser, thus making them functional.
I will also redesign the rear to complement the front end. That will come later.
Fastback mod is awesome!
Great stuff you're doing there Deacon.
Especially enjoy seeing the one-off aspects...
Fender vents, grille, fastback...all unique to your build.
Metal work like that is somewhat of a lost art.
I'm in the midst of fabbing metal flares,
so can relate to the work you're doing.
Simple extension of the OE lip, plus 4", to cover 10" wheels.
Going for stock look...at least as stock as one
can look with 3" of ground clearance and 10" wheels.
Last week was a slow week.
I had a nasty accident last Tuesday. I hit my head against the sharp bonnet latch of my Mercedes. I left a deep, 3 cm gash that bled immediately. It necessitated 4 stitches to stop the bleeding and close the wound,
Then on Thursday, my helper asked for a paternity leave of 3 days.
Then on Saturday while I was on my way to Clark Airbase(former US Airfield) the rear/driverside wheel studs of my Mecrcedes' broke causing the wheel to come loose. Thank God that I felt it and I slowed down when the wheel came off.
Talking about a bad week.
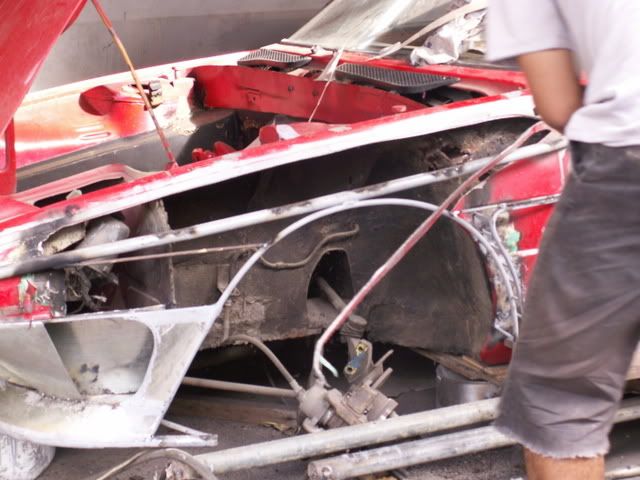
This week is fine. Got to spin the car and mock-up the fender line for the rear wheels.
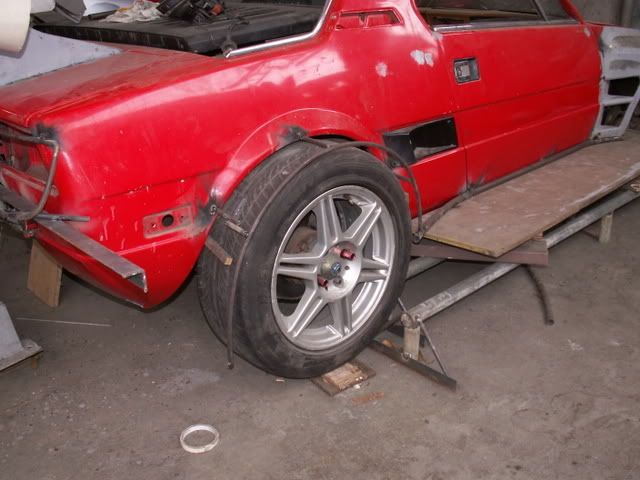
And mocked the "all new" rear end.

I had a nasty accident last Tuesday. I hit my head against the sharp bonnet latch of my Mercedes. I left a deep, 3 cm gash that bled immediately. It necessitated 4 stitches to stop the bleeding and close the wound,
Then on Thursday, my helper asked for a paternity leave of 3 days.
Then on Saturday while I was on my way to Clark Airbase(former US Airfield) the rear/driverside wheel studs of my Mecrcedes' broke causing the wheel to come loose. Thank God that I felt it and I slowed down when the wheel came off.
Talking about a bad week.
This week is fine. Got to spin the car and mock-up the fender line for the rear wheels.
And mocked the "all new" rear end.
OUCH!!
Sorry to hear about your head... and your wheel. Did you do something to the Merc to get it mad at you?
When I was young, my dad had an old Pontiac station wagon with a huge stamped steel latch. It was like a big flat steel fishing hook.
I cut myself on that damn hook a few times before I finally got wise. I took an old tennis ball and slit it with my knife. Whenever I worked on the car, I would stick the tennis ball on the latch. No more cuts, which is a good thing. Now that I am older, I don't have enough hair to cover up all the scars I would have collected.
Keep up the great work deocon.
- Status
- Not open for further replies.