rx1900
1981 X1/9
Hey Hussein. no...i dont think a tracing would be good enough. This tool has been lovingly and precisely crafted from the finest Canadian wood. I have attached a pic that shows it in use. The pic is from the really cool book I have - pic also attached. i'd be happy to send you the tool at no charge. Shoot me a few bucks and I will send the book down with it.....Doug - any chance you could trace the outline of the chain tool & add dimensions? I've been told I may need to tension the chain by moving the cam gear pin to an new hole, given it has 250K miles. I haven't checked the slack, but it would be handy to have the tool around")
But NO....this tool will not enable you to "tension" the chain. That is done by a spring loaded tensioner....it is not adjustable. What you ARE referring to is that.....as the chain stretches the cam timing will change. To correct that...Datsun very cleverly used a top chain sprocket that could bolt on in 3 or so different pin positions. From the factory..I think the sprocket was bolted on to the "A" hole pin. I think that sounded bad.......When the chain stretched in service....the cam timing would of course change. So.....you unbolt the top sprocket and use the alternate "B' or "C" hole or something like that. That brings the cam timing back to proper. Understand?
Keep in mind this is from my memory from the 70's..so I might be a bit off....
But....to to be able to undo the top sprocket...easily visible when you take the valve cover off......if you just unbolted the sprocket....of course then the timing chain would just fall down into the timing cover area...and the tensioner would pop out all the way and you would be in big trouble. No way to access that tensioner unless you remove the oil pan and water pump, pulleys. timing cover, etc.....
So....to prevent all that...BEFORE you unbolt the top sprocket...you just jamb my finally crafted tool down the timing chest. This keeps the tensioner from extending. Then simply unbolt the top sprocket bolt in back on in a different position to correct the cam timing back to ideal.
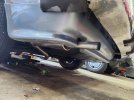
So yeah....this corrects the cam timing...but of course does nothing about the stretched chain itself. Only replacing the chain would cure that. By the way...I recall that you indeed can change the chain in situ without taking off the timing cover. I think the chain had a master link and you could feed in a new chain...if you were careful......
The most common use of my tool was if you wanted to yank the head off. Again you would jamb my tool down there..and leave the chain tensioned in situ. Undo the cam sprocket and pull off the head...
It should be noted that the hole in my tool is for a chunk of rope to be tied onto it. So you could easily yank the tool back out. You would have to supply that and tie it on securely.....