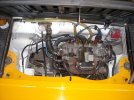
The Rat's Nest - 81 X1/9 Build

Loving following this thread. It's brilliant! Carry on.

Re Midwest Bayless, they are such a great company. I'm in the UK and needed a bunch of bits that I could only find on MWB site. Ordered late Friday, shipped Saturday and arriving today in Yorkshire, England. No messing around!
Thanks for the kind words, brother.

Glad to see people following along.

Takes a village.
 
A few days go by and parts trickle in...

Check out how well Alberto in Italy packaged the parts.
Wrapped like the baby Jesus(!) 😎
Strips of styrofoam cut especially to fit the box, bubble-wrapped inside the boxes, saran wrapped outside, then these sealed plastic containers with custom labels?
Incredible...
Day31package.jpg


Fun to unwrap and inspect.
Something about the packaging feels like treasure.
Day31paper.jpg


Here's the whole schmear.
Yeah, i got way carried away with buying new parts. :rolleyes:
Like i say, since i don't know anything about this box or any like it.
A newbie move to 'throw hardware at the problem' to be sure.
Alberto's parts along the back, SteveC's synchros and 1-2 slider in front, as well as the gasket set.
Everything else from MWB...
Day31Everyone.jpg


Different ages of parts stored in different conditions...
Stuff in cosmoline gets a gas bath, then glass bead at low pressure, then more gas bath and air.
Bare items are just blasted and bathed.
My old stuff I'm re-using gets the same.
Blasting is a mixed blessing because -some- grit inevitably gets left,
But the gas bath and air do as well as can be hoped.
I figure an oil change sooner than later would be $100 well spent.

Started assembling 3-4-5 - New gear, hub, synchro and brake band/shoes.
Re-used only the end block thingies.
New rings are so springy they want to jump out while you try and stab the snap ring.
Here's my solution to get them compressed and make snap ring installation possible.
Day31ring.jpg

Day31Together.jpg


Good fun assembling all of these parts into one whole gearbox.
Hope springs eternal this needs done only once! 🫣
🙏🙏🙏
 
A few days go by and parts trickle in...

Check out how well Alberto in Italy packaged the parts.
Wrapped like the baby Jesus(!) 😎
Strips of styrofoam cut especially to fit the box, bubble-wrapped inside the boxes, saran wrapped outside, then these sealed plastic containers with custom labels?
Incredible...
View attachment 82910

Fun to unwrap and inspect.
Something about the packaging feels like treasure.
View attachment 82911

Here's the whole schmear.
Yeah, i got way carried away with buying new parts. :rolleyes:
Like i say, since i don't know anything about this box or any like it.
A newbie move to 'throw hardware at the problem' to be sure.
Alberto's parts along the back, SteveC's synchros and 1-2 slider in front, as well as the gasket set.
Everything else from MWB...
View attachment 82909

Different ages of parts stored in different conditions...
Stuff in cosmoline gets a gas bath, then glass bead at low pressure, then more gas bath and air.
Bare items are just blasted and bathed.
My old stuff I'm re-using gets the same.
Blasting is a mixed blessing because -some- grit inevitably gets left,
But the gas bath and air do as well as can be hoped.
I figure an oil change sooner than later would be $100 well spent.

Started assembling 3-4-5 - New gear, hub, synchro and brake band/shoes.
Re-used only the end block thingies.
New rings are so springy they want to jump out while you try and stab the snap ring.
Here's my solution to get them compressed and make snap ring installation possible.
View attachment 82912
View attachment 82913

Good fun assembling all of these parts into one whole gearbox.
Hope springs eternal this needs done only once! 🫣
🙏🙏🙏
If you want to read a thread on a difficult rebuild, check out the Rear Engine forum area on the 850 Spider.

 
Look! A present from Chris ‘Mototrooper’!
IMG_7210.jpeg


My wife was wondering why i was so happy about getting it.
😆
Beauty is in the eye of the beer holder, right?

Got my bearings in, a big cleaning session, and started noodling around.
IMG_7215.jpeg


There are two bearings with no oil groove.
On the block side, one goes in the center main,
And the other goes in the rear main cap, by the flywheel, correct?
Hard to tell from the pictures - and the manuals say nothing about it. 👿
IMG_7216.jpeg


Also, these standard thrust bearings are a bit tight.
OK to sand the faces down a bit with some wet/dry on a surface plate to open up clearance?

So far so good!😊
Just a preliminary install with some oil and i can make two full rotations with a spin by hand. 😎
 
Big day yesterday.
While I'd love to prattle on forever about engine building minutiae, we'll spare y'all too much drivel. ;)

Plastigauge gave great numbers. Stoked. All five the same. 😎
IMG_7219.jpeg

IMG_7220.jpeg


End-play was perplexing. These are standard thrust bearings, but they were too thick and wouldn't go into place.
Ay other sizes are thicker.
A bunch of sanding on some 220 on the surface plate got them in, but still too tight.
IMG_7221.jpeg


It took quite a bit of humping to get numbers that made happiness.
Additionally, there's a lot of 'springiness'.
Meaning - you can pry hard with the pry bars and get some bigger numbers,
But less actual play is seen without prying.
Here we ended up sanding until we could pry a good .005-.006",
But unloaded, you'd only see about .002" difference in travel unloaded in each direction.
If that makes any sense...
IMG_7224.jpeg


After taking the bearings to size on the 220, I cleaned them up with some 800 and 1200, then finished them off with steel wool.
You don't want soft bearing material embedded with sanding grit and wearing prematurely.
Steel wool can take the bearings that final bit smooth without introducing grit.
A careful cleanup is performed of bearings between sanding rounds as well.
Cleanliness is next to godliness in engine building, and sanding bearings is dirty work!
IMG_7223.jpeg


After the main caps were torqued the block got moved to a cart for flywheel install.
Didn't know that the gasket set does not include seals, but luckily i was donated some by our man JimD. 😎
Lesseeee here... What are all these parts and where do they all go?
o_O
IMG_7227.jpeg


Again, could go on forever with details; sealants, torques, techniques.
But hands full and life needing lived,
A few tidbits about rod/piston install:
Bits of hose on rod bolts keep crank journals from getting dinged.
ARP lube even goes on factory nuts - it adds 'tightness' relative to dry or engine oil.
I mix assembly lube and oil - put it in an old spray cap and apply with a homemade cardboard applicator.
Old crappy ring compressor works, so away we go.
IMG_7231.jpeg


Additionally, i slather mucho oil on rings and cylinder walls.
With my bare clean hand. Mucho mucho. Pump pump pump.
Too much is never a problem,
Long as you drag out the drip tray... ;)
IMG_7232.jpeg


In the end, we got us a short block.
Since we're still pending a head, no sense in going any farther than this methinks.
IMG_7233.jpeg

IMG_7234.jpeg

IMG_7235.jpeg

IMG_7236.jpeg


Now on to nagging Jim to finish the head, staring, and making 'Vroom!' noises..! :D
 
Last edited:
Looking good so far...

:)
Bernice
Thanks Bernice.
Time will tell how we really did.. 😉

Just copied your double-drilling:
IMG_7237.jpeg


If nothing else we earned bragging rights.

Tell someone you got a double-bolted lollipop and they’re bound to be impressed.
😝
 
Seems you're really turning a corner towards assembly
Yessir! 😃

And check this out.
Another donation!
This time a rare-and-hard-to-find lower steering column cover,
From DaleS in AZ.

Super excited to get one of these.
Big thanks to Dale.
:cool:


IMG_7259.jpeg
 
Half-day out in the 'shop' yesterday...

Got in there and ground welds down.
Thus finishes frunk welding! :D
IMG_7281.jpeg


Popped under there and wire-wheeled around the areas where i burned up the factory undercoating.
(Wheee! :D )
Also tried to get clean metal around the rubber plug holes to stop rust.
Final step was a bit of rubber undercoating from a spray can.
IMG_7279.jpeg


Up under the cowl/scuttle is somewhat perplexing.
Seam all around in there is failing.
IMG_7276.jpeg


While my instinct is to break out the sandblasting stuff, it's time for restraint.
How to reach up under there to clean?
Had some luck with a wire BBQ brush.
Might get a wire cup on a Dremel or die grinder after it as well?
IMG_7277.jpeg


The idea is to stop rusted areas enough to buy us a few years' worth of driving.
Trapping rust under paint can actually speed the rusting process.
Paint will hold water via capillary action that otherwise might be evaporating away more quickly.
Hopefully we're getting the rust sanded away enough that the paint and seam seal are sticking.

Thanks for following along.
Hope to have some painted stuff to show here soon! :)
 
Last edited:
Where you can get at it, I like to use these:
1712068739571.png


Harbor Freight

Then "Rust Dissolver" to add some phosphate:
1712068833951.png


Ace Hardware

And lastly epoxy primer sealer. Then topcoat.

In the final analysis, entropy always wins.
 
Half-day out in the 'shop' yesterday...

Got in there and ground welds down.
Thus finishes frunk welding! :D
View attachment 83193

Popped under there and wire-wheeled around the areas where i burned up the factory undercoating.
(Wheee! :D )
Also tried to get clean metal around the rubber plug holes to stop rust.
Final step was a bit of rubber undercoating from a spray can.
View attachment 83192

Up under the cowl/scuttle is somewhat perplexing.
Seam all around in there is failing.
View attachment 83190

While my instinct is to break out the sandblasting stuff, it's time for restraint.
How to reach up under there to clean?
Had some luck with a wire BBQ brush.
Might get a wire cup on a Dremel or die grinder after it as well?
View attachment 83191

The idea is to stop rusted areas enough to buy us a few years' worth of driving.
Trapping rust under paint can actually speed the rusting process.
Paint will hold water via capillary action that otherwise might be evaporating away more quickly.
Hopefully we're getting the rust sanded away enough that the paint and seam seal are sticking.

Thanks for following along.
Hope to have some painted stuff to show here soon! :)

Yup, I fixed that on my '74 as well. Pried it open, masked the car, then sandblasted all the stuff out:

1712071231396.png

Then some epoxy primer and paint
1712071334554.png


And then seam sealer to keep water from getting in there again, and painted again over the seam sealer

1712071387800.png
 
I use a wire wheel on a angle grinder for areas like that. Either a flat wheel or a cup style depending on the area I'm getting to. The "twisted knot" type lasts much longer and is more aggressive for faster removal. Just make sure you have good control of the angle grinder in case you get the brush under a edge and it 'bites'....it will throw the grinder back a bit.
91281_W3.jpg
images.jpg


I think the reality is you will never completely remove all rust. But hopefully you can do as you say and slow it down long enough to get plenty more years of use out of the vehicle before it rots away. And frankly I've found some areas simply aren't worth trying to deal with, so long as things aren't too bad already. Those I treat with a rust converter and move on.
 
Spun the car around and had at the other end…

Runk repair:
IMG_7286.jpeg


IMG_7288.jpeg


Getting after the torn metal at the seat rails,
Crack at front was large and obvious.
Started by drilling holes at the end of the crack to stop it,
Then adding tacks.
IMG_7290.jpeg


But after looking a little more closely, the failure had other dimensions.
Cracks found at the rear of both rails.
IMG_7302.jpeg


Seat rails have matching reinforcement rails up underneath the car,
And they had pulled away at the rear.
Undercoating is all stress cracked, showing how the floor had moved.
IMG_7296.jpeg


Straight edge on driver's rail shows the angle relative to the floor,
Whole rail had been tipped 'back' as it was sinking into the floor and pulling away the lower rail.
IMG_7292.jpeg


Other side wasn't like that..
IMG_7295.jpeg


Found me a thin piece of wood that fit into that lower rail,
And did some upward pushpush with the ol' floor jack.
IMG_7299.jpeg


Much better.
IMG_7301.jpeg


Drilled some holes thru from the top and plug-welded the whole sandwich together.
IMG_7306.jpeg


Lower rail seems to be wanting to hold tight now - We'll see how it goes over time.
IMG_7304.jpeg


Trying on the seat bottom, the tracks are a bit bind-y and don't slide easily.
Thinking that assembling the whole thing and driving the car around with weight in the seat will be just the ticket.
Tracks will all level out and find their little home eventually, right?
if not, we'll drive the car around some more... ;)
 
Last edited:
Thanks for the metalworking tips, gentlemen.
Prying that scuttle seam open and blasting it out sure seams 😆 like the right thing to do.

Those twisted knot wheels can get away from you!
Had this happen a couple years back. :oops:
IMG_7308.jpeg

IMG_7309.jpeg


Henceforth to be known as the Mackage Attacker.
Let’s just say i was very very lucky…
 
Last edited:
Thanks for the metalworking tips, gentlemen.
Prying that scuttle seam open and blasting it out sure seams 😆 like the right thing to do.

Those twisted knot wheels can get away from you!
Had this happen a couple years back. :oops:
View attachment 83235
View attachment 83234

Henceforth to be known as the Mackage Attacker.
Let’s just say i was very very lucky…
Holy F*$% that makes me shiver! Glad you exited the incident "intact"!!
 
Spun the car around and had at the other end…

Runk repair:
View attachment 83223

View attachment 83224

Getting after the torn metal at the seat rails,
Crack at front was large and obvious.
Started by drilling holes at the end of the crack to stop it,
Then adding tacks.
View attachment 83225

But after looking a little more closely, the failure had other dimensions.
Cracks found at the rear of both rails.
View attachment 83231

Seat rails have matching reinforcement rails up underneath the car,
And they had pulled away at the rear.
Undercoating is all stress cracked, showing how the floor had moved.
View attachment 83228

Straight edge on driver's rail shows the angle relative to the floor,
Whole rail had been tipped 'back' as it was sinking into the floor and pulling away the lower rail.
View attachment 83226

Other side wasn't like that..
View attachment 83227

Found me a thin piece of wood that fit into that lower rail,
And did some upward pushpush with the ol' floor jack.
View attachment 83229


Much better.
View attachment 83230

Drilled some holes thru from the top and plug-welded the whole sandwich together.
View attachment 83233

Lower rail seems to be wanting to hold tight now - We'll see how it goes over time.
View attachment 83232

Trying on the seat bottom, the tracks are a bit bind-y and don't slide easily.
Thinking that assembling the whole thing and driving the car around with weight in the seat will be just the ticket.
Tracks will all level out and find their little home eventually, right?
if not, we'll drive the car around some more... ;)
While the welding department is working in the cockpit, look for cracks across the top of the tunnel in the vicinity of the shifter and handbrake handle. Same for the top of the strut towers. Some vendor sells reinforcement plates for the strut towers that you weld in from the top
 

Attachments

  • DSCN1073.JPG
    DSCN1073.JPG
    322.8 KB · Views: 36
Back
Top