Alternator
Alternator
Replacement
Apparently a GM Delco Alternator can be used: http://www.madelectrical.com/electricaltech/delcoremy.shtml
Many have decided to use a GM alternator instead of the original. Why? cheaper, easily available anyway, more amps, more reliable. Why not? needs some modifications. Cars with air conditioning (AC, or A/C) are a bit different with much less room to work with but I believe all the following still applies. Access to the alternator is best through the rear trunk's access panel. You did know you had one right? (in later cars anyway). In short, the pivot foot, where the alternator mounts on the block must be cut down and a top bracket (the adjustable one) replaced. GM alternators have less spread between the lower foot arms, the Fiat one is too wide, about 1" needs to be hacked out. This doesn't have to be precise since washers can be installed on either side, inside or outside the bracket to get the position of pulley alignment just right so the belt runs straight and true. Cutting a bit more out of the bracket is easily rectified with a washer or two, cutting too little means you get to go back and cut more. The top bracket is most easily replaced with the Mr. Gasket bracket referenced below. It will need to cut down and a new mounting hole drilled too though. It is typically mounted to the engine using one of the water pump bolts. A bit of spacer will be needed as a "stand off" to hold the alternator and top bracket in alignment. The top bracket will end up too far "in" from the alternator's top mounting hole so a spacer will be needed to make up the difference between the bracket and the alternator. Which GM alternator? Most any. one from a '78 Camaro with a 350 is often cited. Will have a mounting point clocked at 180 degrees (the top mount, adjustable one, is directly opposite the foot mount-pivot mount). or "6 and 12". The following is pulled from an earlier thread: (quoting myself actually) ..."Found out they clock from the backside so pivot mount at 6, adjustable at 10 would seem ideal, usual 6 and 12 are obviously fine as many have done it. I wonder if a 6/10 one would let you use the factory upper bracket? I will score one and find out but I'm first going to pull and examine my Bosch." (OEM upper bracket still will not work, alignment still all wrong) I used one from '91 Cutlass Supreme 3.4 but many from that era used it. Available for about $50, 100amp CS-130, 6/10 clocking.
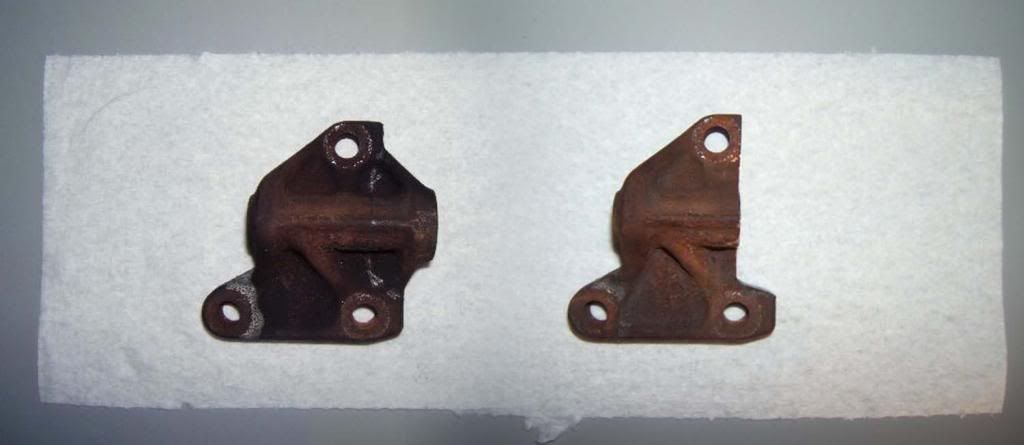
Lower pivot (foot) bracket before and after cut (pictures taken from Tom's thread)
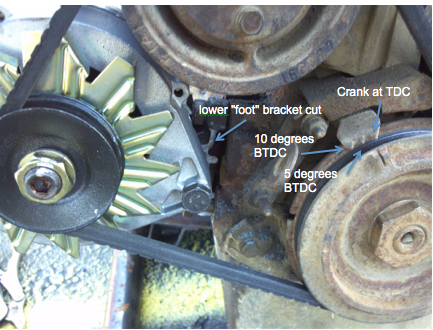
Installed lower bracket cut (forgot whose picture I stole but thanks!)
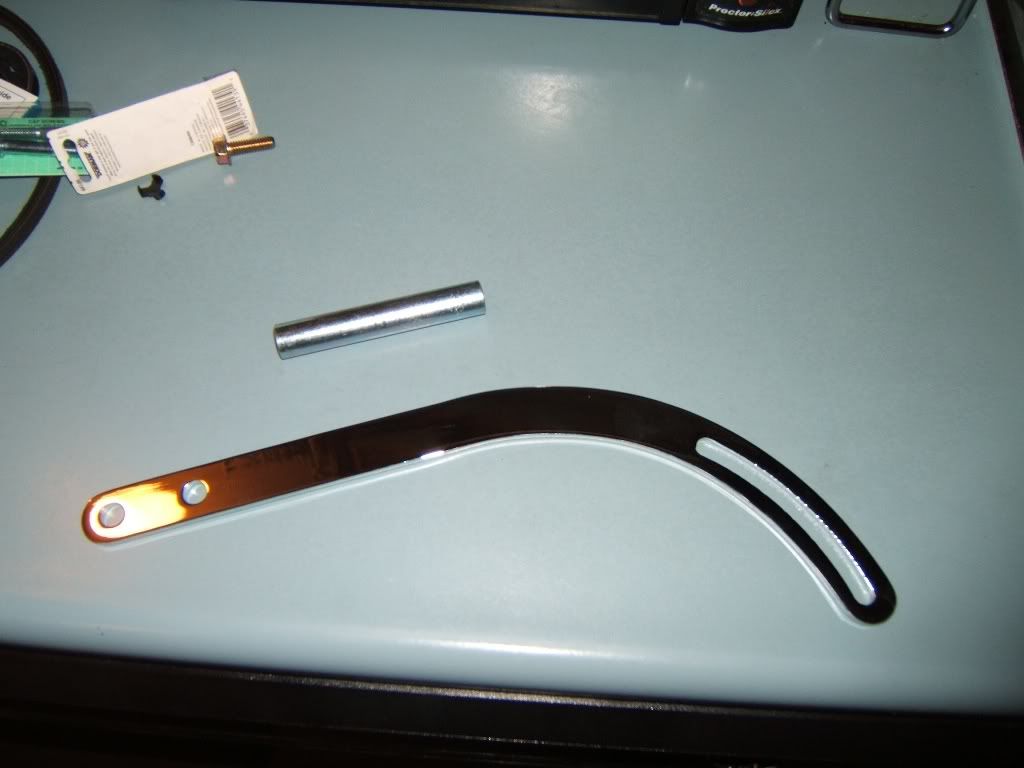
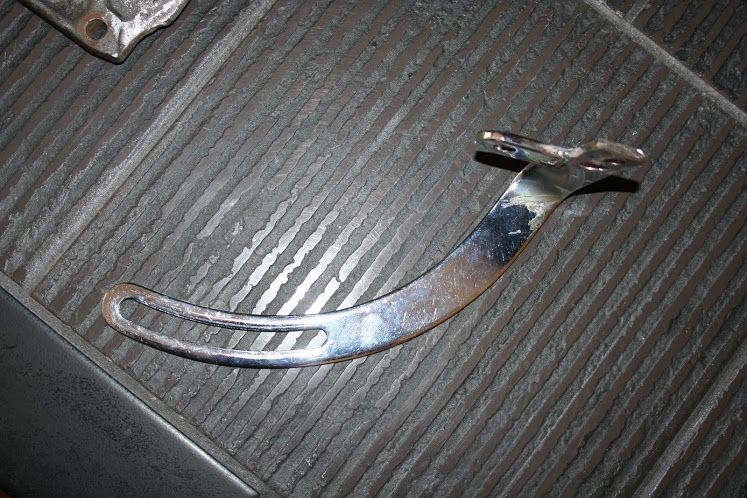
Upper bracket, Mr. Gasket brand, for any GM 350 I think, generic, with spacer (which must be cut down-hole end cut way back and a new hole drilled) Picture also from Tom's thread
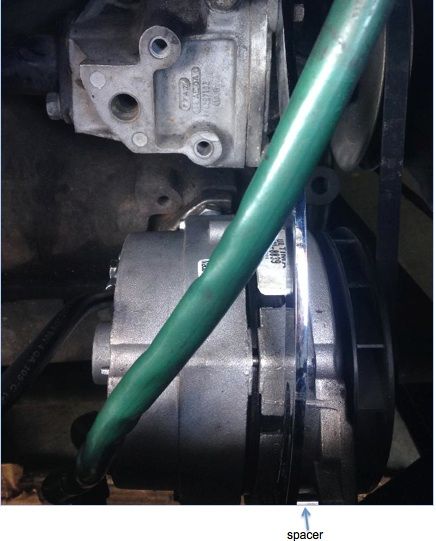
not a very good shot of upper bracket mounted with spacer just barely visible between upper arm and alt. Picture from Rudym (I think)
Tim went further and bent the Mr. Gasket bracket and added a tab (welded) then mounted to the side of the water pump where the OEM bracket would be, good stuff I think but you gotta weld!
and Tim's installed:
http://xwebforums.org/showthread.php?t=15589&highlight=alternator+swap http://xwebforums.org/showthread.php?t=16735&highlight=alternator+swap http://xwebforums.org/showthread.php?t=23299&highlight=alternator+conversion http://xwebforums.org/showthread.php?t=23317&highlight=alternator+conversion
http://www.network54.com/Forum/12159/message/1142890167/GM+alternator+conversion http://xwebforums.org/showthread.php?t=20873&highlight=alternator+swap
Wiring
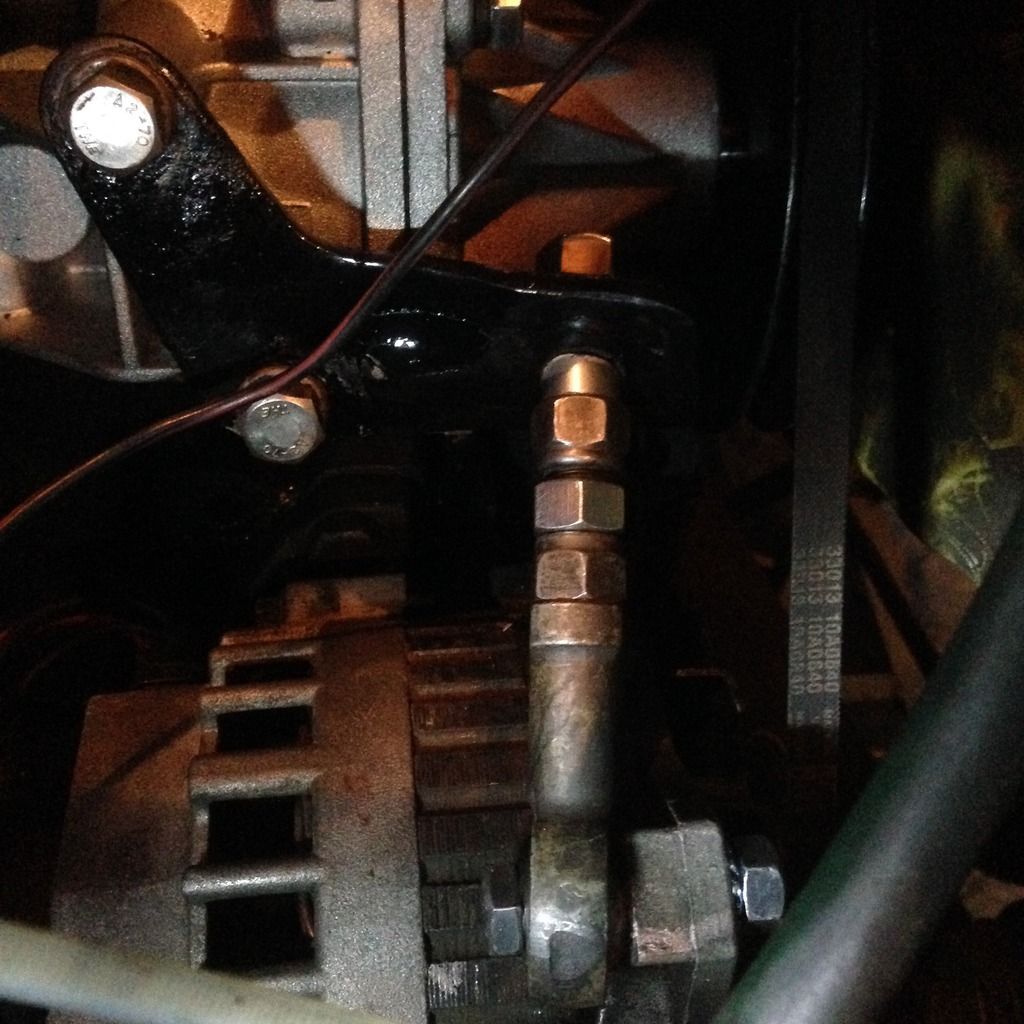
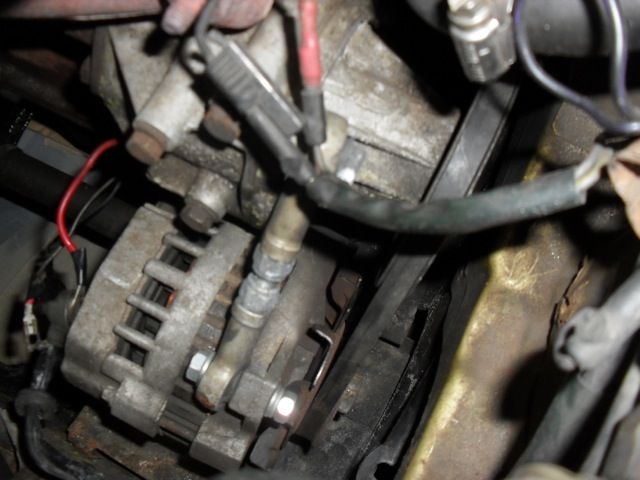
More wiring related http://xwebforums.org/showthread.php?t=23299&highlight=alternator+conversion&page=2 Big fat wire to alt's output lug. Exciter line (if using 3 wire alternator) goes to same lug, OEM spade connector (for charge light) goes the other wire off alt. You can see the red wire in my picture below is the exciter line coming off the alt's pigtail and right back to the output lug, the black wire is the charge warning wire, it comes off the alt's pigtail and then to the car's wiring which is housed along side the big fat one, and the big fat one is on the alt's output lug, goes to the starter and then straight to the battery. Above threads speak of wiring. The charge light circuit is pretty critical. All GM replacements will have internal voltage regulator (like all later model X1/9s) If you have an early car with and external voltage regulator I assume you'd take it out of the circuit but I can't speak to that
Good Ground
The engine/starter/alternator are all mouned in rubber but need to be grounded to the battery and rest of the circuit. Thus the ground strap, usually connected to transmission bell housing and the rear cross member (behind left rear wheel) It's a standard braided metal ground strap. Take it off clean the connections, reinstall. Many will also add another little ground strap to the top, often between one of the cam box bolts and a firewall bolt (like the engine lid hinge bolts). FI cars have a ground on the cambox bolt already, just add a wire and continue it to the firewall. Good idea to upgrade the battery ground to firewall with a bigger gauge wire too.
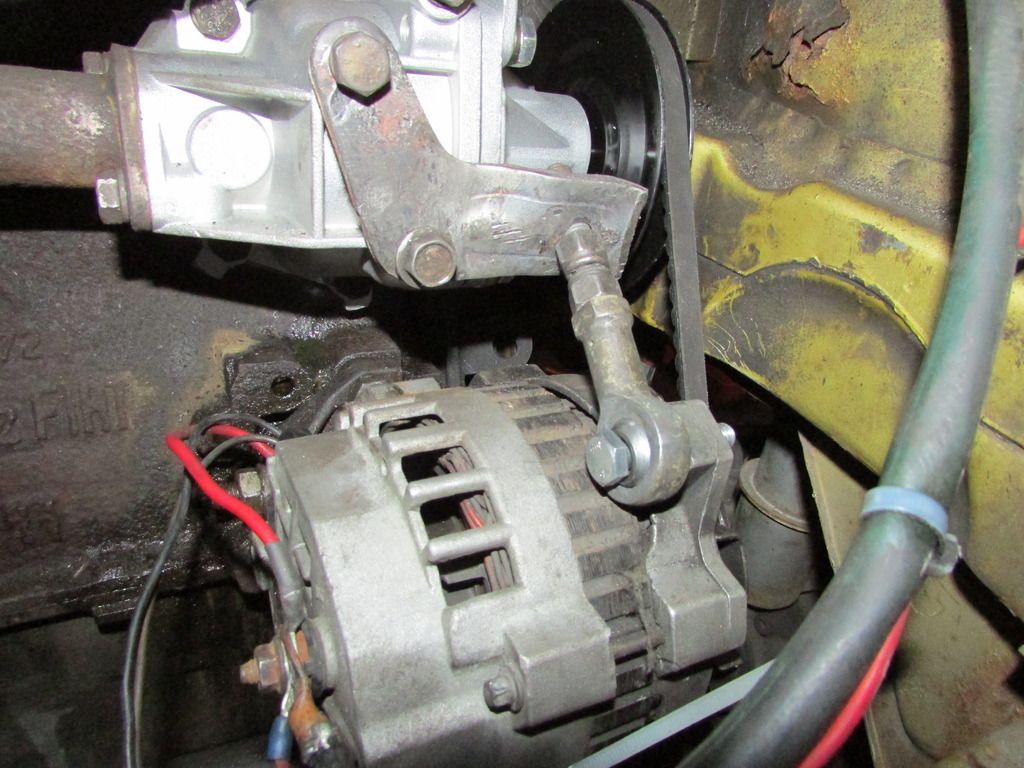
My solution, since I had the CS-130 with mounting clocked at 6/10 and had broken the water pump bolt and the standard Mr. Gasket chrome arm wouldn't work anyway, was to use a heim joint. This worked fine in the end but was a hassle to get there. I ended up replacing the water pump, thus fixing the broken bolt but even so, the Mr. Gasket arm won't work with this clocking of the mounting points so I stuck with the heim joint thing. Not really recommended unless you plan for it. Ultimately probably better then a flimsy Mr. Gasket bracket held on by one little water pump bolt.
3 years now, works great.
CS-130 with upper mounting point at about 10 o'clock (pivot point considered 6 and looked at from the back, industry standard I guess)
Trouble stripping/breaking the water pump bolt, not up to the task; too much vibration
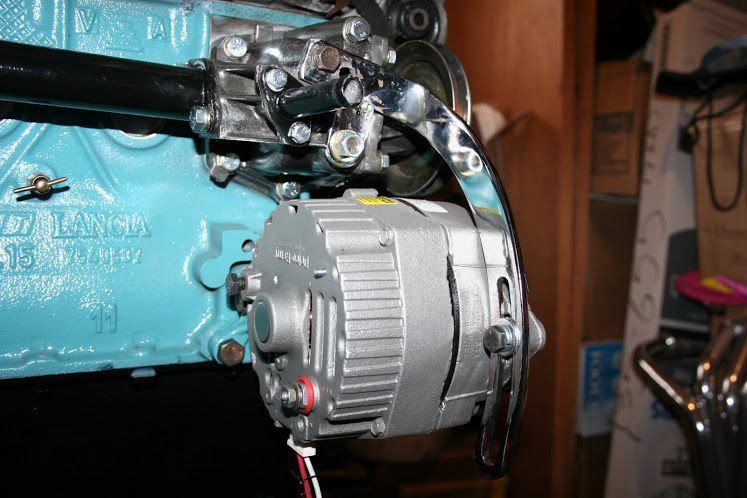
Took original upper mount, lopped it off, bent it straight and put a hole in it ended up with this, much better;
 And then cleaned up and an angled spacer (just cut a straight one on an angle) and washers/lock nuts and such;