Coolant Pipe Rework Surprise! Pipe Maker?

RZSR X

True Classic
So after all my research on the forum I decided to go with cutting off the existing pipes at the box ends followed by sliding in smaller SS pipes. Great plan...

But not knowing what was original on a '74 and what isn't I just discovered I cut off copper pipes(that aren't sitting inside of larger pipes) which I have since learned weren't original doh! And after looking down said pipes I realized that the large coolant leak at the back of the box was not coming from the copper coolant pipes! Insert many swear words here.

Which leaves the Heater Pipe, right? Has anyone experienced this pipe as the cause of the leaking coolant out of the box before?

Because now I'm at a crossroads. I can continue my rework as planed and plug off the heater but that seems like a lame thing to do on a 20k+ resto with a targa top or I can remove the f'ing box!!!

So can one disconnect and reconnect the heater pipe in the front from under the X with the box off or easily (oxymoron on an X1/9) from in the interior? Since the interior is 100% restored I do not want to mess with it again at all.

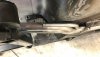
And lastly does anyone know the company that makes the pipes to fit as seen in the image below? My pipes are toast as a templet now.
coolant pipes and box.jpg


Oh and I only have this much area under the X to work.
X Garage.jpg


Thanks, Carl

PS. I know the wing is on backwards :)
 
Thanks Dan,

Sounds like Rick at Brown & Miller Racing might still have Paul Davock's CnC file of the cooling pipes. Since I don't have a template anymore I'll call them tomorrow and see if they can make them. If I'm removing the box then I should be able to get the heater tube out in one piece then I'll just need to find someone to copy it.

Now I'm wondering how the box tunnel was reapplied since I haven't seen any rivets along the sides... I just knew this was going to be a major PITA!
 
If you don't want to remove the tunnel:
The quick-and-easy way to replace the two large pipes is to cut them off at both ends and slide them out. I posted my experiences with this recently.
The quick-and-easy way to replace the heater pipe is to run it on the interior, next to the tunnel, not inside of it. A really long heater hose has been used for this and has the advantage of no leank-prone joints along the way.

On my old X1/9, I cut the bottom tunnel only to find that the problem was indeed the heater pipe in the top tunnel. This was 30 years ago, the car was only 10 years old at the time.
If I remember correctly, the leak had not been caused by rust, but by the shifter grinding on it somehow (don't remember the details).
 
The heater tube is much simpler than the coolant lines. I totally recommend going with B&M SS tube replacements - don't do what I did (do it yourself - too much work).

Recommend using a spot-weld bit and drilling out the cover. New tubes. The heater return line is the one that is in the lower tunnel cover, the one that goes in the upper part of the tunnel is the hot side of the heater.

It's pretty easy to bend a 5/8" tube for both the source and return lines of the heater but you might wanna just use copper with 45° and 90° elbows soldered in.

The box tunnel is spot welded on. It is structural so best to re-weld it. Even getting a cheap flux-core MIG from Harbor Freight would be good or hiring someone to do it would also be a quick-n-easy job. Since you're gonna drill out the spot welds, it's really just zipping around those holes and done.

I have a whole story on my tubes and tunnel at this point - structural SS, removable - that Rodger says I should post but I'm just not ready yet. And it was expensive and time consuming unless you're bonkers.

Good luck!
 
I best look into the top tunnel first. This of course forces me to remove the center console which is a pain to get back in without bulbs etc. falling out the back or the console cracking and then there are the Corbeau seats that are mounted and sealed to the body that rest right on top off the console. It's so funny that my smaller '61 Mini had two to three times the room in the interior than the X!

I like the idea of running a heater hose on the inside.

Lot's to look into, thanks guys.
 
I had both heater tubes rusted through. You can access the lower tube when you cut open or remove the box. If you strip the interior around the shifter tunnel you remove the upper tube by cutting it in sections. I replaced both with copper tubing. Then I decided a proper gutted interior requires a heater delete. Then in the fall I reinstalled it with long runs of heater hose in the cabin next to the passenger side of the shifter tunnel. To do a heater delete you can run a section of hose from the two hose spigots on the engine or you can plug the port on the head after removing the angle pipe and modifying the pipe coming off the back of the water pump by cutting off the heater hose spigot and welding or brazing the opening.
 
Which leaves the Heater Pipe, right? Has anyone experienced this pipe as the cause of the leaking coolant out of the box before?
Just to add another example, my heater tubes also leaked when I began re-commissioning my X after being off the road for almost 15 years. And they poured coolant out of the tunnel and through the floor pan (the upper tube leaked into the cabin and through the rubber plugs as the fluid seeped between the layers of floor sheet-metal, carpet, etc...a nice source of internal rust now).
So I'd recommend replacing both tubes. If one tube has already corroded through, then the other won't be far behind.

Take a look at the already referenced projects above, it will help to understand how the tubes are situated. I have not replaced mine yet, I'm still working on other aspects of the re-commissioning project. But one option I am considering is to locate BOTH tubes in the lower tunnel box. My intention is to remove the tube from the upper tunnel area and to keep both of them as far away from the interior of the vehicle as possible. I live in a climate where "AC" is critical and "heat" is an option (actually a hindrance for 9-10 months of the year). So I want to reduce any source of interior heat.
Looking at it, I think if the lower box is removed (I also need to replace the two large radiator coolant tubes), both heater tubes should fit in there by stacking them on top of one another ("piggy-backed"). Then both can be routed the same way as the existing one in that lower box area.

There is also a company in Italy that makes new SS replacement coolant tubes. I believe they offer the smaller heater tubes as well as the larger radiator ones (I don't think Brown and Miller offer the heater ones?). Shipping from Italy would be expensive however. So it will likely be better to make new ones from scratch.
 
Thanks Ed but the body etc. is the last step (and the most enjoyable for me to work on) of the restoration. The paint and bumpers you see are what came on the X. The exterior paint and body looks better in pics than it is, trust me. When I bought it from the guy in Ellay that took it off the original owners hands but never drove it said the paint was original. Since he was having race cars delivered to Thunderhill Raceway he said he could drop it off at my residence in Emeryville (and since it was a relative small investment for a classic car and a '74) I bought it without seeing it in person, Doh. He literally didn't even know it had been repainted which will of course makes my paint resto much more time consuming.

The paint will be a metallic lime, with custom block-less bumpers and the piece de resistance - a Saratoga top!

Now it's time to head up to the garage and see how the box tunnel was applied and where the heater hoses connect. The Nascar shop can make all 3 pipes in SS for me. And I like the idea of running the heater return hose straight down under the car and into the box tunnel to travel back with the other 3 pipes, leaving the old return pipe where it lay.

In for a penny in for a pound!
 
Made the reconnaissance run and here are my findings in pictures.

Shifter Box
Tunnel Below Shifter.jpg

Visible Copper Pipes in Tunnel Box
Pipes in Shift Tunnel Hole.jpg

Heater Pipes at Heater
Heater Pipes at Heater.jpg

Heater Pipes at Tunnel Behind Console
Heater Pipes Connecting at Tunnel.jpg

Tunnel Box with Spot Welds?
Tunnel with Spot Welds.jpg

Tunnel Box Front
Tunnel Front End.jpg

Tunnel Box Rear
Tunnel Back End.jpg


1st) The connectors on the heater hoses - say what? Is that the mechanism to open an anchovie can? Gone!

2nd) So are these spot welds? And if so a Spot-Weld Bit is what I use to remove them? What size bit?

3rd) Not clear on best way to run the Heater Return Hose (instead of pipe) either through the upper tunnel or straight down through the floor and into the tunnel box.

Thanks, Carl
 
#2: Yea, you can see them cut out on your original post here (the photo all the holes). 3/8" spot weld cutter is what you're after - they're all very similar.

Do you know which heater tube is leaking? If it is the hot side (source) then its the one on the inside (cabin side) of the tunnel. Return goes straight down from the header to the lower tunnel cover area.

If your return line is leaking and you simply run a long heater hose to replace it then you don't need to drop the tunnel, just change the connections to your new replacement hose.
 
Those anchovie can pop tops are kind of a bitch to remove. I just cut through the band portion of them with a small cutoff wheel.

You said the tunnel (lower box portion) had been removed previously (prior owner?), so the spot welds to reattach it might be different than original. But it looks like they did a clean job compared to many.

The fresh under-coating makes it harder to see everything, but the pipes appear fairly decent. However my pipes looked quite good on the outside yet leaked badly when water pressure was applied. They tend to rot from the inside, so looks can be deceiving. Too bad you cut the copper pipes off, chances are they were good, but oh well.

If you end up having to remove the tunnel (lower box), then here is what I'm considering doing for the heater pipes. Run both of them in that lower tunnel area (like one already is) by stacking them on top of one another....
Tunnel Back End.jpg


Regarding the other option you mention to run a long length of heater hose inside the vehicle, along side the tunnel. That is pretty much how Fiat ran one of the AC lines on my '79 factory AC equipped X. It is under the carpet on the passenger side of the center hump, pretty much just laying there. But their AC design/installation is really poor, so I'm not certain if that is a good model to follow or not...but I guess it works.
 
Dr. Jeff are you saying that I could have 2 identical heater pipes made then offset them so they clear each other coming up into the interior tunnel? When the tunnel box is removed is there ample room (opening for the 2 heater pipes to rise up into the interior?). Maybe have the lower one made an inch longer in the front to rise up to the same height?

If so I'm now game to removing the tunnel box and installing 4 SS pipes! I already have the cooling hose kit that the pipes connect to so I would end up with a better than factory set up when done.

Darwoodious, I'll hit up Harbor Freight for the 3/8" spot weld cutter and remove the undercoating along the weld area.
 
If you use the vendor who makes the tubes that Bernice recommends, MAKE SURE you tell them to move the drains upward to the ends of the tubes by 4 inches. (!)
Failure to do this will yield a set of tubes with the drains INSIDE the tunnel support. (!) Ask me how I know ... You can also ask that they not include the drains.
Otherwise, these tubes are top quality and will last a lifetime.
 
You could also run the second heater house outside but next to the pipe box using P clips. I personally would do a delete on those drain spigots as I see no need for them and they are just a source of possible leaks.
 
Here are some of the photos that belong in my "over-engineered structural SS tube tunnel" post, but looks like you're eager to go and I think these photos will help you a lot Carl.

This first set is before I pulled out the old tubes so you can see placement. The inner/hot heater tube connects to host on the passenger side of the tunnel under the hand brake. There are 3 (IIRC) places this is spot welded with brackets as it follows the passenger side tunnel up to the heater.
IMG_20151011_185354.jpg IMG_20151011_185345.jpg IMG_20151011_185245.jpg

The return line runs down thru one of those oval cutouts (no plug here Rodger!) and next to the radiator coolant line tubes. It's a pretty good size hole.
IMG_0853.jpg IMG_1290.jpg IMG_1367.jpg

Front to rear, Jeff is thinking you could run them on top of each other and exit that way. Yeah, probably. It is tight and I even added a little more room on my setup for some extra vertical structure in the tunnel wall as well as needed some room for my brackets, but you could probably do it.
IMG_1314.jpg IMG_1290.jpg

I think the only thing that will be difficult is routing both of the hard heater lines around towards the engine bay.

Hope this helps.
 

Attachments

  • IMG_1311.jpg
    IMG_1311.jpg
    219.2 KB · Views: 1,916
  • IMG_1313.jpg
    IMG_1313.jpg
    169.5 KB · Views: 607
are you saying that I could have 2 identical heater pipes made then offset them so they clear each other coming up into the interior tunnel?
That's pretty much the idea. However it is only a concept at this point, I have not done it. As you say, one tube would need to be longer and possibly other minor dimensional changes to allow them to be positioned "piggy-back" on top of one-another. Actually both tubes may require slight changes to allow them to fit this way. The excellent photos "darwoodious" provided are a tremendous help in seeing how it might work. The oval opening at the front of the floor pan (where the tubes would pass into the interior by the heater box) seems to be long enough for both to go through, if they are positioned correctly. Otherwise the hole could be opened up a little. As for two tubes fitting under/within the tunnel, the outside diameter of each heater tube is less than half the outside diameter of one radiator tube. Therefore mathematically there should be enough room for two heater tubes to be positioned directly on top of each other. But until the tunnel is removed and more investigation is done, it has not been proven. As for the routing at the rear, into the engine bay. I plan to re-route the heater hoses from the engine to bring them both parallel (along side one another) under the engine to the opening at the rear of the tunnel...where the two rigid tubes will end. But that is mainly for my personal desire, to make for a cleaner install, getting them more out of sight and avoiding some of the poor routing done by the factory (in my opinion).

So if you go this direction it will require some development work. When the time comes to do mine I will look into it further, but that won't be for awhile. At this point I can't say if it is a good concept or not, just an idea. Your decision to look into it further or not.

Just to be clear, the drains that are being referenced above are for the larger radiator tubes (toward the front of them). Not the heater tubes...we're talking two different topics at the same time so don't get them confused.
 
Last edited:
Back
Top