
You are using an out of date browser. It may not display this or other websites correctly.
You should upgrade or use an alternative browser.
You should upgrade or use an alternative browser.
Selling the X & Bought an 75 Datsun 280Z
- Thread starter lookforjoe
- Start date
lookforjoe
True Classic
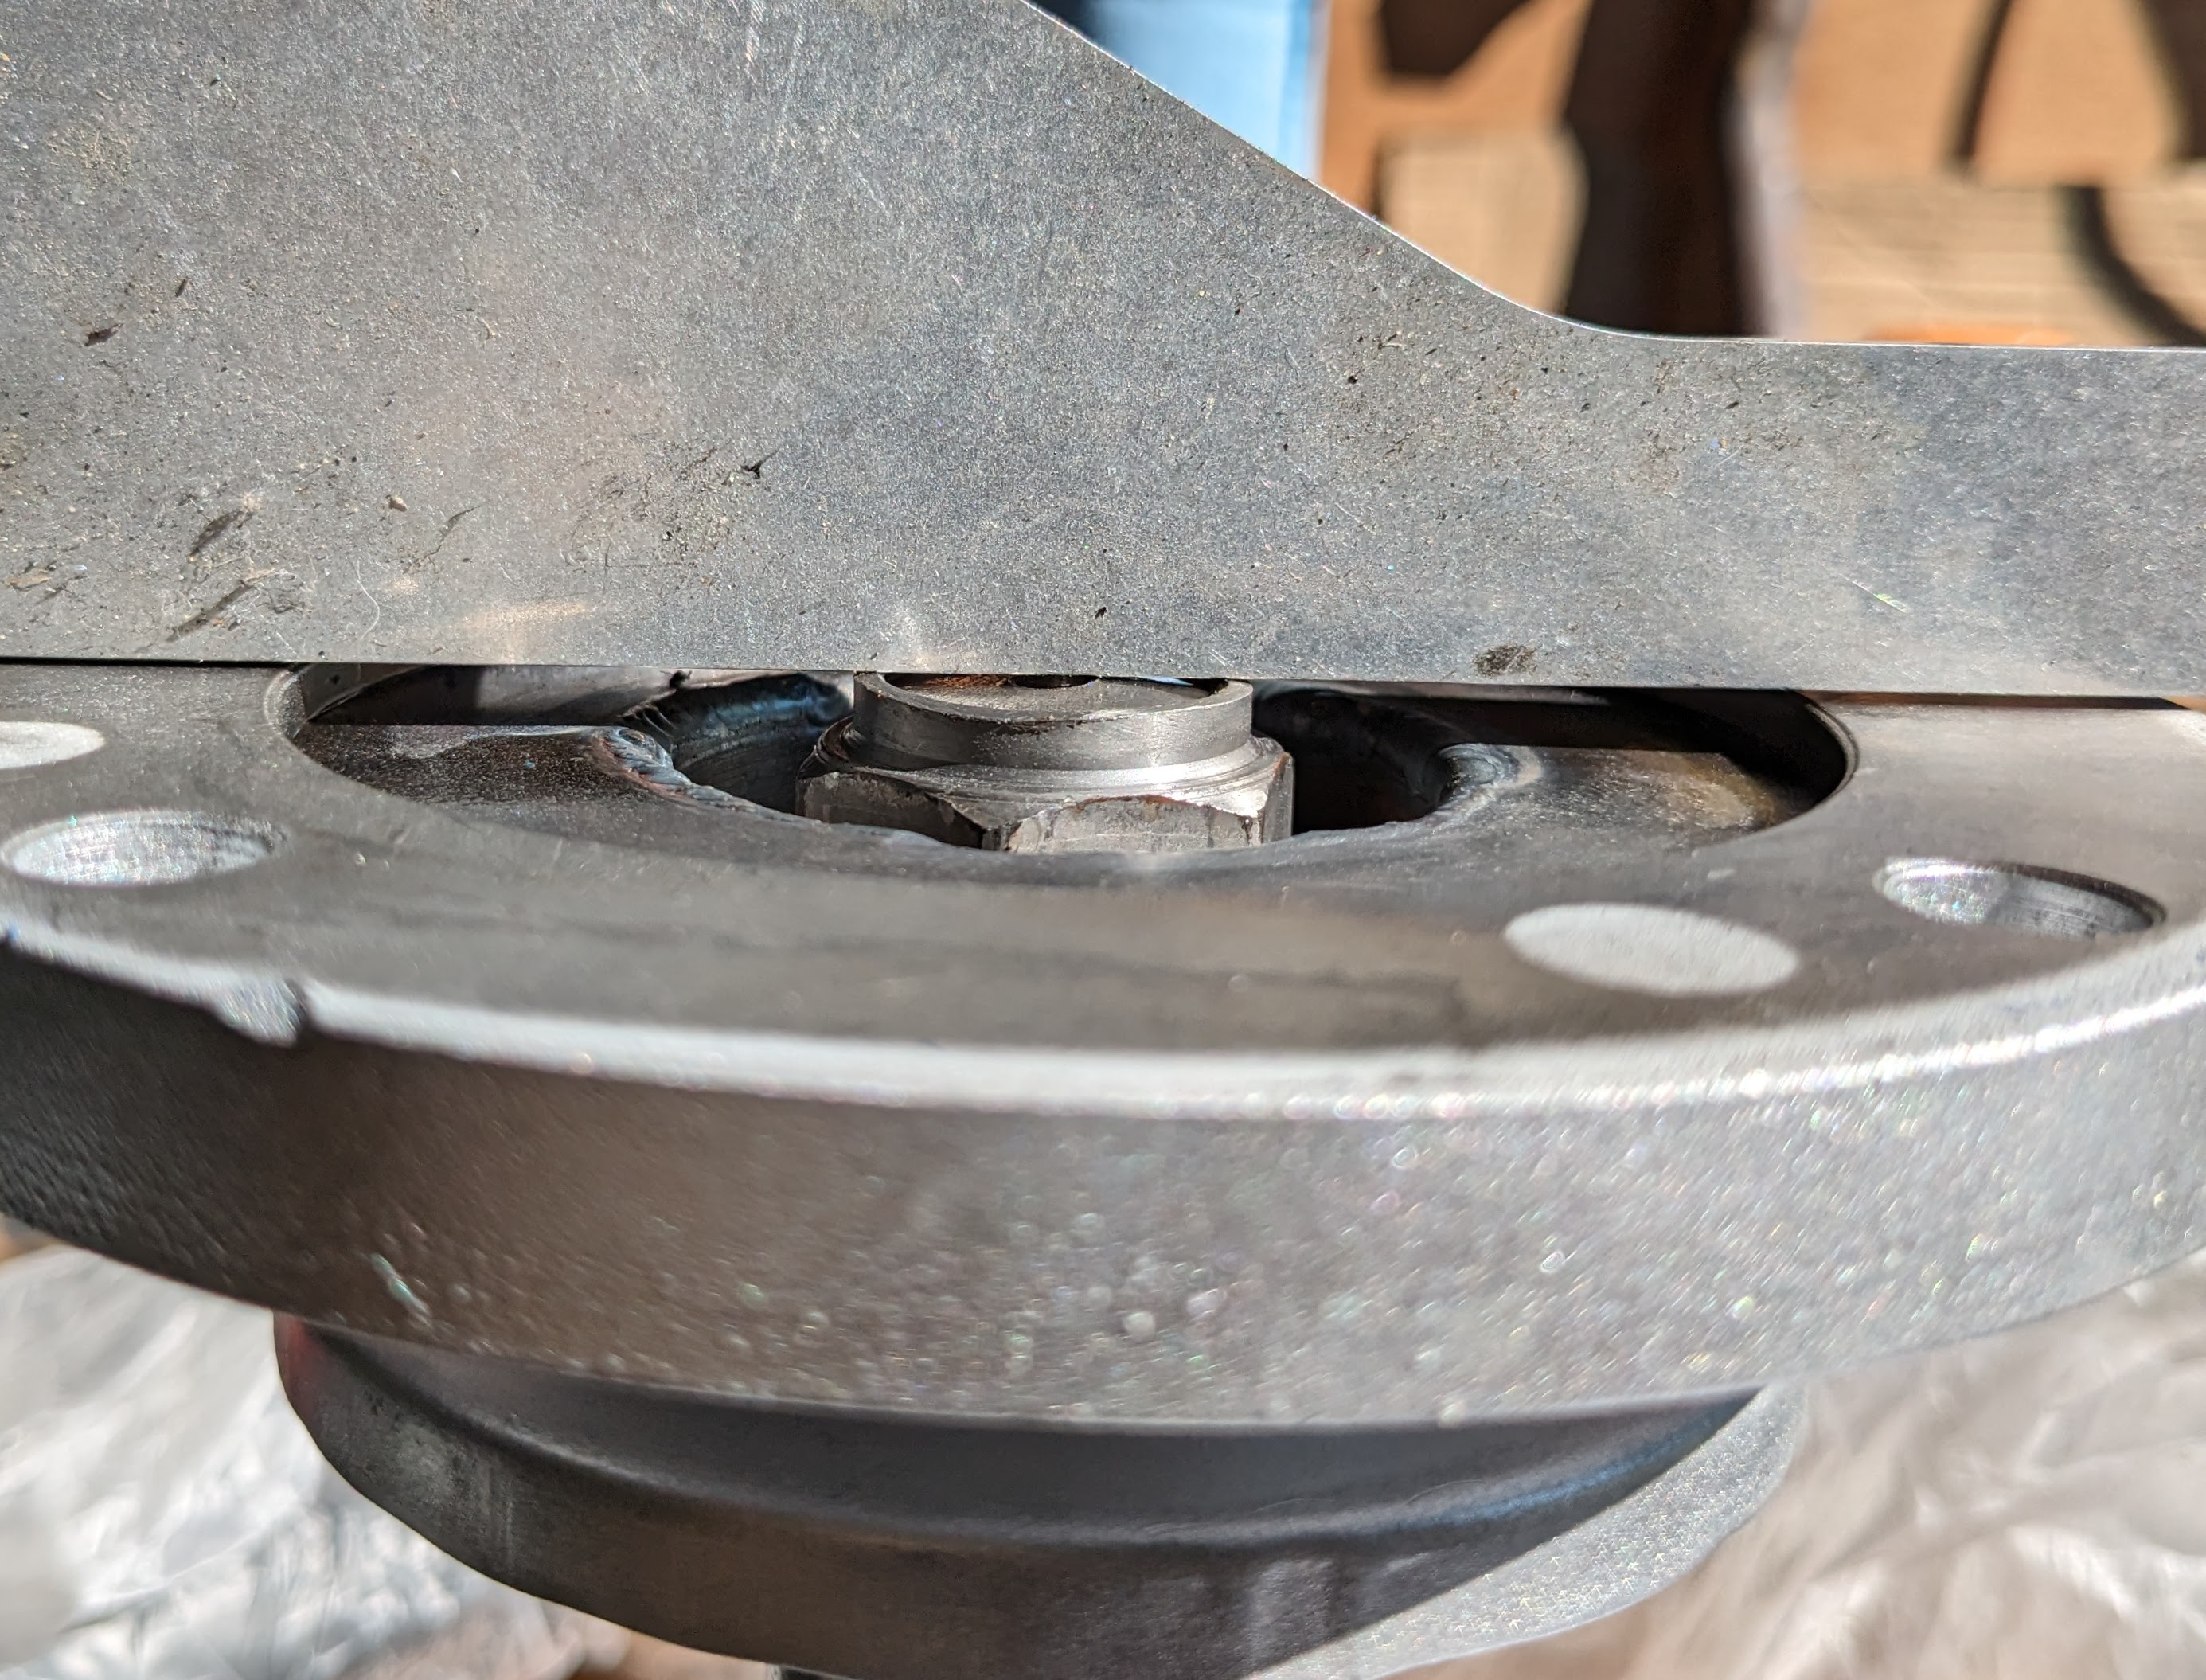
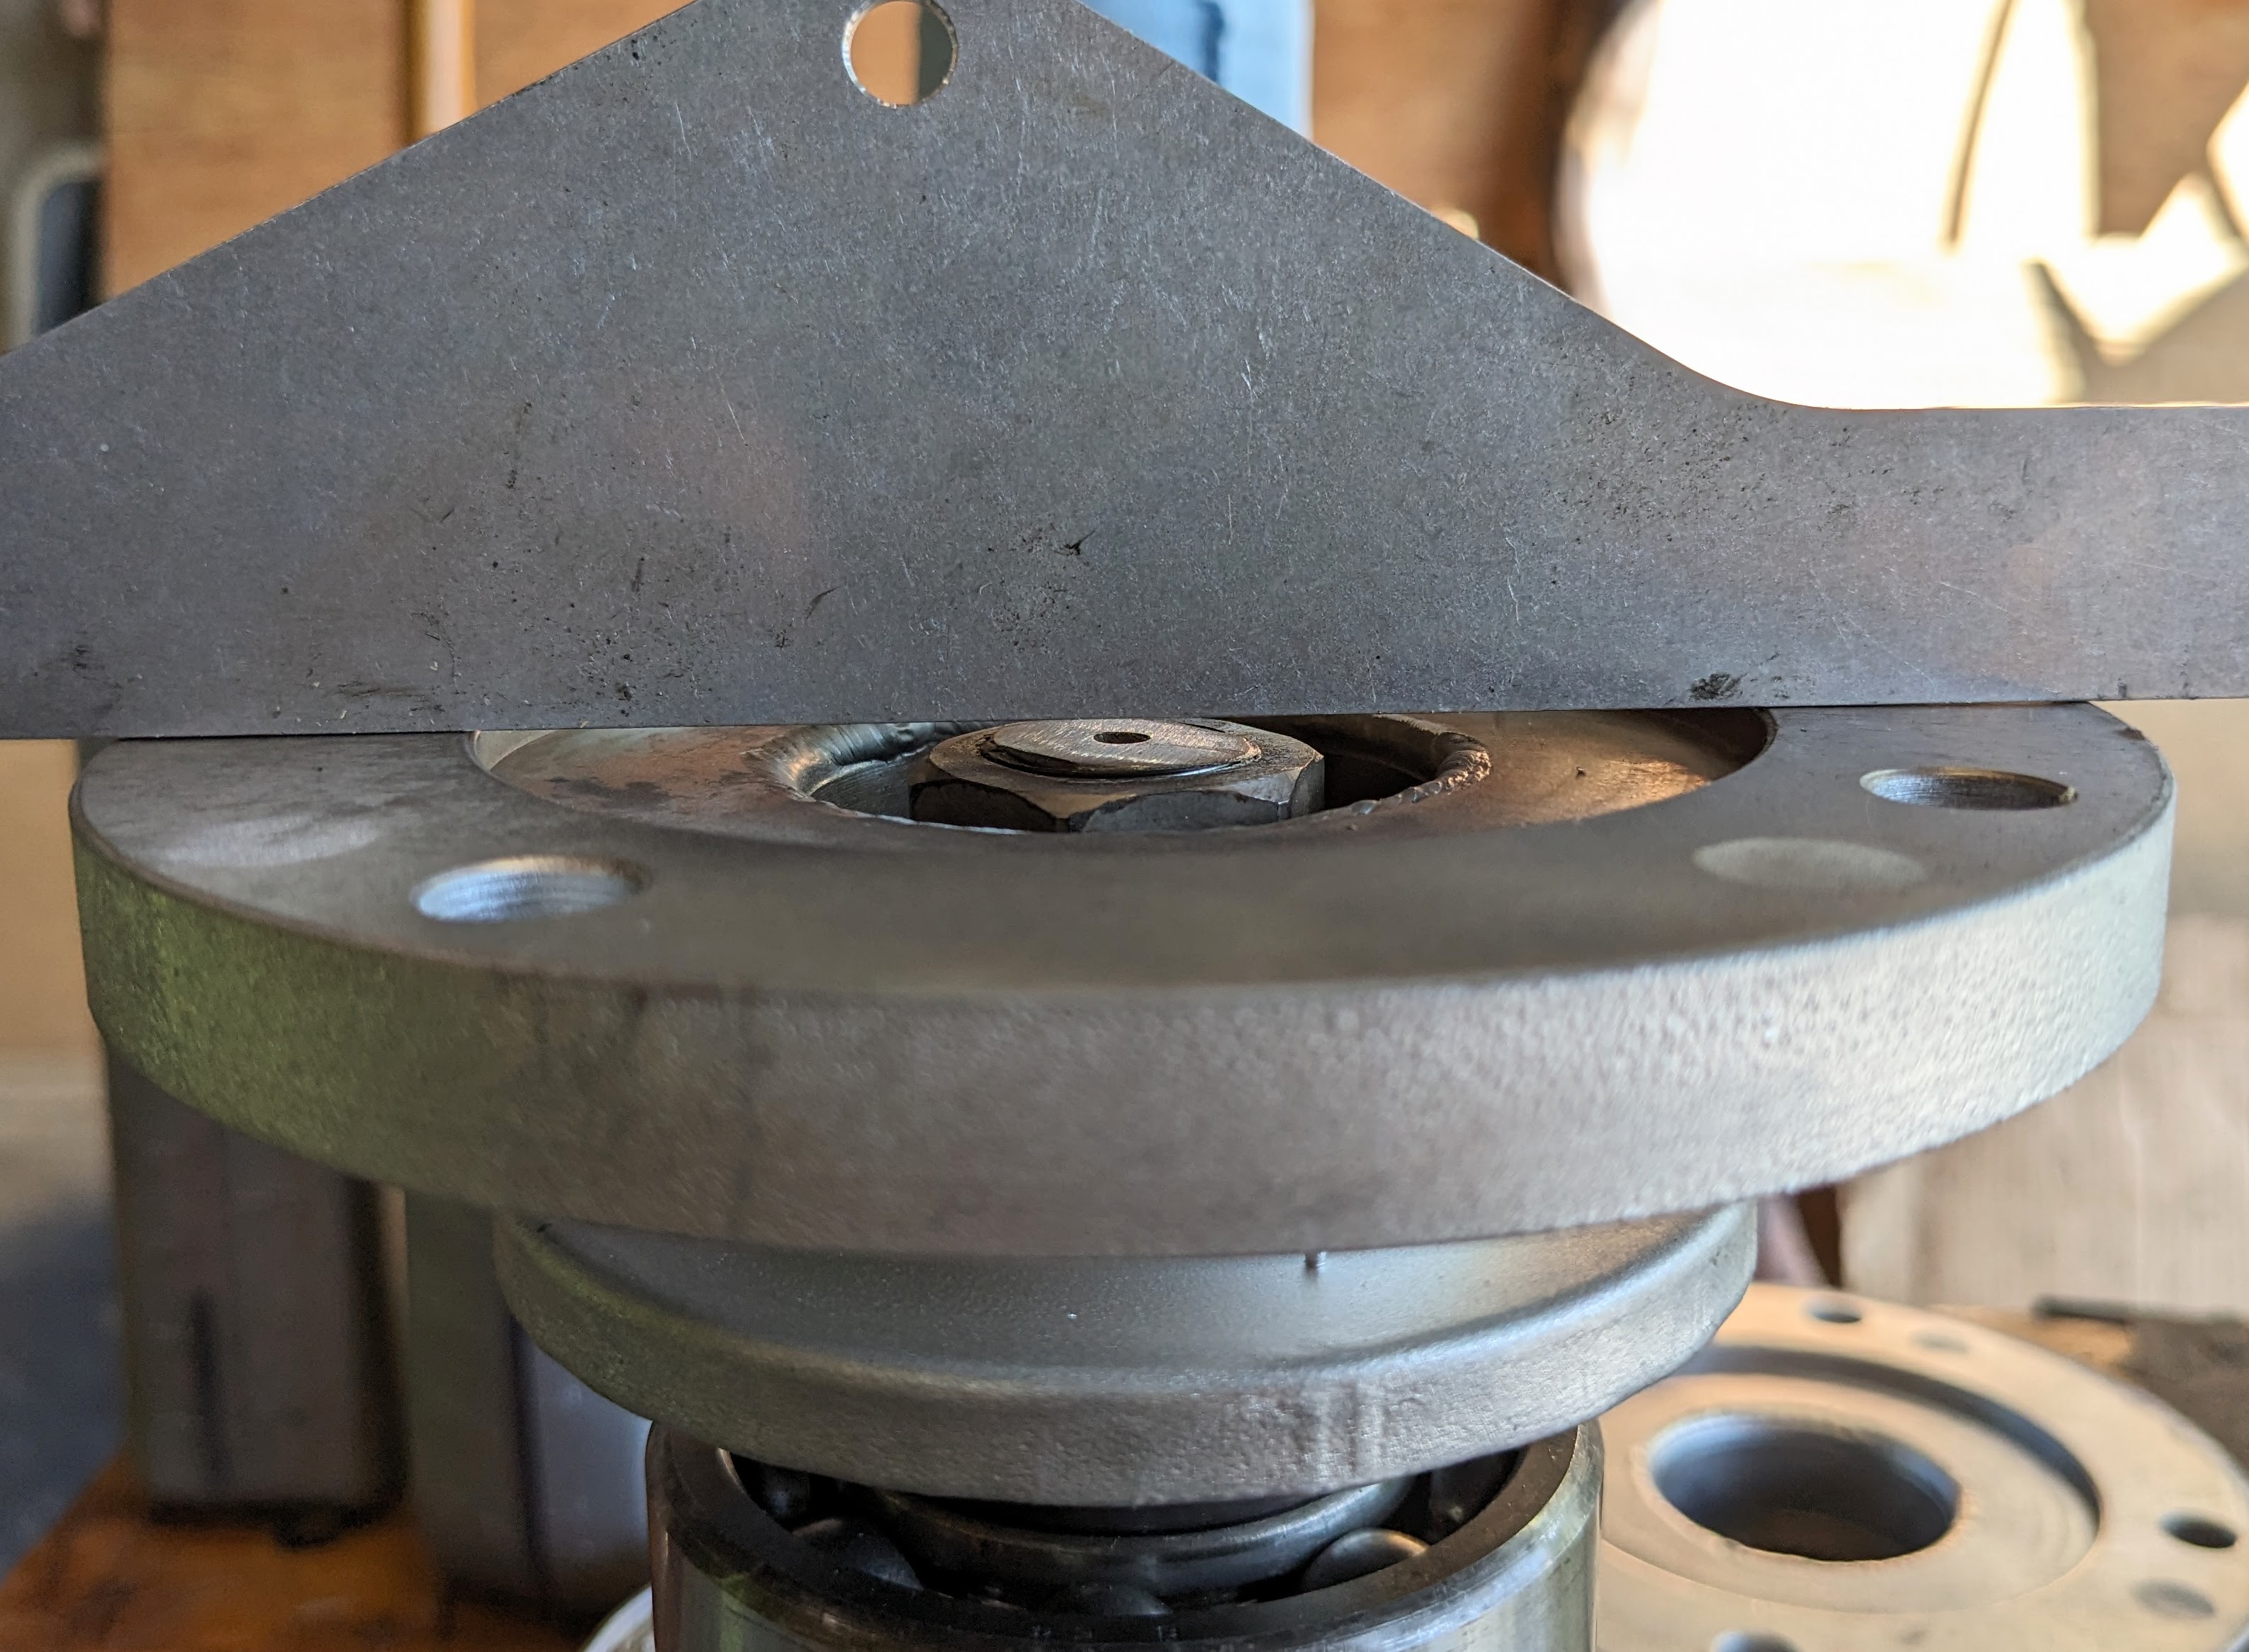
Worked on welding the flanges to the hubs today. I wanted the stock offset, as I have seen several posts & YT vids where the Silvermine flange offset was an (binding) issue - especially if the car is lowered at all. He does say it's only for stock height cars, up to 1" lowered. I'm using the Eibach spring set from MotorSport, so I don't know if that ends up more than an inch difference or not.
Clamped the outer ring so I could weld it flat.

removed the hub/flange so I could weld the outer ring. I added a collar to act as a heat sink & prevent the ring from warping.

Got a little hot on one side, but it's far enough inboard that I didn't get any distortion - getting down into the narrow gap on two sides was a bitch - which was another issue with some of the ppl using these flanges as intended.


After that I (MIG) tacked the hubs into the flanges - with them clamped in a vice to make sure they stayed flat

then I welded the inner lip, to make sure they stayed put before seaming the outer ring to the hub

Then finally welded the rings to the hubs - kept the two clamped to together to act as a heat sink


pressed 2" studs

space for CV flange, without diminishing total spacing from diff to outer flange

Hopefully get it all back in the car tomorrow - wheel bearings, strut inserts, driveshafts, rear disc brakes

Last edited:
lookforjoe
True Classic
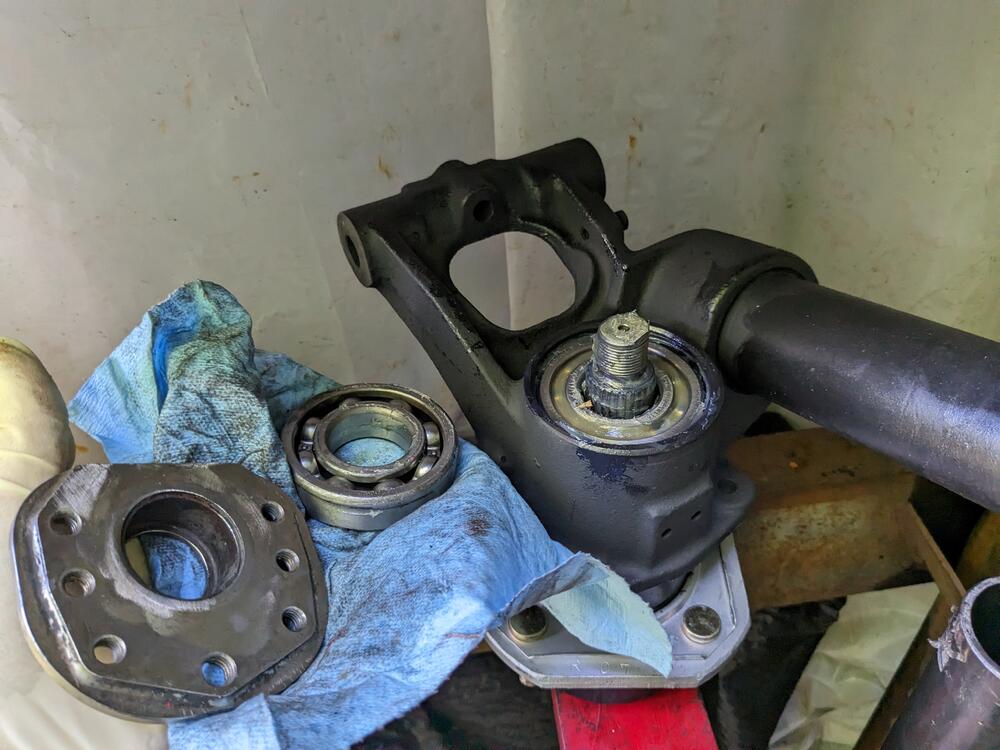
Slow going today. All I got done was the bearing & spindle/hub assembly, and a couple odds & ends.
Besides pressing the outer bearing onto the spindle first, I didn't find the FSM particularly helpful in terms of assembly directions. It is important to only apply pressure to the side of the race being inserted, to prevent bearing damage, but I couldn't see anyway to press the spindle with bearing into the hub that didn't involve applying load to the inner race as well. I ended up just tapping the outer flange evenly around the circumference to seat the outer race of the outer bearing in the hub. To install the inner bearing in the hub and on the spindle, I just used the old bearing, so both inner & outer races were loaded evenly.
Before I did any assembly I did another dry run with the old bearings to determine if I needed to cut it down to clear the CV. I did need to. Took the nuts off, cut off the shoulder.

Reassembled. Clearance is good here - about a 1mm off the CV inner cup


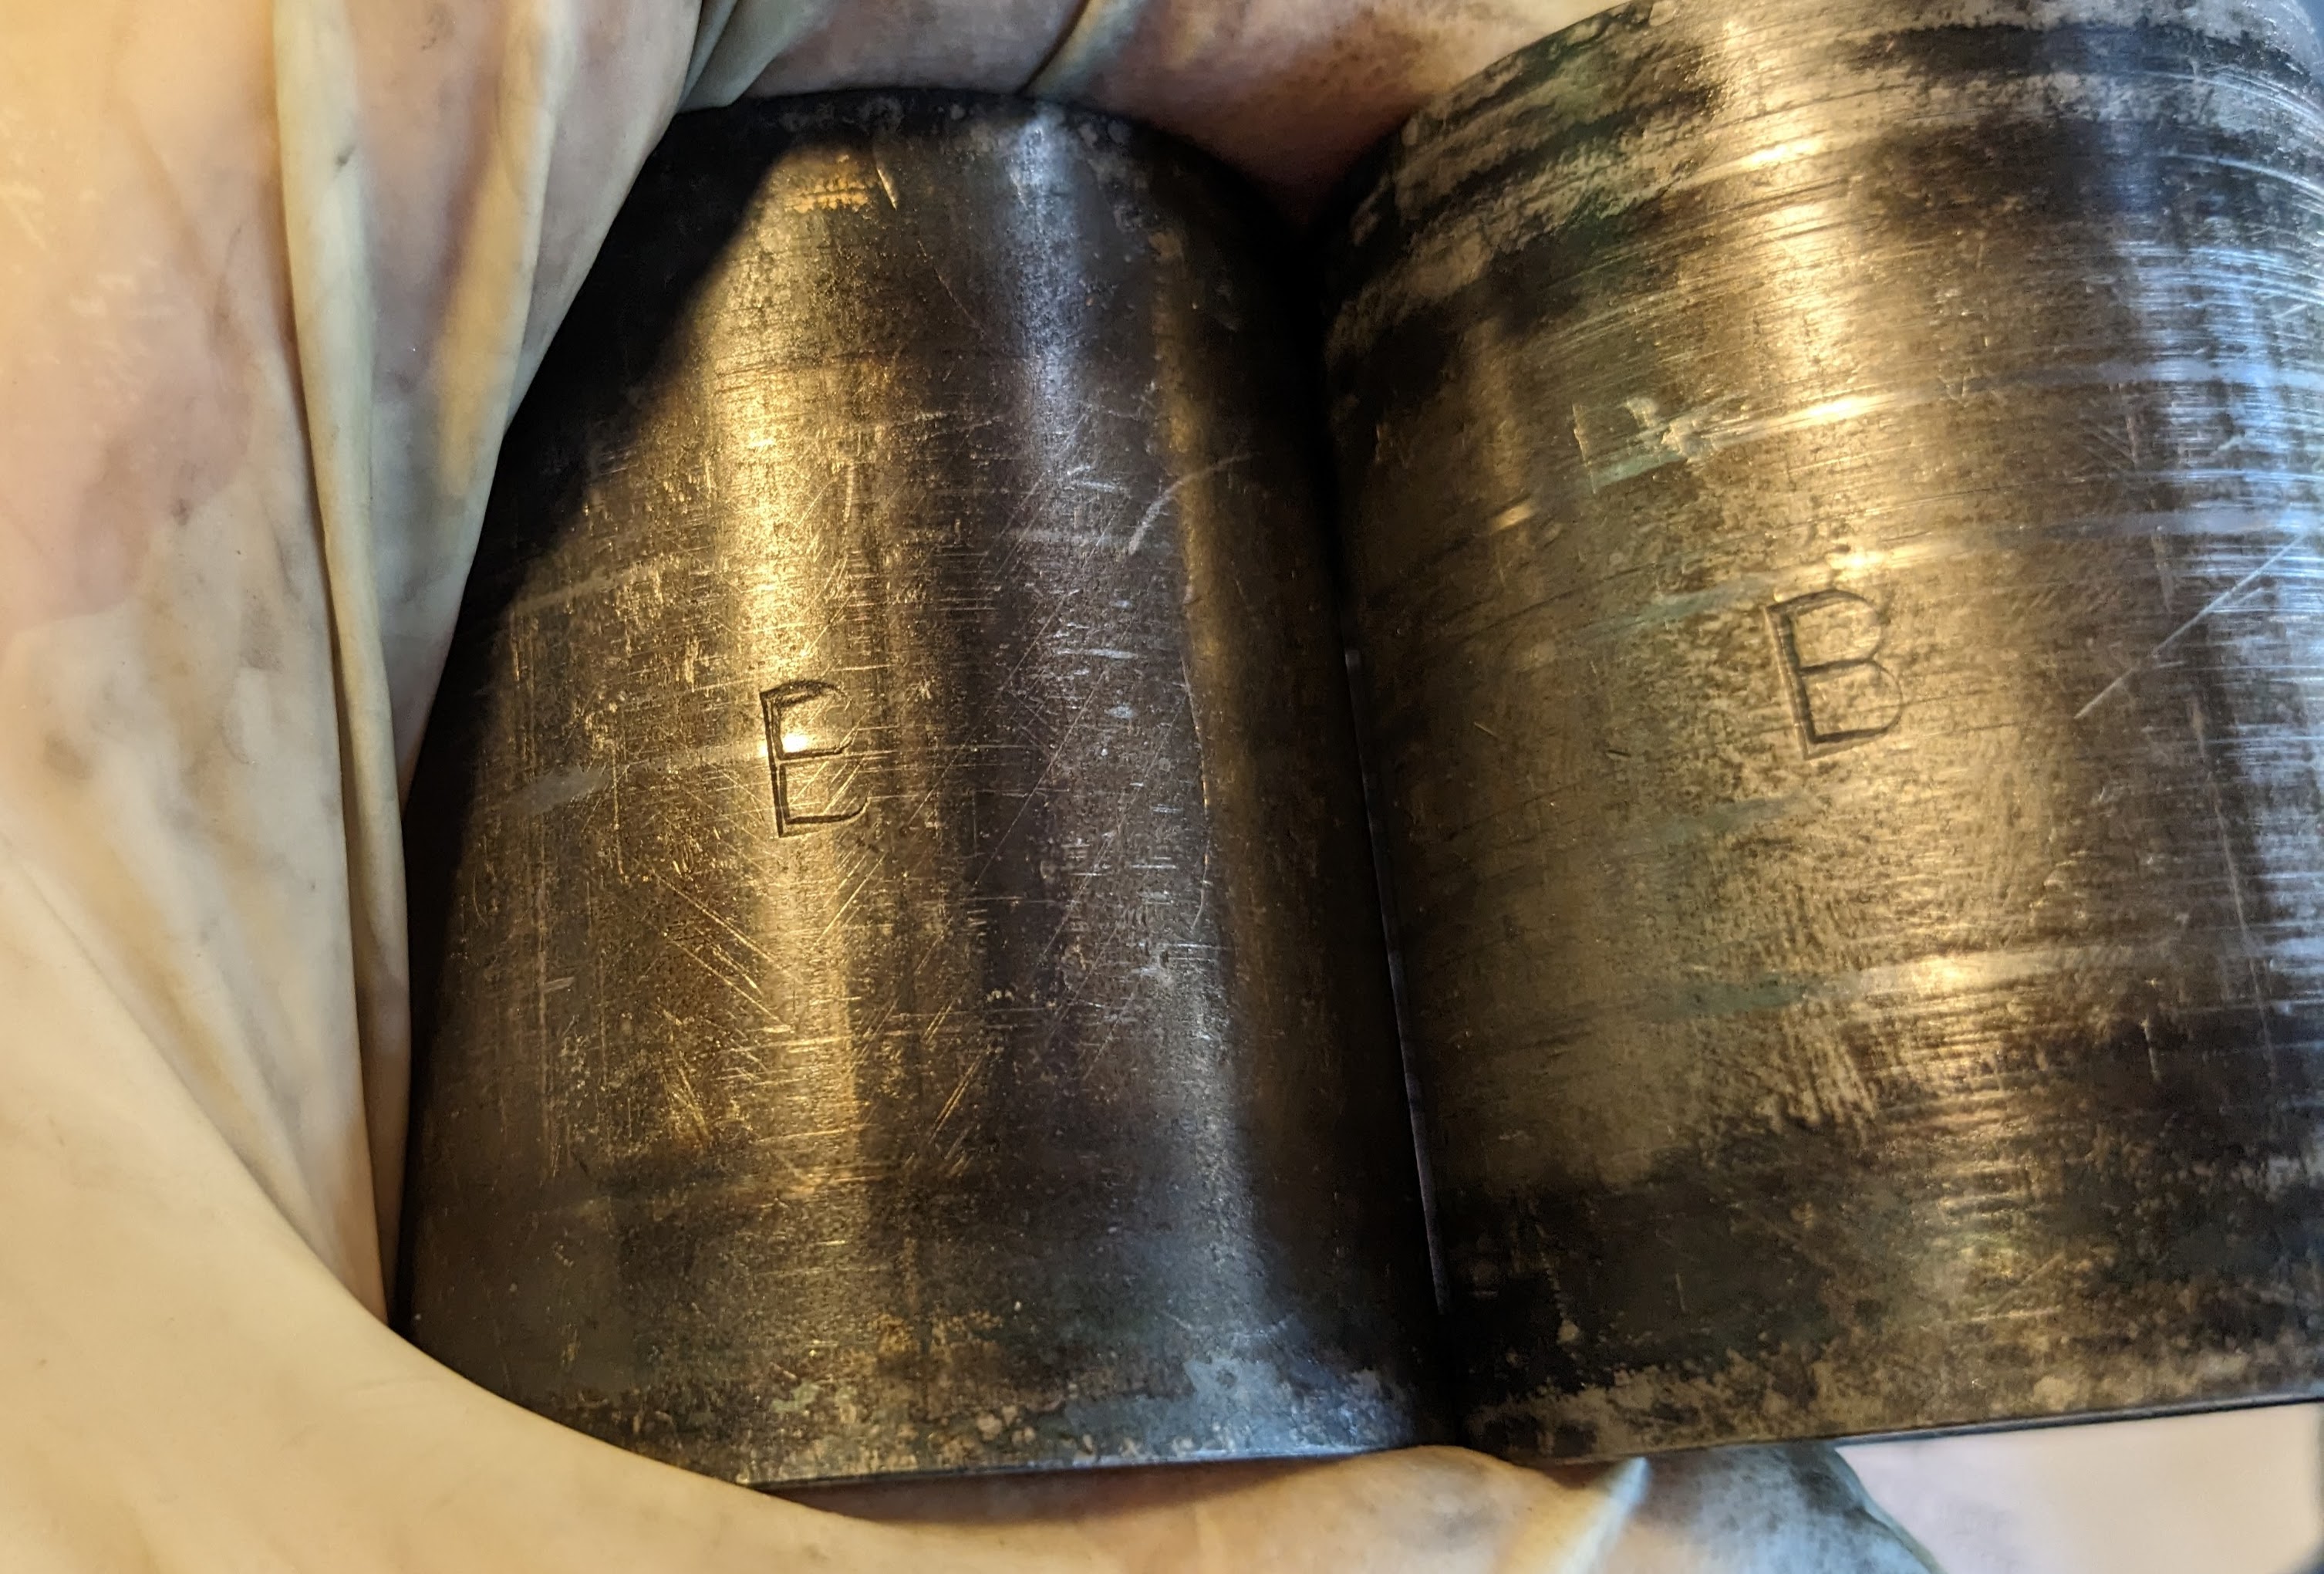
Both distance pieces were marked B

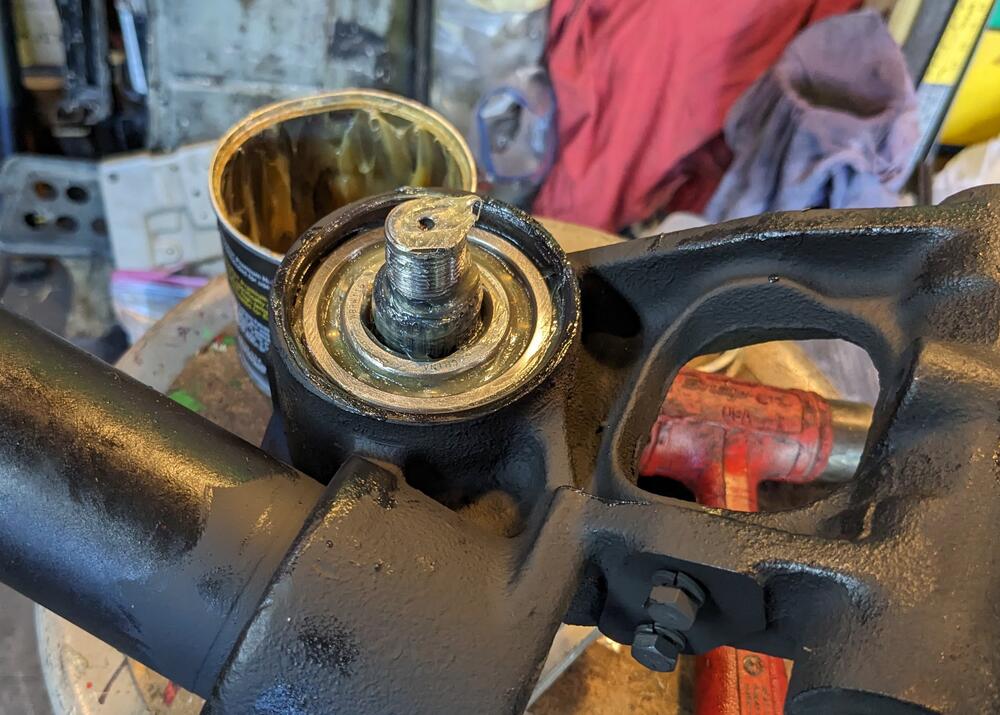
pressing the inner bearing, after greasing the backside of the inner & outer bearing cavities & installing distance piece. Used an old camber plate from my 98 XC to apply load to inner & outer races, and still clear the spline shaft
#2
inner grease seal going in. It is pressed all the way in, according to the FSM diagram , just doesn't look like the lip is going to have much surface contact with the inner hub flange
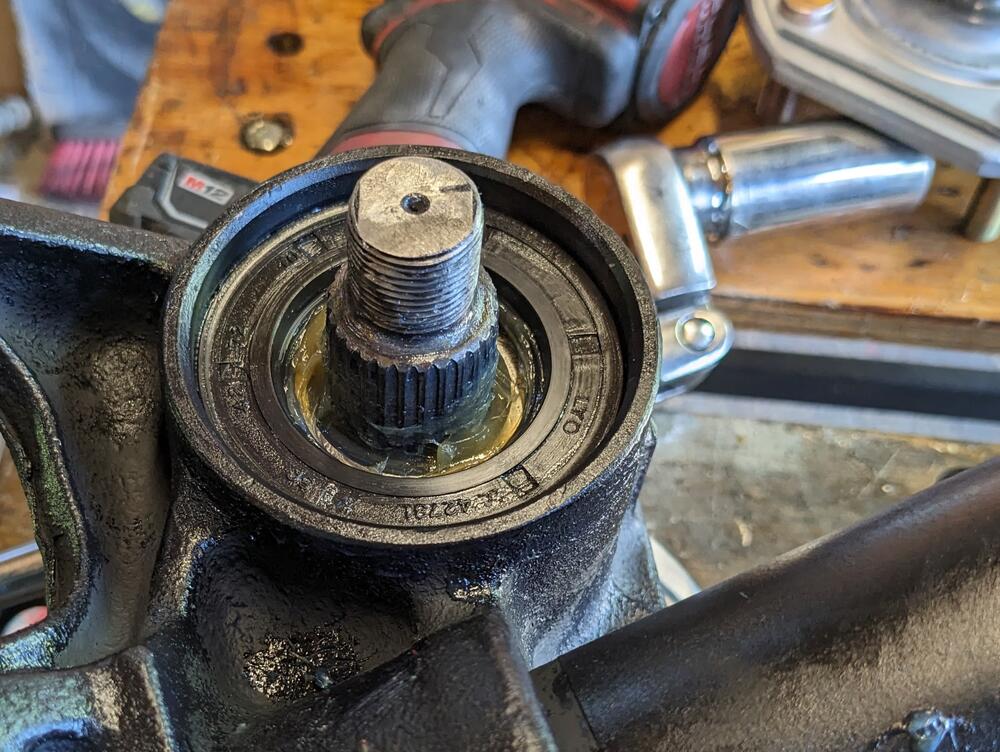
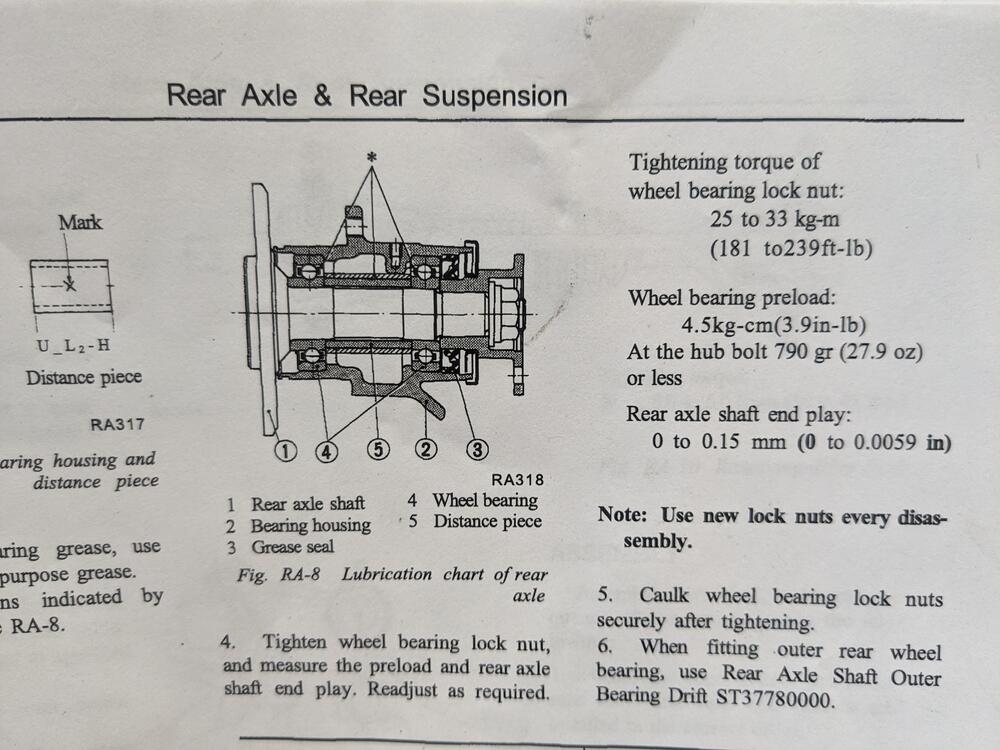
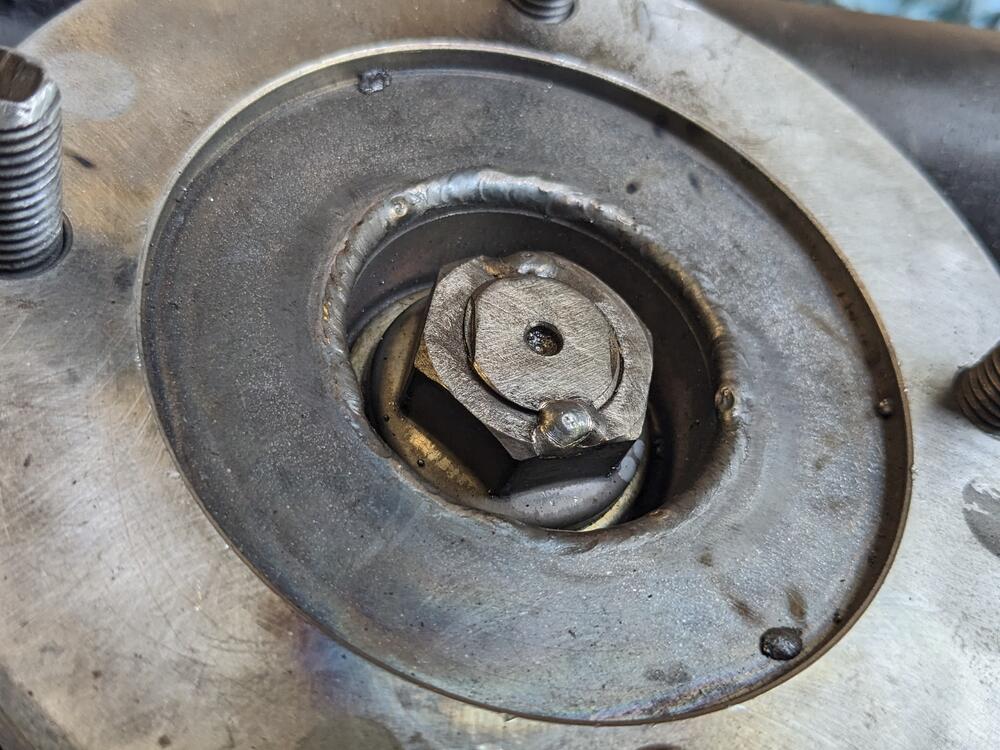
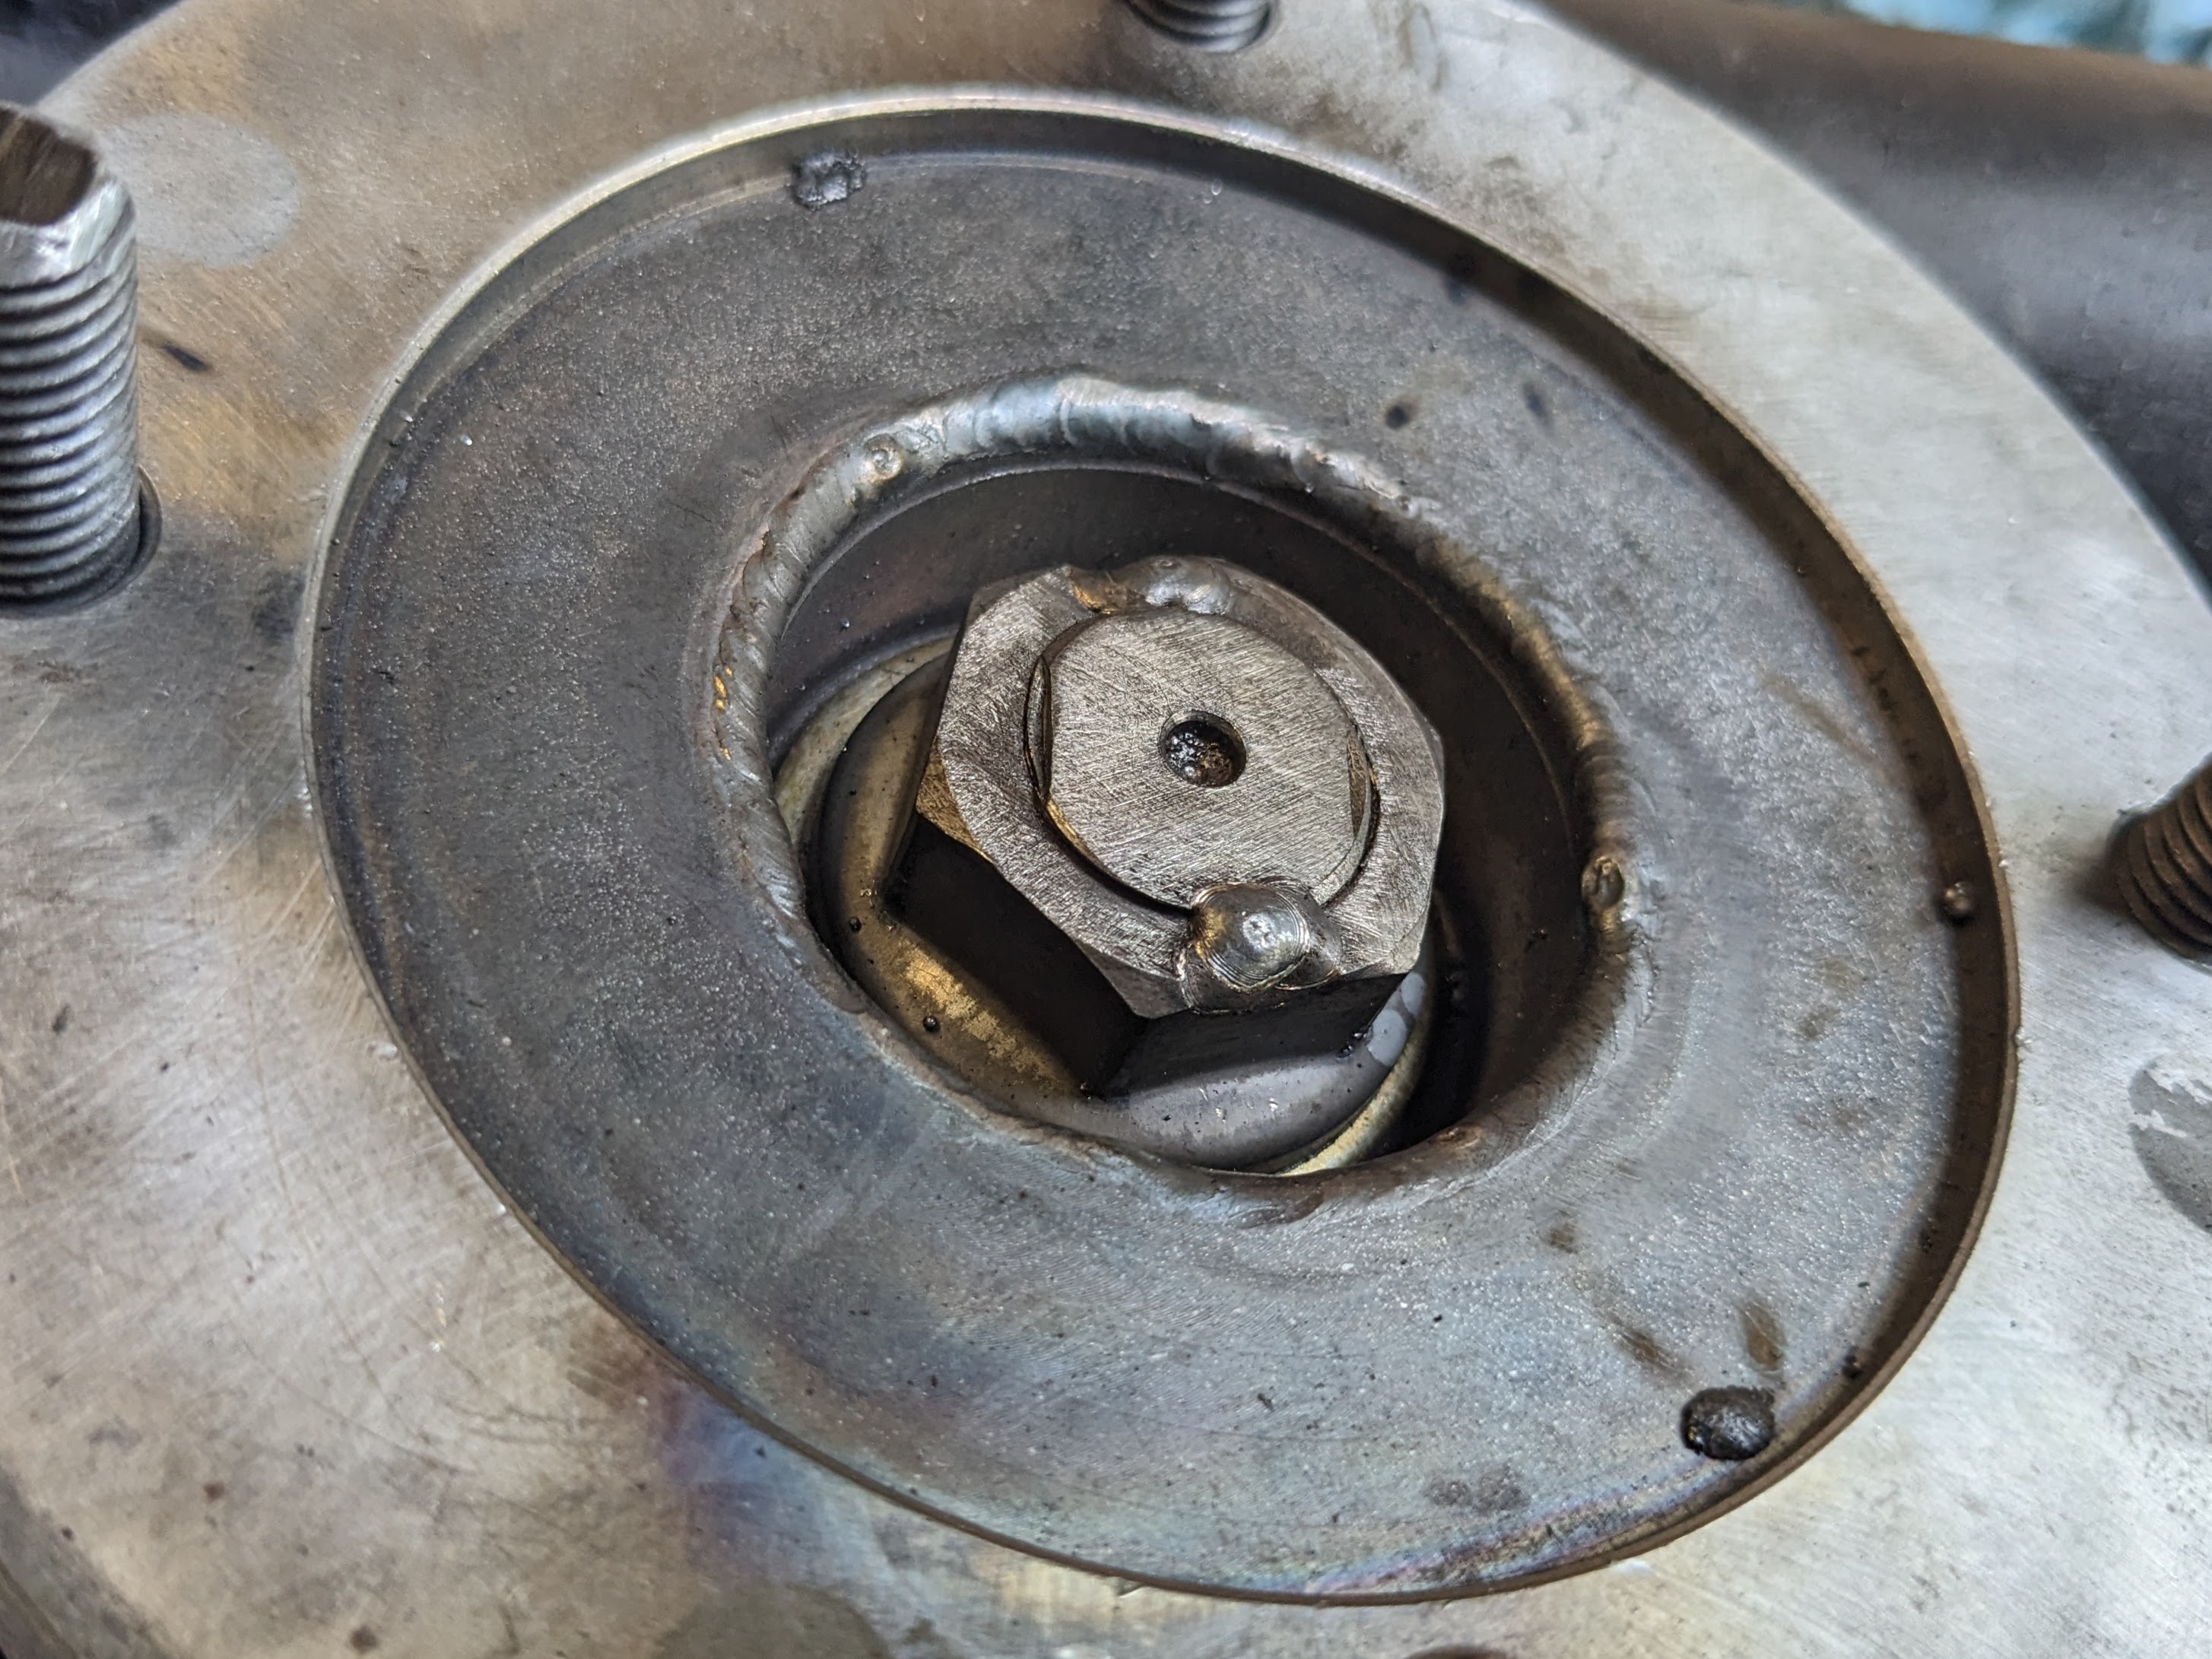
I then torqued the nut to 195ft/lbs. drag feels even, no end play. I have no way of measuring 3.9in/lb. My 1/4" drive Snap-on torque wrench is not accurate below 10in/lb
I had notched the nuts, so I could tack weld them to the spindle without creating a weld- mound that would interfere with the CV cup clearance.

#1 welded. In the unlikely event I ever need to remove them again, I can cut the tack weld as easily as cutting the stake shoulders of the original
#2
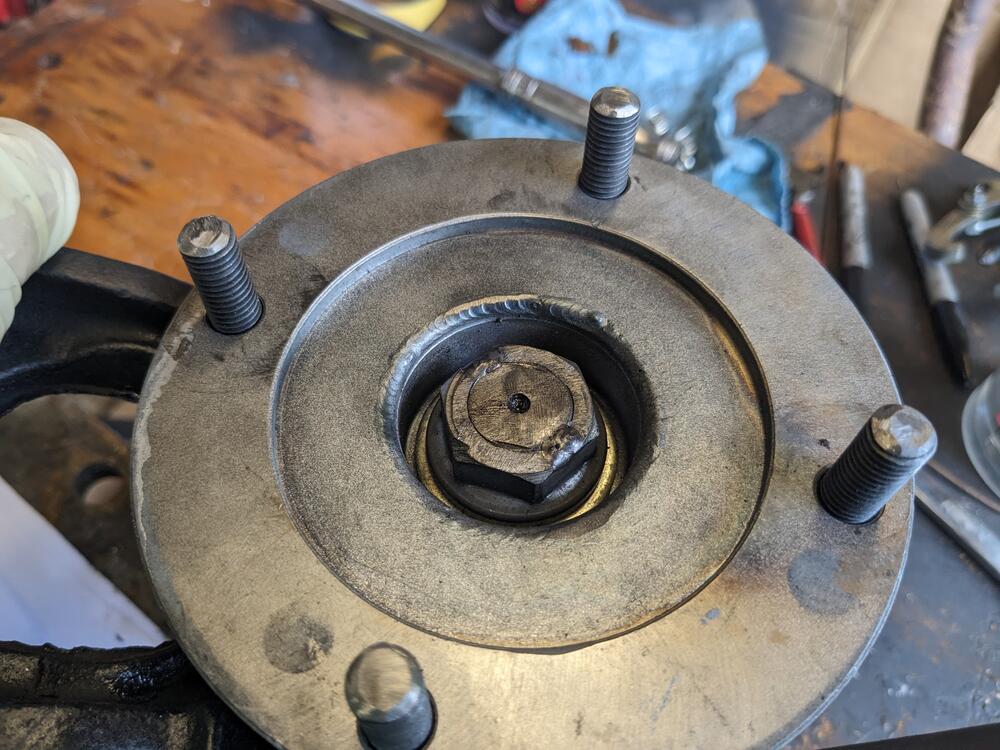
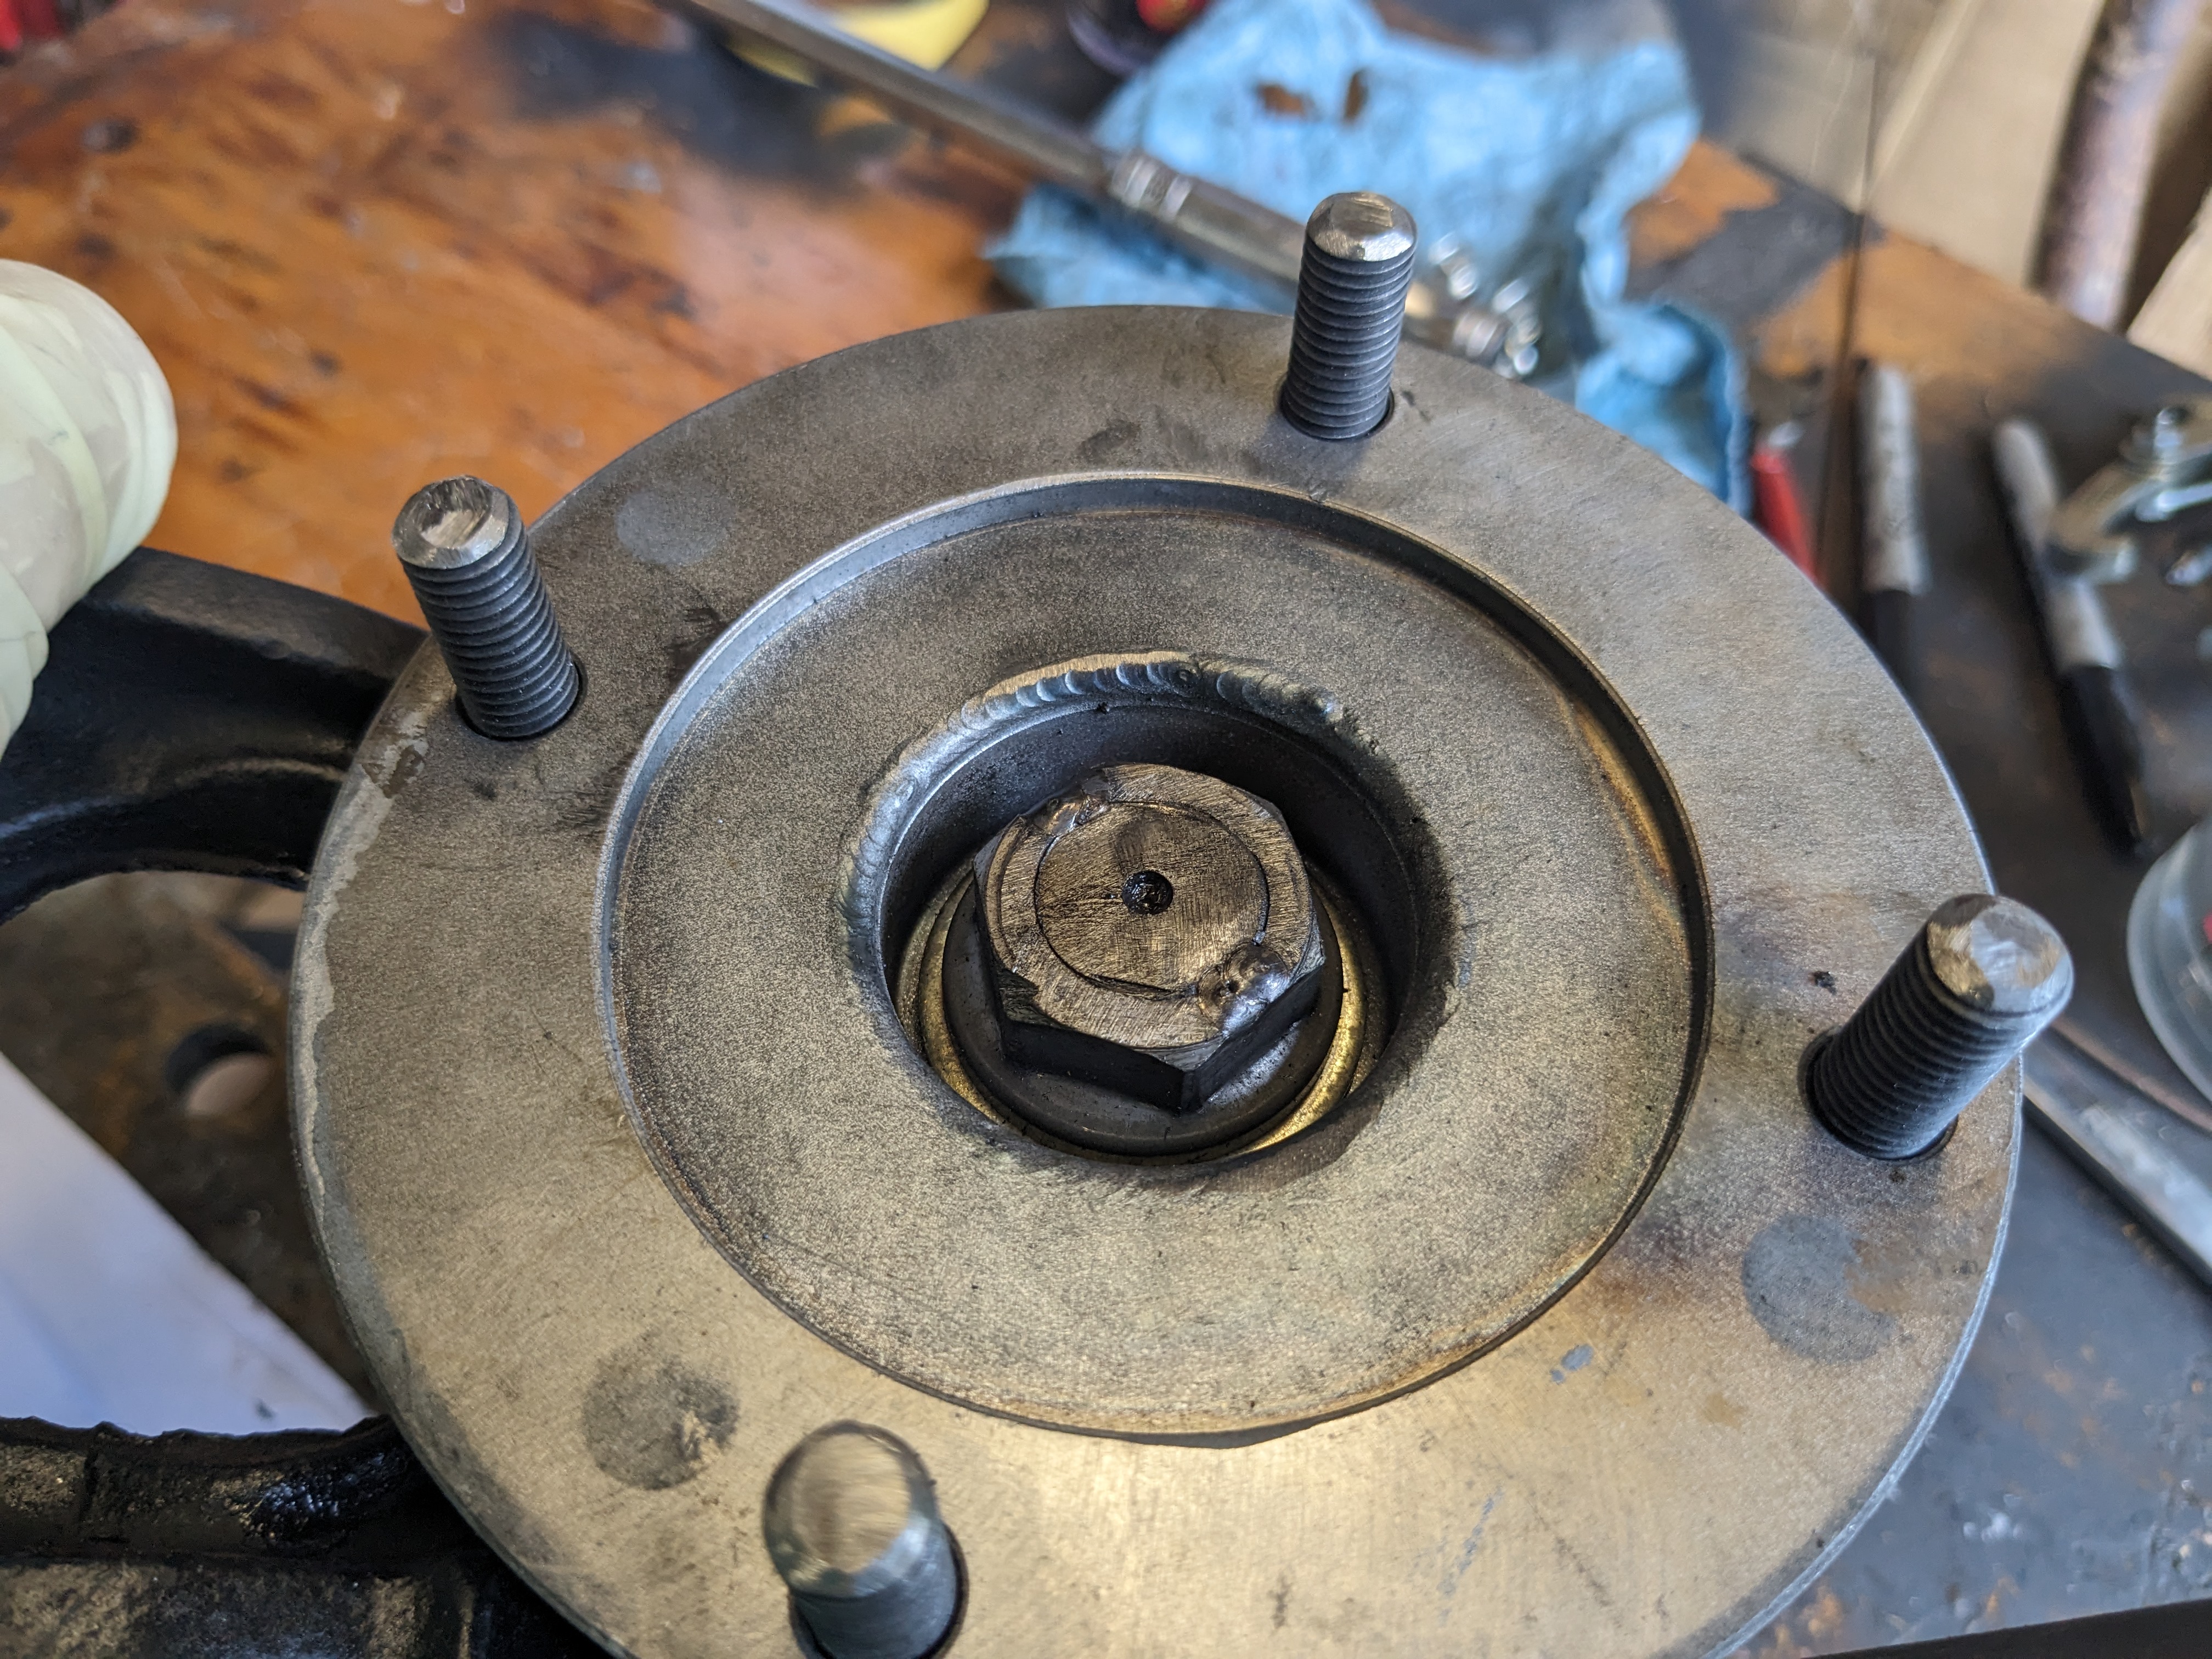
I found the wheel studs I bought for the rear were actually 2.25", not 2" as listed. Test fit the spindle with a rotor to check depth. I had to cut them down to 2" or the wheel nuts won't seat
after

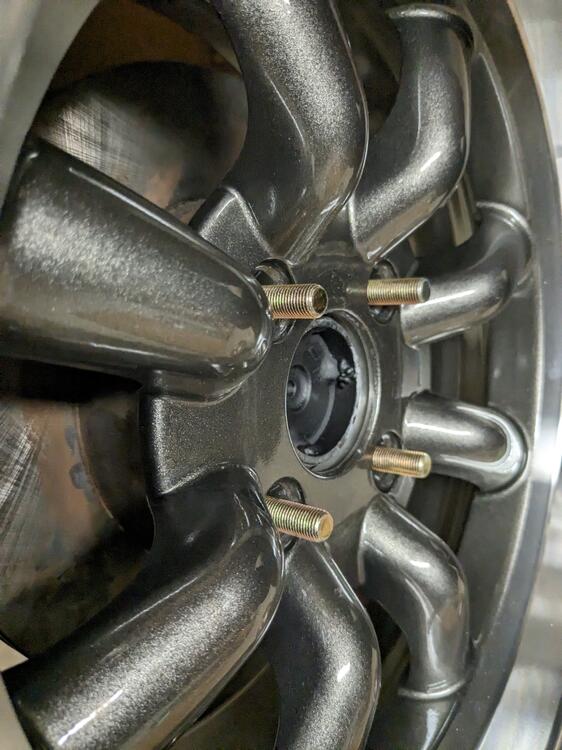
Another catch - with the larger OD CV flange, clearance off the Strut cast base is an issue - I had looked at that, but without it being assembled, there was no way to be certain what would be best approach. I opted to use press-studs, similar to wheel studs, just M10x1.5
They were longer than needed, so I trimmed about 1/4" off, as assembly on the car may become an clearance issue
cut

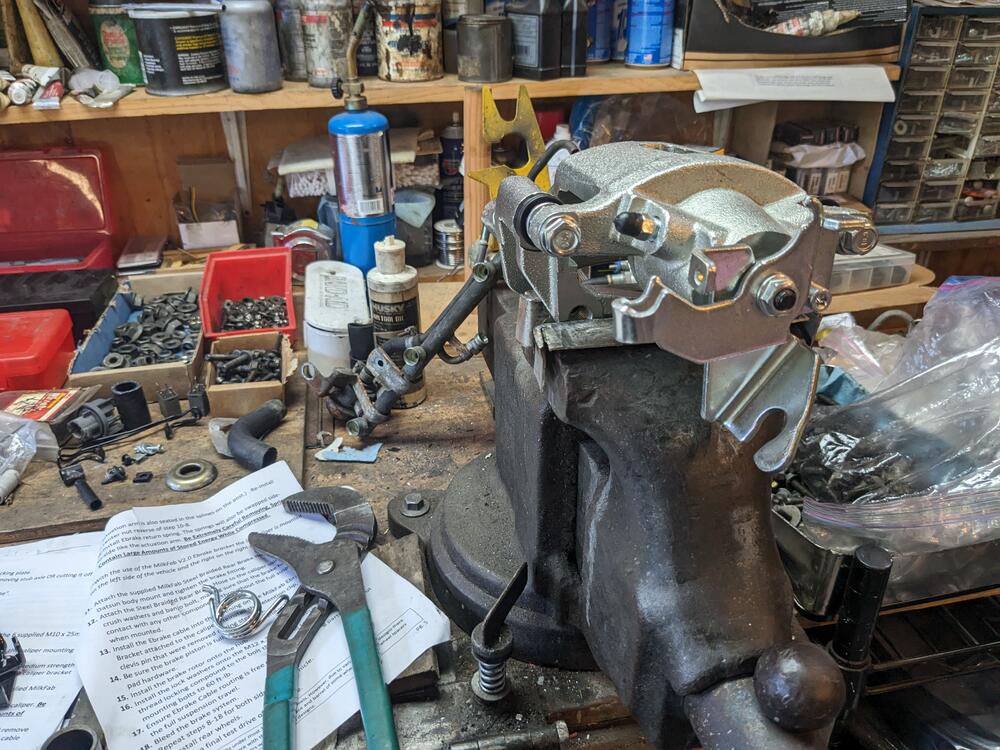
After that I test fit the MilkFab brake caliper brackets & swapped out the eBrake as per their instructions.
parts removed

MilkFab eBrake bracket positioned, cable levers reversed L/R as per their instructions
checked offset with a rotor, everything looks good

Going to be out of town until next Friday, so have to wait to get it all back in the car.
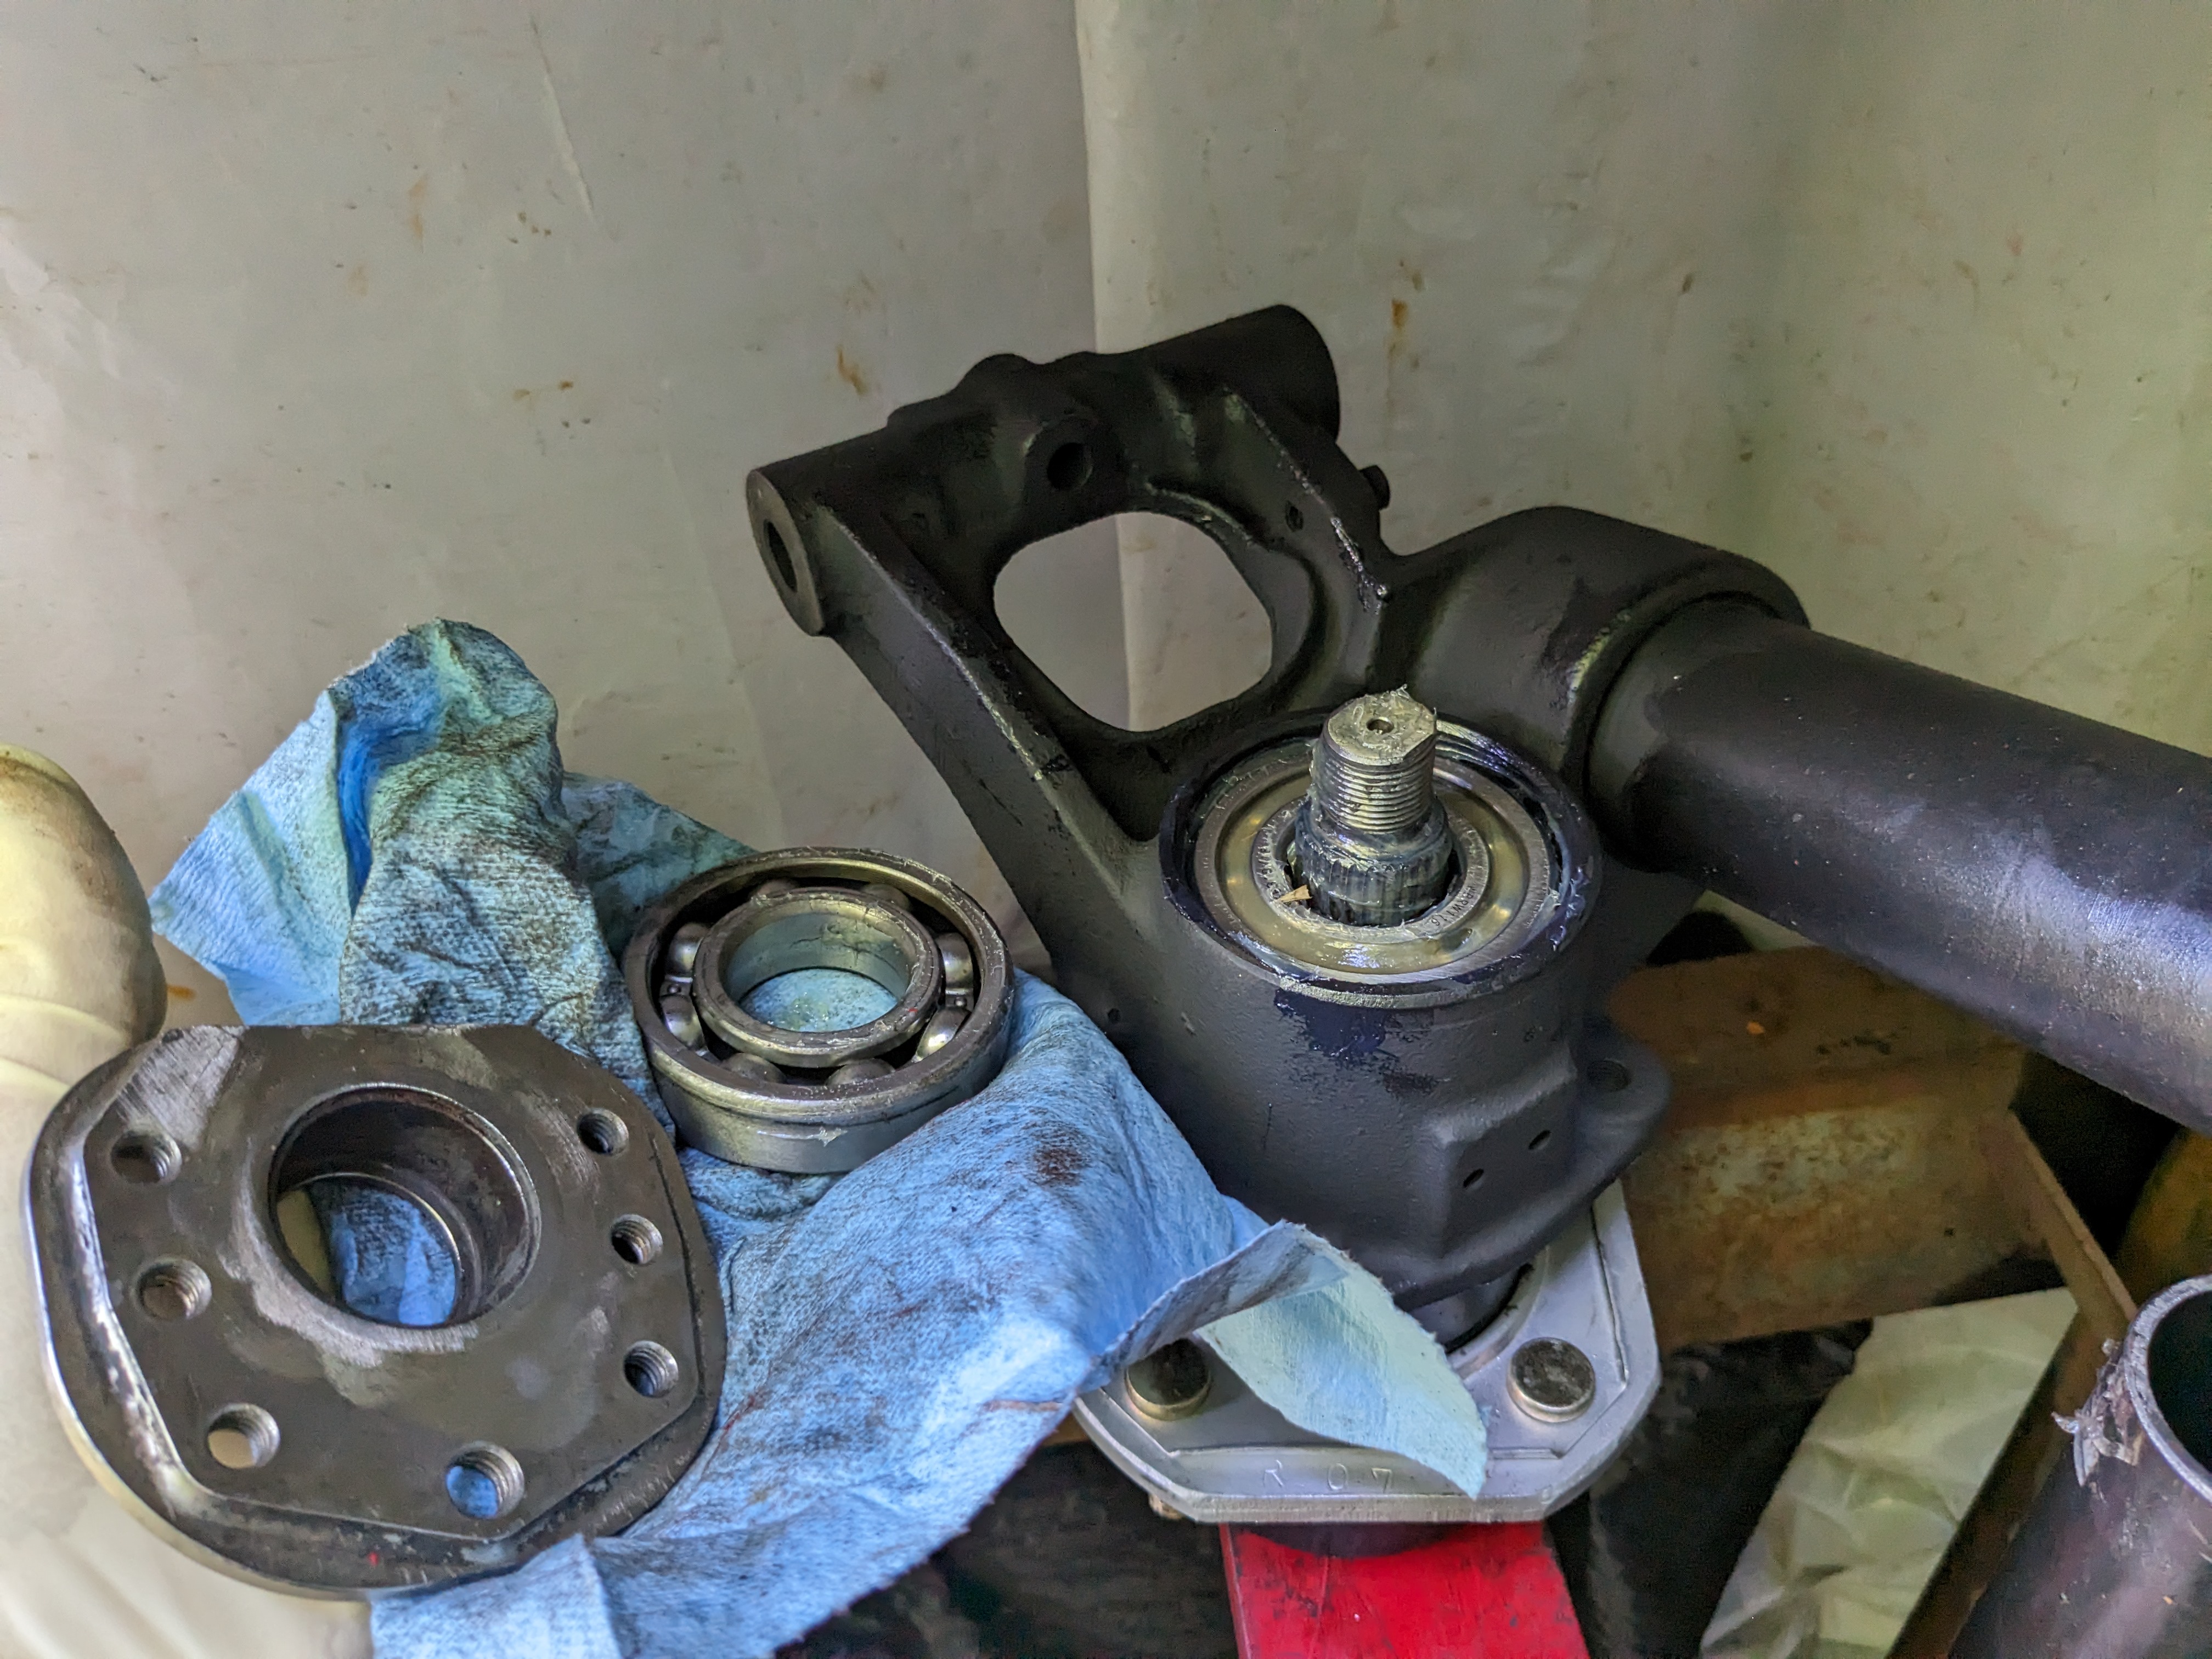
Besides pressing the outer bearing onto the spindle first, I didn't find the FSM particularly helpful in terms of assembly directions. It is important to only apply pressure to the side of the race being inserted, to prevent bearing damage, but I couldn't see anyway to press the spindle with bearing into the hub that didn't involve applying load to the inner race as well. I ended up just tapping the outer flange evenly around the circumference to seat the outer race of the outer bearing in the hub. To install the inner bearing in the hub and on the spindle, I just used the old bearing, so both inner & outer races were loaded evenly.
Before I did any assembly I did another dry run with the old bearings to determine if I needed to cut it down to clear the CV. I did need to. Took the nuts off, cut off the shoulder.
Reassembled. Clearance is good here - about a 1mm off the CV inner cup

Both distance pieces were marked B
pressing the inner bearing, after greasing the backside of the inner & outer bearing cavities & installing distance piece. Used an old camber plate from my 98 XC to apply load to inner & outer races, and still clear the spline shaft
#2

inner grease seal going in. It is pressed all the way in, according to the FSM diagram , just doesn't look like the lip is going to have much surface contact with the inner hub flange

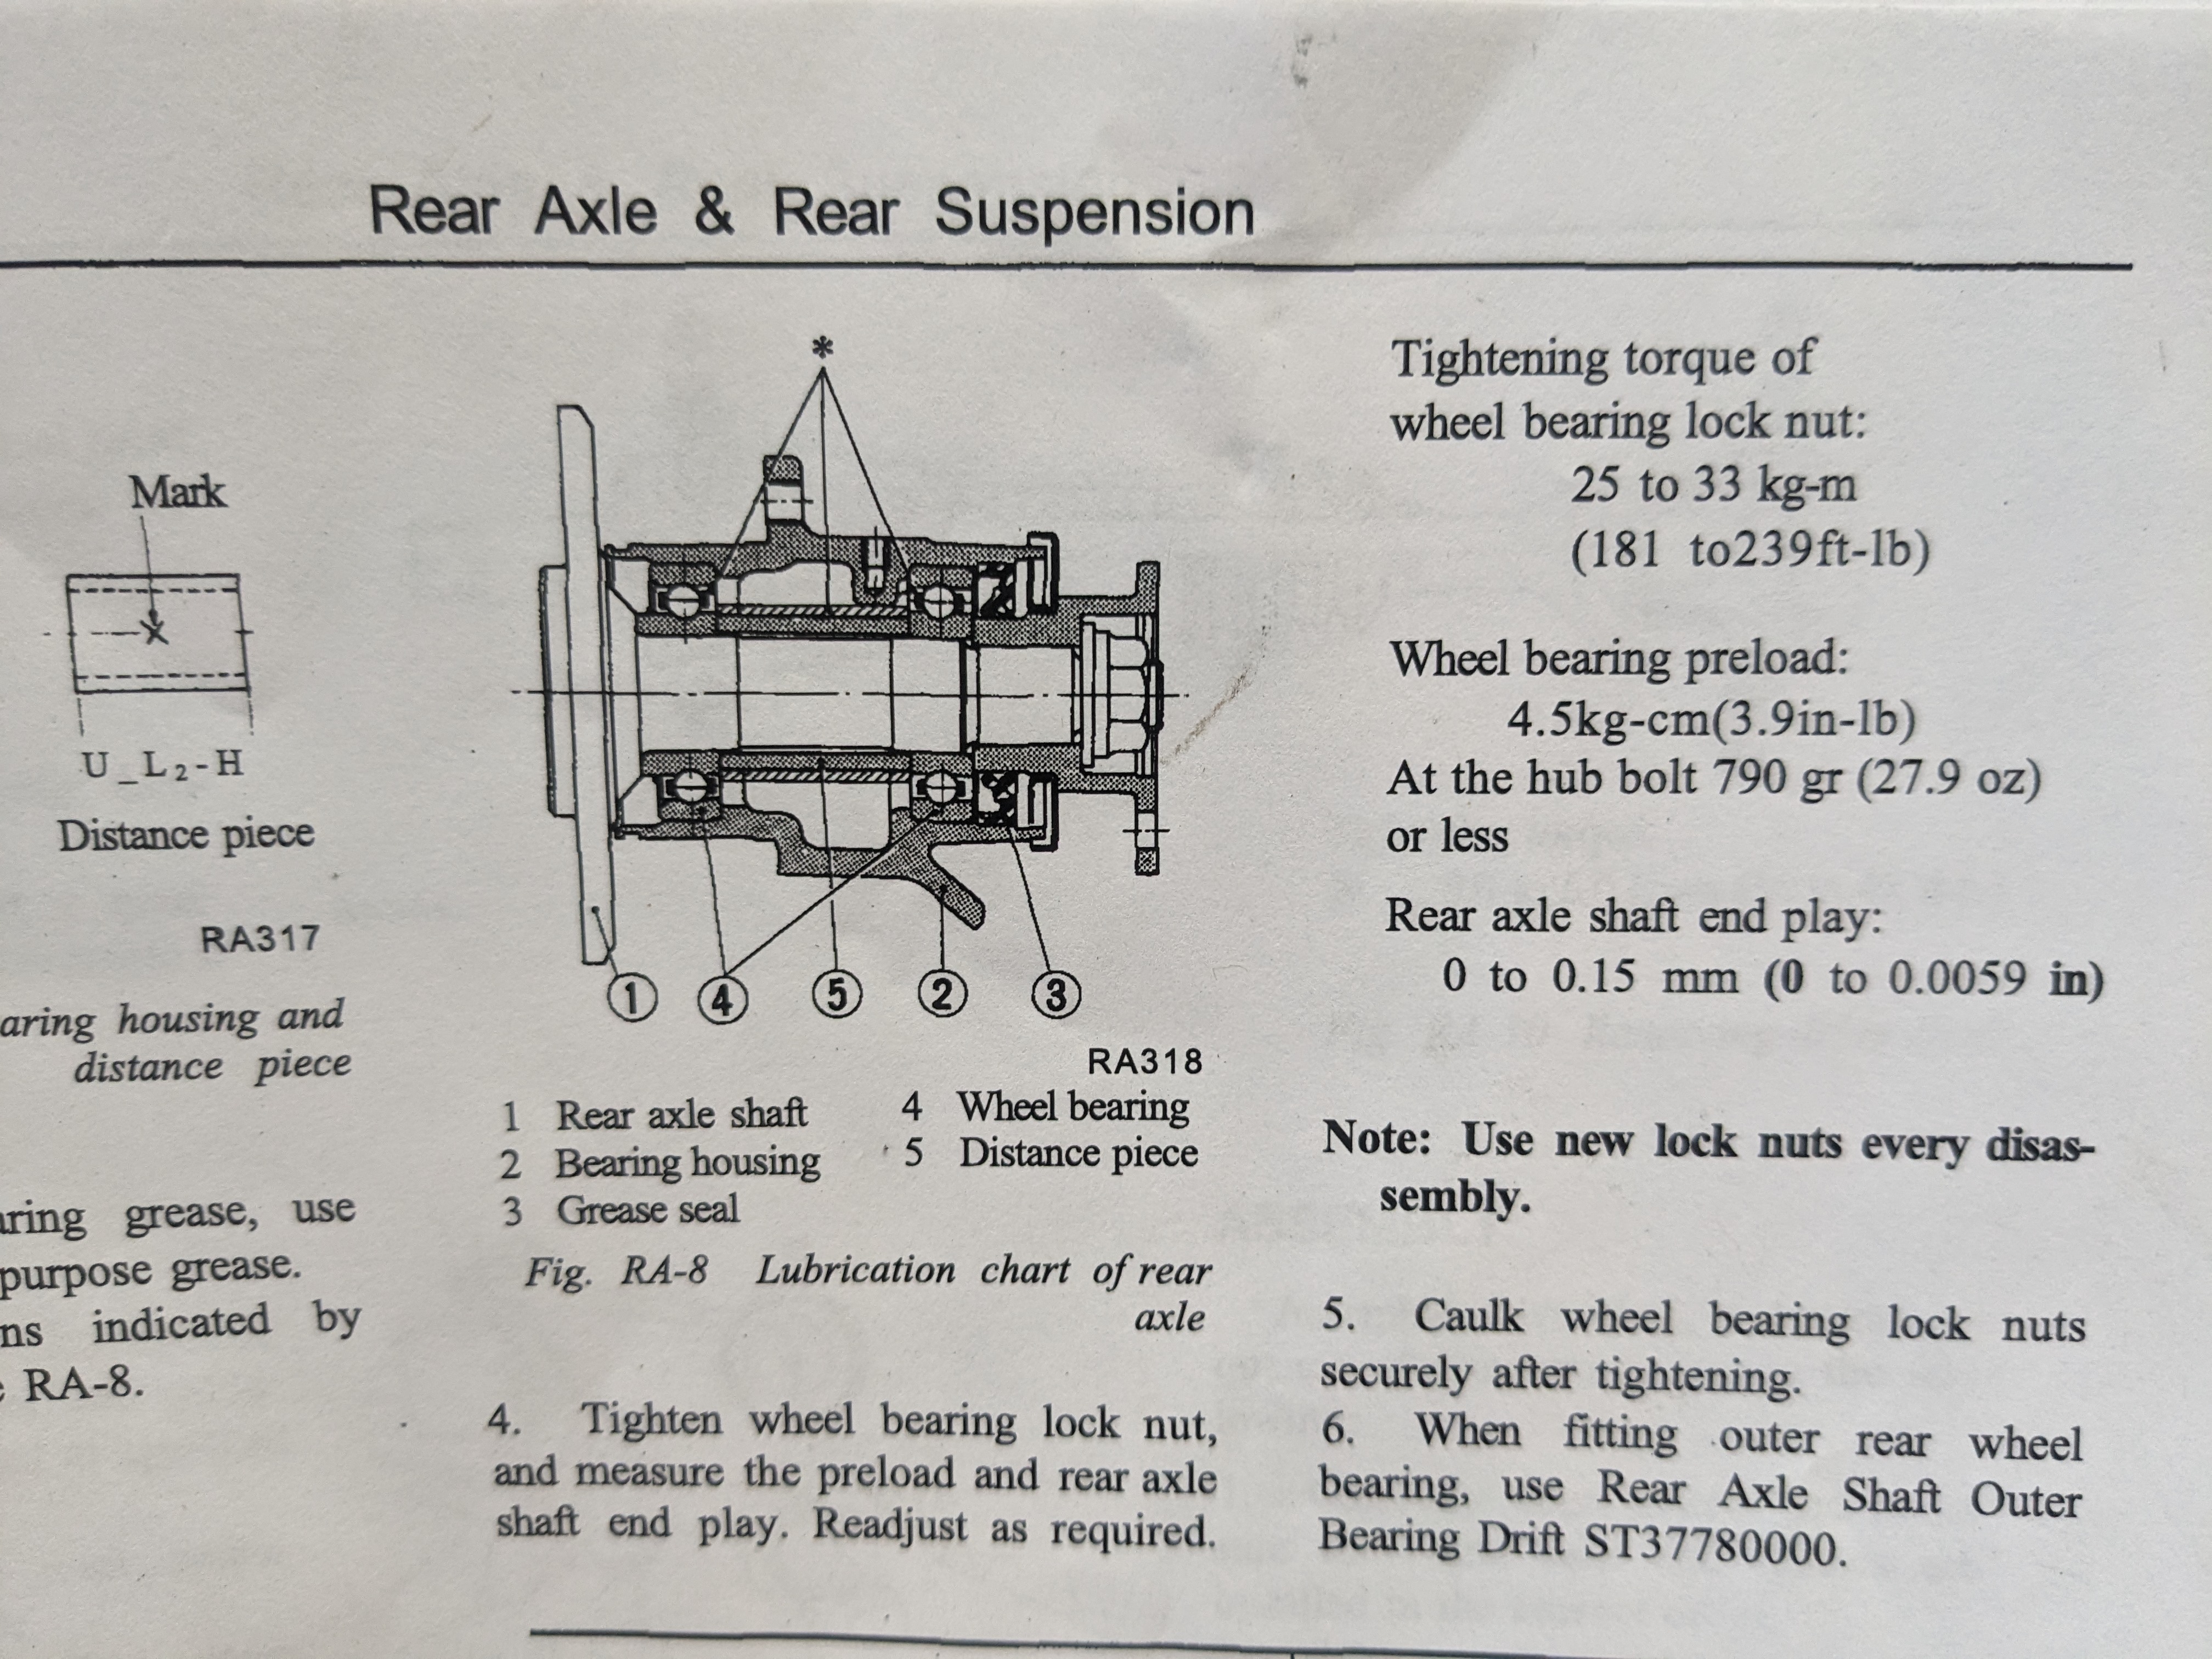
I then torqued the nut to 195ft/lbs. drag feels even, no end play. I have no way of measuring 3.9in/lb. My 1/4" drive Snap-on torque wrench is not accurate below 10in/lb
I had notched the nuts, so I could tack weld them to the spindle without creating a weld- mound that would interfere with the CV cup clearance.
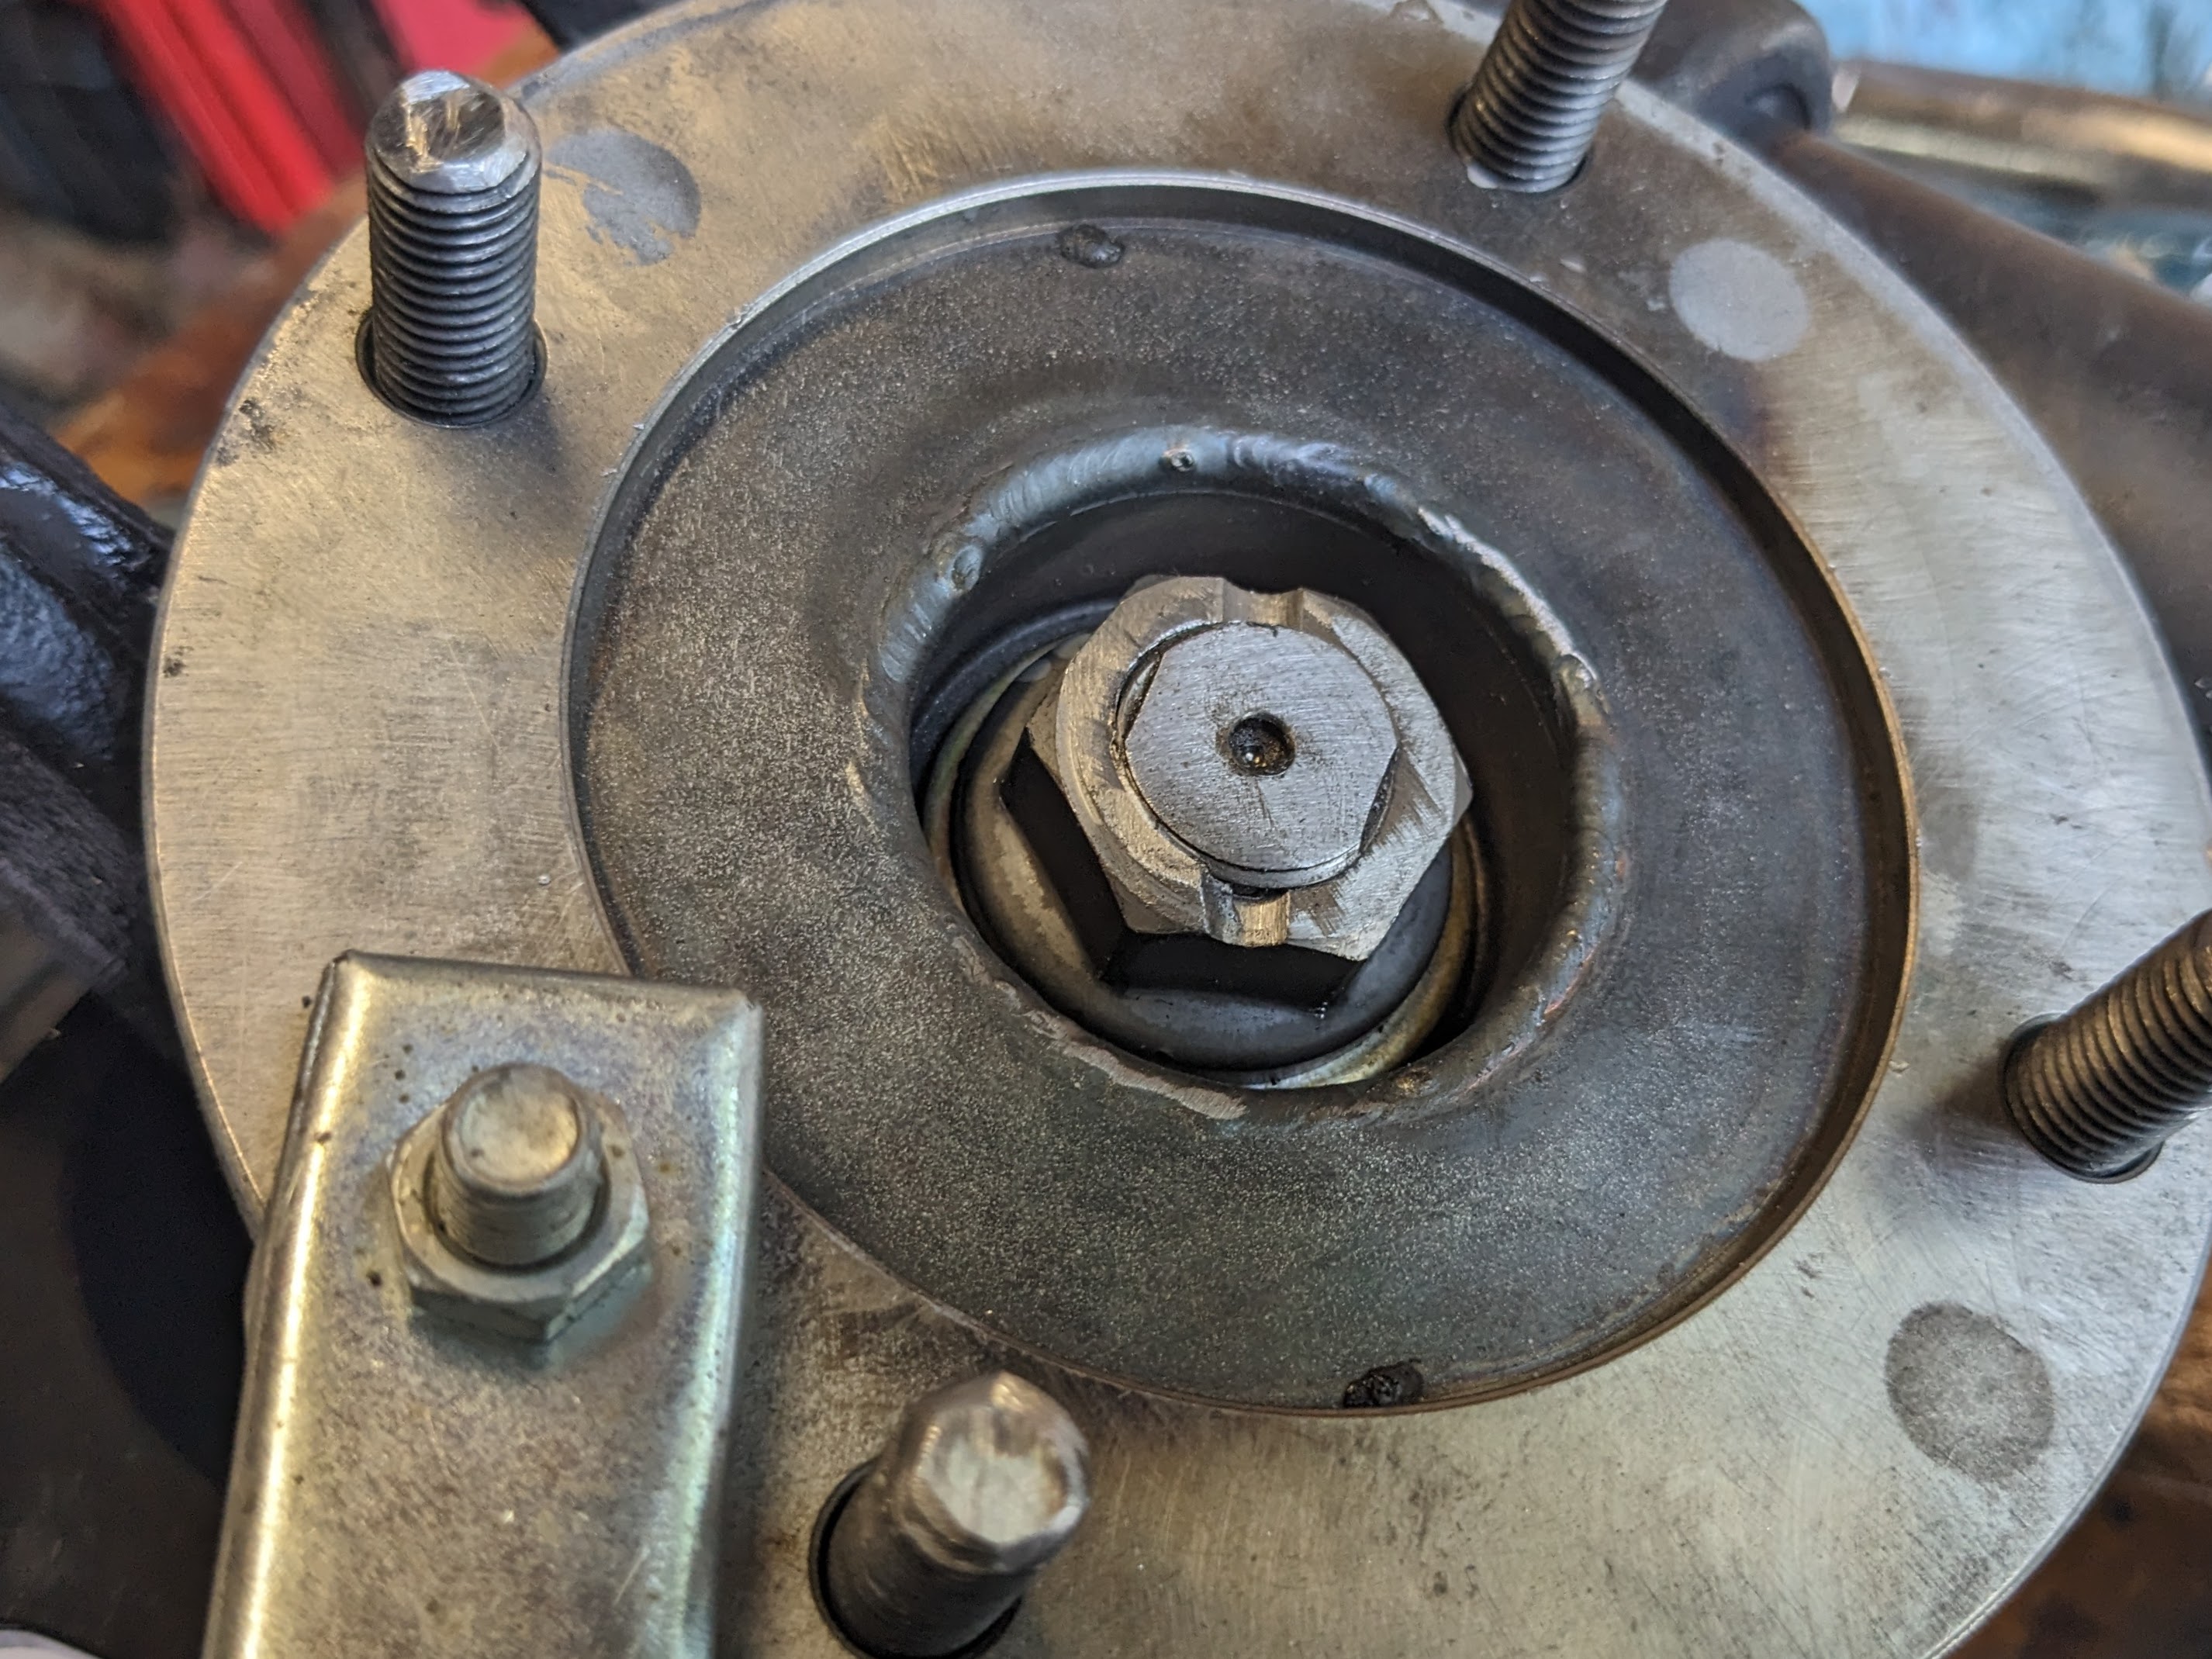
#1 welded. In the unlikely event I ever need to remove them again, I can cut the tack weld as easily as cutting the stake shoulders of the original
#2
I found the wheel studs I bought for the rear were actually 2.25", not 2" as listed. Test fit the spindle with a rotor to check depth. I had to cut them down to 2" or the wheel nuts won't seat
after
Another catch - with the larger OD CV flange, clearance off the Strut cast base is an issue - I had looked at that, but without it being assembled, there was no way to be certain what would be best approach. I opted to use press-studs, similar to wheel studs, just M10x1.5


They were longer than needed, so I trimmed about 1/4" off, as assembly on the car may become an clearance issue
cut
After that I test fit the MilkFab brake caliper brackets & swapped out the eBrake as per their instructions.

parts removed
MilkFab eBrake bracket positioned, cable levers reversed L/R as per their instructions

checked offset with a rotor, everything looks good

Going to be out of town until next Friday, so have to wait to get it all back in the car.
lookforjoe
True Classic
RedTail Perf. Exhaust tip finally arrived.
Nicely constructed pieces. This particular transaction with the company was a PITA though.
Anyway, to question would be how much to have it protrude relative to the skinny bumper install. Didn't have much luck finding pics online to refer to.

I can cut a couple inches off the tailpipe & set it like this:

lookforjoe
True Classic
I prefer them as flush to the body as possible. I don’t care for tips sticking too far out.
One of the Z owners said the exhaust will discolor the taillamp if it's not out at bumper level.
Expanded the tailpipe to get a tight fit for the tip.


Last edited:
lookforjoe
True Classic
Still don't have the rear back together - I forgot I needed to clean (power washed, dried, rinsed with turps, wire brushed) & apply the 3M stone guard (1 can) & Undercoat (1 can) first


Did the back of the Gas tank while I was at it


Did the back of the Gas tank while I was at it

Last edited:
lookforjoe
True Classic
Took care of the clutch slave hose & fork boot today
New boot in place

line attached, slave attached


bled by putting bleeder line into fluid, then make sure reservoir is full & just stroke the pedal about 10 times, done

New boot in place

line attached, slave attached


bled by putting bleeder line into fluid, then make sure reservoir is full & just stroke the pedal about 10 times, done

lookforjoe
True Classic
So.... I got some work done on the rear suspension & CV conversion. First, I started to assemble the rear struts only to find the spring was waaayy to short - then I figured out I put the rears on the front - I'm used to cars where the front spring is typ[ically longer than the rear, and I just assembled it that way. SO, I had to remove both front struts, remove the .002 springs & put the .001's on instead, then assemble the rears with the 002's. The fronts (Eibachs) are so short that the upper seat is loose at full drop.
Didn't get many pics today, it was so f'ing hot I was dripping all over everything. Only got the right side in.
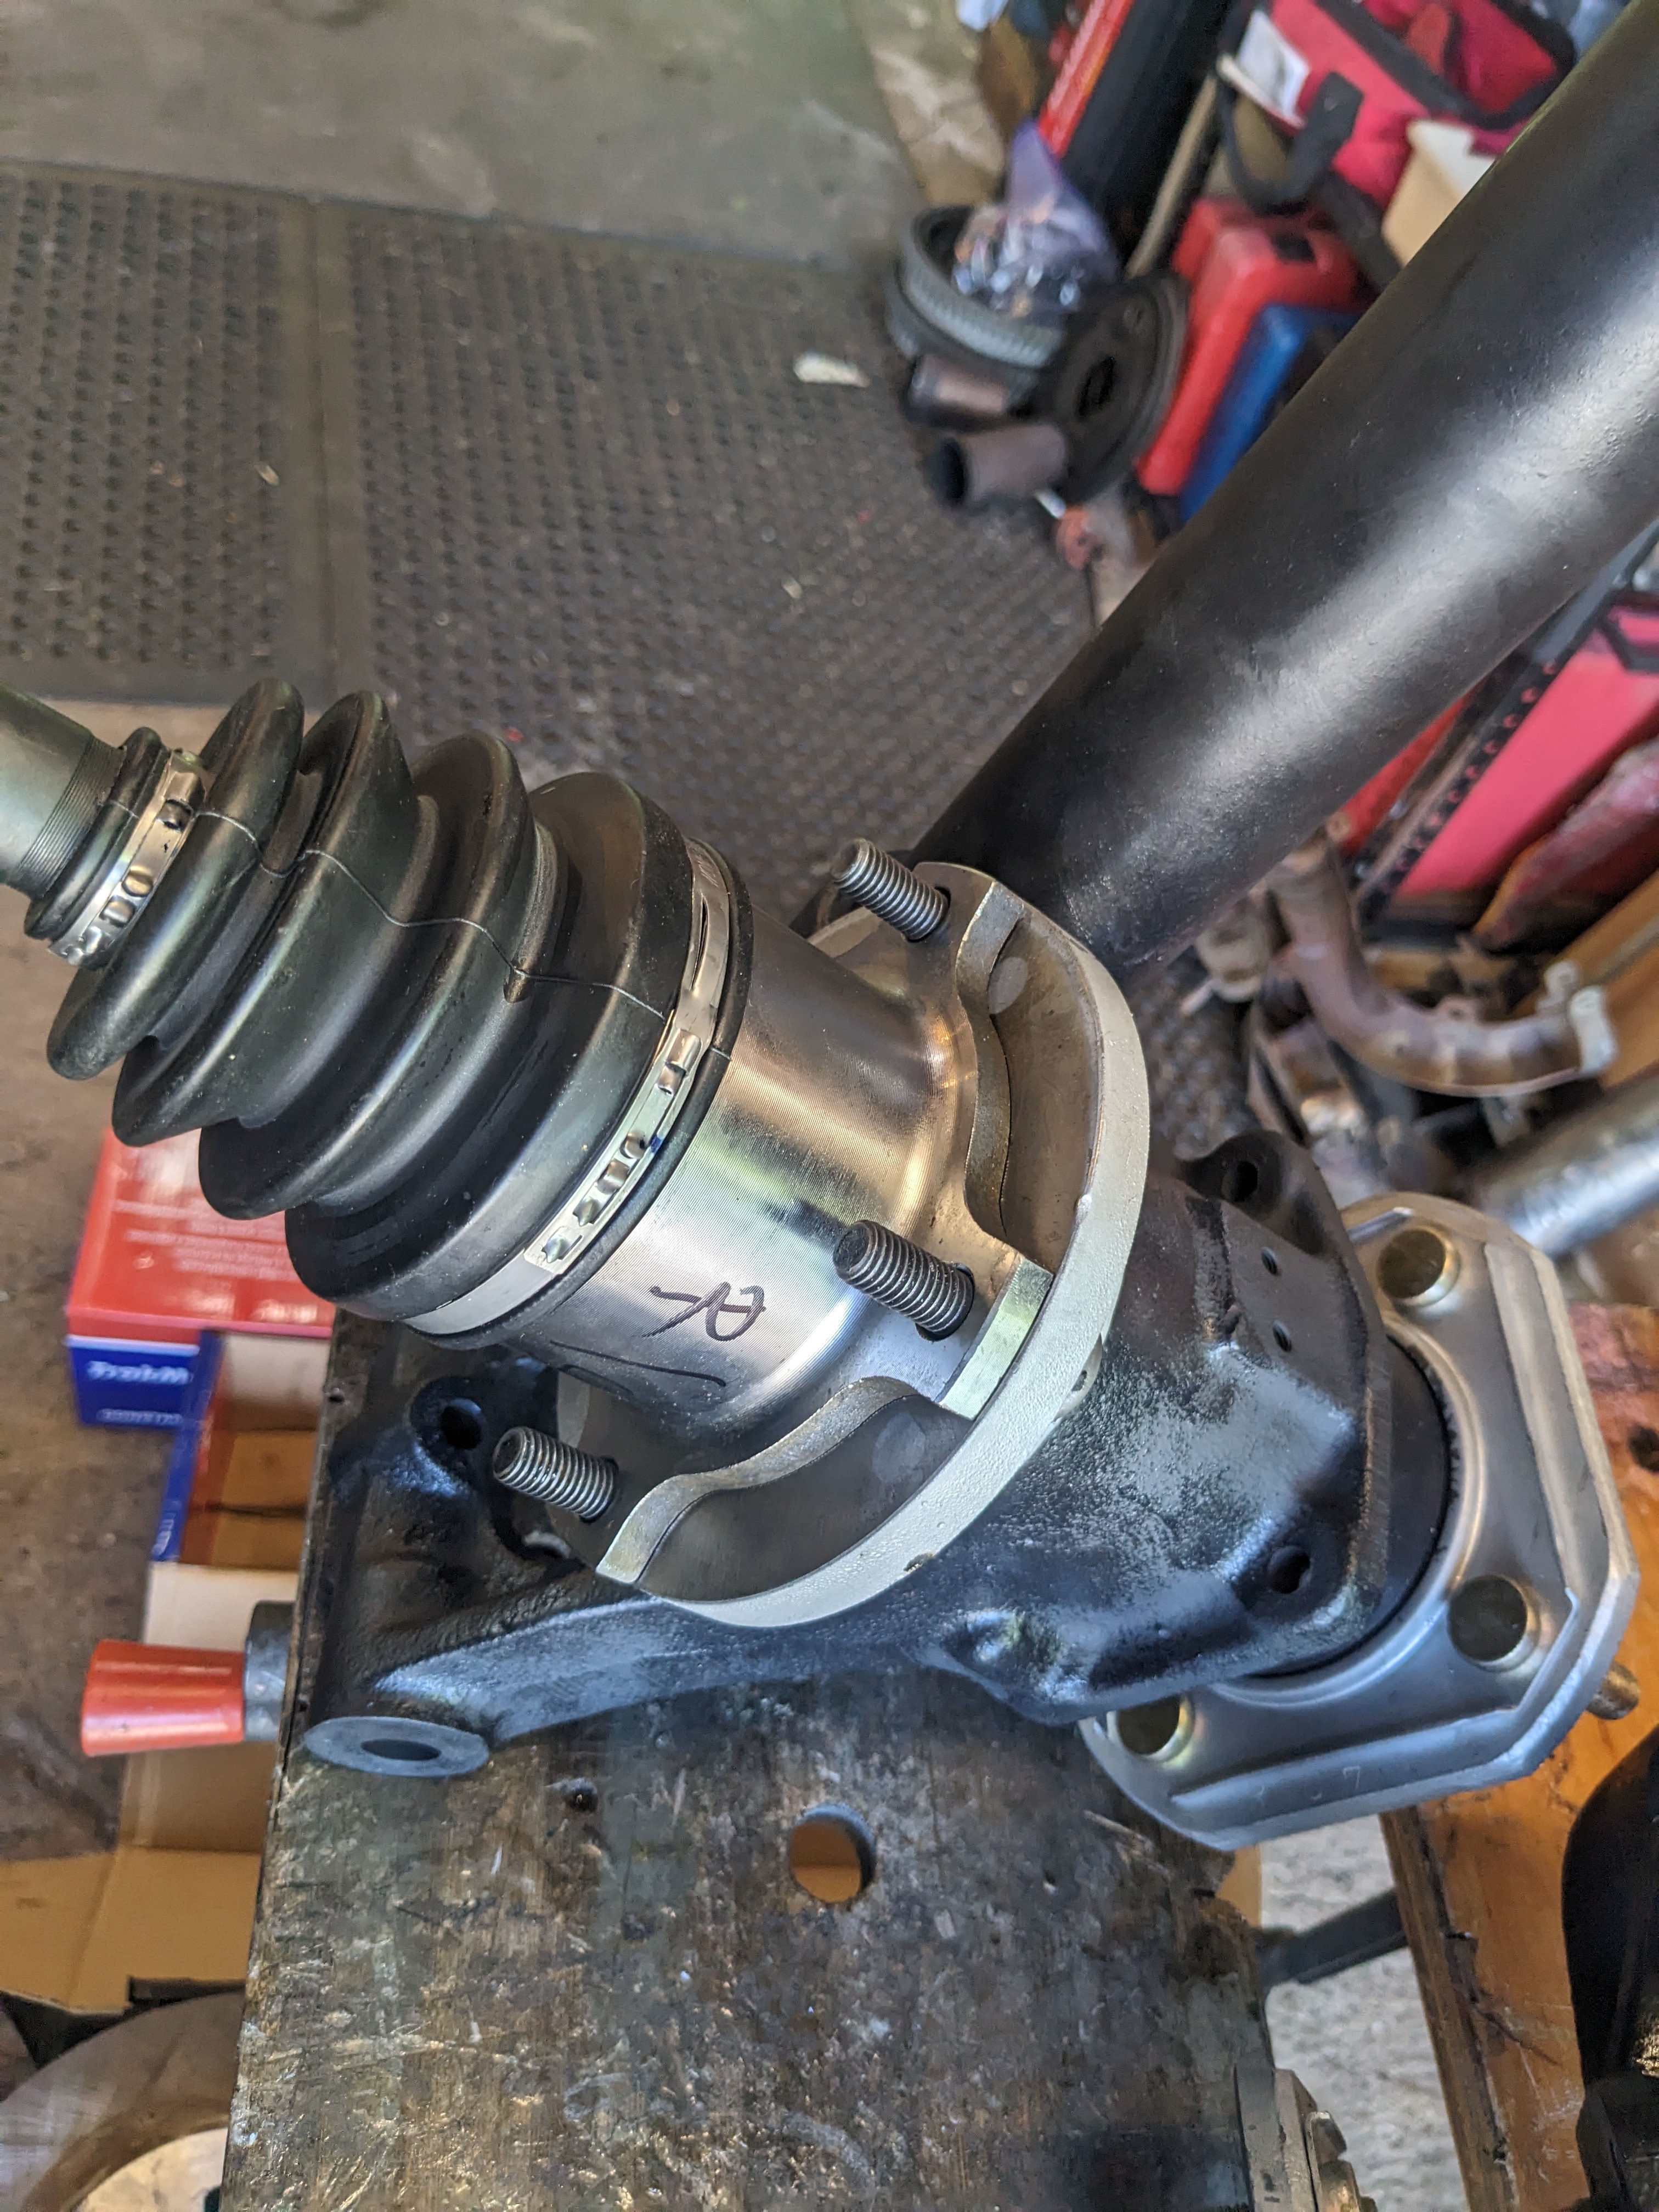
Checked the right axle & stub against the 300ZX T right axle (#NI8442), overall the later axle is longer when fully extended. With it installed (with outer CV now at it's inner end of travel) , I had about 1/8 - 3/16" slack between the flange & CV, so no bind will occur. I was going to change the axle seals in the diff, but the ones I got off RockAuto are the wrong dimensions - with the axle inner stub out, I got the numbers off the seal R15 35 55 11

The seal I have is clearly too small (when measured). I went back with the dimensions I now have off the seal & figured out the National 711070 matches the 35/55/11mm dimensions. I have no obvious leaks from the seals, but I really wanted to do them now. The way these axles are installed with studs on the flanges, the hub spindle bolt has to be removed to get the axle out

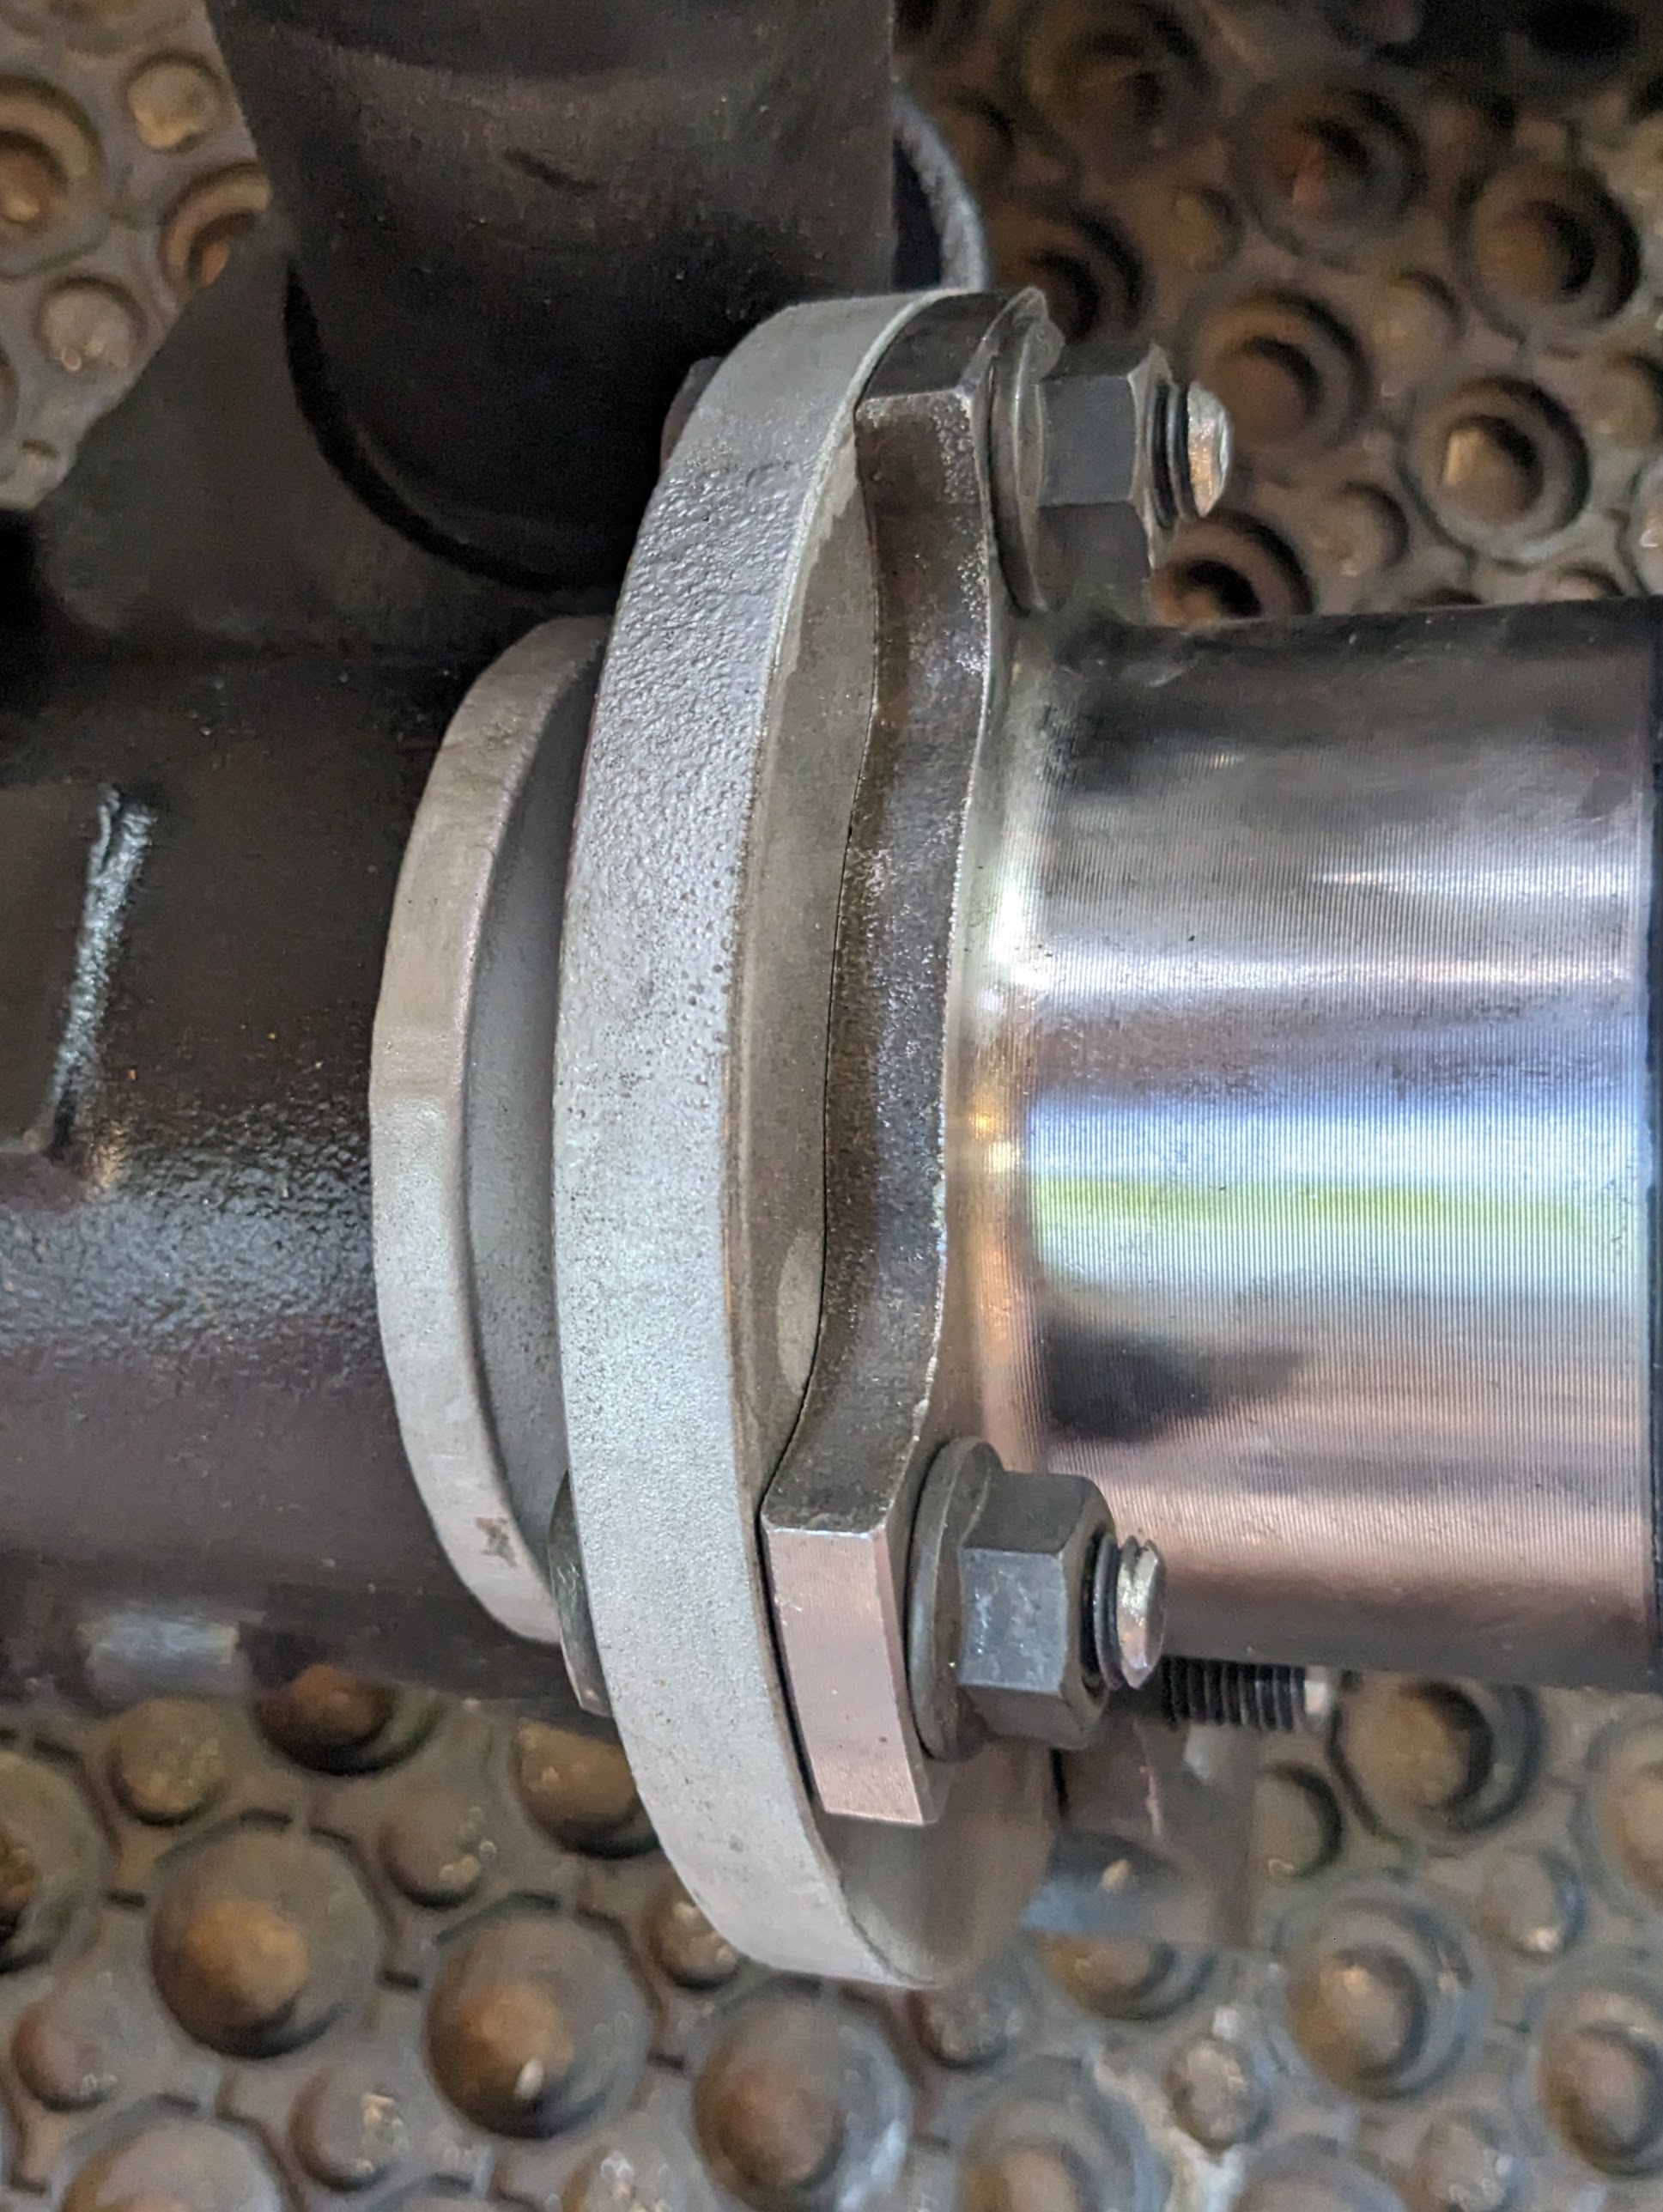
right axle in the diff, located in the outer flange

clearance at full drop

clearance at normal ride height - not very scientific, and it's unclear form the pics, however there is much more play as the axle lifts
getting the clevis pin back in was fun - I had to double-nut the spindle & work it back & forth on it's axis to get the pin to drop, then I also had to knock the spindle fore/aft to get it to fully seat in the housing

Didn't get many pics today, it was so f'ing hot I was dripping all over everything. Only got the right side in.
Checked the right axle & stub against the 300ZX T right axle (#NI8442), overall the later axle is longer when fully extended. With it installed (with outer CV now at it's inner end of travel) , I had about 1/8 - 3/16" slack between the flange & CV, so no bind will occur. I was going to change the axle seals in the diff, but the ones I got off RockAuto are the wrong dimensions - with the axle inner stub out, I got the numbers off the seal R15 35 55 11

The seal I have is clearly too small (when measured). I went back with the dimensions I now have off the seal & figured out the National 711070 matches the 35/55/11mm dimensions. I have no obvious leaks from the seals, but I really wanted to do them now. The way these axles are installed with studs on the flanges, the hub spindle bolt has to be removed to get the axle out

right axle in the diff, located in the outer flange

clearance at full drop

clearance at normal ride height - not very scientific, and it's unclear form the pics, however there is much more play as the axle lifts

getting the clevis pin back in was fun - I had to double-nut the spindle & work it back & forth on it's axis to get the pin to drop, then I also had to knock the spindle fore/aft to get it to fully seat in the housing

Last edited:
lookforjoe
True Classic
Yesterday I fitted the left axle ('87 300ZX T, #N18435) & strut assy. I found that the left axle had almost no play in the outer CV at full drop. I can't imagine it would work without binding using one of the flanges as intended, esp. w/ stock springs, since that would drop the hub even further.
Left inner stub. They are the same length, just aftermarket has a shorter innermost spline section and deeper outer seal seat shoulder.

left axle seal was also not leaking, so I'm just going ahead without replacement

installing the strut assy - used my jack to lift the assy. in place, so I could secure the strut top plate in the tower


once the top was secured, I could position the spindle hub & insert the spindle/bolt and clevis. Not fun. The elements do not readily align, so the shoulders on the spindle can catch on the bushing sleeve in the control arm. This side took several tries to get it in place.

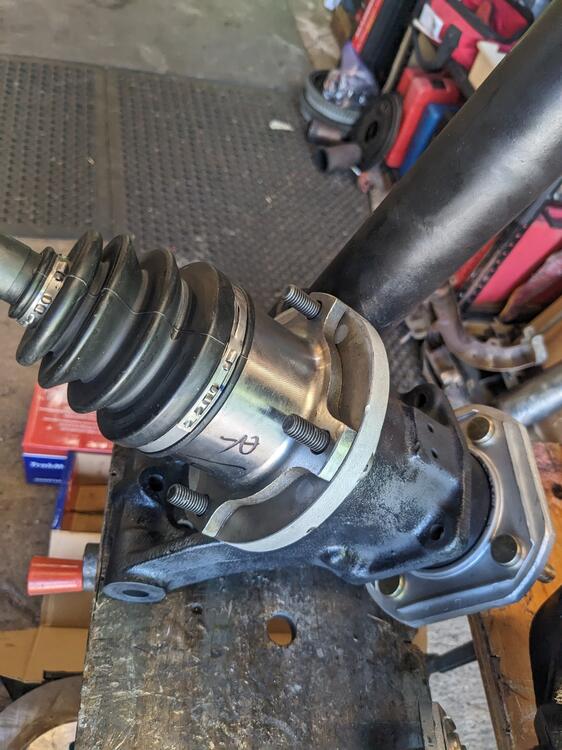
Spindle & axle in place

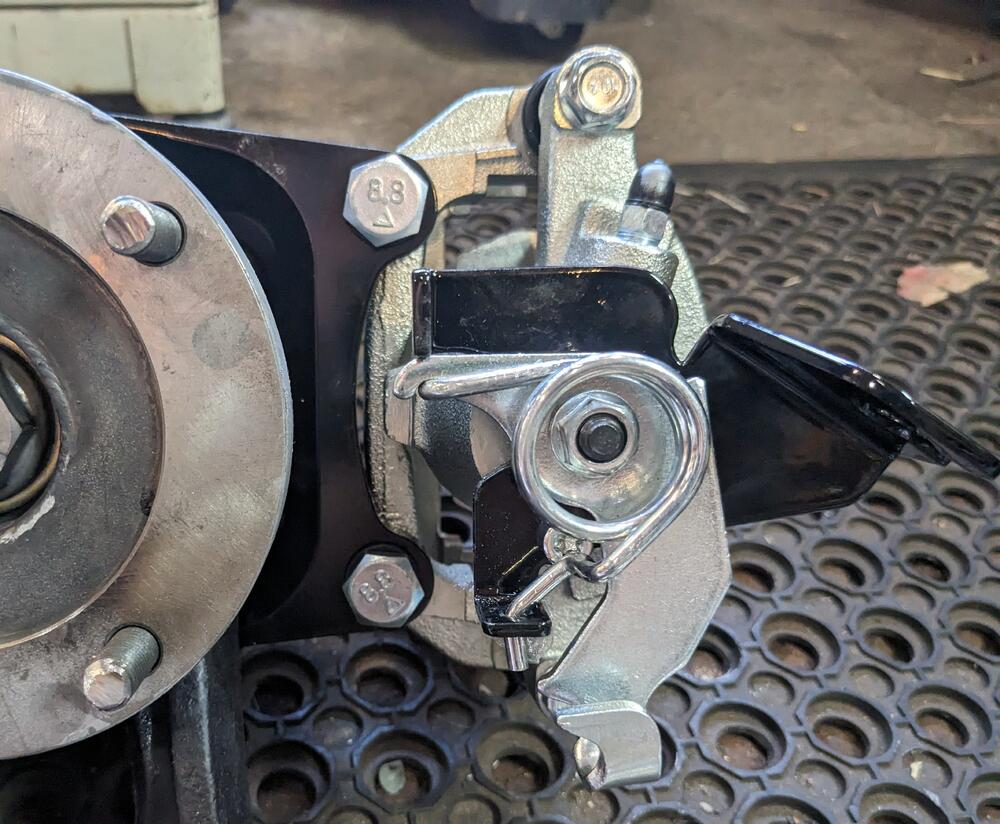
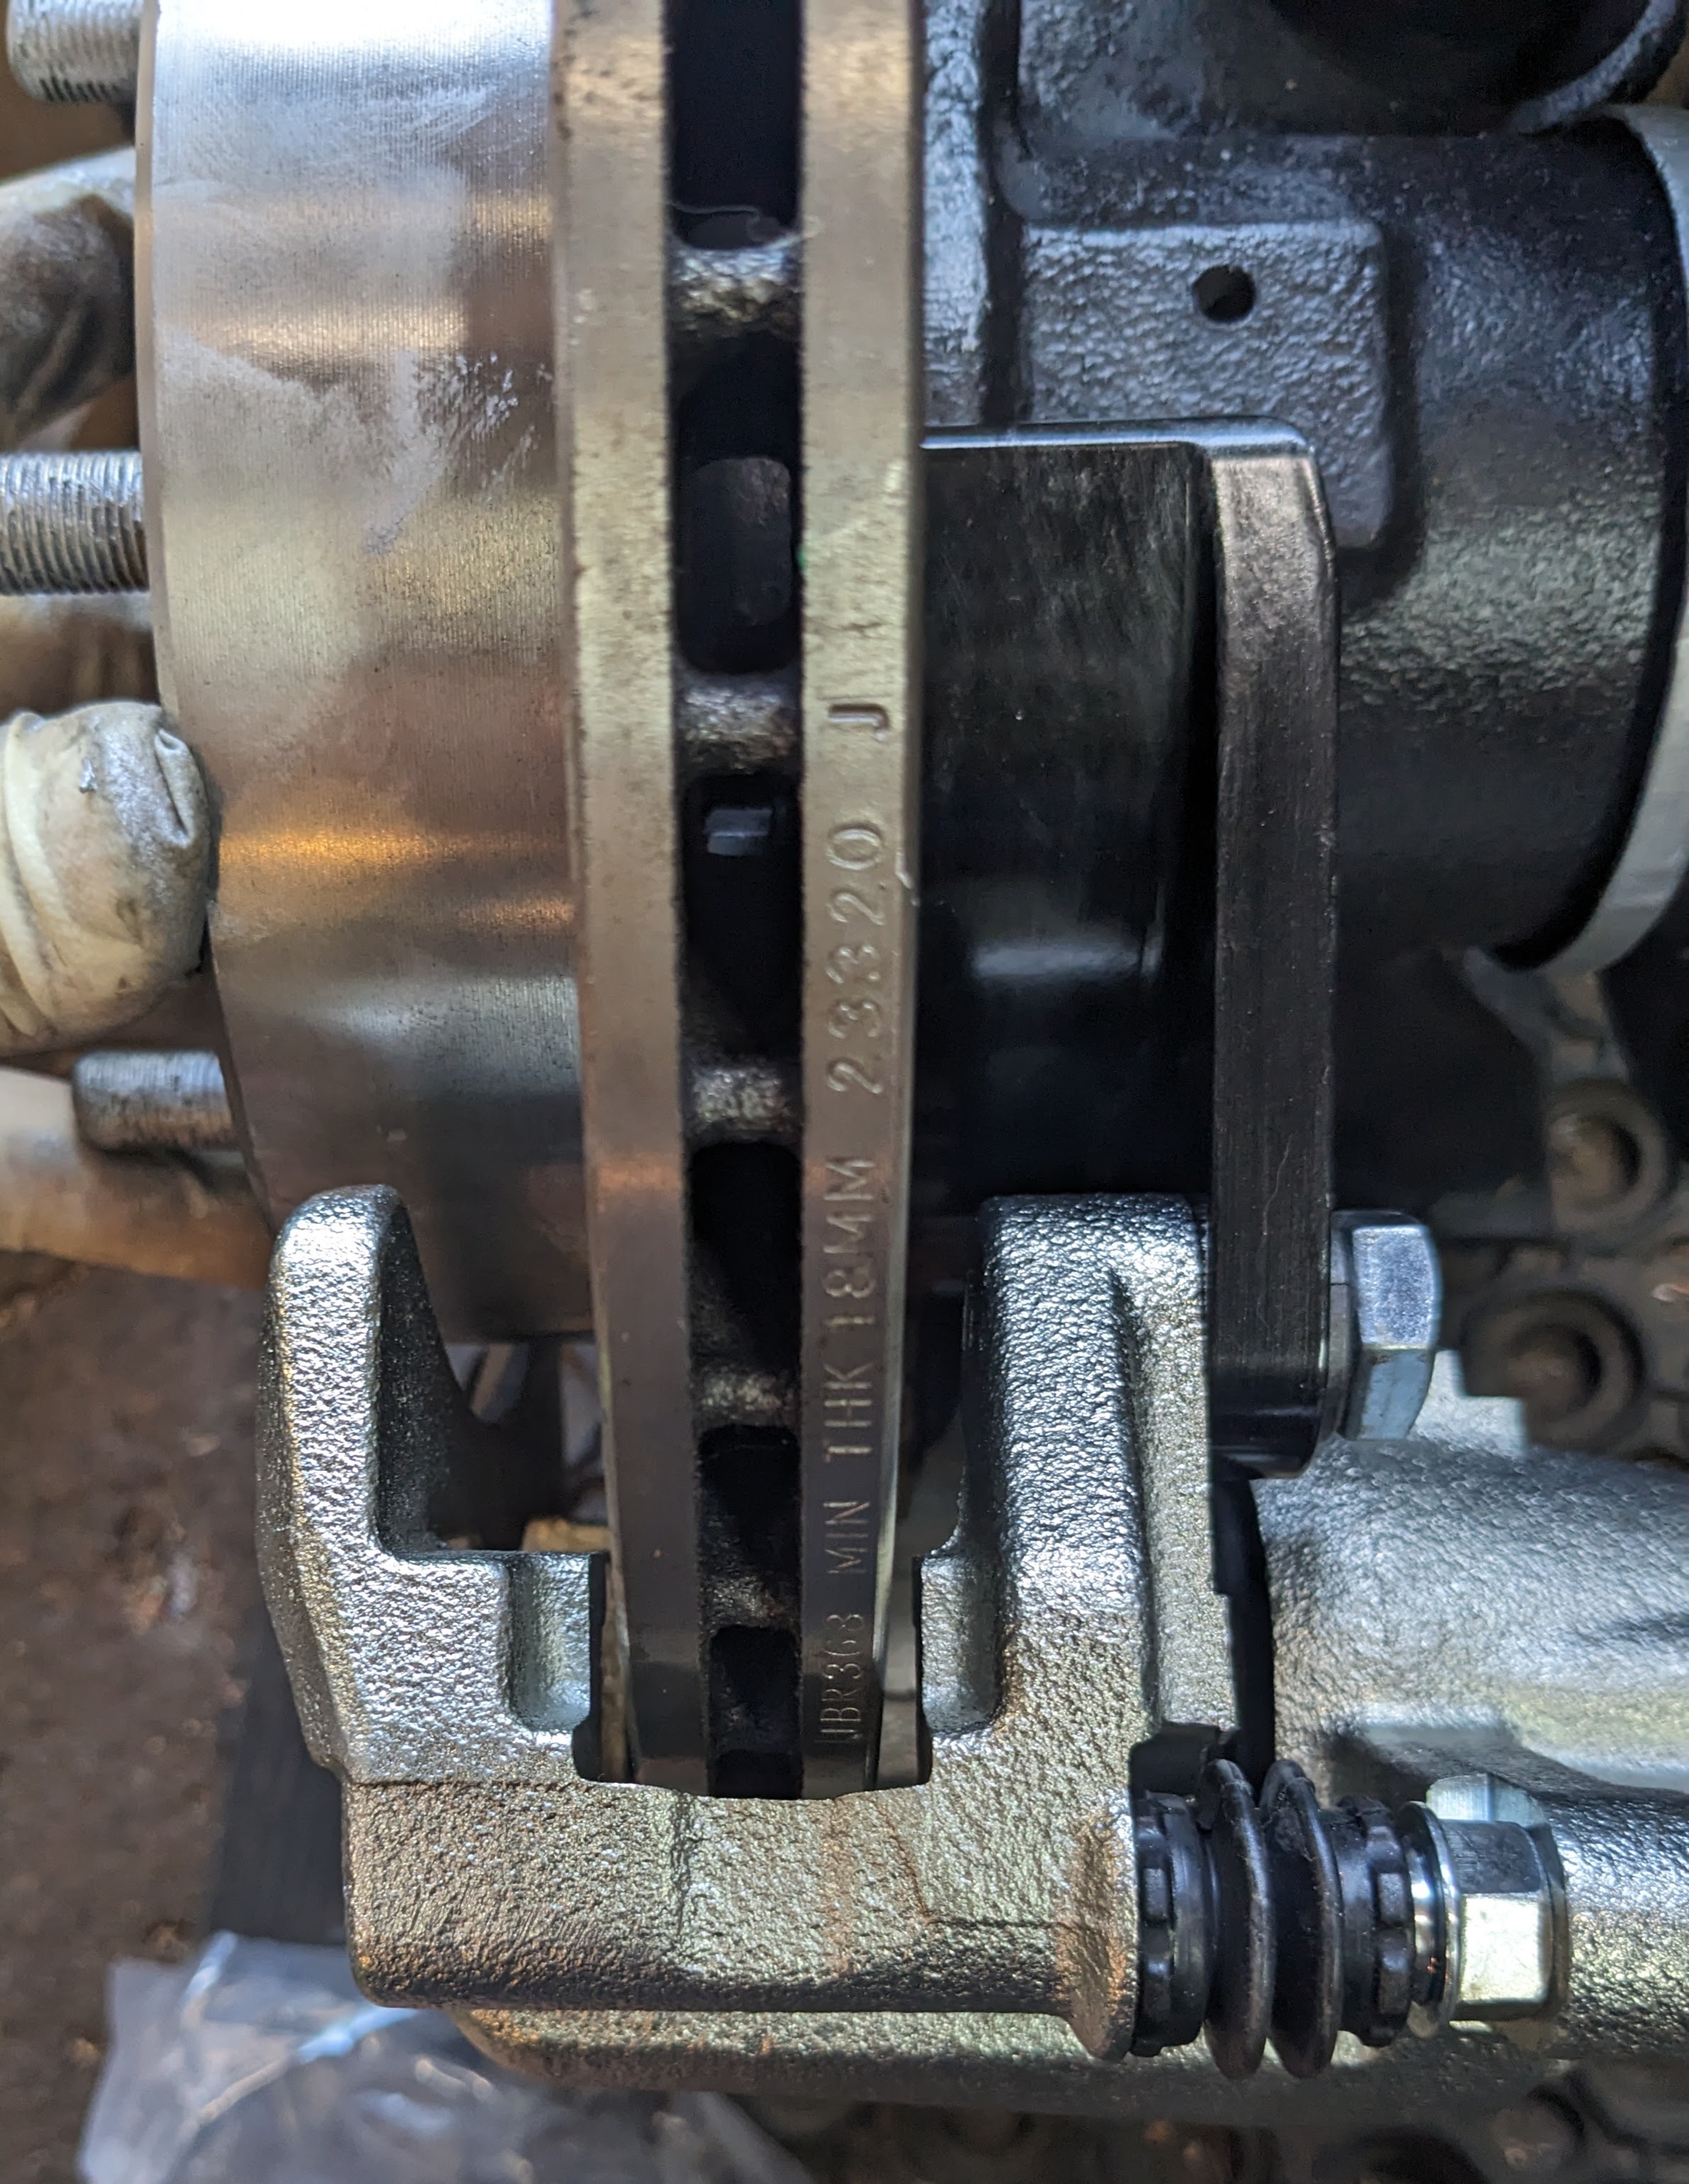
With that done, I started on the brake install. (re-drilled) '88 300ZX T Rotor then (Mustang rear '05-2014) caliper hanger installed, all good so far...

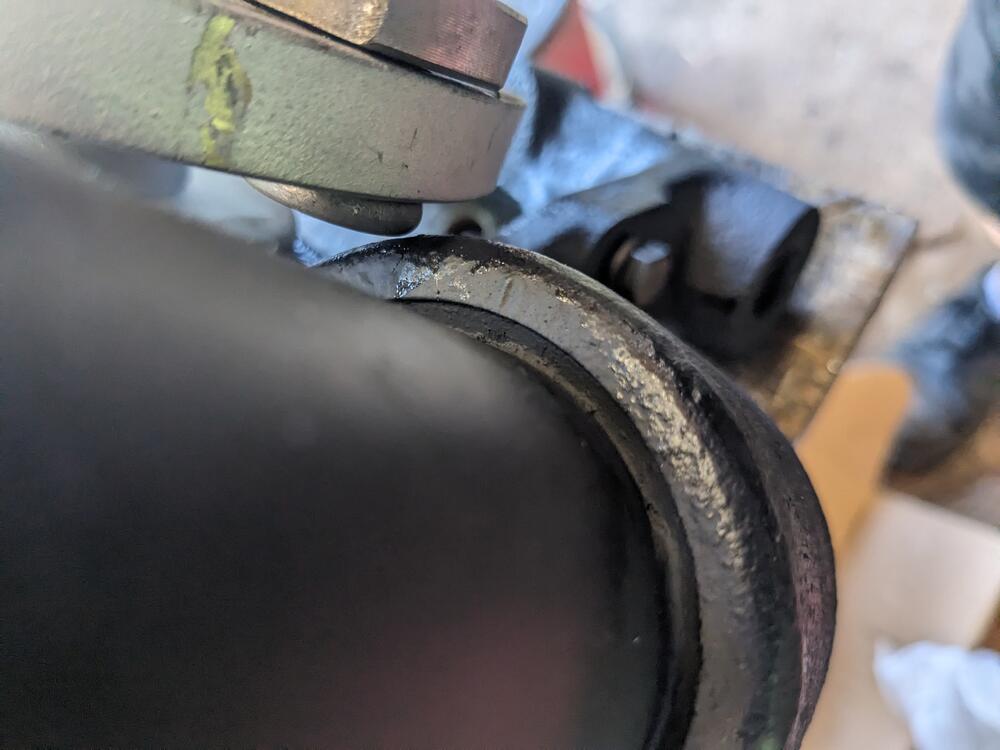
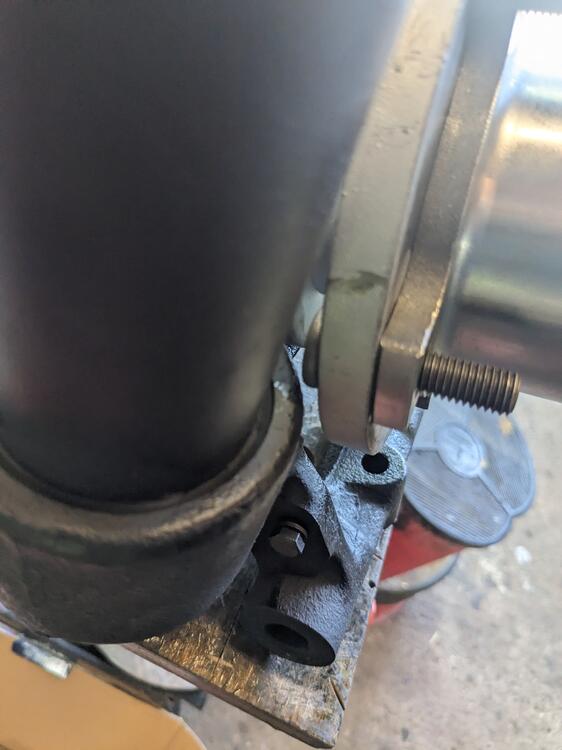
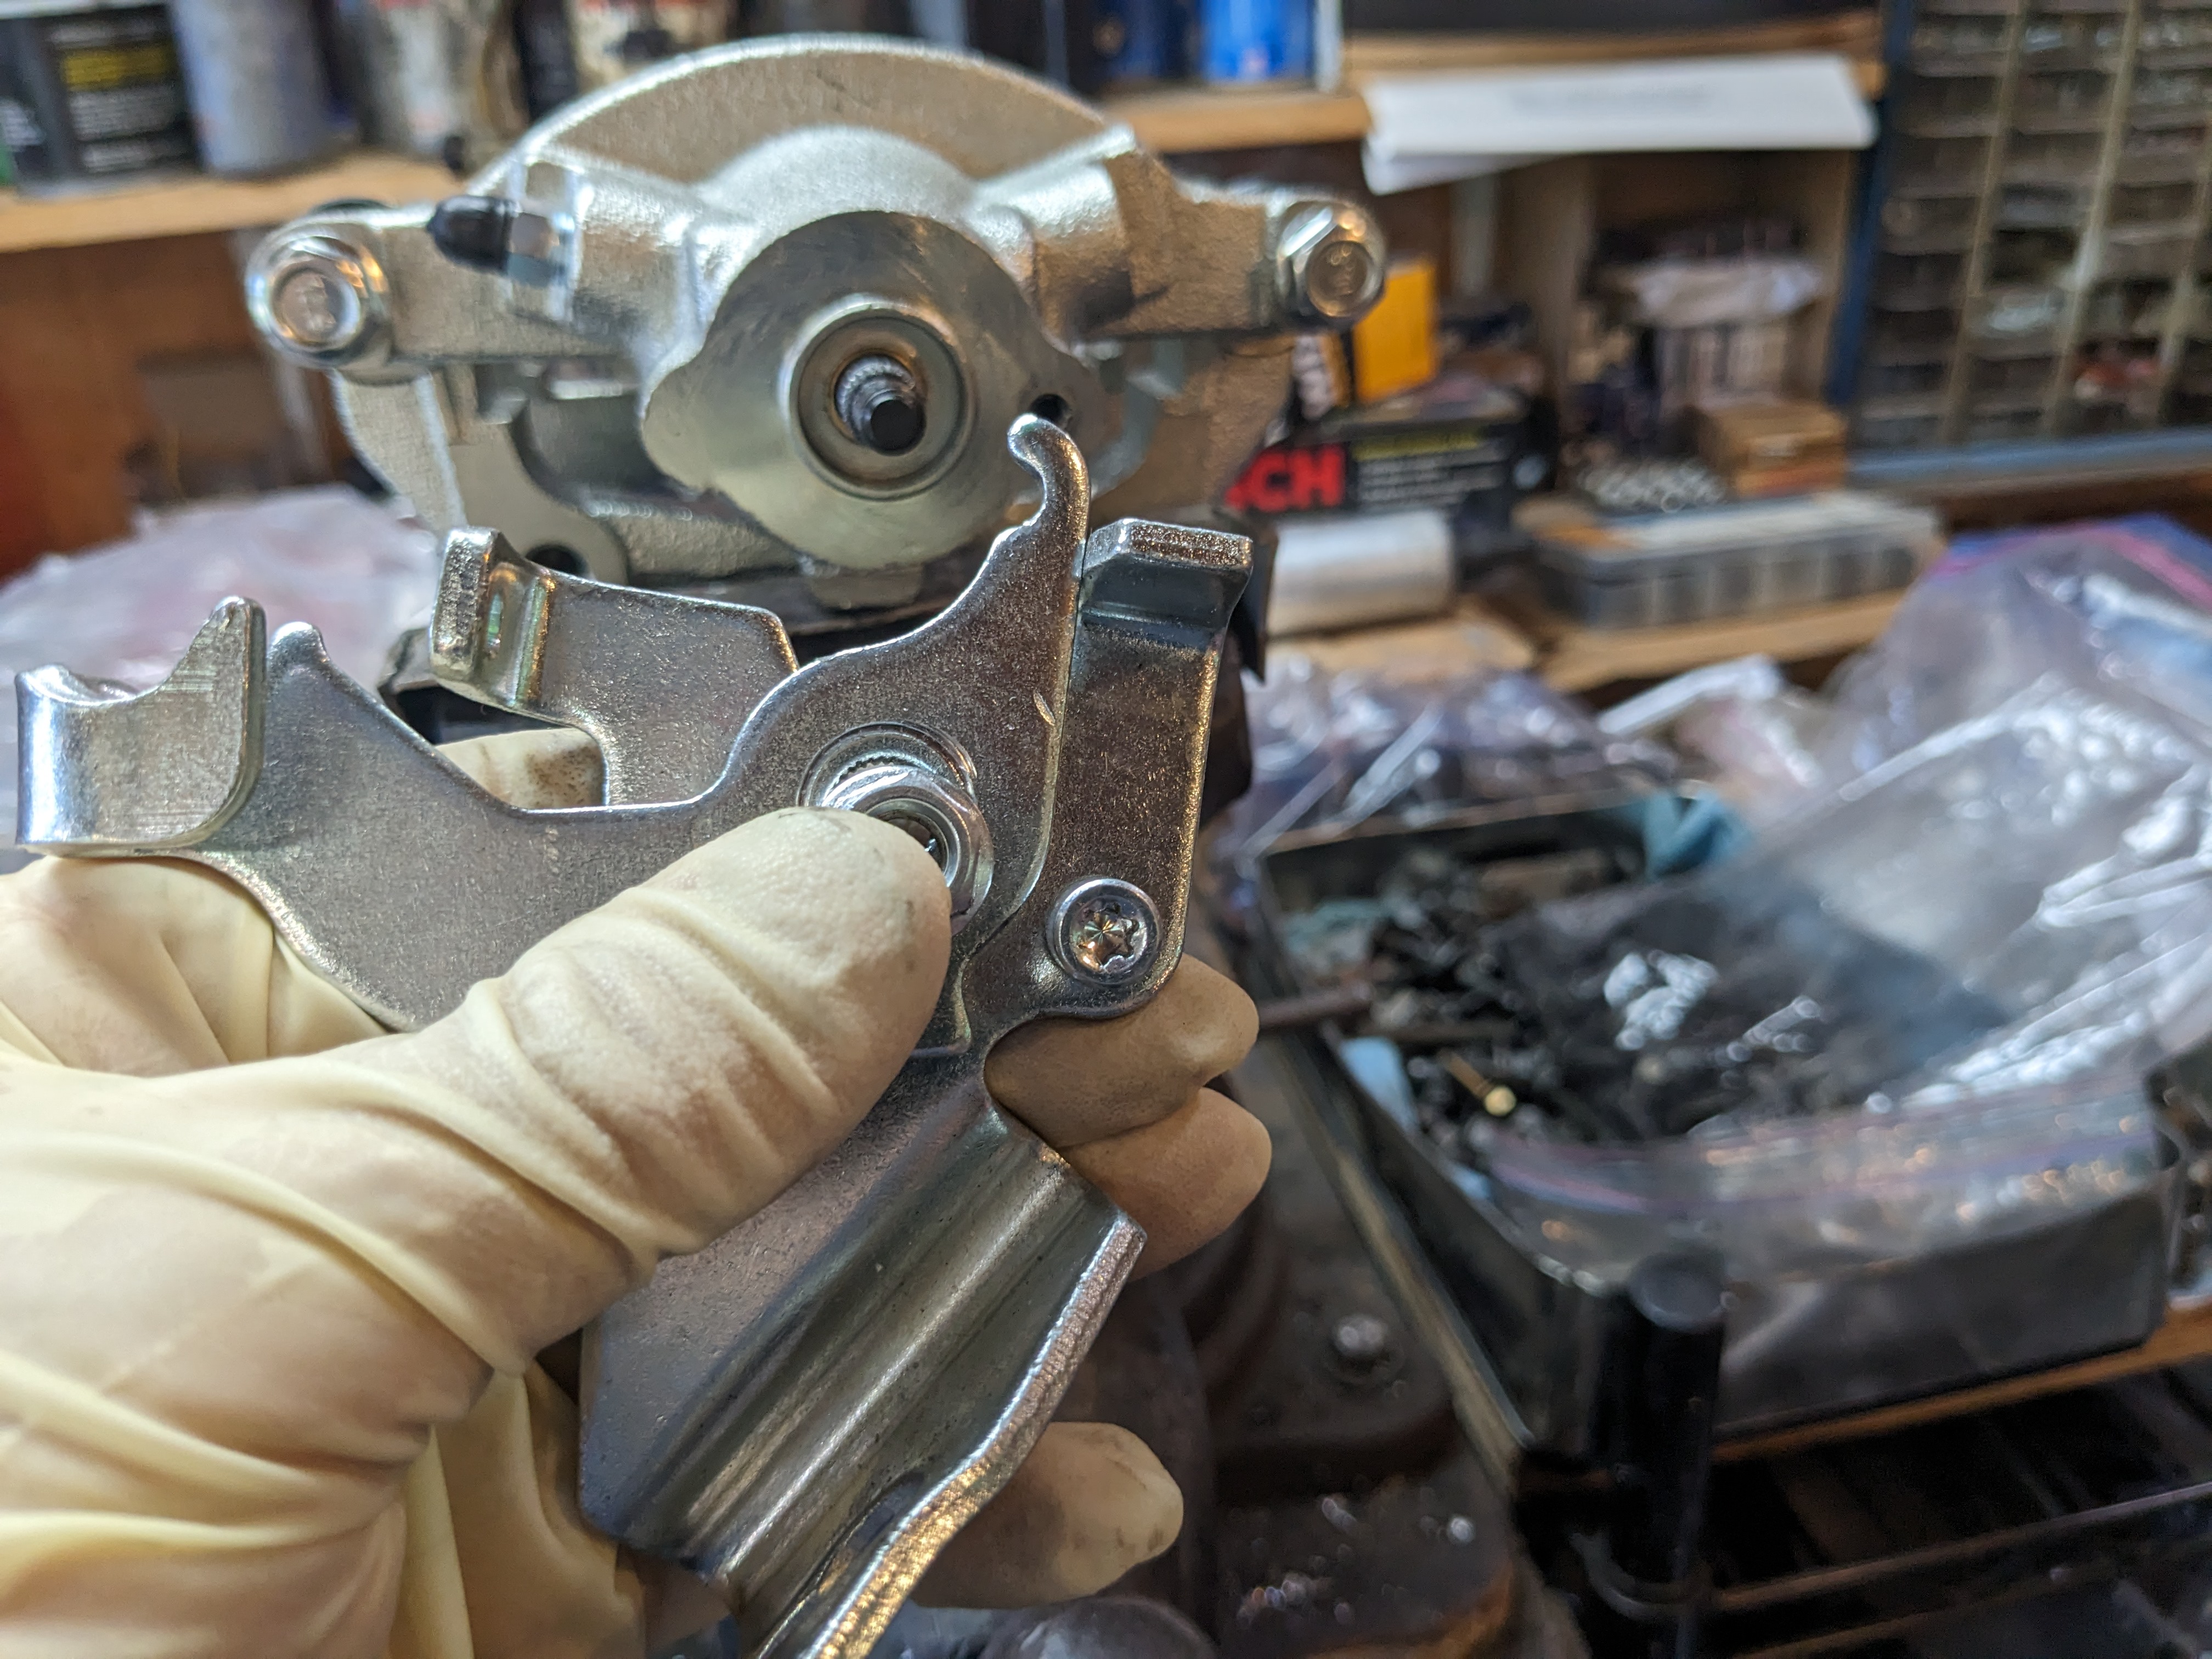
Then I found a couple issues. I had never checked the kit listing to see if the kit worked with modded setups - it doesn't mention whether it only works with stock setups & I didn't think to ask at the time. The eBrake bracket will not clear the CV flange. I'd be curious to see a pic of it in relationship to the stock U-Joint shaft flange, as it seems that the cable bracket would still end up pretty close to the rotating flange.
Needs to swing inward I'd say at least 3/4" from here to get the upper caliper retaining bolt into the caliper slider pin. I'll have to cut & weld the bracket to make this work. Angle and offset relative to the actuating lever can't change too much or it will bind the cable, and/or just not operate as intended. I've emailed MilkFab to see if they have suggestions.


This also seems to be an issue - Milkfab directions just say to attach the stock cable end to the lever. I could not see how the different designs could interface - now looking at the pics, I'm thinking he wants the clevis pin looped over just the outer ear of the lever. There are no comments in the instructions or photo documentation to assist in this, which would have been helpful. I'll work on this today.


Left inner stub. They are the same length, just aftermarket has a shorter innermost spline section and deeper outer seal seat shoulder.

left axle seal was also not leaking, so I'm just going ahead without replacement

installing the strut assy - used my jack to lift the assy. in place, so I could secure the strut top plate in the tower


once the top was secured, I could position the spindle hub & insert the spindle/bolt and clevis. Not fun. The elements do not readily align, so the shoulders on the spindle can catch on the bushing sleeve in the control arm. This side took several tries to get it in place.

Spindle & axle in place

With that done, I started on the brake install. (re-drilled) '88 300ZX T Rotor then (Mustang rear '05-2014) caliper hanger installed, all good so far...

Then I found a couple issues. I had never checked the kit listing to see if the kit worked with modded setups - it doesn't mention whether it only works with stock setups & I didn't think to ask at the time. The eBrake bracket will not clear the CV flange. I'd be curious to see a pic of it in relationship to the stock U-Joint shaft flange, as it seems that the cable bracket would still end up pretty close to the rotating flange.
Needs to swing inward I'd say at least 3/4" from here to get the upper caliper retaining bolt into the caliper slider pin. I'll have to cut & weld the bracket to make this work. Angle and offset relative to the actuating lever can't change too much or it will bind the cable, and/or just not operate as intended. I've emailed MilkFab to see if they have suggestions.


This also seems to be an issue - Milkfab directions just say to attach the stock cable end to the lever. I could not see how the different designs could interface - now looking at the pics, I'm thinking he wants the clevis pin looped over just the outer ear of the lever. There are no comments in the instructions or photo documentation to assist in this, which would have been helpful. I'll work on this today.


Last edited:
lookforjoe
True Classic
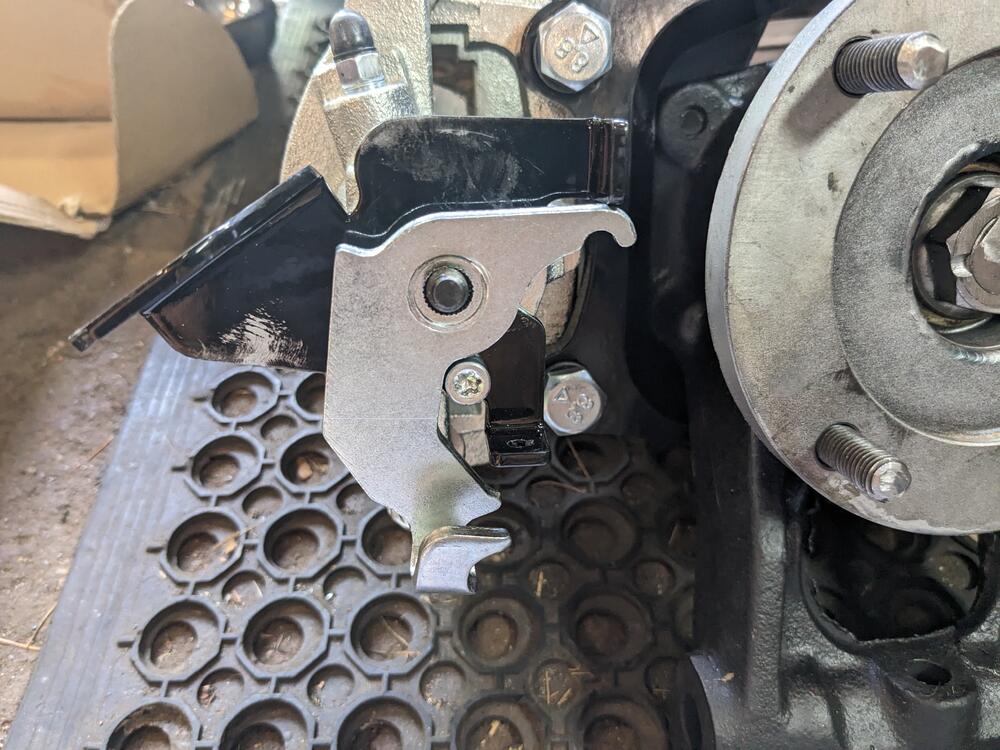
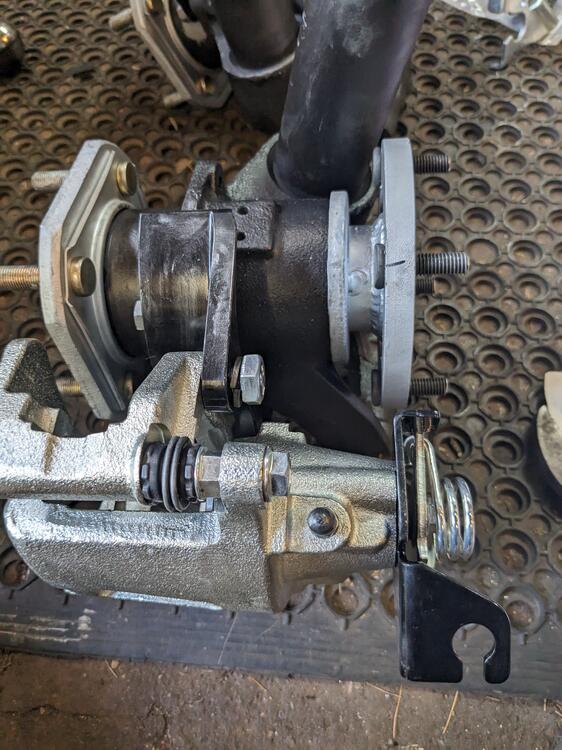
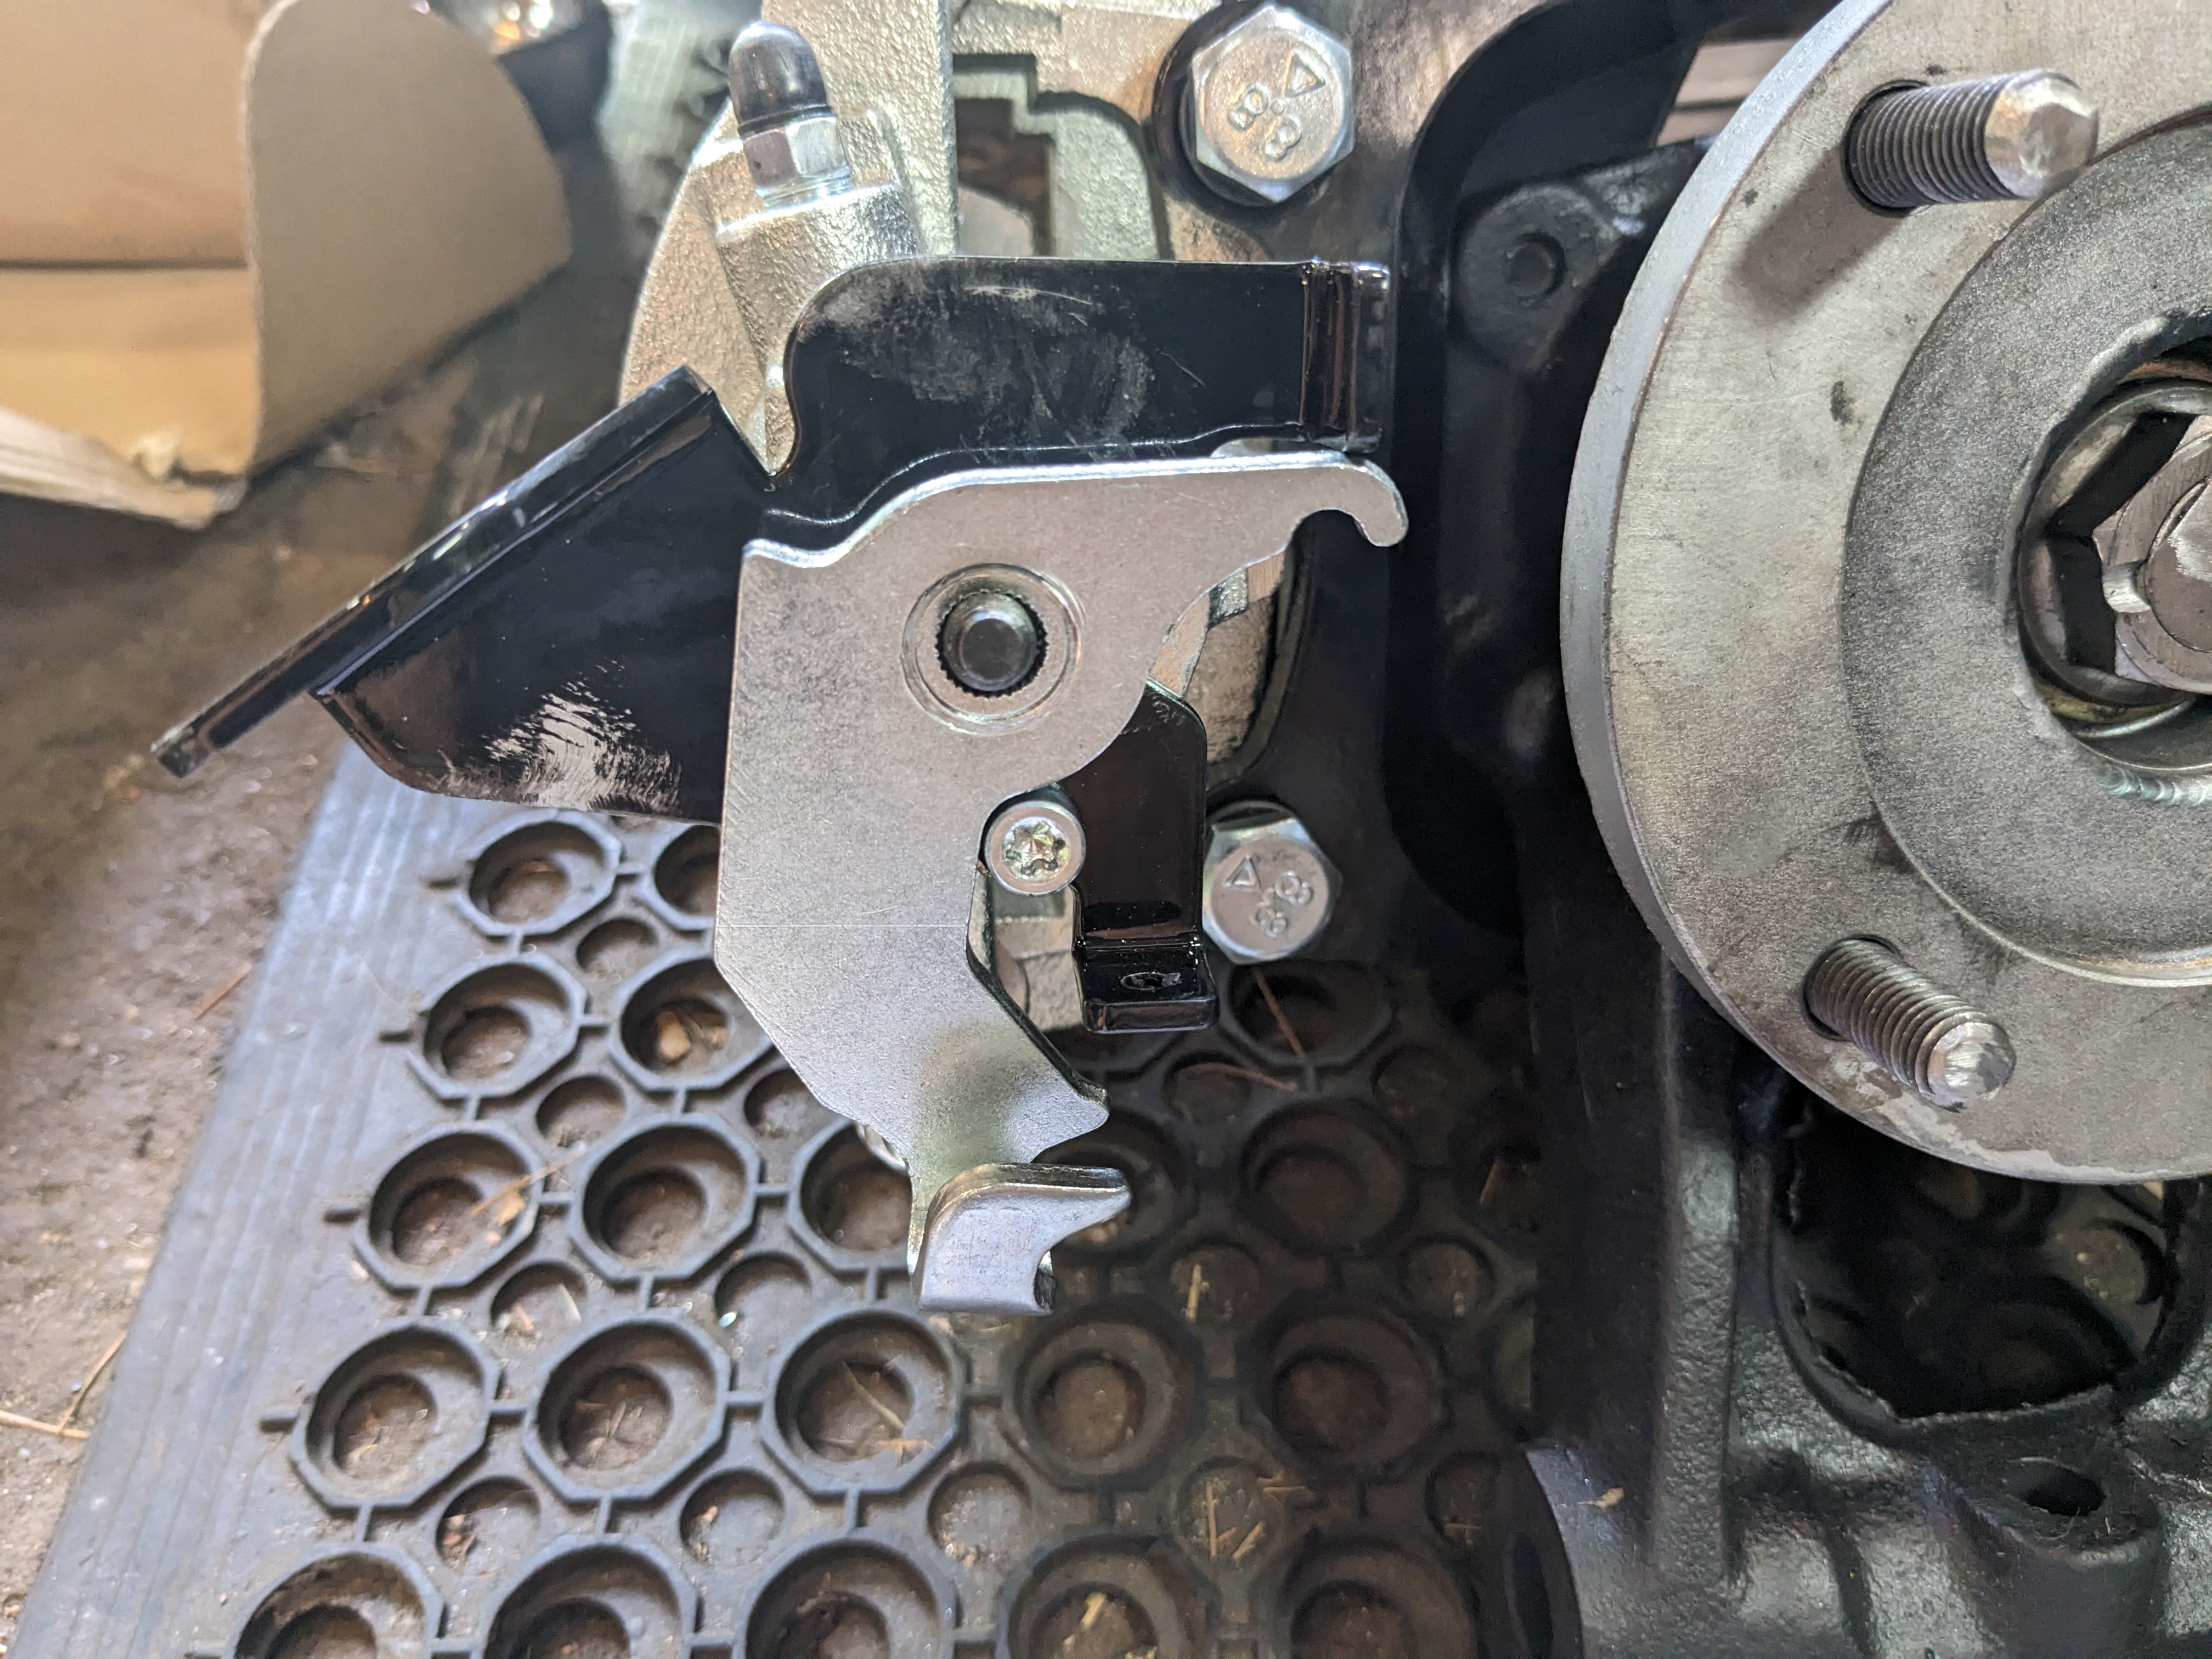
Resolved the eBrake lever issue. Figured out I could just redrill the axis point, and gain the necessary clearance off the flange

Rotated the flange on the back of the caliper to mark the centerline, drilled a new 1/4" hole just outside the existing

Reassembled after confirming offset clearance


Rotated the flange on the back of the caliper to mark the centerline, drilled a new 1/4" hole just outside the existing
Reassembled after confirming offset clearance
lookforjoe
True Classic
Cable attaches as I thought after looking at the pics I took

Getting all the cables / hoses routed nicely. Used a vacuum- bleeder after this to get the rears bled (Dot 3).


adjusted the cable to get enough slack. Looking online, there are ppl using pliers to turn the rod - I realized that the rod end is 8mm, just have to turn it

had dropped the heat shield to get better access - so I removed the Cat heat sensor & shield while I was in there

Volvo grommets to fill that & another hole

problem with MilkFab cable bracket - it flexes significantly when cable is operated. I've emailed MilkFab about it

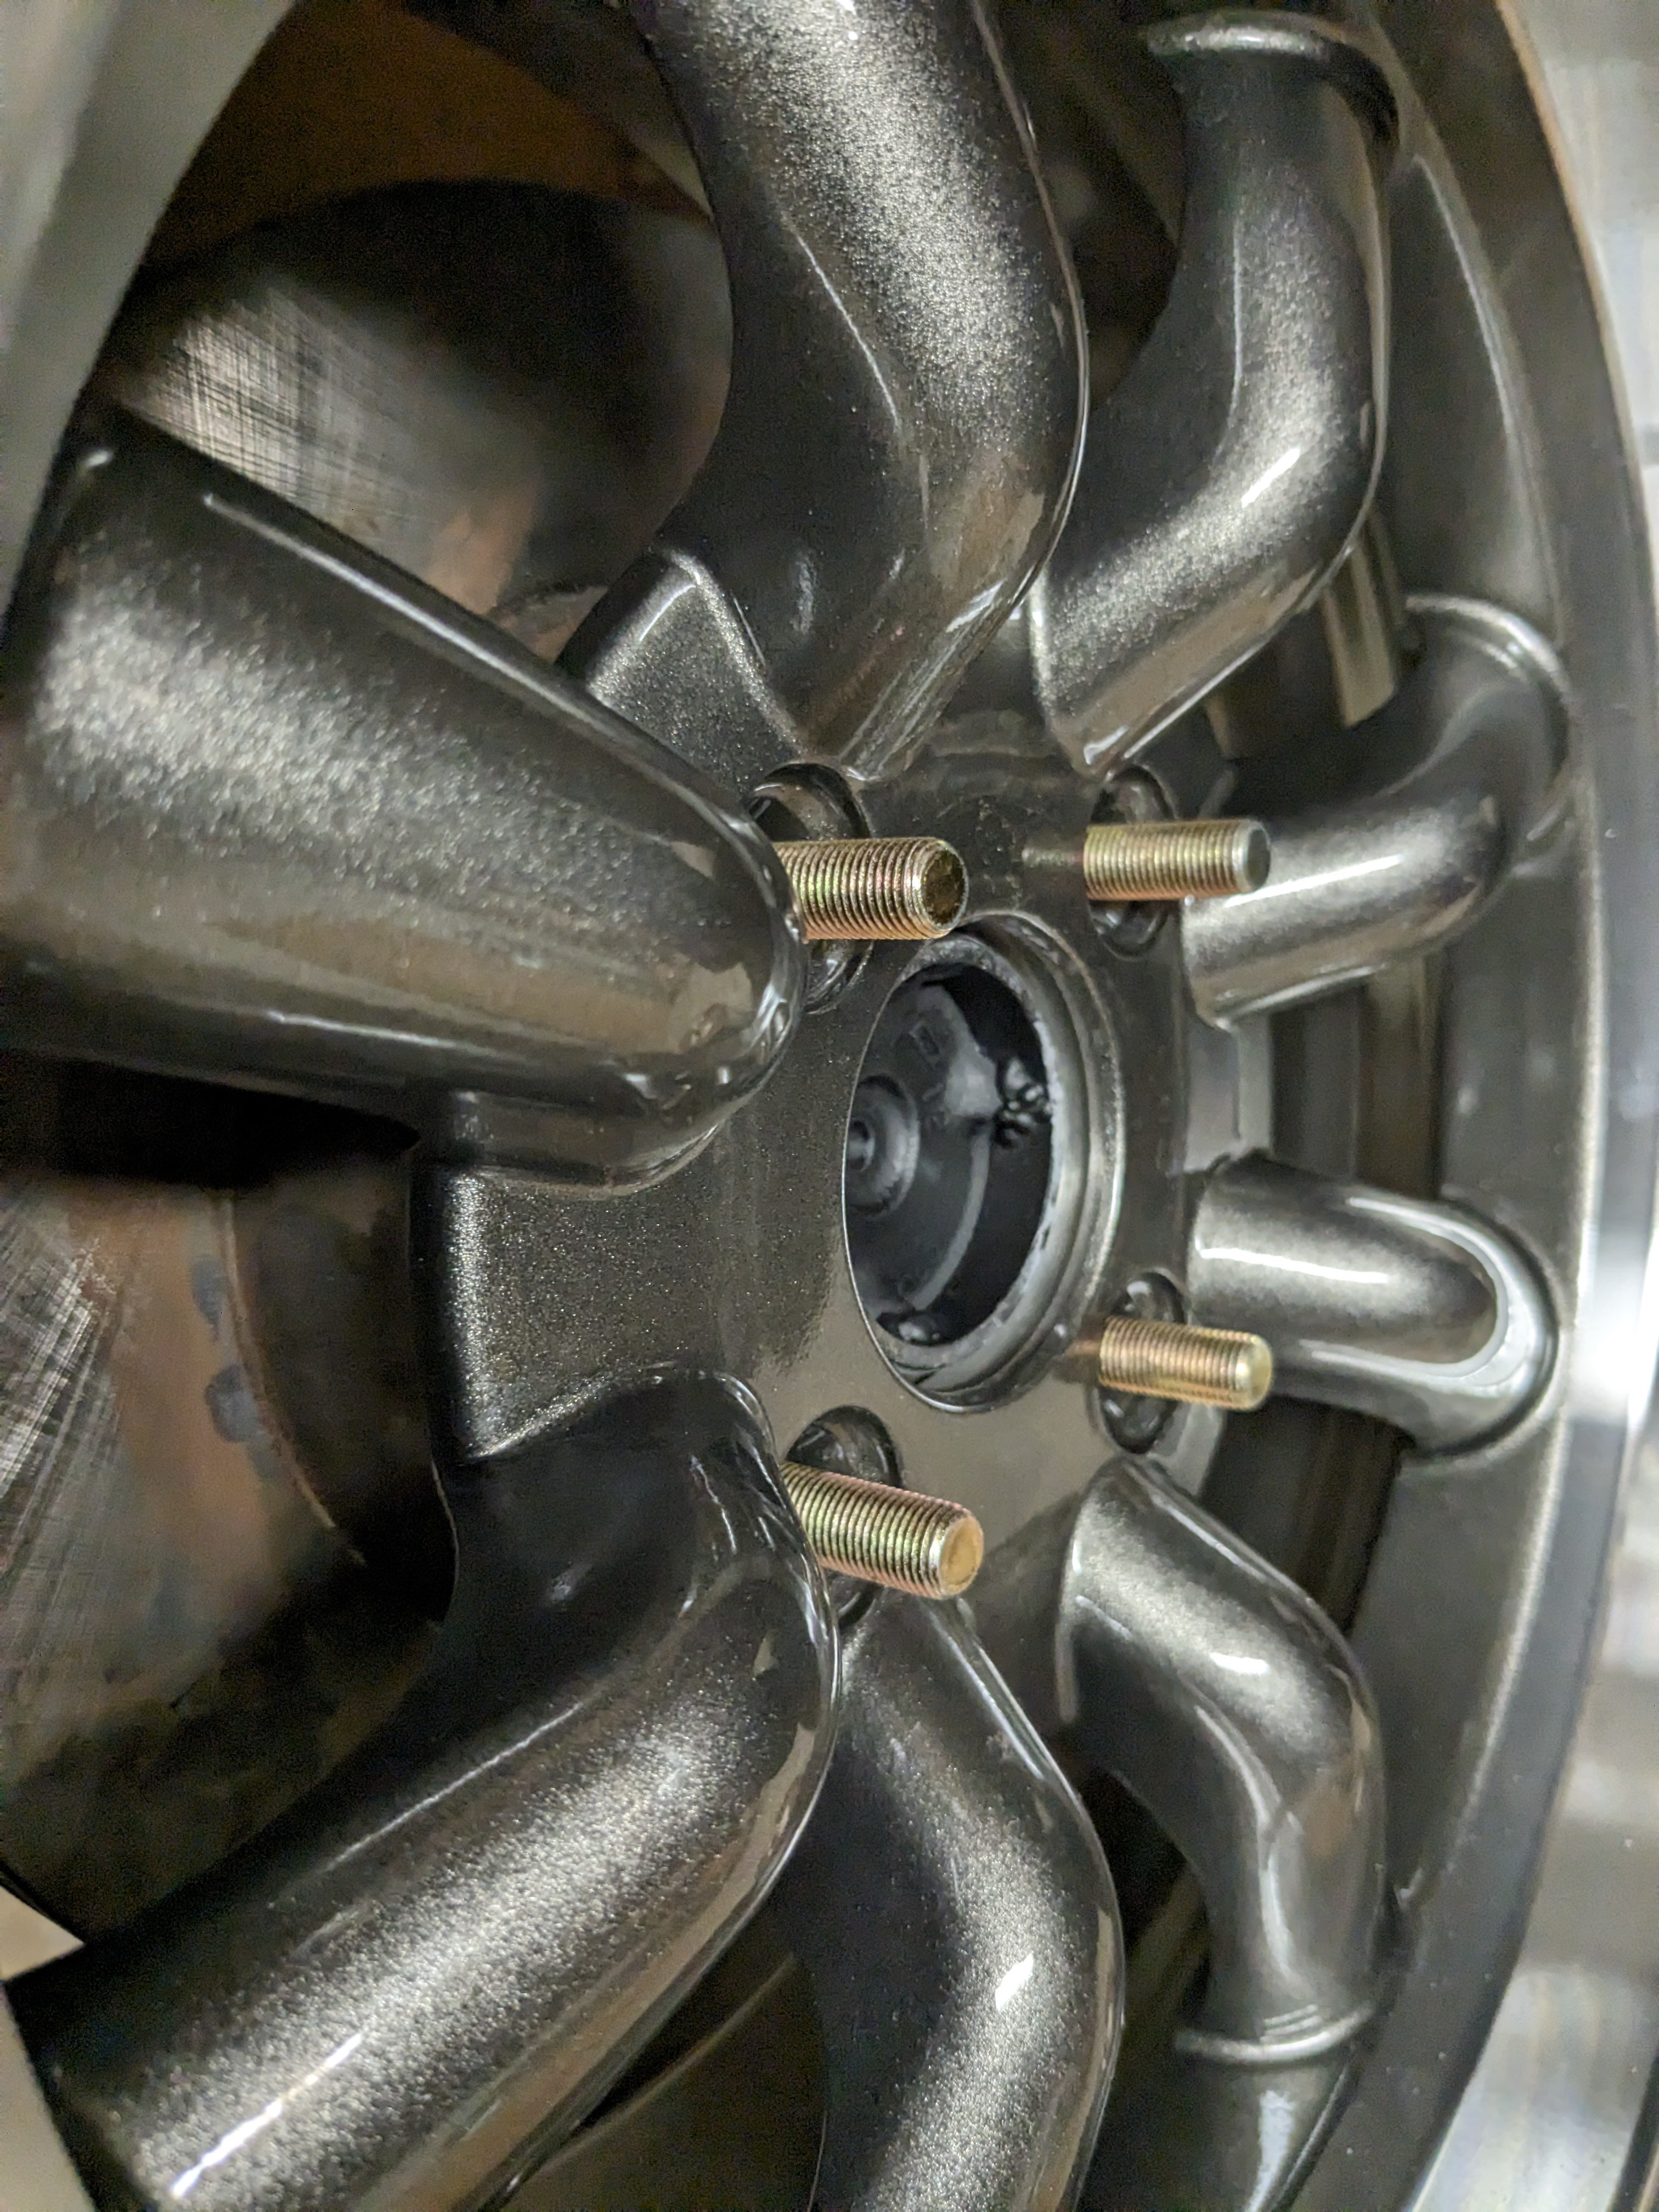
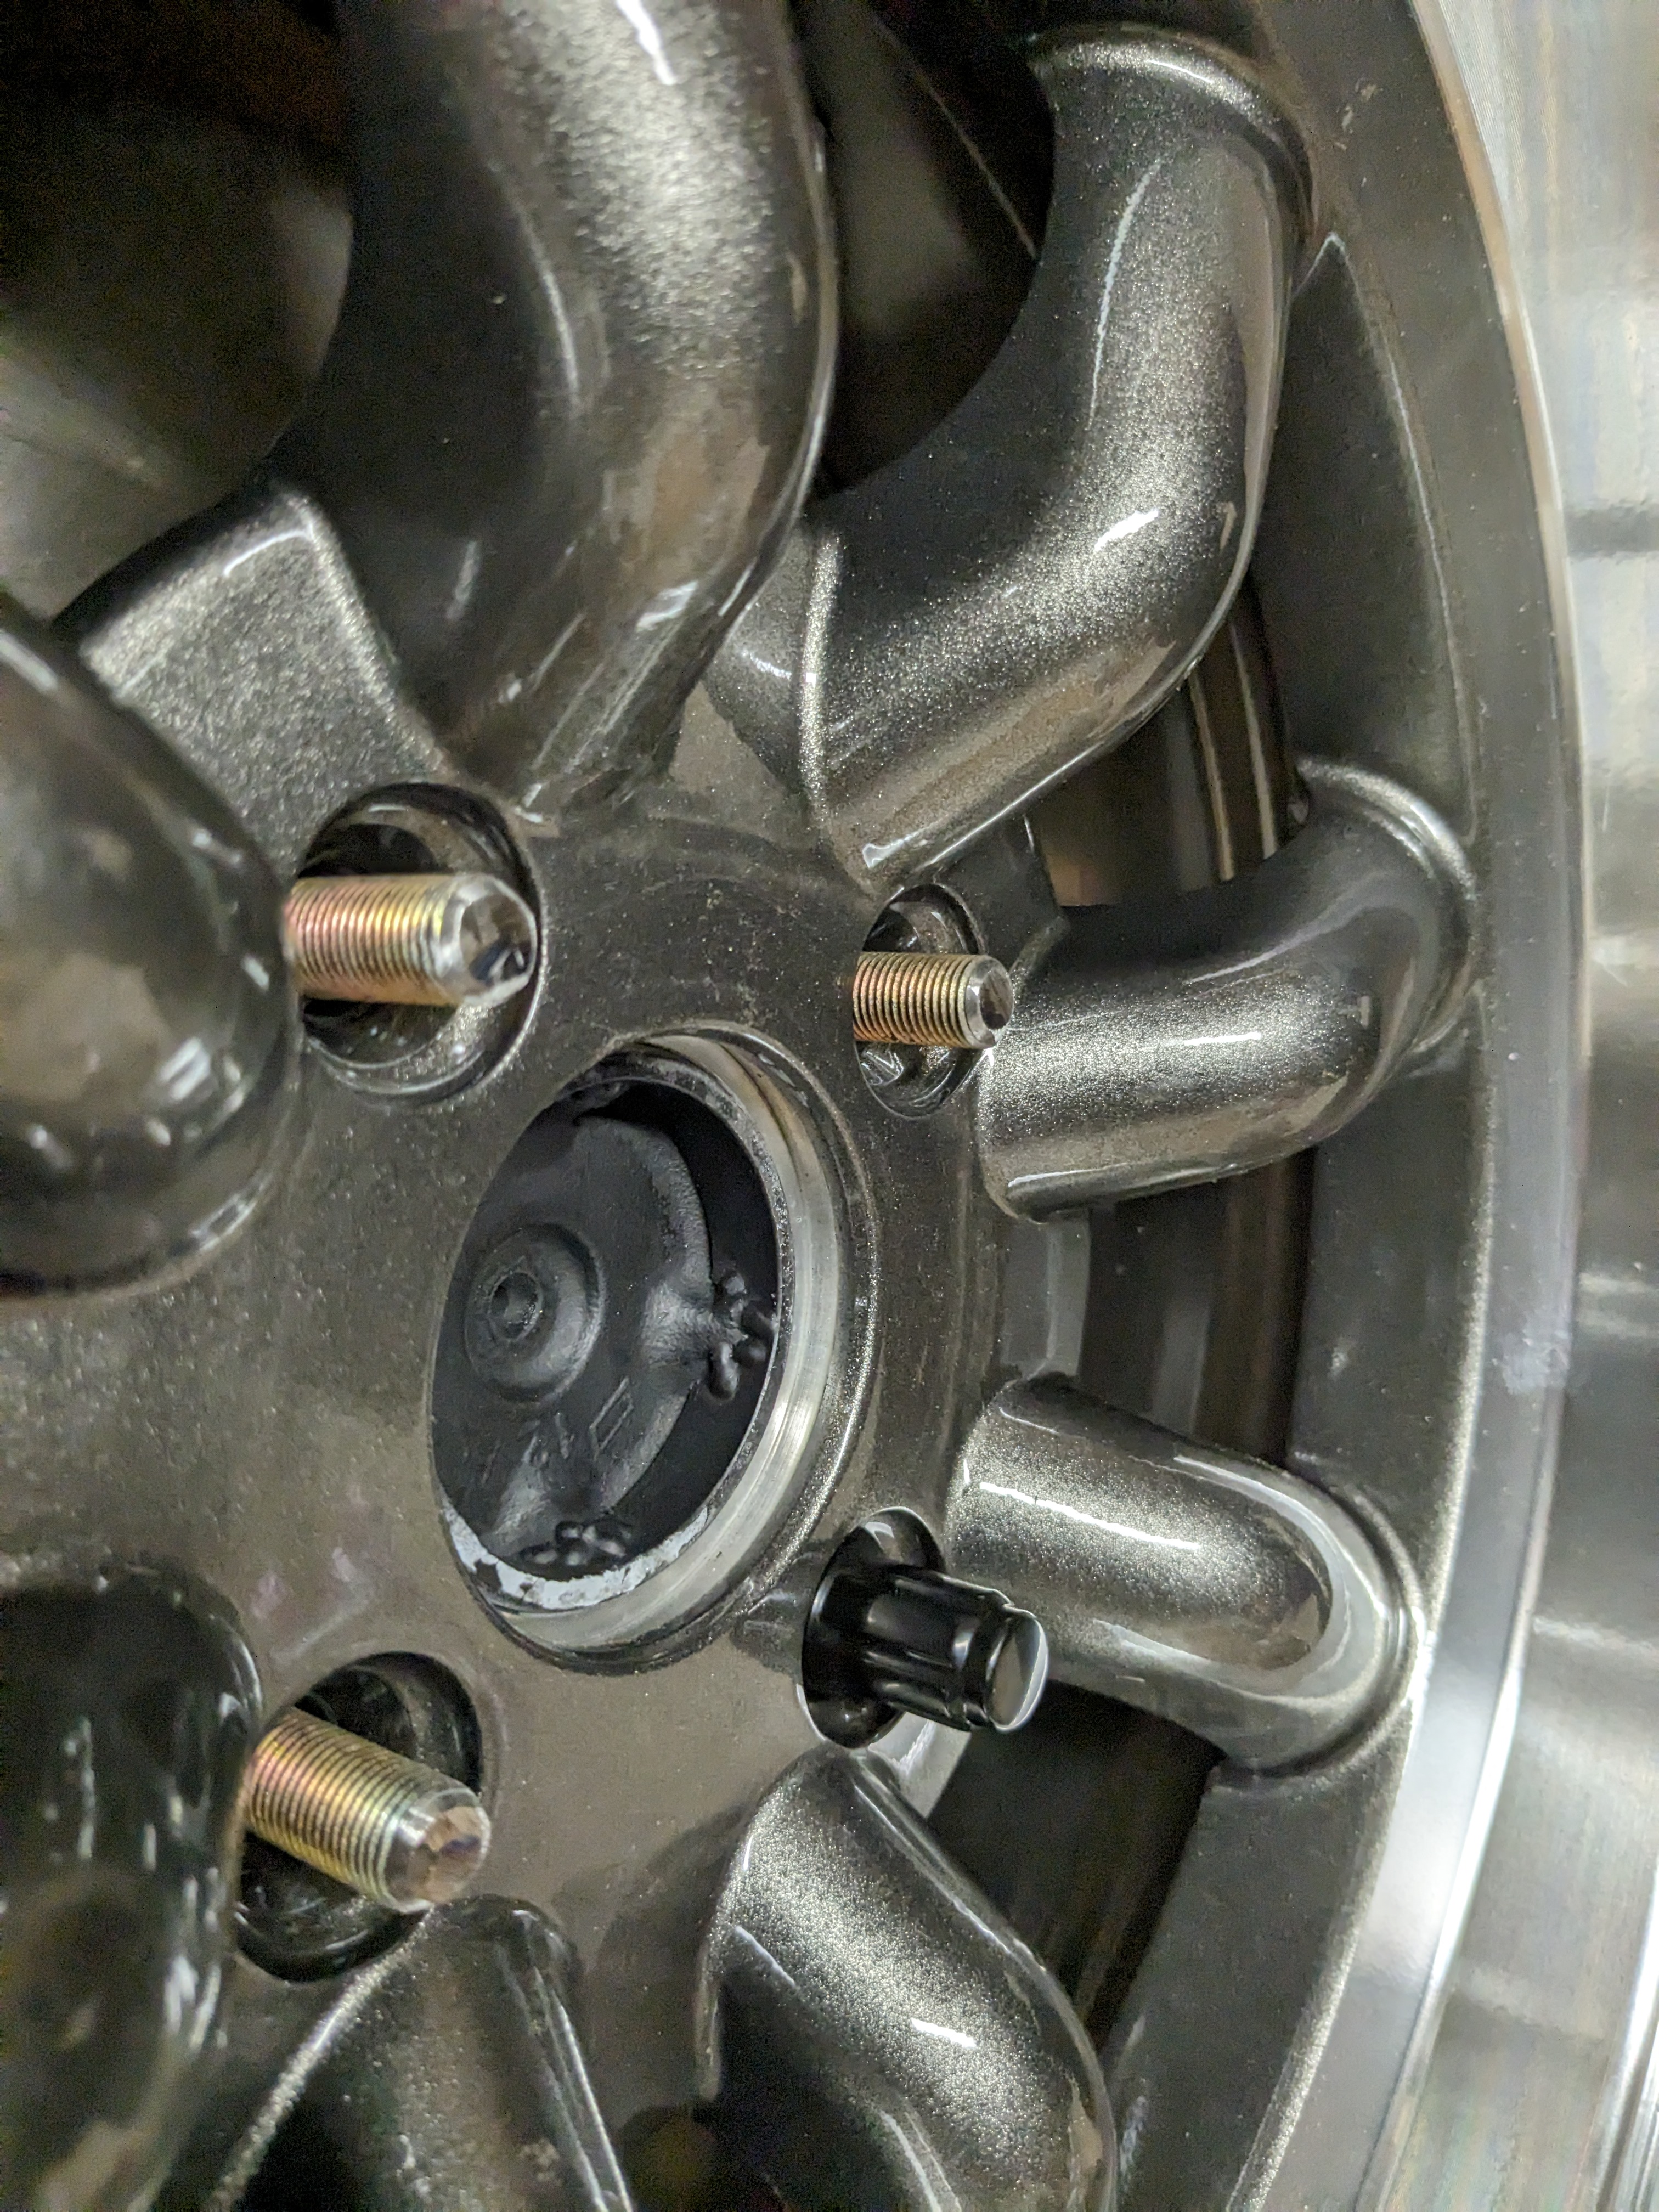
car in the air, did some more power washing before putting wheels back on

wheels on, after driving to settle the suspension - when I first took it off the stands, it looked like monster-truck arch clearance. Still would like it lower, but roads around here are not great & the town had speed bumps all over. Feels so much better on the road now, it was horrible with all the worn parts.


Getting all the cables / hoses routed nicely. Used a vacuum- bleeder after this to get the rears bled (Dot 3).


adjusted the cable to get enough slack. Looking online, there are ppl using pliers to turn the rod - I realized that the rod end is 8mm, just have to turn it

had dropped the heat shield to get better access - so I removed the Cat heat sensor & shield while I was in there

Volvo grommets to fill that & another hole

problem with MilkFab cable bracket - it flexes significantly when cable is operated. I've emailed MilkFab about it

car in the air, did some more power washing before putting wheels back on

wheels on, after driving to settle the suspension - when I first took it off the stands, it looked like monster-truck arch clearance. Still would like it lower, but roads around here are not great & the town had speed bumps all over. Feels so much better on the road now, it was horrible with all the worn parts.


Last edited:
lookforjoe
True Classic
So, now that I'm driving it again, the exhaust is WAAAAYYYY to loud & drones terribly between 2-3K rpm. I will have to look at a different muffler, and perhaps a resonator that is smaller than the 3" Magnaflow I have, that was too long to fit after the cat in the straight section, which is only about 10".

So, while I'm figuring out what to do about that, I worked on making the bike carrier for the pickup - we are taking a trip to upstate NY/CT & will be doing some trails up that in a couple weeks. I still have my Volvo/Thule carriers from the 90's, so I want to make use of them. I'm making stakes with adaptors to retain the Thule cross bars & bike holders. The forward rail holds the forks, I have to figure that one out tomorrow - the stake holders are not equal to the bikes' spacing of 41" from hub to hub, Ann's bike is similar spacing.
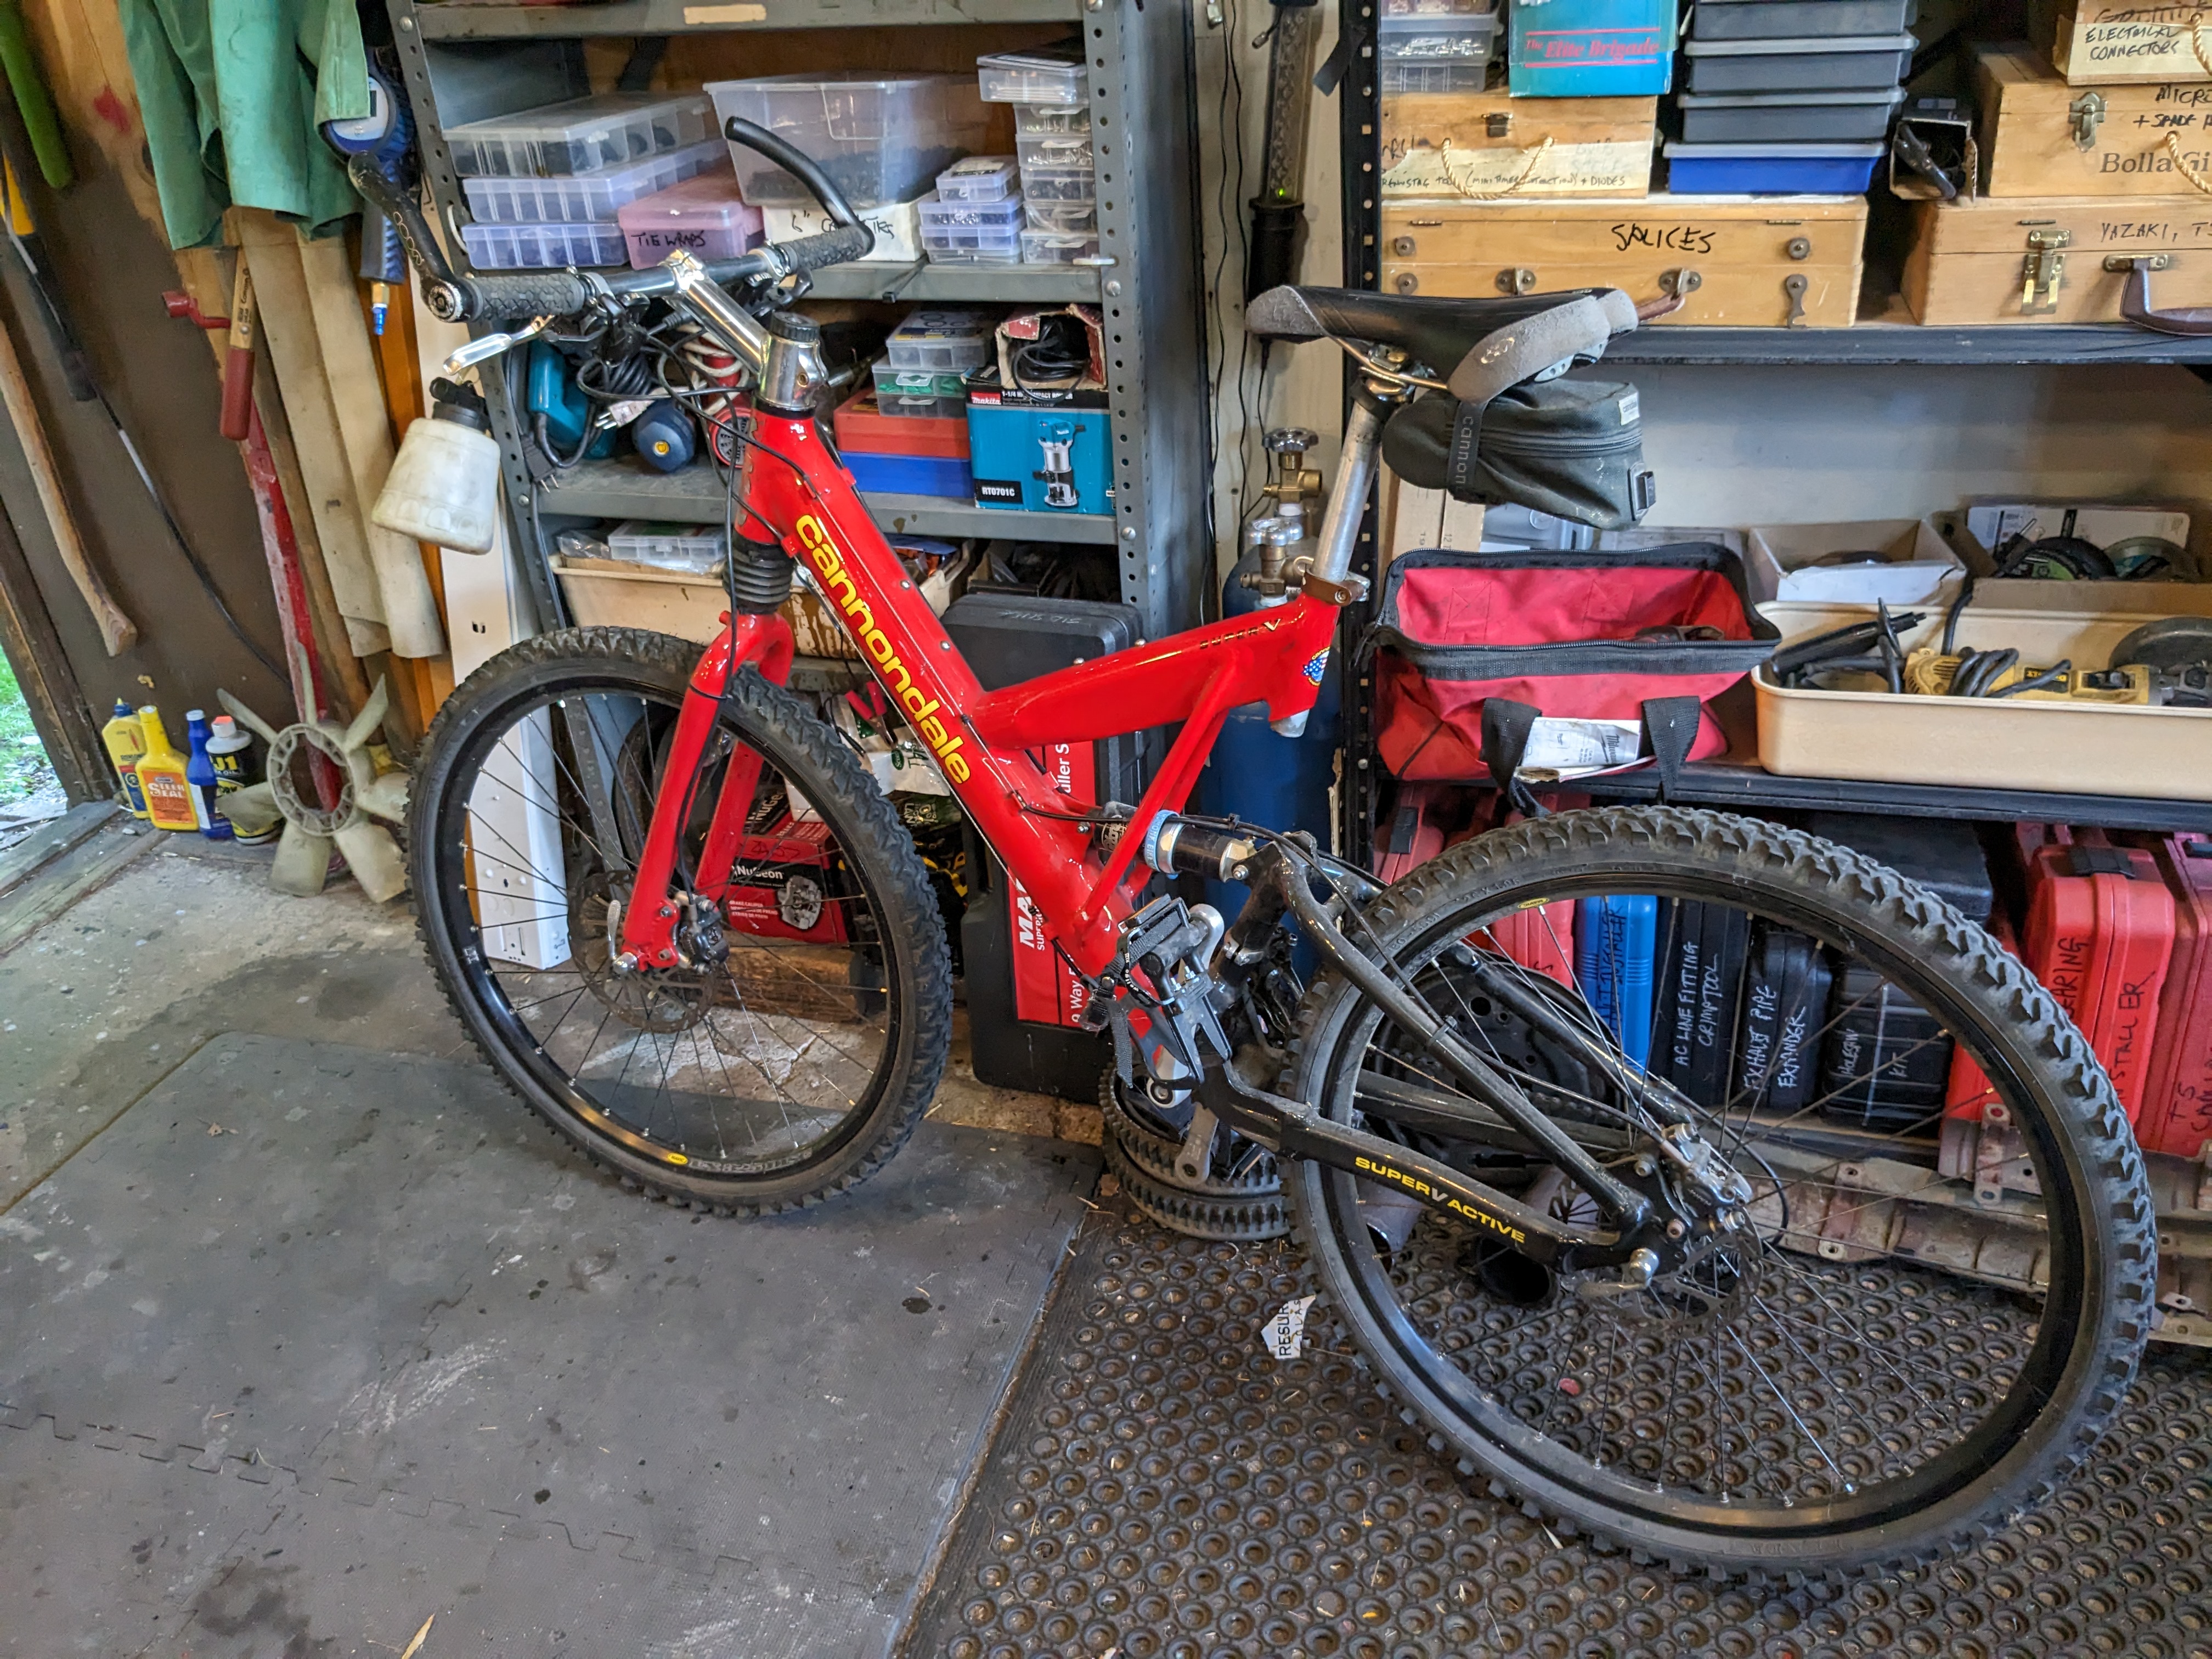
My bike is not much newer than the pickup truck
rear wheel carriers
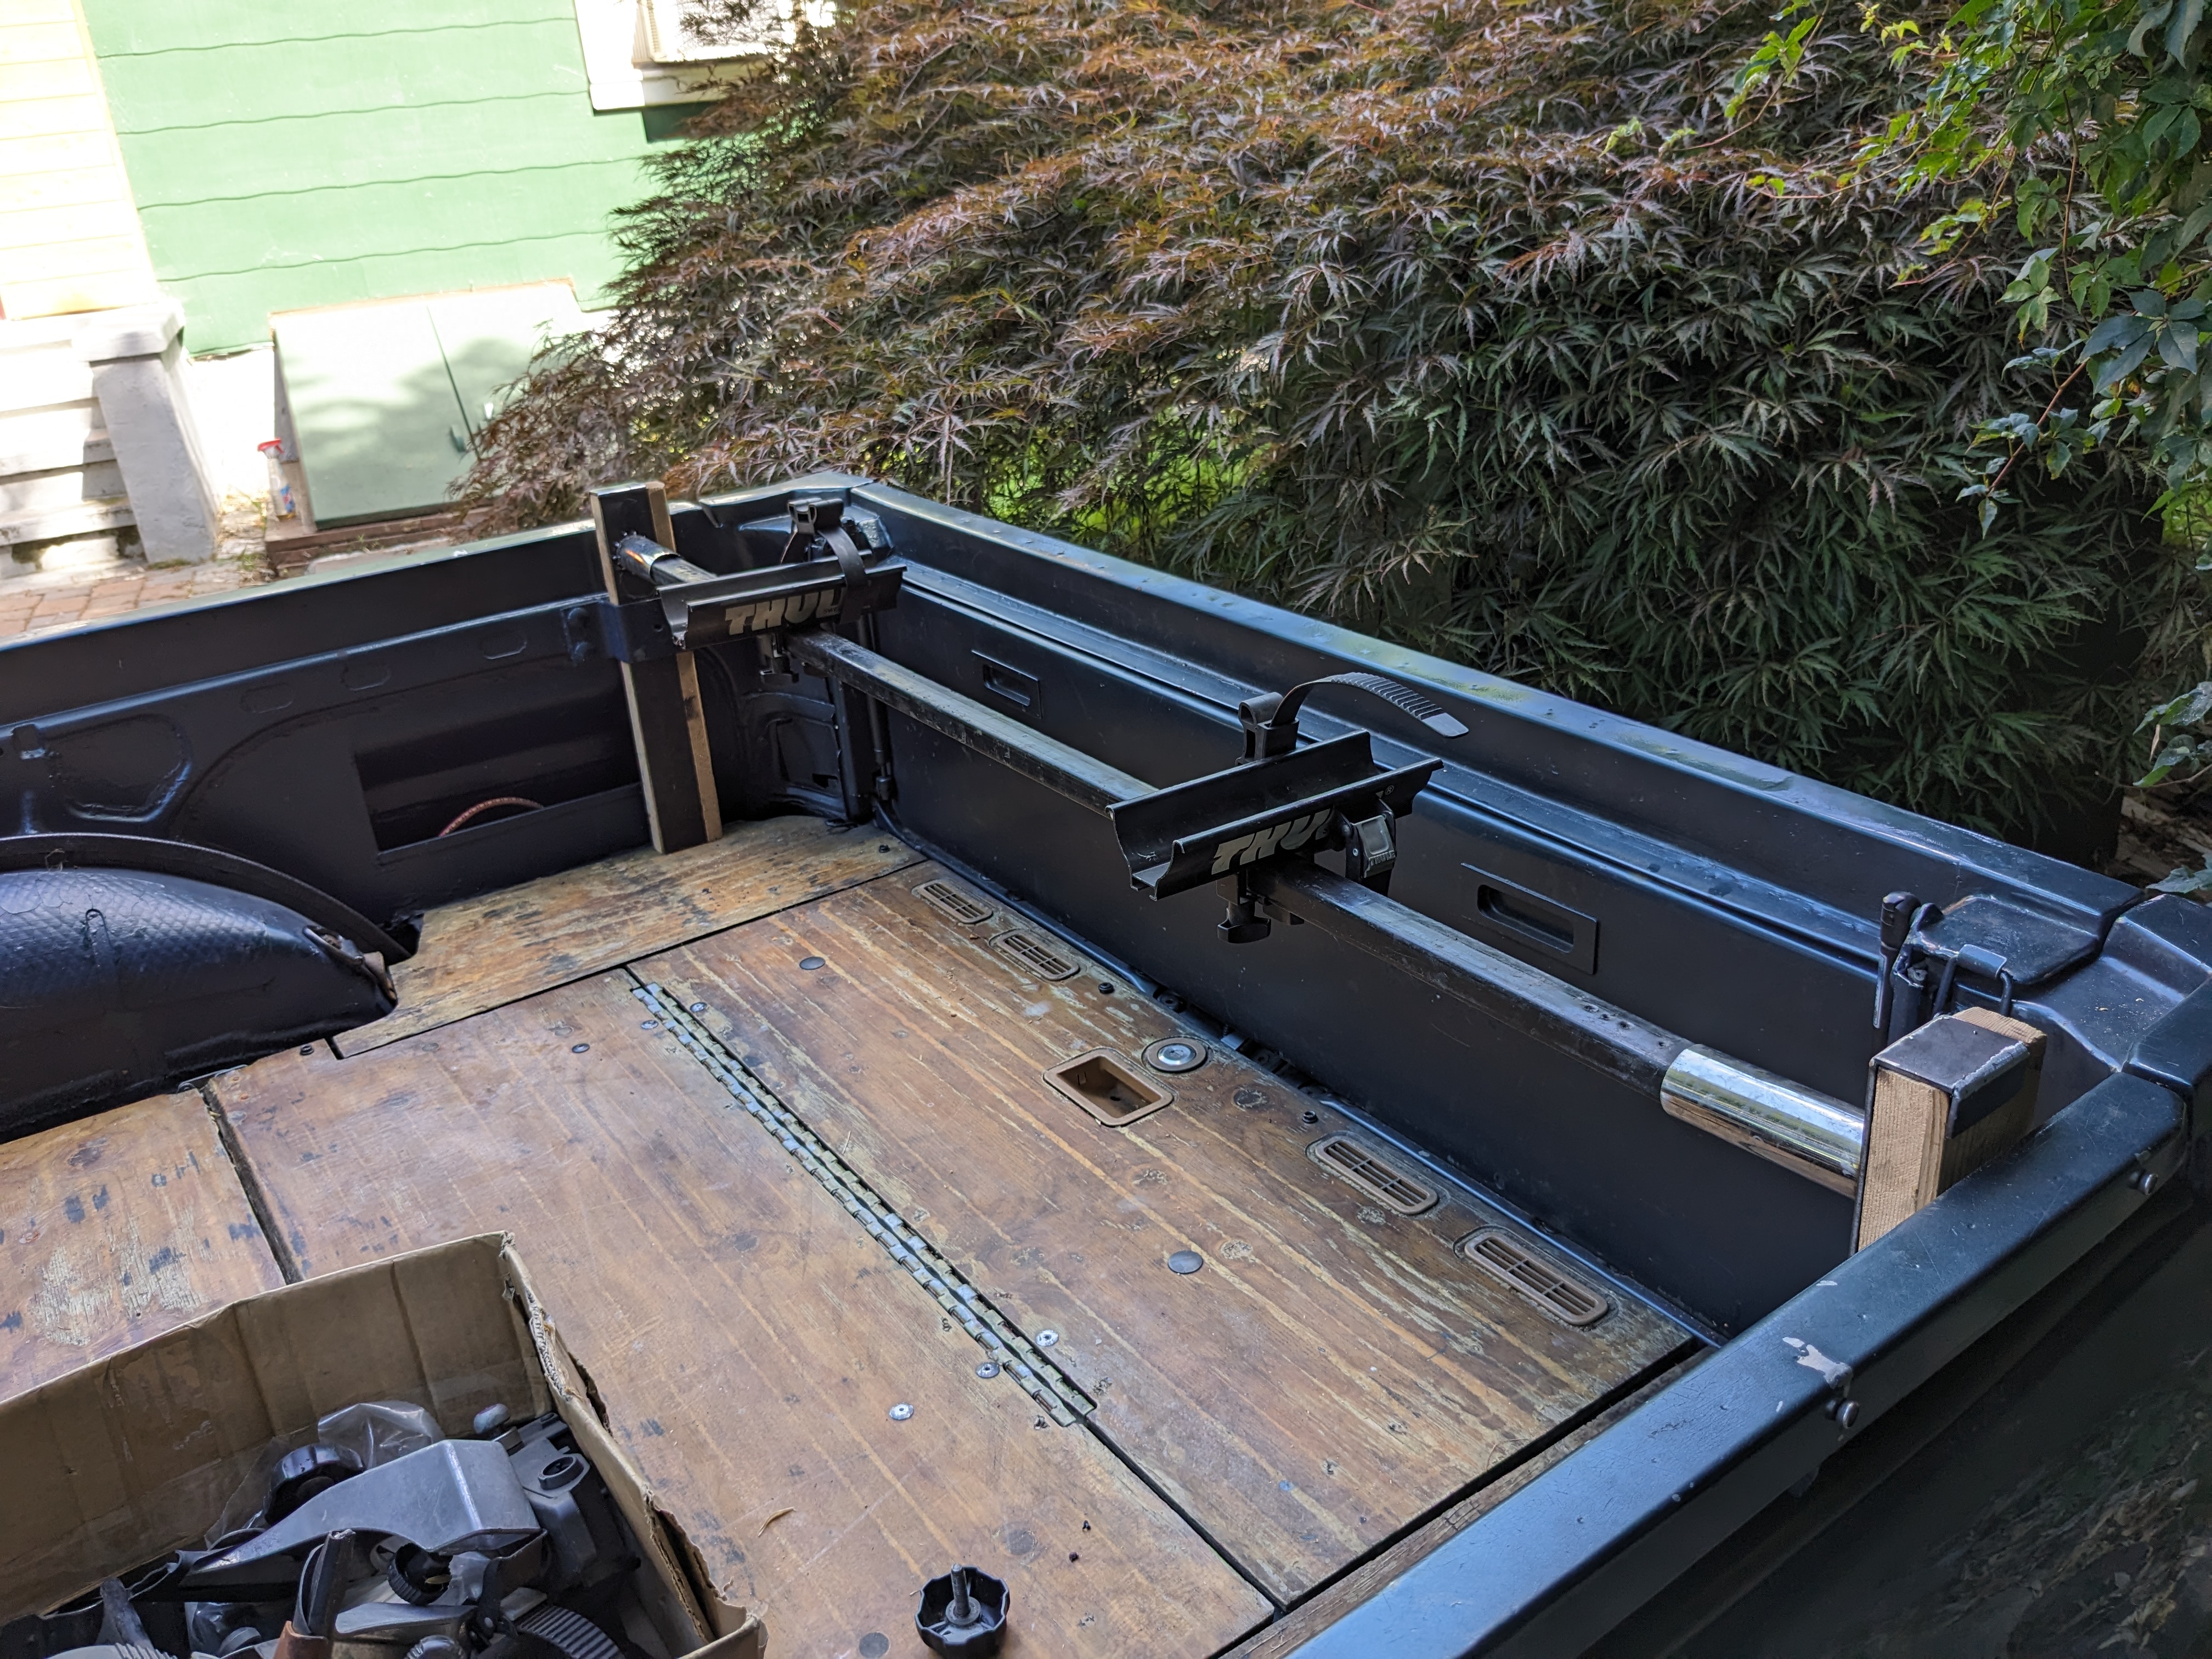
tacked parts to check fit
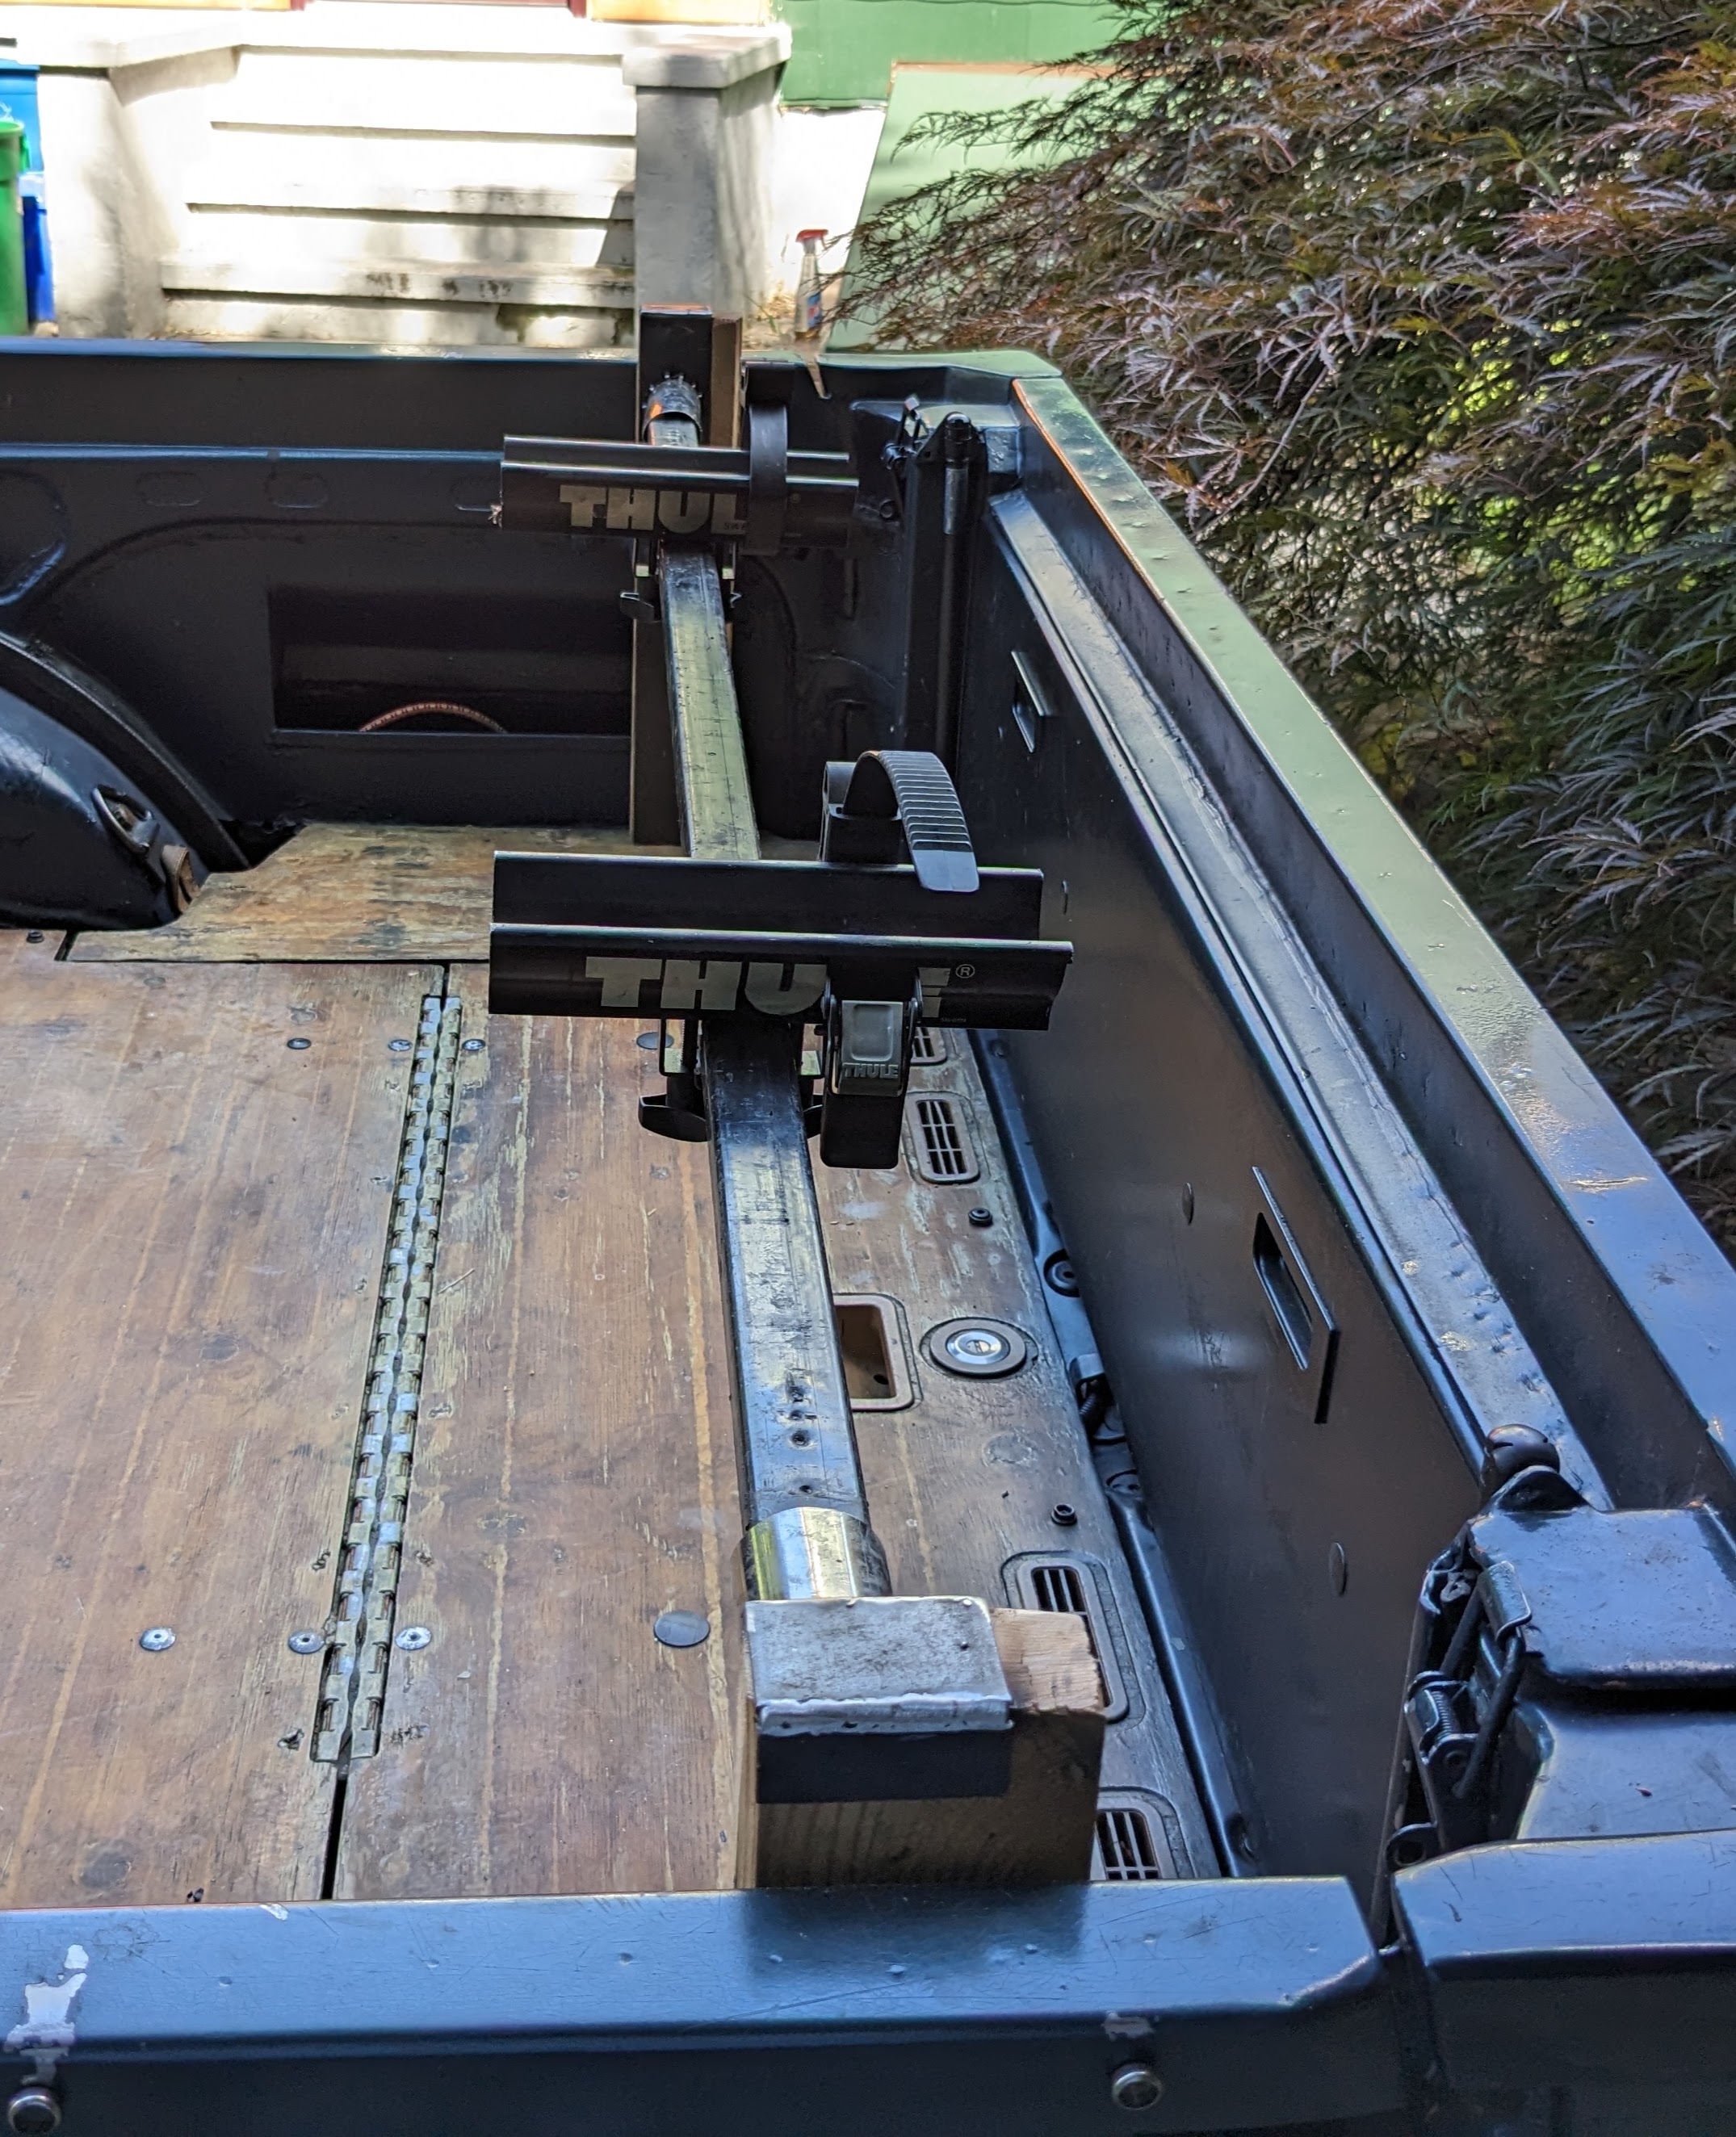
Gusset on the underside to prevent bowing

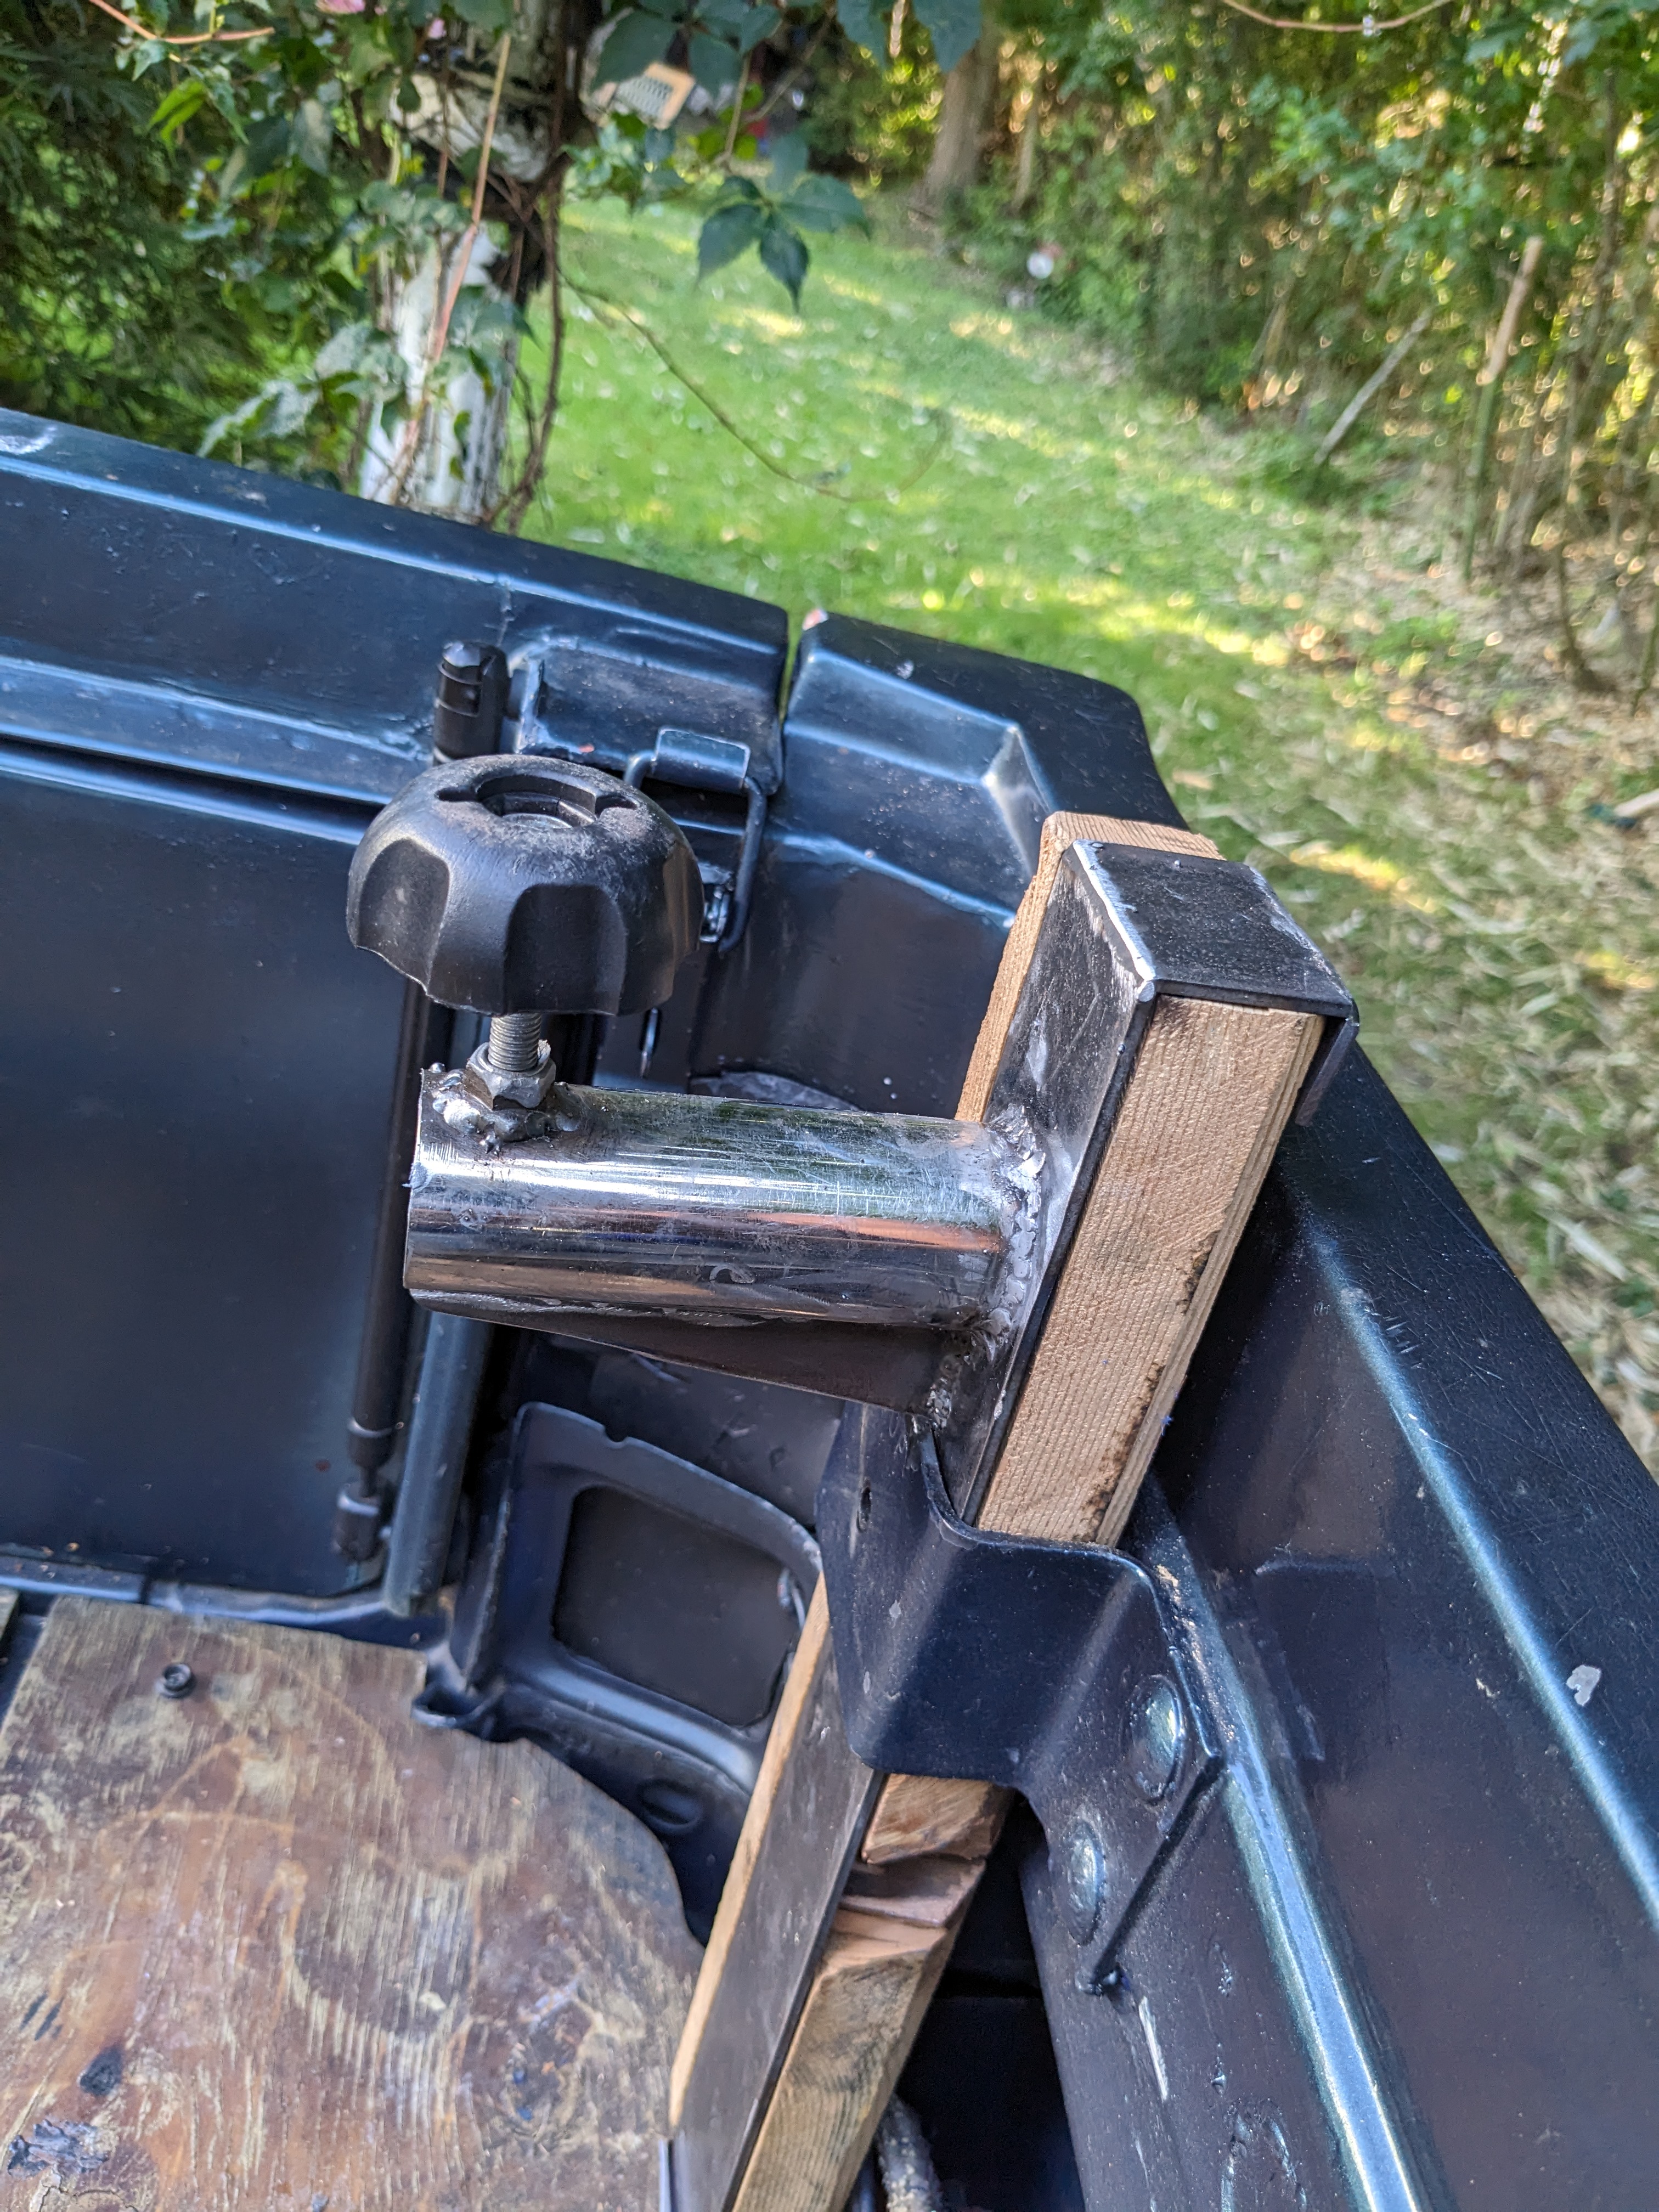
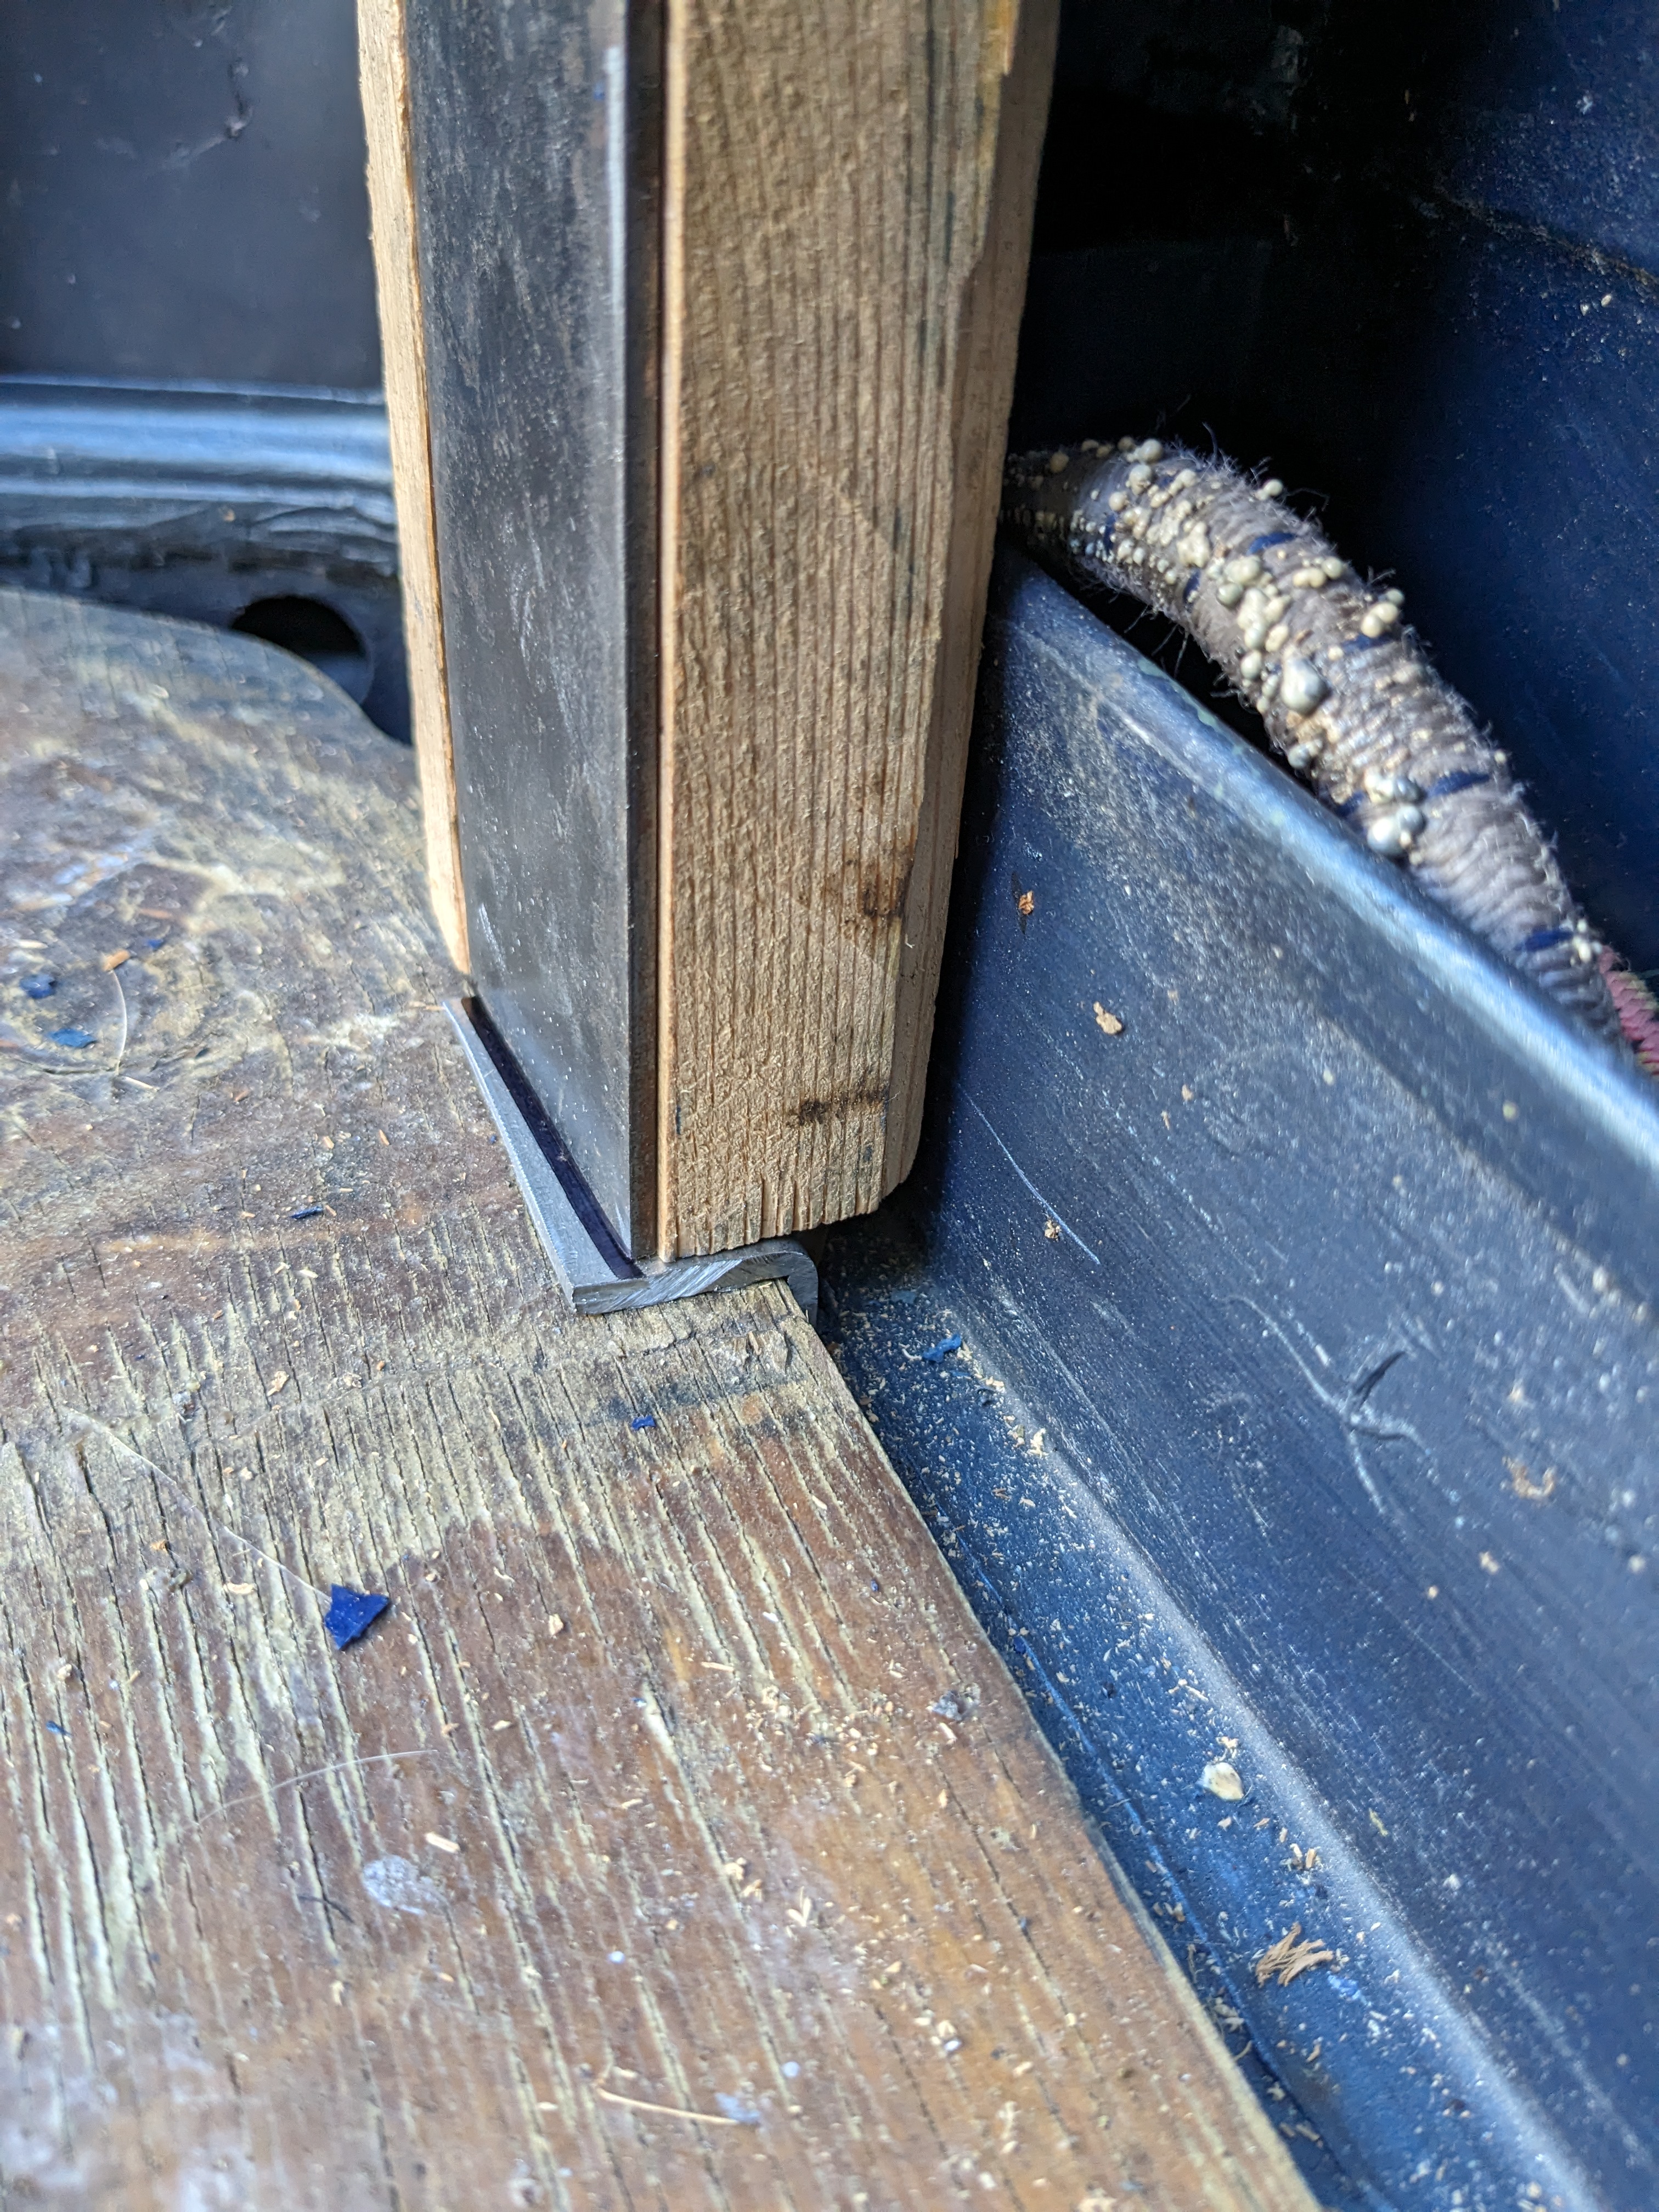
staggered base will lock against the floor board to prevent stake tilting inwards
So, while I'm figuring out what to do about that, I worked on making the bike carrier for the pickup - we are taking a trip to upstate NY/CT & will be doing some trails up that in a couple weeks. I still have my Volvo/Thule carriers from the 90's, so I want to make use of them. I'm making stakes with adaptors to retain the Thule cross bars & bike holders. The forward rail holds the forks, I have to figure that one out tomorrow - the stake holders are not equal to the bikes' spacing of 41" from hub to hub, Ann's bike is similar spacing.
My bike is not much newer than the pickup truck
rear wheel carriers
tacked parts to check fit
Gusset on the underside to prevent bowing
staggered base will lock against the floor board to prevent stake tilting inwards
dllubin
Don
I remember that Cannondale design. That was back in the days when people were experimenting with rear suspension designs that did not suck too much energy from the rider due to suspension movement from pedaling. My mountain bike is a 1991 model. It was one of the first Trek carbon fiber bikes. There was an option to get it with front suspension but that model used the first suspension fork made by RockShox and it was not very good - too much bobbing while pedaling and not ridgid enough for precise direction control.So, now that I'm driving it again, the exhaust is WAAAAYYYY to loud & drones terribly between 2-3K rpm. I will have to look at a different muffler, and perhaps a resonator that is smaller than the 3" Magnaflow I have, that was too long to fit after the cat in the straight section, which is only about 10".
View attachment 75949
So, while I'm figuring out what to do about that, I worked on making the bike carrier for the pickup - we are taking a trip to upstate NY/CT & will be doing some trails up that in a couple weeks. I still have my Volvo/Thule carriers from the 90's, so I want to make use of them. I'm making stakes with adaptors to retain the Thule cross bars & bike holders. The forward rail holds the forks, I have to figure that one out tomorrow - the stake holders are not equal to the bikes' spacing of 41" from hub to hub, Ann's bike is similar spacing.
My bike is not much newer than the pickup truck
rear wheel carriers
tacked parts to check fit
Gusset on the underside to prevent bowing
staggered base will lock against the floor board to prevent stake tilting inwards
I did a fair amount of hiking in the Adirondacks in my youth but never took a bike that far north. Have a great time.
lookforjoe
True Classic
Z with the organ donor


lookforjoe
True Classic
What will be the weight different between the in line 6 and the V6, with transmission?
500 + 80lbs for the L28/4 Spd
315 +125lbs for the VQ35DE/ CD009 6 Spd.
Engine sit back over the crossmember with less forward overhang than the L28 also.
lookforjoe
True Classic
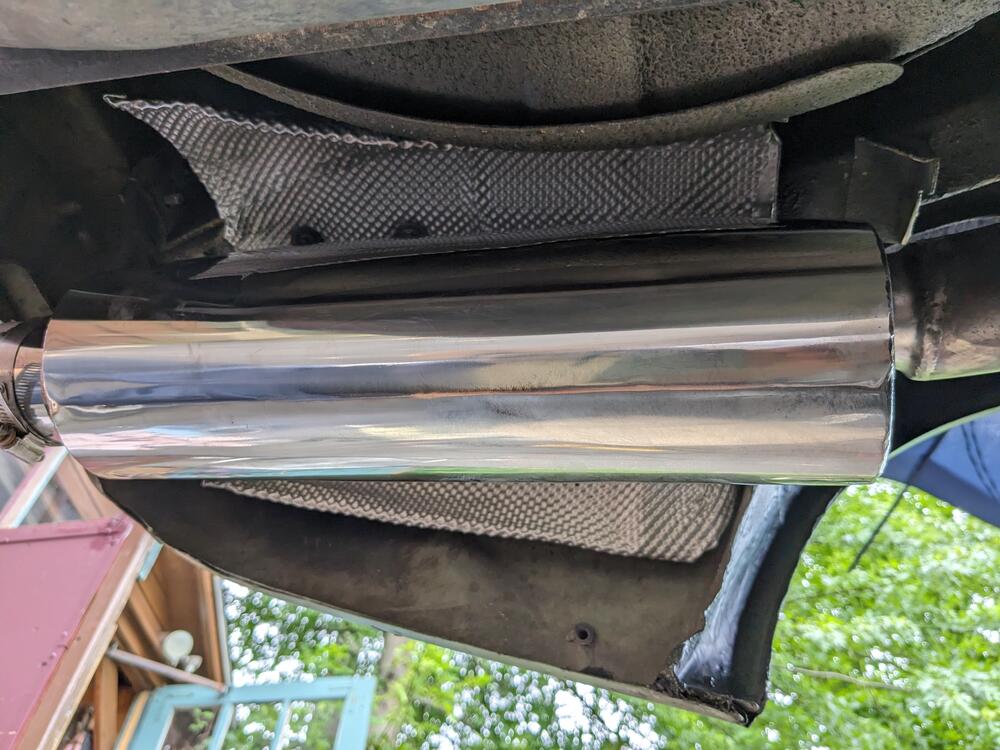
Put the 9" resonator in today. Took care of the drone, but the exhaust is just way too loud. I have another Solo Performance STL 25, so I'm going to put that in next.

lookforjoe
True Classic
Reworked the rear section to incorporate the Solo Perf. muffler. Dimensions are a little different - a little more rectangular in cross section than oval , so I had to cut & move the feed pipe and remove the stock exhaust hanger bracket to make it fit
Have to weld the rear hanger to the muffler outlet, then add a short section for the exhaust tip to clear the valance

Got the whole thing set closer to the rail, but with better clearance off the spare well


Left the innermost part of the bracket, so I have something to hang a support off of.

got it all tacked, now I have to weld it all & make a new hanger

Have to weld the rear hanger to the muffler outlet, then add a short section for the exhaust tip to clear the valance
Got the whole thing set closer to the rail, but with better clearance off the spare well
Left the innermost part of the bracket, so I have something to hang a support off of.
got it all tacked, now I have to weld it all & make a new hanger
lookforjoe
True Classic
Made a heat shield (cut from S40 rear floor shield) to go above & around the muffler, since it is now set so close to the frame/floor. Bolted in place where the original bumper shock shield was attached


forward muffler hanger

gaps/clearance off the subframe is still good


Just have to deal with the tailpipe now


forward muffler hanger

gaps/clearance off the subframe is still good


Just have to deal with the tailpipe now
Last edited: