What did you do to your X1/9 today ?

I haven’t seen these done without the black accents. I see they are Alfa sized ones based on the 185/55 14 tires I see on there.

Do you have a ‘long’ shot from the side So we can see the effect?
Not yet. Too close quarters in my tiny shop to take good pics. Snow's piled in front of the shop door, maybe in a few days I can get some good side shots. But I do like them without the black insets.
 
With three days left before I have to return to school, after giving up (essentially, for now) on the Abarth, I decided to begin some last minute safety and drivability maintainance to the X. This means new manifold gaskets, alternator, belts, fixing the bent wheels, and fixing the passenger side no pop up, no pop down headlight ( just a broken linkage and blown fuse).


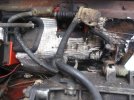
This is the most torn down I've had the engine to this point. Other than the heatshield to alternator to AC compressor interference (absolutely awful) it was quite easy to get to this point. The manifold nuts were hardly tight at all... torquing them down to spec probably would have fixed the leak tbh. I'm sure the torque spec is super low since it's steel in aluminum, but this was unnaturally loose, to the point of poor retention.

PXL_20220103_234152113.jpg
 
think about the fuel lines as you are this far in. when they fail there is a high chance of engine fire. (many x1/9's have been lost due to this problem) Midwest sales a nice kit for this.
 
think about the fuel lines as you are this far in. when they fail there is a high chance of engine fire. (many x1/9's have been lost due to this problem) Midwest sales a nice kit for this.
Thanks for the input, I totally agree. I have the MWB hose kit right in my hand! New injectors too.

Hopefully my fear of an engine bay fire is gone after this work 🙂🙂
 
HI yes I painted the car myself ,base coat clear coat , spray can only used on engine cover , the inner heat shield is there ,under is black top is blue so when you look from the top you see the the blue , seen something similar on here and liked the idea .
Absolutely beautiful paint job! What paint manufacturer did you use, if you don't mind?
 
Ah. I have the same problem. I hate the little press clips, and I have a ton of small metric machine screws that would work fine.
Thanks
I held the threaded end of the screws with pliers, heated the head with a propane torch, then gently twisted the hot screw head into the plastic on the back side exactly where the tab was. Once cooled, I heated a small, flat screwdriver and smashed the bulged plastic around the base of the screw. The upshots are that they are not seen from the front, they are very strong, and the screws are way easier to deal with than press nuts. Good luck.
 
Finally got everything buttoned up after replacing all injection hoses, injectors, manifold gaskets, belts, and the alternator. The job was very straightforward and simple once the old alternator broke free. I ended up cutting the old belt... not sure how I would have gotten it out otherwise.


Definitely runs better now. I haven't had a chance to wring it out yet as the oil didn't get up to temp during my drive, but so far it seems incredibly smooth!
 
Not wanting to outlay $ 150.00 on a new X 1/9 battery to have it wither again with months of inactivity. Borrowed a similar size 12 volt battery from a junk yard that tested good and held a charge from a battery charger. Then to proceed with a needle point prod light tester to a good earth. Chuffed when fat red wire in spare tire space was pin prodded and lit up when ignition switch with key turned to 'START'
Now have starter motor solenoid, ignition trigger wire to take to new relay for starter. Onwards and upwards......
 
Thanks for the confirmation on the behavior of the voltage gauge. I assumed it to be correct until I noticed that the turn signals drag the gauge down significantly yet the hazards do not, indicating that it's a poor representation of actual battery voltage- but that was just an assumption on my behalf.


As far as the 7506 bulbs:

My goal when trying to find the best LED tail light bulb was to use one that's easily available at local stores.

I somewhat succeeded.

The 7506R, (the suffix indicates a color, R for red, A for Amber) can be found at local parts stores, but they seem to be in low demand and supply. They will likely have to order them, but they're most definitely available.

I have not tried the amber yet, and based on the reflector design of the rear turn signals, I do not think the two diode type will work very well. Thankfully they make ones that have many LEDs in a cylindrical shape that will act more "incandescent" and produce a good beam.

Edit 12/13/21: I have now added all of the above info regarding taillights, and more, to the Wiki! Feel free to edit and add whatever you'd like if you learn anything else about the subject, especially alternate part numbers as bulb part numbers are an absolute tangle of compatible and equivalent parts.
What year is your X19?
 
What year is your X19?
1985!

If you're asking because of the lights, I believe I have a different turn signal/ running light arrangement than you, based on your thread. My turn signals and running lights are the same bulb with dual "filament"...which just equates to two brightness levels on the LEDs. Dual bulb probably looks better actually, as the dual filament equivalent LEDs look kinda meh at their lower brightness level.
Yup, our older cars have two bulbs for parking/flashers, at least up front. When I take the lenses off the back I’ll see what’s up there. See the other thread for a question about how-to make LED flashers run correctly.
 
think about the fuel lines as you are this far in. when they fail there is a high chance of engine fire. (many x1/9's have been lost due to this problem) Midwest sales a nice kit for this.
Fuel lines in the closed space of an X 1/9 engine bay, critical in avoiding an engine bay fire. Mine was laid up for four years following a fire in the area of a poorly secured (no clips) fuel filter to fuel hose. Only burned for less than 60 seconds before being extinguished, but what a mess. Now scrupulous at fuel/vapour lines. European, correct inner diameter, stainless steel braided with Norma stainless steel clips. Metal fuel filters from MWB. Will in future pay greater attention to fuel lines.
 
Fuel lines in the closed space of an X 1/9 engine bay, critical in avoiding an engine bay fire. Mine was laid up for four years following a fire in the area of a poorly secured (no clips) fuel filter to fuel hose. Only burned for less than 60 seconds before being extinguished, but what a mess. Now scrupulous at fuel/vapour lines. European, correct inner diameter, stainless steel braided with Norma stainless steel clips. Metal fuel filters from MWB. Will in future pay greater attention to fuel lines.
The 1300s had an additional fire danger for those that removed their air pump belt to get more power. That would allow hot exhaust gases to heat up the air injection manifold to the point where it could melt plastic fuel filters and fuel lines if they happened to touch it. I was looking at an X where that was done and had to tell the owner that his clear plastic fuel filter had partially melted and distorted from sitting on the manifold and was close to letting loose its contents. For those doing an air pump delete, you need plug the manifold line to prevent exhaust gases from heating it or better yet, remove the manifold and plug the 4 holes with M12x1.25 bolts.
 
Don, I have a carburettor 1500 with no air-pump, not needed in 1980's laws. I still suspect that the plastic fuel filter was the culprit for the initial fuel leak, The distributor points the ignition.
plastic fuel filter:post fuel-fire .jpg
 
Last night...er, this morning... I decided I'd replace a broken headlight pod turnbuckle/linkage. That was a mess...I should have left the pod on the car, but whatever. It's back together now.


I also cleaned about 1/8inch of dirt and mud out of the front right headlight pod. Glad I did, because there are signs of surface rust down there from the continuous wetness. I've been using POR15 for stuff like that but it seems to not adhere too well to parts that flex and vibrate, so I may need to look into other options.
Ask Jimmyx about rust prevention - I believe he may know of alternate products?
 
Re-applied the reflective markings I had made for this build.
And oh yeah, got the Lancia/fiat hybrid seats and door panels back from the upholsterer.
Looking forward to a fun week of interior work.
View attachment 56857View attachment 56858View attachment 56859View attachment 56860View attachment 56861
Those seats and door cards looks absolutely fantastic- exactly the look I'm going for, admittedly.

I'm gonna have to consciously try not to copy your build since it's so so similar to what my dream is for my X!
 
Back
Top