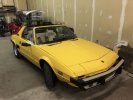
What did you do to your X1/9 today ?

Went out and walked around my X today; I went for groceries Tuesday in her, and we'll be thawed out next weekend, drivable weather again!
IMG_2026.JPGUntitled.png
 
Temps got above freezing today so fitted the last quarter bumper and the correct series 1 side repeaters along with a NOS front indicator/side light unit. Next job will be to tackle the leaking drive shaft boots!

 
Well my X19 was picked up in Pittsburgh today so my .. “what I did today“ was pray for decent weather on its ride here to South Florida.

X19 beach and palm tree photo next week 😎🌴

Friday update ...the X arrives tomorrow morning. That car sure must be happy with the storm in its rear view mirrors. No more snow for this X
 

Attachments

  • 5F769698-0ADF-4405-83ED-28210085A29B.jpeg
    5F769698-0ADF-4405-83ED-28210085A29B.jpeg
    215.7 KB · Views: 92
  • 9CCA64A9-3C7B-4EB1-BD34-DB3C43F85AC9.jpeg
    9CCA64A9-3C7B-4EB1-BD34-DB3C43F85AC9.jpeg
    70.5 KB · Views: 111
  • C036043F-0A9E-42D3-B02B-905B88D273AC.jpeg
    C036043F-0A9E-42D3-B02B-905B88D273AC.jpeg
    78.1 KB · Views: 108
  • 3166C54A-6AFC-45D2-B43E-FF16BCCB02D7.gif
    3166C54A-6AFC-45D2-B43E-FF16BCCB02D7.gif
    3.4 MB · Views: 84
Last edited:
Finally got the 10mm nuts loose on my rear brake lines. WHEW, jfc that was a PITA. I ultimately didn't need to resort to heat, just repeated rounds of PB B'laster and cleaning with a wire brush. I honestly felt prouder of getting those nuts loose than just about anything else I've done on this car.

Being a bit of a masochist, I followed that up with removing the old calipers from the handbrake cables, another delightful task.
 
Cleaned the crankcase breather/trap and replaced the fuel filter. Noticed a weep of oil from the cam box timing belt end seems to have got a bit worse, I was planning on changing the camshaft to an early 1300 version at some point so will address that nearer the time. Must do the drive shaft boots as they are now leaking badly.
 
Installed new rear flex brake hoses, reattached the handbrake cable to the calipers (this was accompanied by a lot of cursing), reinstalled the dust shields, installed the new rotors, reinstalled the wheel spacers, installed the new caliper mounting brackets, installed new brake pads with new anti-rattle springs. Starting to believe this thing might get back on the road at some point!
 
In the process of fabricating the mount it occurred to me the placement and orientation in particular might matter. First, studied the switch knocking it about to figure out how it worked and sensitivity to tripping. You can feel the mechanism work bouncing it off the tool bench. Then did some research and found this, which you may find of interest. Seems like (1) you want the red button facing up (2) it should be securely mounted (3) in an accessible location. This post was from a Ford forum:

"FYI, they are direction sensitive. Upside down isn't good.

How they work: there is a small funnel shape with a magnet at the bottom. A ball bearing rests in the funnel held in place by the magnet. There is a big flag on top of the funnel that goes to the trip switch.
When you take a hard hit from the side the ball is knocked off the magnet and ramps up the funnel tripping the switch. Also a hard roll over will just lift the ball off the magnet and trip the switch. But a hard hit from the bottom (hitting a pothole) pushes the ball into the funnel not tripping the switch. A side hit while upside down will have gravity pulling the ball so it is more sensitive.

There is a reason why the trip switch is on the top. "
Installed:
inertia switch.JPG
 
Last edited:
Armrests that light up when you open the door or when an auxiliary switch is flipped. Additional courtesy lights under the dash as well. Smoked (lightly smoked) Lexan cover over the LED strip. Door jambs have 2 switches in each. One set of switches operate these lights. The other operate the factory light.

Armrest,02.jpg
Armrest.jpg
 
Back
Top