Windshield installation? who's done it

Kevin Cozzo

True Classic
so I have had a windscreen sitting here, and it's the last major thing to do. I bought the replacement rubber trim from Midwest, as I never really liked that chrome strip. I have watched about a million videos on people dropping one in. I know an independent glass guy, but meh, $150 right now, and I already did the hard part of removal, lol...I got two sets of suction cups and a buddy that is pretty mechanically skilled. We dry fitted it without the rubber just to make sure, as someone here had an issue with one not fitting? And mine has been sitting for a couple of years, and you just never know with this sorta stuff as to the quality of what you get, but it does seem to fit. I just painted the car, so I took a lot of time cleaning up the area, and have brand new pinch-weld molding around the opening...So I guess my questions are:
1)What adhesive did you use? I am thinking either Sika primerless urethane, or Dow U-428, primerless, both are offered in 2 tubes, because we all know that when you can't just run down to the store- one tube with jam or have a problem, so having the second tube on hand is a good idea
2) What's the best way to bead the sealant on our cars? I have seen that most all glass guys cut a "V" in the tip, and make a tall pointed bead, that will squish out...and would it be better to put in on the car, or the glass? I would think the body
3)will the rubber trim help center the glass?- it look pretty straightforward, the rubber trim has some sticky stuff on the inside of the groove. I'm guessing we just wrap that around the edge of the glass, pressing it on very snug, maybe put some tape on the front to make sure it won't come off while handling?
My big fear here is really just making a freaking mess...was planning on covering the dash of course, and putting blue painters tape just on the inside of that pinch weld moulding, and maybe on the outside body while dry fitting with the rubber gasket
Any other advice would be helpful, don't want a mess or a leaker. I have built aquariums before, so this doesn't seem that different, lol
 
Knowing that I need to remove my windshield from my 82, I'm very curious myself. Personally, I like the chrome trim and would want to keep it. So you're using the black gasket that Ant used in the Wheeler Dealer episode on @tvmaster's car? I'm really curious about that. It seemed Ant was going to reuse the chrome strip, but then it was the big black gasket and nothing more was said.

So folks who reuse the chrome strip, does that take a different windshield gasket? Do you reuse the old one? Or if you buy new, are the original styles still available?

My post was also not helpful, sorry. But spawned more questions.
 
There is no “gasket“ it is the sealant that seals and holds the windshield in place. There is an inner trim that is placed, then the sealant, then the windshield and then use the same sealant to attach black or chrome trim to the face of the windshield.

I have not done this job either and will be very interested to see the process and results.
My windshield seems VERY new, although there was no official note of that. I wonder what happened....
 
When I got my latest X, it was obvious a new windshield had been installed as there were no pits in it. The chrome trim was included with the car but not attached. I merely used silicone adhesive to attach it to the windshield glass as it did not appear to provide any actual sealing function. Maybe I'm missing a component.

When you adhere the glass, make sure you have a nice seal all the way around or you will get water on your floor whenever it rains. Not a big deal for me since I have no carpet or insulation but would be a bummer with a full interior.
 
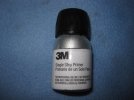
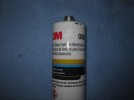
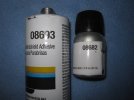
I did mine a couple of years ago. Never did one before, so this was a learning experience for me. I watched a few YouTube videos first. I used 3M Urethane adhesive and primer.
81 windshield install 02.JPG81 windshield install 03.JPG81 windshield install 04.JPG

The primer is applied to both the inside and edge of the windshield that will be hidden by the inner trim strip. The primer is also applied to the inner frame of the window. The key to using the adhesive is to either have a powered caulk gun (which I didn’t) or leave the cartridges out in the hot sun for quite a while to let them get warmed up which makes the adhesive flow much better. I think I cut the tip at an angle, but I have seen the V notch cut mentioned in some videos.

I didn’t have the rubber trim so can’t comment on that. I reinstalled the chrome trim as it is stock later. I masked off the outer part of the windshield frame where I did not want the adhesive to go. I also cut two small plastic blocks out of some left over plastic and fashioned them as standoffs so that when I sat the windshield in the frame, the windshield would settle on the blocks and leave an even gap all the way around. You don't want the windshield sliding down and hitting the body. It takes a while for the adhesive to set so this way you don't have to hold it in place forever. I don't have any photos of the standoffs, but they were small enough to support the windshield, but not stick up past it. Maybe 3/8" wide and an 1/8" thick. The goal is to have an even gap between the windshield and the frame. I applied the adhesive, then placed the standoffs in the adhesive about a third of the way in from each side, then set the windshield and slid it down so it rested on the standoffs.

With the adhesive nice and warm from the sun, start injecting it around the gap as fast as you can pump. This is where a powered caulk gun would help. One tube is more than enough to do the whole windshield. I filled the gap so it was above the inner trim strip and up to the edge of the window frame. You just have to estimate the amount based on trying the windshield in to make the standoffs.

Once I seated the windshield and pressed it into place, I used a small plastic tool, kind of like a rounded screwdriver shape, to run along the gap between the windshield and the frame like a spatula. I used this to smooth out the urethane so that it was flush with the windshield and filled the gap fully, like smoothing caulk with your finger. Oh yeah, make sure to wear gloves as this urethane is hard to get off and gets everywhere if you are not careful, even if your are. Have lots of paper towels handy to wipe off the excess from the spatula. If there are any gaps as you are smoothing, then add a little more, then smooth. Once it starts to set, stop messing with it as it will not stay smooth at that point. For my windshield, I had to use a clamp on the lower driver's side, just to hold the windshield down a little to keep it flush with the frame until the adhesive set.
81 windshield install 01.JPG


Once it sets, it cleans off the windshield easily with a sharp razor blade. Peel off the tape and you should have a clean line to the body.

I used the second tube of adhesive to glue on the chrome trim strip. It is just glued to the surface of the glass. I have not seen the rubber trim up close, so not sure how it is attached.
Windshield trim.JPG
 
And hey, you're local Rodger! :)

Wow, I would have thought the chrome trim used little clips to attach.
 
The way the chrome (actually polished stainless) strip is made is that it is hollow and has a thin black plastic molding inside piece that fits into it. The black plastic molding extends over the metal area that would contact the glass. It stops just as the rounded edge of the metal leaves the glass, so it is not that visible unless you look closely at it installed. This black molding is filled with polyurethane that glues the trim to the glass. When you remove the metal trim, you want to be careful not to cut that black molding part if possible. When I first removed mine, I didn't realize that so just used a utility blade to slip under the trim and slowly cut it off. I kind of mutilated the black plastic molding in the process. When I went to reinstall it, I ended up cutting the black trim off of the area that would contact the windshield. To replicate it, I just used some black pin striping tape and laid it all around the edge of the metal similar to where the original molding plastic ended, then glued it down with urethane.
 
Yeah, the rubber edging is nice, because it is U shaped to go around the glass, and has a lip that goes over the edge of the frame to keep water out. Inside the U part is sticky goop, so I think it is supposed to be put around the glass first, and it kinda fills the gap between the windscreen and frame...Before I mount it, I will dry mount it to see if I am correct....hoping I won't need the blocks then....My aluminum strip is in ok condition, I just don't like the moisture trapping part of having it glued on....here's a pic of it
1632352771614.png
 
My guess is that you're missing the rubber U-channel that goes on the inside of the car. Check and snap a pic of you can!
Or the new windscreen is much thinner- I think mine is...the old one was hella thick in comparison. I only decided to pull mine because someone scratched mine removing ice (yes she is gone now, lol) and there was minor rust around it, and I was painting....But would have really rather kept the original...the thickness makes me concerned of something coming thru the windshield.
 
Hi are you using the seal from mwb ,ordered one for mine but not installed yet ,going to paint dash first before installing
 
Yeah, the rubber edging is nice, because it is U shaped to go around the glass, and has a lip that goes over the edge of the frame to keep water out. Inside the U part is sticky goop, so I think it is supposed to be put around the glass first, and it kinda fills the gap between the windscreen and frame...Before I mount it, I will dry mount it to see if I am correct....hoping I won't need the blocks then....My aluminum strip is in ok condition, I just don't like the moisture trapping part of having it glued on....here's a pic of it
View attachment 52447
Sorry, I’m thick - do you have a wider shot, I’m not quite getting how this slides in. :)
 
Yeah, the rubber edging is nice, because it is U shaped to go around the glass, and has a lip that goes over the edge of the frame to keep water out. Inside the U part is sticky goop, so I think it is supposed to be put around the glass first, and it kinda fills the gap between the windscreen and frame...Before I mount it, I will dry mount it to see if I am correct....hoping I won't need the blocks then....My aluminum strip is in ok condition, I just don't like the moisture trapping part of having it glued on....here's a pic of it
View attachment 52447

Yeah, that seal is NOT stock. That's some aftermarket thing. I've never seen that seal on an X1/9 from the factory.
 
The seal - I’m assuming it came from MWB, but I can’t be sure (nobody will tell me). It’s not as elegant as the flimsy silver tin (lol), but I’m hoping it offers longer-term protection against subterranean rust… BJ, another chance for you to ogle my Steelies

B1DB50EF-ED59-48EA-A94D-DE0843786013.jpeg
 
The seal - I’m assuming it came from MWB, but I can’t be sure (nobody will tell me). It’s not as elegant as the flimsy silver tin (lol), but I’m hoping it offers longer-term protection against subterranean rust… BJ, another chance for you to ogle my Steelies

View attachment 52476
You need to get a mirror that actually works… Those baby turbo’s were an abomination
 
Back
Top