Windshield installation? who's done it

Yes, I ordered it from MWB....they have it on Amazon also, but I figured the Midwest boys have used this particular style so......Theree are 2 different mouldings- first there is a pinch weld moulding that is inside of the windshield. I noticed on my original (thicker) screen, it acted as a depth stop as to how far it went in, but it does nothing more that cover up the edge of the hole opening.. This is not stock, but have seen it used on some asian imports, and I like the simplicity
 
You need to get a mirror that actually works… Those baby turbo’s were an abomination
lol - that was actually part of our on-air negotiation banter that was left on the cutting room floor. Baby Tornado’s with convex, blue glass now adorn the doors. And they are superb. The baby turbo’s need some paint and are for sale or trade 😎
 
Well update...I didn't use the rubber addon strip. It just wouldn't work for my windshield....I had high hopes. I put it on the glass, and went to dry fit it, and it wouldn't cover the edges completely, and then started coming off as I fooled with fitment. The problem was with the size of the windshield I believe...I got it years ago, and there's no returning it. The Windshield was barely bigger than the outer edge of the inside molding, by only a mm or two. I ended up doing it like Rodger had done his. I carefully taped the outer perimter of the frame, made some small resting blocks to keep the windshield centered. I did put a tiny bead on the moulding also, then a big fat bead in the gap around the screen. Set the screen in the sealant, and then went around the edges with a pop sickle stick at first...ended up putting more sealant on top, and used my gloved finger to smooth it down, like caulking a bathtub. Only thing I would have done different would to have put the tape closer to the glass. If you tape it, be sure and take it off while the sealant is wet to make a nice clean line. Next day I did the stainless strip, after cleaning and polishing it. Same process with taping around the outer frame. I used Acetone around the edges the wipe off excess, leaving a bead between the trim and the windscreen...that was messy, and took a lot of rags
If the windscreen was bigger, I probably would have kept the rubber strip
Did you take any pics along the way?
 
When you are doing this, things are happening fast because you want to get the sealant smoothed before it sets. Only way to get photos would be to have someone else with a camera snapping away as you are hustling to get it done.
And or a tripod.
 
I did mine a couple of years ago. Never did one before, so this was a learning experience for me. I watched a few YouTube videos first. I used 3M Urethane adhesive and primer.
View attachment 52417View attachment 52418View attachment 52419

The primer is applied to both the inside and edge of the windshield that will be hidden by the inner trim strip. The primer is also applied to the inner frame of the window. The key to using the adhesive is to either have a powered caulk gun (which I didn’t) or leave the cartridges out in the hot sun for quite a while to let them get warmed up which makes the adhesive flow much better. I think I cut the tip at an angle, but I have seen the V notch cut mentioned in some videos.

I didn’t have the rubber trim so can’t comment on that. I reinstalled the chrome trim as it is stock later. I masked off the outer part of the windshield frame where I did not want the adhesive to go. I also cut two small plastic blocks out of some left over plastic and fashioned them as standoffs so that when I sat the windshield in the frame, the windshield would settle on the blocks and leave an even gap all the way around. You don't want the windshield sliding down and hitting the body. It takes a while for the adhesive to set so this way you don't have to hold it in place forever. I don't have any photos of the standoffs, but they were small enough to support the windshield, but not stick up past it. Maybe 3/8" wide and an 1/8" thick. The goal is to have an even gap between the windshield and the frame. I applied the adhesive, then placed the standoffs in the adhesive about a third of the way in from each side, then set the windshield and slid it down so it rested on the standoffs.

With the adhesive nice and warm from the sun, start injecting it around the gap as fast as you can pump. This is where a powered caulk gun would help. One tube is more than enough to do the whole windshield. I filled the gap so it was above the inner trim strip and up to the edge of the window frame. You just have to estimate the amount based on trying the windshield in to make the standoffs.

Once I seated the windshield and pressed it into place, I used a small plastic tool, kind of like a rounded screwdriver shape, to run along the gap between the windshield and the frame like a spatula. I used this to smooth out the urethane so that it was flush with the windshield and filled the gap fully, like smoothing caulk with your finger. Oh yeah, make sure to wear gloves as this urethane is hard to get off and gets everywhere if you are not careful, even if your are. Have lots of paper towels handy to wipe off the excess from the spatula. If there are any gaps as you are smoothing, then add a little more, then smooth. Once it starts to set, stop messing with it as it will not stay smooth at that point. For my windshield, I had to use a clamp on the lower driver's side, just to hold the windshield down a little to keep it flush with the frame until the adhesive set.
View attachment 52420

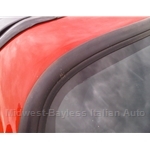
Once it sets, it cleans off the windshield easily with a sharp razor blade. Peel off the tape and you should have a clean line to the body.

I used the second tube of adhesive to glue on the chrome trim strip. It is just glued to the surface of the glass. I have not seen the rubber trim up close, so not sure how it is attached.
View attachment 52421
How difficult was it to remove the original windshield?
 
How difficult was it to remove the original windshield?
If the windshield is already toast then it is not that hard to get out.
If you are removing one you want to keep them use some sharp thin blades and strong thin wire.
The main thing is not to pry the glass.
Just keep cutting and digging until it easily lifts out.
These windshields are old and brittle.
The slightest pressure on the glass can cause it to crack.
 
I took mine out with a sharpened flexible putty knife, a few single-edge razor blades, and some PB Blaster.
It was already cracked, but we got it out without further cracking.
Trim came off pretty easily first.
I should have bought new edging for inside too, it took hours to clean to reuse.
 
If the windshield is already toast then it is not that hard to get out.
If you are removing one you want to keep them use some sharp thin blades and strong thin wire.
The main thing is not to pry the glass.
Just keep cutting and digging until it easily lifts out.
These windshields are old and brittle.
The slightest pressure on the glass can cause it to crack.
In my case, it's not the original windshield, AND, it's been installed using the rubber surround found at MWB web site. So I'm confused as to what exactly may be glued to what, or inserted into what, as the people who did the job cannot be contacted.
 
How difficult was it to remove the original windshield?
My windshield already had fogging between the pieces of glass so I was not planning on reusing it anyway. The original glue was so hardened from years in the sun, it was not flexible anymore. It was a bitch to remove and the glue had to practically be ground out.
 
My windshield already had fogging between the pieces of glass so I was not planning on reusing it anyway. The original glue was so hardened from years in the sun, it was not flexible anymore. It was a bitch to remove and the glue had to practically be ground out.
yuck. ok, thanks,
 
Curious if one would recommend removing themselves or having a big name glass repair shop remove the old windshield? Or maybe it doesn’t matter. Wasn’t sure how gentle they would be with their power removal tool.
 
Curious if one would recommend removing themselves or having a big name glass repair shop remove the old windshield? Or maybe it doesn’t matter. Wasn’t sure how gentle they would be with their power removal tool.
I called two ‘big-name’ windshield companies, and if you weren’t purchasing a windshield from them, they wanted no part of it. Now, if you could find one of their installers on his/her free time somehow….
 
How difficult was it to remove the original windshield?
I have done three. I broke the first one, learned enough from the experience to get the next two out.
I would want a very good reason to start in on this job, the chances of it going wrong are high.
 
I have done three. I broke the first one, learned enough from the experience to get the next two out.
I would want a very good reason to start in on this job, the chances of it going wrong are high.
Were all three 'original' installations, or were any newer, rubber-surround installs, the things found at the MWB site which surround the windshield edges? Even though they didn't mention it on air, I'm pretty sure something went terribly wrong with the WD job, as both the original windshield and metal trim never made it back on the finished car...
 
Were all three 'original' installations, or were any newer, rubber-surround installs, the things found at the MWB site which surround the windshield edges? Even though they didn't mention it on air, I'm pretty sure something went terribly wrong with the WD job, as both the original windshield and metal trim never made it back on the finished car...
Two original installations where I was able to find the heater wires molded into the adhesive and melt it out (two batteries in series to get 24V did the trick), one reinstalled with soft mastic and that's the one I broke.

BTW, I have at least two sets of the original '74 windshield trim in the boneyard.
 
Back
Top